

.avif)
[What is Yoom]
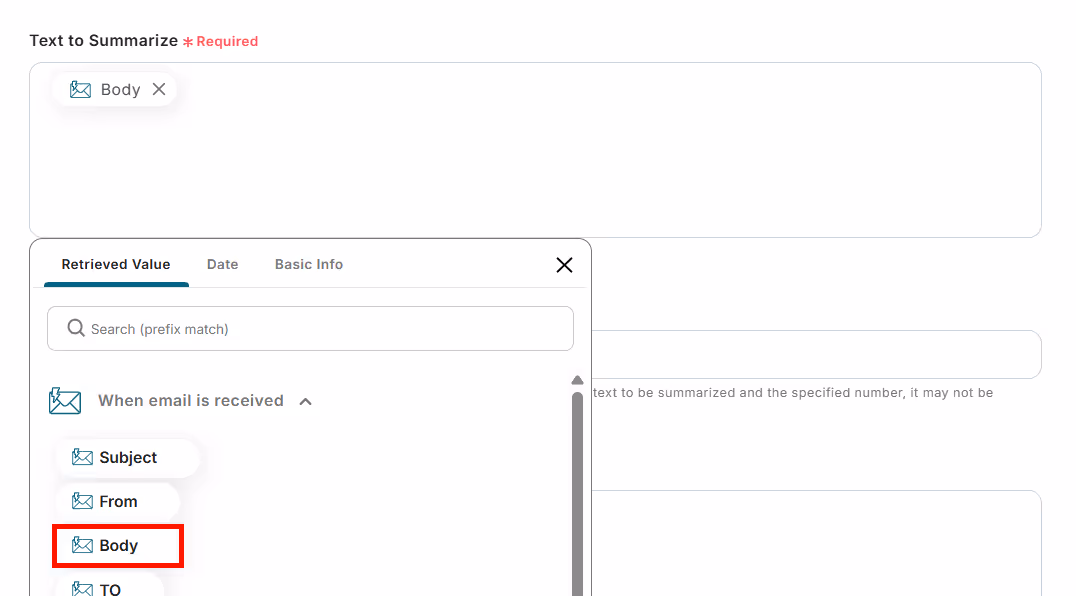
How to "Receive a long email with Yoom, summarize the content, and notify Slack"
With Yoom, you can connect apps and automate workflows without any special knowledge or coding!
There is also a two-week free trial period, so it's recommended for those who want to try it out!
This time, we will explain how to create a flow bot to "Receive a long email with Yoom, summarize the content, and notify Slack".
For basic operations of Yoom, refer to First Time with Yoom.
Step 1: Connect My Apps
After logging into Yoom, select "My Apps" and then choose "+ Add".
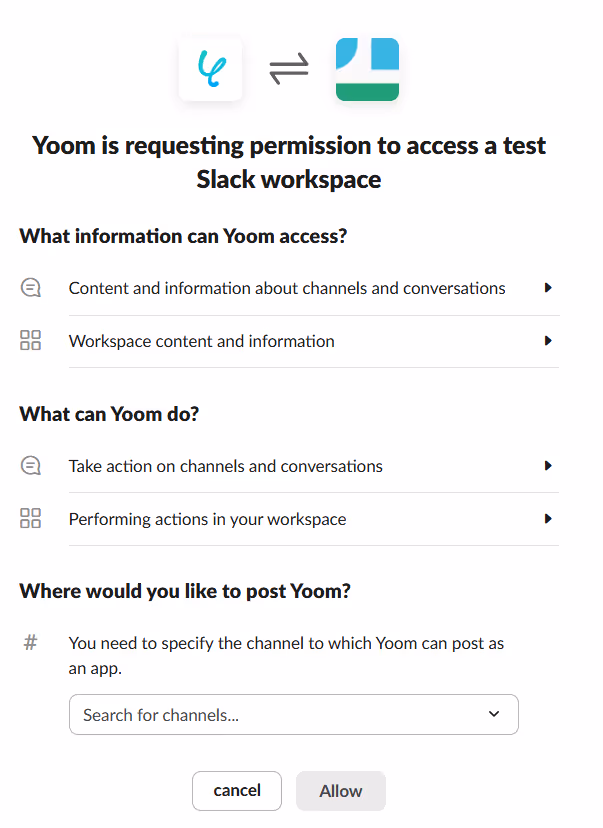
Connect Slack from My Apps.
Select "My Apps" and then choose "+ New Connection". Connect Slack from My Apps.
Select the channel you want to use from "Search Channels" and click "Allow". This completes the connection of My Apps!
Once the app connection is complete, click "Try it" on the template below to copy it!


.avif)
.avif)
.avif)


