Airtable・Stripe・Outlookの連携イメージ
How to Integrate Applications

2025/01/09

How to integrate Airtable, Stripe, and Outlook to create a payment link in Stripe from Airtable and send it via Outlook

a.ohta

When invoicing with Stripe using data managed in Airtable, it is necessary to transfer items, quantities, amounts, etc. Additionally, if you need to send a separate Stripe payment link, it will be sent to the customer's email address, which can be somewhat cumbersome.
Therefore, this time we will introduce automation by integrating Airtable, Stripe, and Outlook using a Chrome extension.
Since you can complete the invoicing process with just a click from the detail page of an Airtable record, those looking to improve their operations should definitely take advantage of this.

Recommended for

  • Companies conducting invoicing operations using Stripe
  • Companies managing purchase data, etc., with Airtable
  • Companies using Outlook for customer emails
  • Those who want to streamline Stripe invoicing operations using Airtable data
  • Those who often spend time on Stripe invoicing operations

Benefits and Examples of Integrating Airtable, Stripe, and Outlook

Benefit 1: Reduces Workload

By implementing this integration, you can activate a Chrome extension from the detail page of a specific Airtable record and send a Stripe payment link via Outlook. This is expected to reduce the workload.
For example, normally you would check the data in Airtable and manually create the invoice details. Then, to send the Stripe payment link via Outlook, you would need to enter the customer's email address each time.
If there are many invoices, this series of flows can become a significant burden, but automation allows you to complete it with just a click, reducing the workload.

Benefit 2: Improves Efficiency

This integration utilizes a Chrome extension to automatically retrieve data from Airtable, which manages invoice details and customer email addresses, and send emails via Outlook. This can potentially shorten work time and improve efficiency.
For example, due to the length of the series of flows, invoicing operations may be prolonged, or due to busyness, invoicing operations may be postponed, leading to difficulties in task management in daily operations.
However, by integrating the apps, these flows can be automated, potentially shortening work time and improving efficiency.

Benefit 3: Prevents Invoice Errors

Integrating Airtable, Stripe, and Outlook may reduce the likelihood of errors in invoice details.
For example, if the entire series of flows was previously done manually, there is a possibility of invoicing incorrect details due to data transcription errors.
By incorporating this app integration, you can reflect Airtable data directly in the payment details, ensuring that as long as there are no discrepancies in the stored data, the accuracy of the content is easier to maintain than when invoicing manually.

Now, let's explain how to "create a Stripe payment link from Airtable and send it via Outlook" using the no-code tool Yoom.

[What is Yoom]

Create a Stripe Payment Link from Airtable and Send it via Outlook

You can activate the Airtable API with just a click using a Chrome extension and retrieve the stored data.
Then, using the Stripe API, you can retrieve that data and create a payment link. Additionally, you can also send emails using the Outlook API.
In this way, by using the APIs provided by Airtable, Stripe, and Outlook, you can create payment links and send emails based on the stored data.
Generally, programming knowledge is required to achieve this, but with the no-code tool Yoom, it can be easily achieved without programming knowledge.

The integration flow this time is broadly divided into the following processes.

・Integrate Airtable, Stripe, and Outlook with My Apps
・Set up to activate the Chrome extension from the Airtable detail page
・Set up to create a Stripe payment link and send it via Outlook
・Turn on the trigger button to verify the integration operation of Airtable, Stripe, and Outlook

First, register with Yoom.
Yoom offers a 2-week trial, allowing you to actually operate and check the usability.

Step 1: Integrate Airtable, Stripe, and Outlook with My Apps

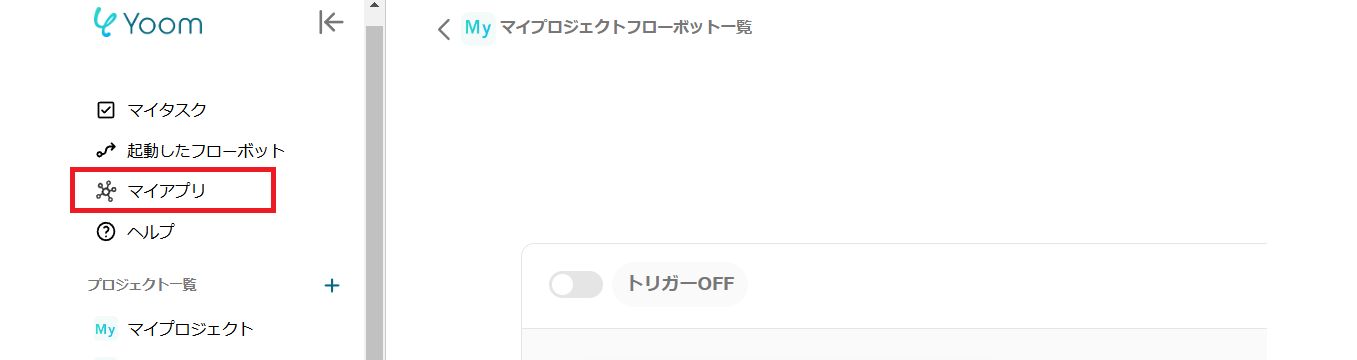
After completing the registration for Yoom, please select "My Apps" from the menu on the left side.

Next, click the new connection button at the top right.

Integration of Airtable and Yoom

1. Prepare Airtable
Prepare the Airtable you will use at this stage.

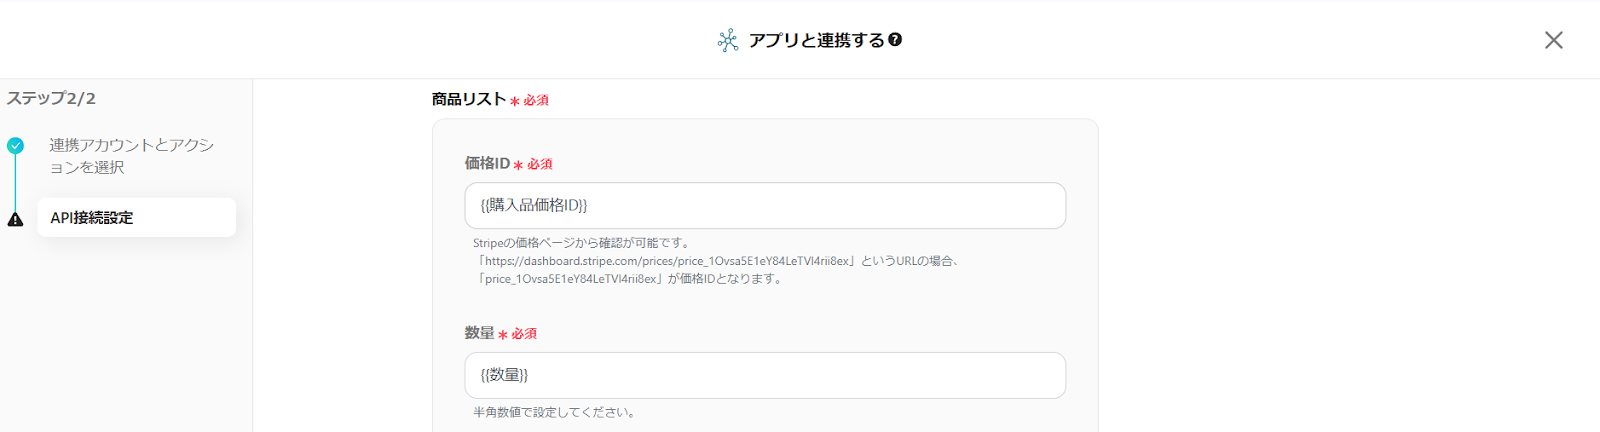
<span class="mark-yellow"></span>The following items need to be set in the fields.<span class="mark-yellow"></span>

  • Purchase Price ID/This can be checked from the Stripe price page.
  • Customer's Email Address/This address will be sent from Outlook

2. Search

Once Airtable is ready, enter Airtable in the search box and click the Airtable icon.

3. Log In
First, log in to Airtable.
The Airtable sign-in screen will appear. Sign in with the account you want to integrate.

4. Add a Base

After signing in, you will transition to the above screen.

Click "Add Base" in the red frame and select the base you want to integrate.

5. Grant Access

Once the base is added, press "Grant Access".

Return to the Yoom screen, and if the above display appears, the integration is complete.

Integration of Stripe and Yoom

1. Search

Select the Stripe icon.

*Stripe is an app available only with a paid plan. A two-week trial is available for the paid plan.

2. Enter Required Information

Enter the account name and access token.

Choose a descriptive name for the account name, such as the company name or the person in charge.
For more details on the access token, please refer to How to Register My App in Stripe.

3. Add

Once the account name and access token are entered, press the add button at the bottom right.
If the screen changes and the above display appears, the integration is complete.

Integration of Outlook and Yoom

1. Log In
Log in to Microsoft365. By logging into Microsoft365, the integration with My Apps will be completed quickly.

*Regarding Microsoft365 (formerly Office365), if you are not subscribed to a general corporate plan (Microsoft365 Business), authentication may fail.

2. Search

Click the Outlook icon.

3. Integration Complete

The screen will change immediately. If the above display appears, the integration is complete.

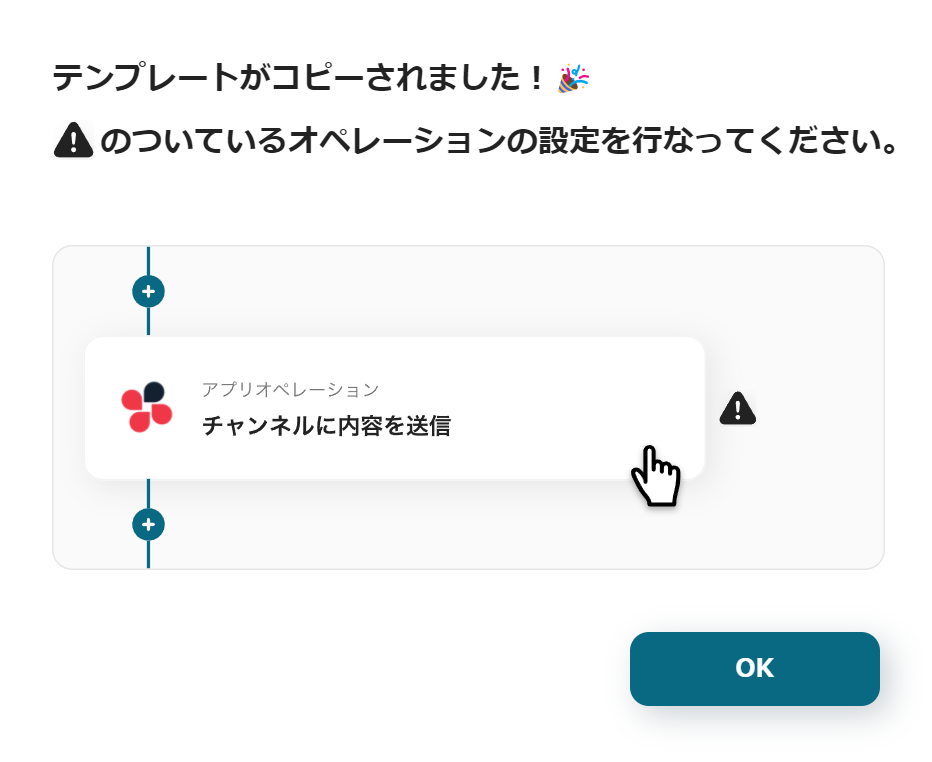
Step 2: Copy the Template

Next, please copy the template to be used this time.

1. Click "View Details" on the top banner
2. Click "Try This Template" at the bottom of the transitioned screen
3. If you haven't registered with Yoom yet, please register

* If you have already registered, the login screen will be displayed, so please log in.

When the Flowbot template is copied to "My Projects", the above display will appear.

You will be taken to a page like the image, so let's proceed with detailed settings.

Step 3: Setting to Launch Chrome Extension from Airtable's Detail Page

1. Open My Projects

Open "My Projects" from the menu on the left side of the screen.

2. Open the Copied Template
Click "【Copy】Create a Payment Link from Airtable for Stripe and Send via Outlook".

3. Chrome Extension Trigger

Select "Launch from Record Detail Page" from the Chrome extension icon.

4. Install Chrome Extension

Please proceed with the installation of Yoom's Chrome extension.
For more details, please check How to Set Up Triggers Using Chrome Extensions.

Once the Chrome extension installation is complete, press Next.

5. Enter ID

Please enter the required fields.
Access Airtable and set it according to the supplement at the bottom of the box from the URL of a specific database.

6. Enter Sample URL for Launch Page

To launch the Chrome extension from Airtable's detail page, enter the Airtable detail page URL.

Click the arrow to the left of the customer data field.

A detail page like the image will open.
Copy the URL from the icon in the upper right and paste it into the launch page URL sample.

7. Run Test


Once all settings are complete, click the test button, and if "Test Successful" is displayed in blue, press Save.

8. Add Output


To reflect Airtable data in Stripe's billing details, retrieve the purchase price ID data.

Click the red frame.

Click the "+" mark.

The retrieved data will be displayed on the right side of the screen.
If there is other data to be retrieved, retrieve and add it in the same way.

9. Save

Once data retrieval is complete as shown in the image, save it.

Step 4: Setting to Create Stripe Payment Link and Send via Outlook

1. Integrate with Apps

Select "Create Payment Link" from the Stripe icon.
Proceed to the next step.

2. Set Required Fields

Set the required fields in the red frame.


Since you are using a template, data insertion is already complete. Please confirm that it is in the same state as the image.

3. Run Test

Press the test button, confirm that "Test Successful" is displayed in blue, and then press Save.

Continue to set up sending emails from Outlook.

4. Send Email


Select "Send Email" from the Outlook icon.
Scroll down the screen.

5. Set Content

Set the recipient. Click the box.


Click the red frame.

Select the data corresponding to the recipient.


Once inserted, it will look like the image.
Please note that the "Address" in the image is a placeholder and not the actual email address, but the address stored in Airtable will be used in practice.

Modify the subject and body as needed.

6. Confirm and Run Test

The details of the created email will be displayed.
Check for any errors and press the test button.
* Please note that the email will actually be sent.

7. Turn ON the Trigger

When the creation of the Flowbot is complete, the above display will appear. The trigger is initially set to OFF, so turn it ON.

Then access Airtable and select Yoom from the Chrome extension button in the upper right.
The Flowbot will launch by clicking the title of the created Flowbot.

Flowbot template used this time

Create a Payment Link from Airtable for Stripe and Send via Outlook

Other Automation Examples Using Airtable, Stripe, and Outlook

Yoom has other examples of automation using Airtable, Stripe, and Outlook, so here are a few introductions.

1. Send a Thank You Email via Outlook When a Payment is Made on Stripe
You can create and automatically send emails with original content, such as "Thank you for your purchase."

2. Register inquiries received in Outlook to Airtable

You can also accumulate the content received in Outlook in Airtable. This may facilitate smoother customer support.

3. Register a sales transaction in freee when a payment is created in Stripe

Automatically registering sales transactions is likely to reduce the workload of accounting personnel.

Summary

By automating routine tasks such as invoicing, you may be able to have more free time in your daily work schedule.
Additionally, it becomes easier to avoid manual errors, potentially improving the accuracy of your work.
Yoom allows for app integration without the need for programming. No complex knowledge is required. It is designed to be easy to try for those who have previously given up on automation.
By reviewing this series of processes, you can expect business improvements, so why not take this opportunity to try it?

The person who wrote this article
a.ohta
After working as a general store manager, I started working from home as an SEO writer. Later, an outsourcing agreement was signed with a marketing startup for about 5 years. Surrounded by students at the University of Tokyo, I held a computer and spent my days studying various business terms and how to use SaaS tools. When I was a general store manager, time was taken over and over again by office work such as sales and inventory management, human resource management, and ordering, etc., and I was unable to serve customers and often missed sales times. Even when outsourcing, there are many detailed tasks such as input, etc., and “can't such monotonous tasks be automated?” I thought so, and I really sympathize with Yoom's vision!
Tags
Airtable
Stripe
Outlook
Automatic
Automation
Integration
Notification
App integration
No items found.
What is Yoom hyperautomation?
Conventional RPA can only automate simple repetitive tasks, and the setup process was very complicated.
With “hyperautomation,” which combines various technologies such as AI, API, RPA, and OCR, it is possible to automate many tasks that could not be realized until now more easily than before.
Don't Just Connect Apps—Automate Everything
Most tools simply connect one app to another, leaving the complex tasks to you. Yoom goes much further: From document creation and browser automation to OCR and generative AI, Yoom handles it all seamlessly in one platform.

Why settle for basic integrations? Streamline your entire workflow with Yoom’s powerful hyperautomation.
Learn more about Yoom
Helpful Materials
I understand Yoom! 3-piece set of materials
Download materials
Understand in 3 minutes! Yoom service introduction materials
Download materials
Find out by Before After! Yoom Case Study Collection
Download materials
See a list of useful materials