

.avif)


1. Open the top banner and click "View Details"
2. Click "Try this template" at the bottom of the migrated screen
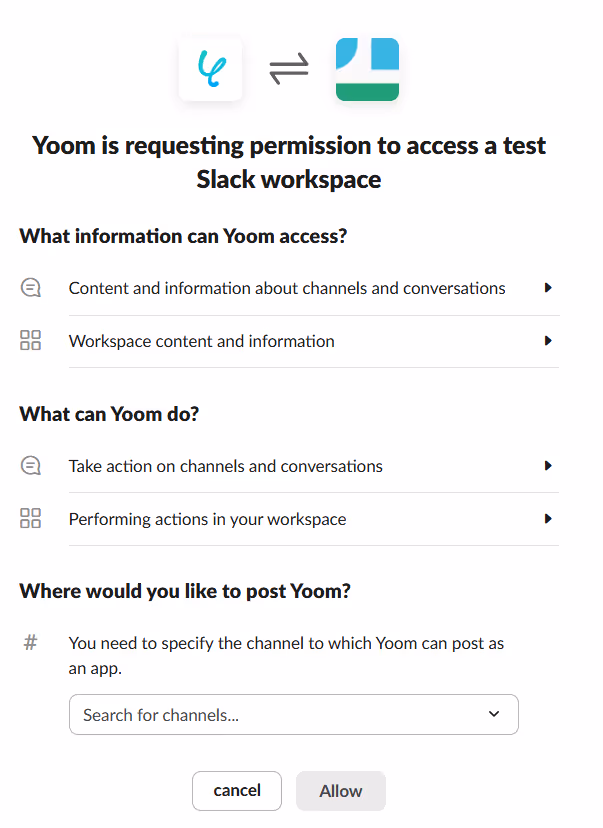
3. If you haven't registered with Yoom yet, please register
※ If you have already completed registration, the login screen will be displayed, so please log in.
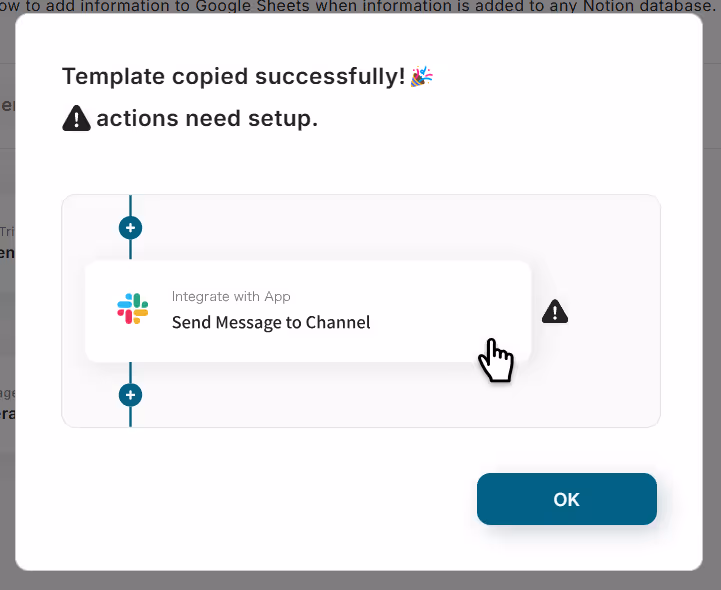
When the Flowbot template is copied to "My Projects", the above display will appear.

You will be taken to a page like the image, so let's proceed with detailed settings.
Step 3: Launch Airtable and Set Up to Retrieve Status Data
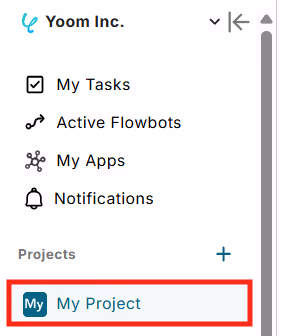
1. Open My Projects
Open "My Projects" from the menu on the left side of the screen.
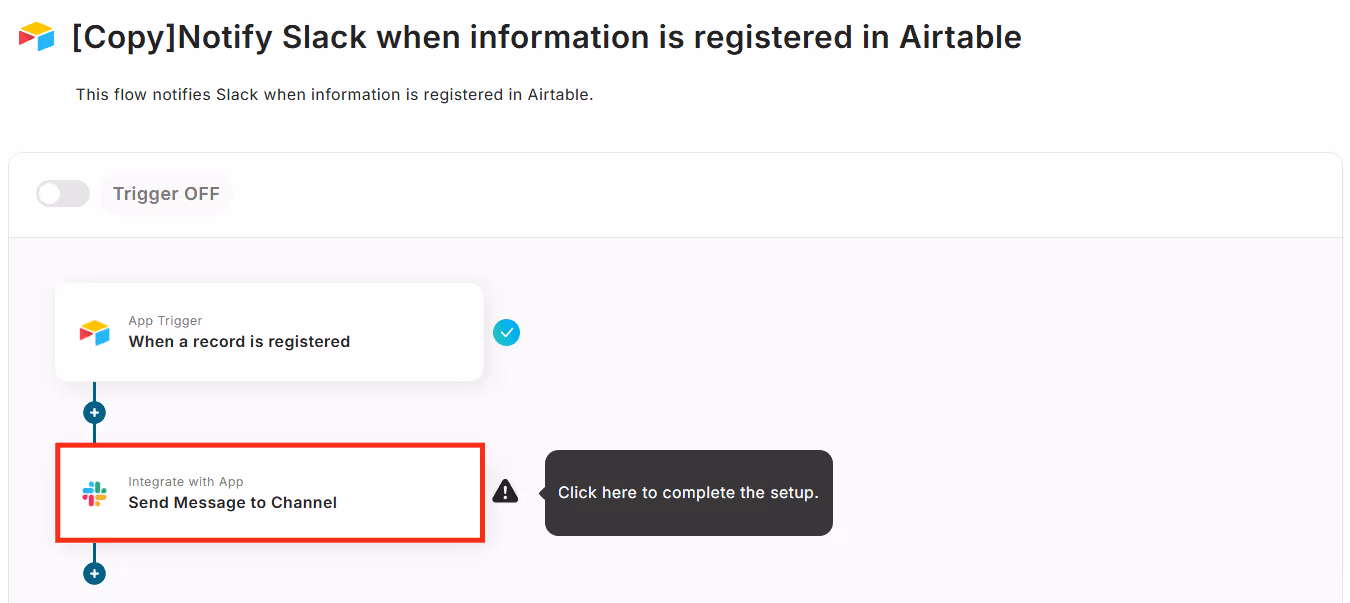
2. Open the copied template
Click on "【Copy】Notify Slack when information is registered in Airtable".
3. Select an app trigger

Click on "When a record is registered" under the Airtable icon.
Since the title and other settings are complete, press Next.
4. Set the trigger activation interval

Set the activation interval.
You can choose trigger activation intervals of 5 minutes, 10 minutes, 15 minutes, 30 minutes, or 60 minutes. A shorter setting is generally recommended.
Please note that the shortest activation interval varies depending on the plan.
5. Enter the ID

Follow the supplement at the bottom of the box and copy & paste from the Airtable URL.
6. Enter the field name for Created Time

Enter the field name set in Airtable.

This time, since it was set as "Created time", enter "Created time".

This time, it is set as "Updated Time", so it was set as shown in the image.
7. Run the test

Once the settings are complete, press the test button.
If "Test Successful" is displayed, it is complete. Click Save.
Step 4: Set Up Notifications to Slack
1. Connect with the app
Click on "Send a message to a channel" under the Slack icon.
Since the title and other settings are complete, press Next.
2. Set the channel ID for posting

Set which channel to post Airtable data to.

Click the box to display a list of channels, and select the channel where you want to receive Airtable data.
By selecting, it will be inserted into the box, and the setting will be complete.
3. Set the message content

Next, set the message to be posted to Slack.
Click the box.

Select the red frame.
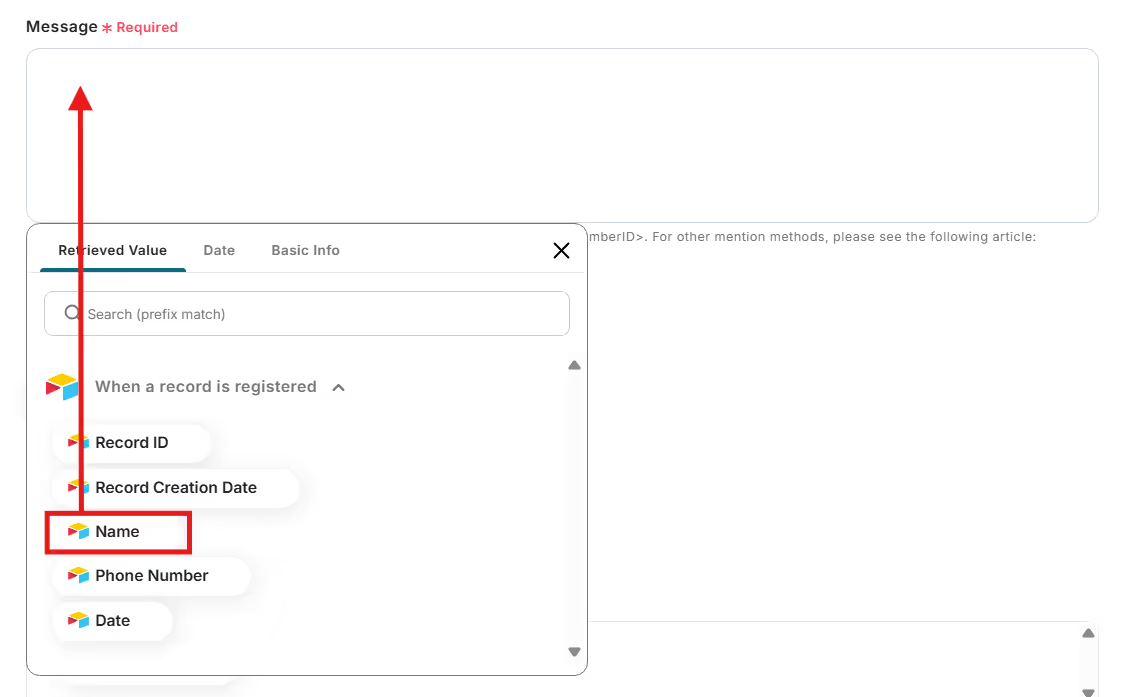
The data sent in the Airtable test will be displayed as shown in the image.
Click to insert the content you want to notify.

Once the data is inserted, it will look like the image.

If there are other necessary data, insert them in the same way.
4. Arrange the layout
To make it easier to read, arrange the layout.

This time, it was arranged as shown in the image.
By using line breaks and symbols, it becomes easier to read, so change it to your preferred layout.
It is also possible to add mentions. Please check the supplement at the bottom of the box for details.
5. Run the test

Once the layout is arranged, press the test button at the bottom of the screen.
If "Test Successful" is displayed, the setup is complete. Let's save it.
6. Turn on the trigger

When the creation of the Flowbot is complete, the above display will appear. The trigger is initially set to OFF, so turn it ON.
Flowbot template used this time
Notify Slack when information is registered in Airtable


.avif)
.avif)
.avif)


