

Update Notion Database When Order Information is Updated in Amazon Seller Central
This flow is recommended for those managing order information in both Amazon Seller Central and Notion, and who wish to streamline their order management process.
.png)
・

By integrating Amazon Seller Central with Notion via API, you can automatically transfer data from Amazon Seller Central to Notion!
Simply click "Try it out" on the automation example you're interested in and register an account to immediately experience the integration between Amazon Seller Central and Notion.
Registration takes just 30 seconds, so feel free to give it a try!
This flow is recommended for e-commerce managers using Amazon Seller Central who also want to manage order and customer information in Notion.
This flow is recommended for those managing order information in both Amazon Seller Central and Notion, and who wish to streamline their order management process.
By automatically creating a reply with Dify and translating it with ChatGPT, you can expect to reduce the time it takes to compose a response. This flow is recommended for those who feel challenged by handling emails in multiple languages.
Let's get started by creating a flow that integrates Amazon Seller Central with Notion! This time, we'll use Yoom to proceed with the integration of Amazon Seller Central and Notion without any coding. If you don't have a Yoom account yet, please create one using the registration form here.
[What is Yoom]
This time, we will create a flow to integrate data from Amazon Seller Central into Notion!
The creation process is broadly divided into the following steps.
First, connect Amazon Seller Central and Notion with My Apps.
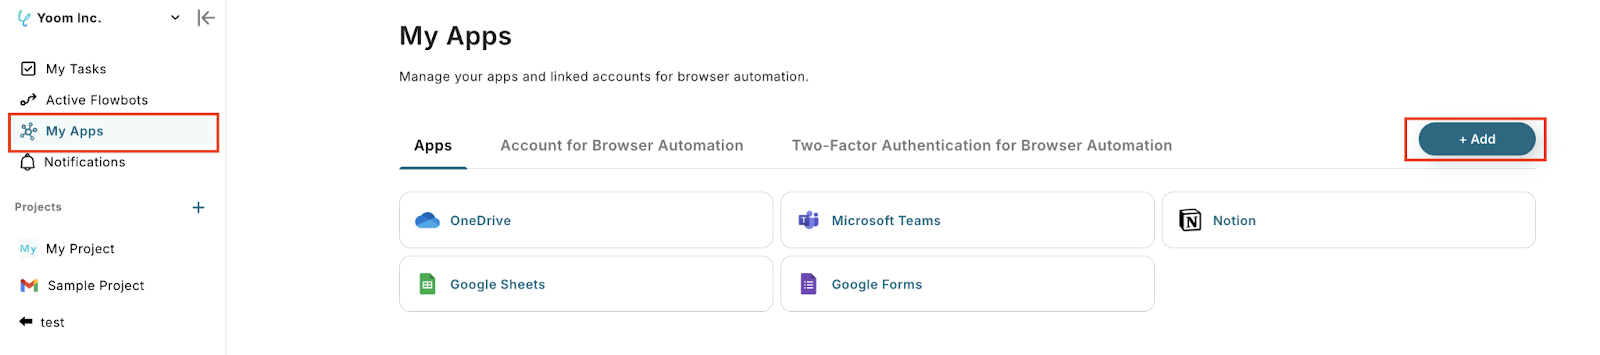
After logging into Yoom, click "+ Add" from "My Apps" in the left menu.
[For Amazon Seller Central]
1. Search for "Amazon" and select Amazon Seller Central from the list of apps.
2. Enter the domain of the Amazon Seller Central account you want to connect.

This completes the My Apps connection for Amazon Seller Central.
[For Notion]
1. Search for "Notion" and select Notion from the list of apps.
2. Log in to the Notion account you want to connect with Yoom.
Log in with your email address here.
Enter the email address of your Notion account and click "Log In".
3. Enter your password and click "Log In".
4. A confirmation screen for Yoom's access request will appear, so click "Select Page".

5. Select the page to allow Yoom access and click "Allow Access".

This completes the My Apps connection for Notion.
Once the My Apps connection is complete, let's set up the template right away.
Click "Try it" on the banner below to copy the template.
When the template is copied to Yoom, the following screen will be displayed, so press "OK".

(1) Click on "When buyer information is created" at the top of the template.

(2) Select the Amazon Seller Central account information you want to link with in "Account information you want to link with Amazon Seller Central" and click "Next".

(3) Select the trigger activation interval from 5 minutes, 10 minutes, 15 minutes, 30 minutes, or 60 minutes.
It is generally recommended to set the shortest time.
*Please note that the activation interval varies depending on the plan.

(4) Enter the ID of the marketplace to be operated in "Marketplace ID".

(5) Select the "Sales Region".

If the test is successful, click "Save" to complete the settings.
(1) Click on "Add Record" in the template.

(2) Select the Notion account information you want to operate with in "Account information you want to link with Notion".

(3) Enter the ID of the database where you want to add the record in "Database ID".
From "Candidates", a list of databases in the linked Notion account will be displayed.
Clicking on the database name you want to set will automatically enter the database ID.

(4) Set the information you want to add to the record in "Value of the record to be added".
By selecting an item from "When order information is created" in "Output", you can automatically quote the information extracted in Step 3 into the message.

(5) Once the "Value of the record to be added" is set, click "Test".

(6) If the test is successful and the information is added to Notion, click "Save" to complete the settings.

With this, all settings are complete.
After completing the settings, a pop-up like the one below will be displayed, so turn ON the trigger.
Let's check if the flow operates normally!

This flow is recommended for those who need to communicate in multiple languages, handle international operations, or want to improve email processing efficiency by reducing the burden of manual summarization and translation.
By leveraging the API of Amazon Seller Central and Notion, various automations can be achieved!
How about the following automations, for example?
When order information in Amazon Seller Central is created or updated, it is possible to automatically notify various chat tools and save necessary data!
You can automatically notify chat tools when tasks in Notion are updated, or automatically add form responses to Notion!
By integrating data between Amazon Seller Central and Notion, you can automatically store order details from Amazon Seller Central into Notion!
Once sales data is automatically stored, it becomes easier to check as a history, and managing and analyzing popular products also becomes more convenient.
Yoom is designed to be simple and user-friendly, allowing even beginners to easily connect apps. No difficult programming knowledge is required.
This makes it easier for those who have previously given up on automation to take on the challenge!
Registration is completed in 30 seconds, and you can start using it immediately afterward. Try it out and see how it feels!

.avif)


.png)

.png)

