

Create a Sticky Note in Miro When a Database is Updated in Notion
This flow is recommended for situations where you manage data in Notion and want to create sticky notes in Miro to prevent information leaks or errors.
.avif)
・

By integrating Notion and Miro via API, you can automatically sync Notion data with Miro!
Simply click "Try it out" on the automation example you're interested in and register an account to immediately experience the integration between Notion and Miro.
Registration takes just 30 seconds, so feel free to give it a try!
This flow is recommended for those using Notion as a project management tool and wanting to centralize information in Miro.
This flow is recommended for situations where you manage data in Notion and want to create sticky notes in Miro to prevent information leaks or errors.
This flow is recommended for situations where you want to continuously share the latest information while using Notion and Miro as project management tools.
Now, let's create a flow that integrates Notion and Miro! We will use Yoom to proceed with the integration of Notion and Miro without any coding. If you don't have a Yoom account yet, please create one using the registration form here.
[What is Yoom]
This time, we will create a flow to integrate Notion data with Miro!
The creation process is broadly divided into the following steps.
First, connect Notion and Miro to My Apps.
Once logged into Yoom, click "+ Add" from "My Apps" in the left menu.

[For Notion]
1. Search for "Notion" and select Notion from the list of apps.
2. Log in to the Notion account you want to connect with Yoom.
Here, log in with your email address.
Enter the email address of your Notion account and click "Log In".
3. Enter your password and click "Log In".
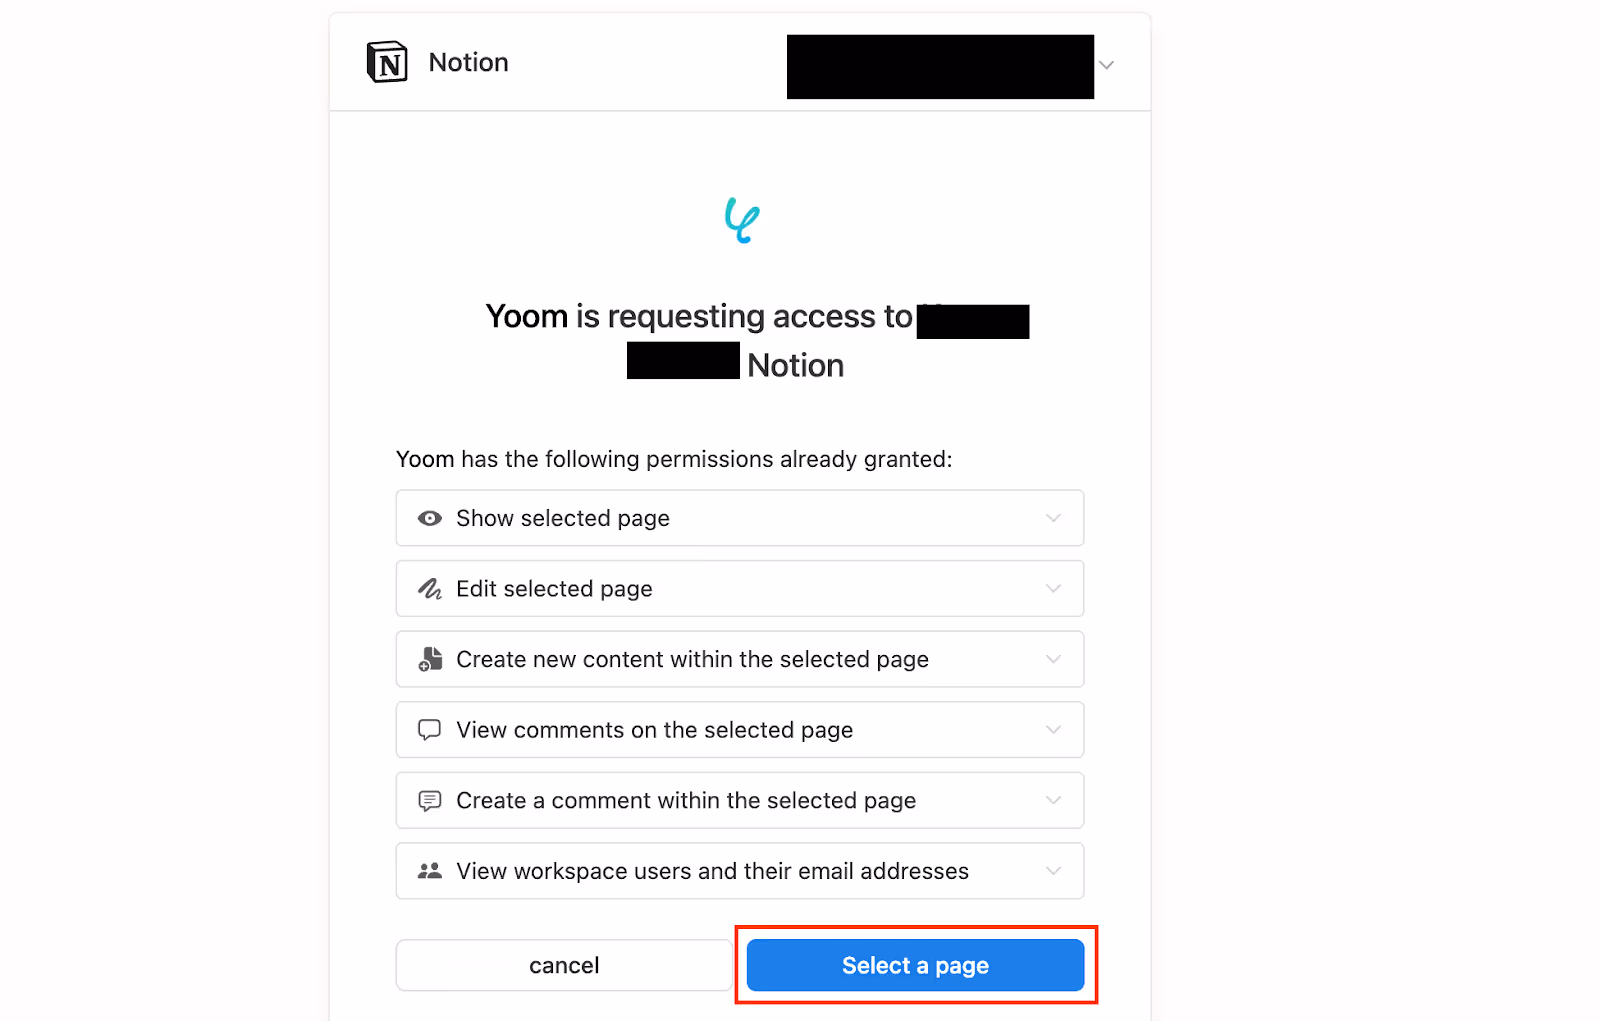
4. When the access request confirmation screen by Yoom is displayed, click "Select Page".
5. Select the page to allow access to Yoom and click "Allow Access".

This completes the My Apps connection for Notion.
[For Miro]
1. Search for "Miro" and select Miro from the list of apps.
2. Sign in to the Miro account you want to connect with Yoom.
Choose whether to log in through another app displayed at the top or enter your email address and password. This time, use email address and password login and click "Continue with Email".

3. Select the team to connect with Yoom and click "Add again".
This completes the My Apps connection for Miro.
Once the My Apps connection is complete, let's set up the template right away.
Click "Try it" on the banner below to copy the template.
When the template is copied to Yoom, the following screen will be displayed, so press "OK".

(1) Click on "When a page is created or updated" at the top of the template.

(2) Select the Notion account information you want to link with under "Account information to link with Notion" and click "Next".

(3) Select the trigger activation interval from 5 minutes, 10 minutes, 15 minutes, 30 minutes, or 60 minutes.
It is recommended to set it to the shortest time by default.
※ Please note that the activation interval varies depending on the plan.

(4) Click "Test" to extract information from the page created or updated in Notion.
If the information is correctly extracted in "Output", click "Save" to complete the setup.

(1) Click on "Create Board" in the template.

(2) Select the Miro account information you want to operate with under "Account information to link with Miro" and click "Next".

(3) Set the name of the board to be created in Miro as desired in "Board Name".
You can automatically quote the page information extracted in Step 3 from "When a page is created or updated" in "Output".
For example, if you want the board name to be the same as the page title, select "Page Title".

(4) Set the description of the board as desired in "Description".
You can directly input text like "Customer Information", or you can quote items you want to add to the description from "Output".

(5) Set the "Board Public Level" to one of the following three options as desired.

(6) Set the "Board Public Level" to one of the following three options as desired.

(7) Click "Test" to run the test.
Ensure the test is successful and that the board information is correctly extracted in "Output".

If there are no issues, click "Save" to complete the setup.
With this, all settings are complete.
After completing the setup, a pop-up like the one below will be displayed, so turn on the trigger.
Let's check if the flow operates correctly!

This time, we introduced how to link data from Notion to Miro, but if you want to link data from Miro to Notion, please use the following template as well.
This flow is recommended for those who manage tasks or projects with Miro and Notion and want to standardize business processes.
This flow is recommended for those who need to communicate in multiple languages, handle international operations, or want to improve email processing efficiency by reducing the burden of manual summarization and translation.
By leveraging the APIs of Notion and Miro, various automations can be achieved!
How about considering the following automations?
You can automatically send an email when a page is created or updated in Notion, or automatically add pages or records to Notion based on information from other apps!
In Miro, you can automatically create boards and invite users, or create sticky notes and cards in Miro automatically when information is added to a spreadsheet, among other things!
By integrating Notion and Miro, you might be able to manage and create tasks more quickly.
When tasks that are text-based are transferred to Miro and automatically converted into more visually accessible formats like sticky notes or cards, it seems like task management could become easier than ever!
Additionally, compared to when tasks were created manually, the efficiency gained could make it easier to manage tasks that need to be shared with the team, potentially leading to increased productivity!
Moreover, Yoom offers many templates beyond the automation introduced this time.
If the integration of the apps you use regularly can be easily implemented, a stress-free workflow might be achievable…!
Furthermore, it's a delightful point that no specialized knowledge is required, and even beginners can set it up smoothly!
To reduce the burden of work and create a comfortable working environment, register with Yoom now and implement automation!

.avif)


.avif)

