


Next, connect the app.
My App Integration
When the display appears as shown in the image, select "My Apps" from the menu on the left side of the screen.
We will now integrate Notion and Google search with Yoom. This is called "My App Integration".

First, let's integrate Notion with Yoom.
Click "Create New" in the top right and enter "Notion" in the search box.
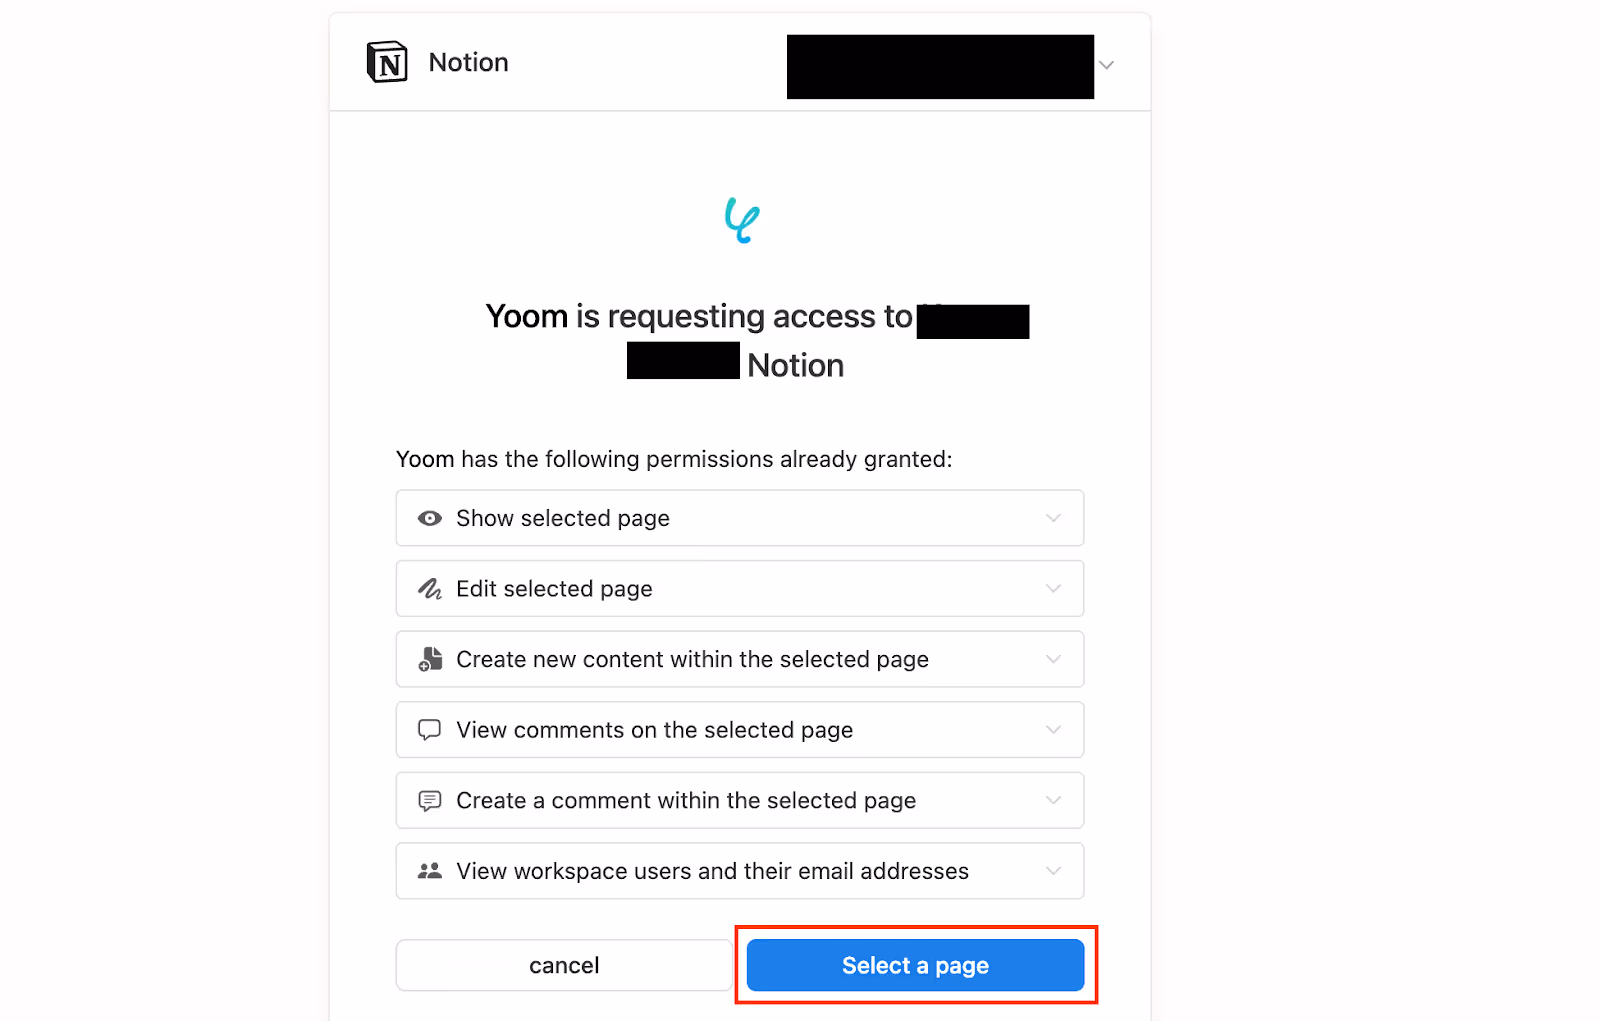
Once you transition to the screen above, press "Select Page".
Make sure not to forget to check the page you just created.

Then, click "Allow Access" to complete the integration between Notion and Yoom.
↓
Next, proceed to integrate Google search with Yoom.
Similarly, enter "Google Search" in the search box and click the Google icon.
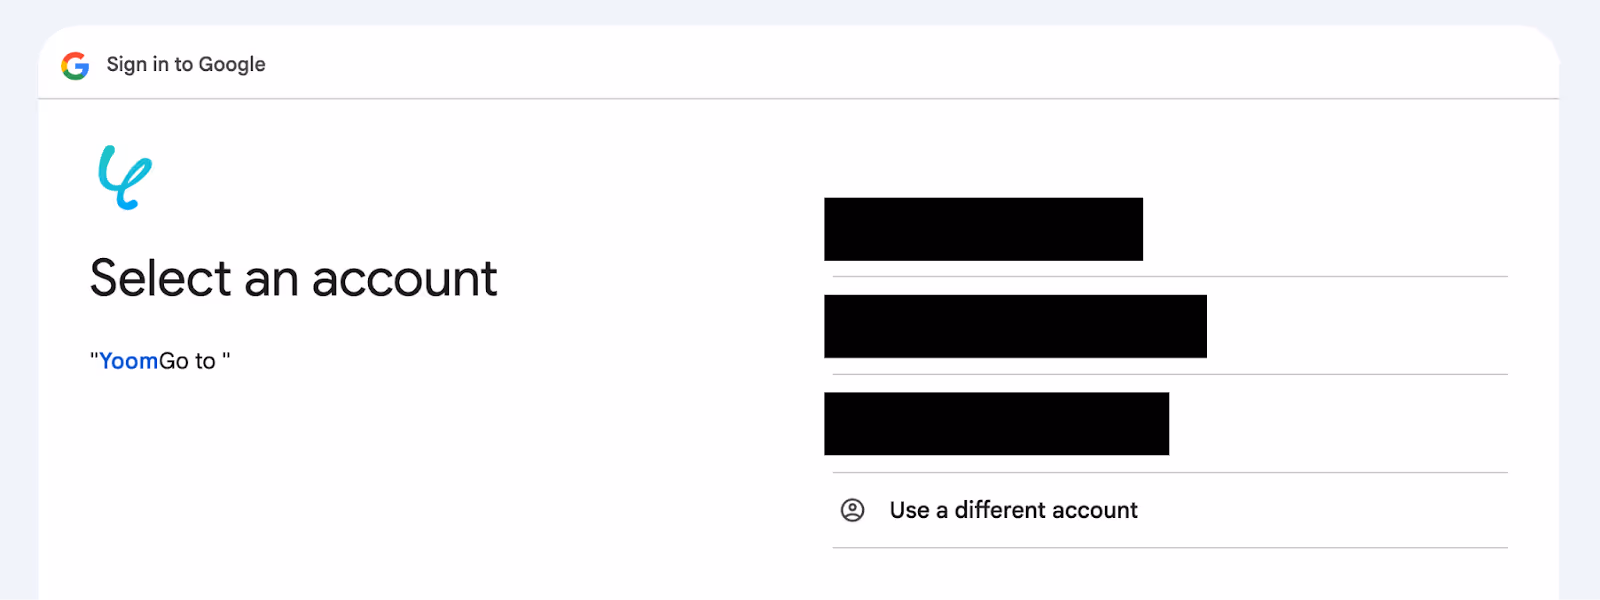
1. Select Account
Press the Google account of the Gmail address to be integrated with Yoom.
2. Log in to Yoom
Transition to the image page, read the terms, and click Next.
3. Yoom is requesting additional access to your Google account
Press Continue.
When you transition to the authentication screen, select Allow all permissions.
With this, Notion and Google search have been integrated with Yoom.
Next, let's set up the Flowbot!
Notion Trigger Settings
A menu will be displayed on the left side of the screen. From there, select My Projects and go to the page to create a Flowbot.
Then, select the "【Copy】Search Google with company information registered in Notion, summarize the obtained snippets with AI, and add information to the database" that you copied earlier.
Next, press "Edit" in the top right.
↓
Press "When a page is created or updated" on the Notion icon.
By using the template, the necessary items such as title and trigger action are already set.
Check if there are any differences in the account information, and if not, proceed to the next step.
↓
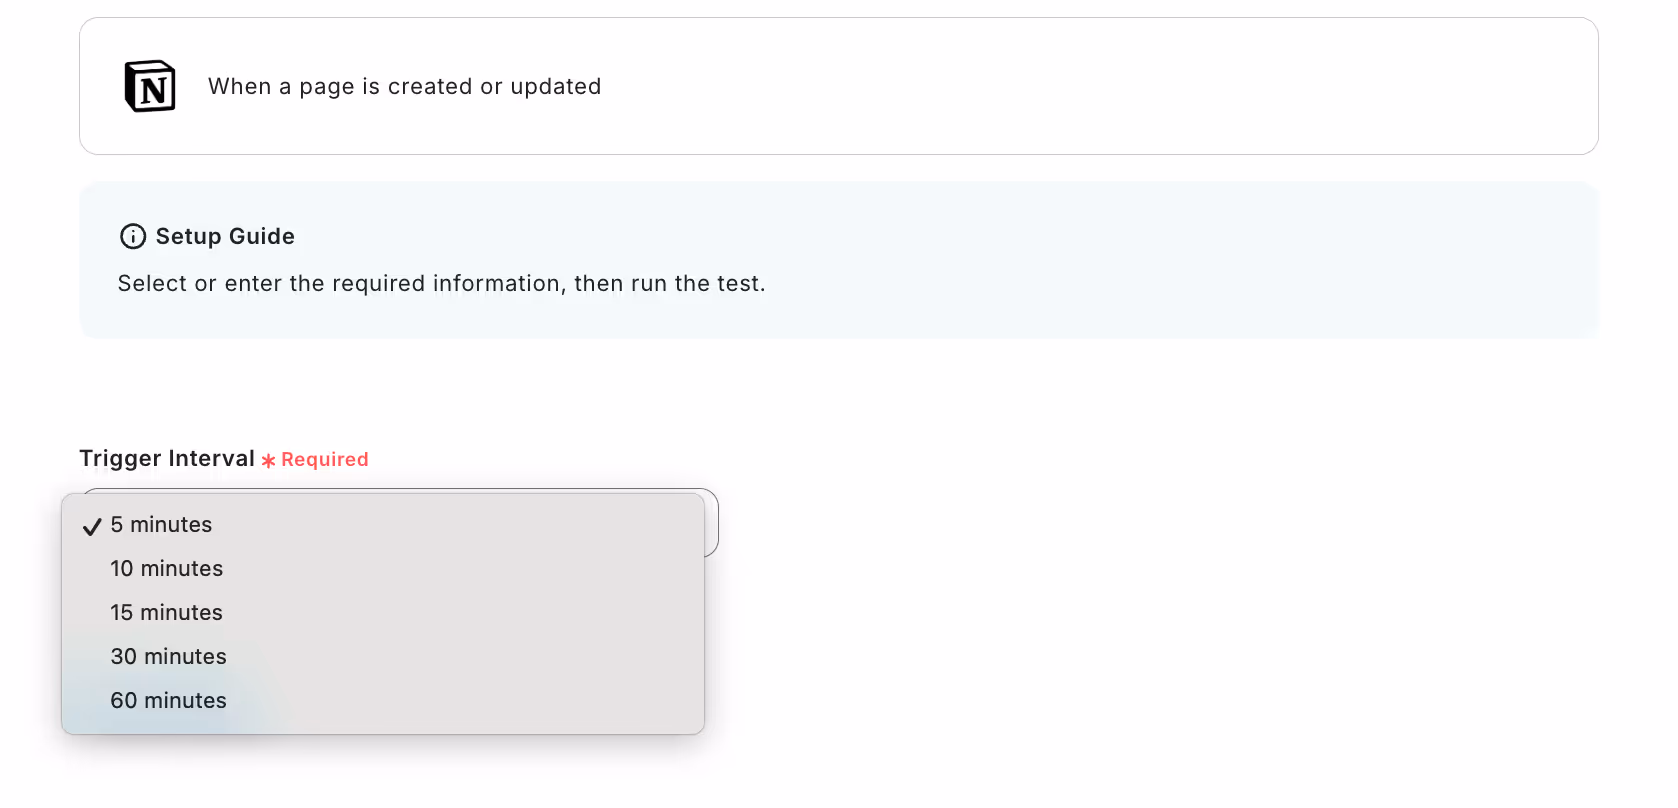
Set the trigger activation interval.
The selection of trigger activation intervals varies depending on your plan.
Then, try pressing the button labeled "Test" below.
If "Test Successful" is displayed, click Save.
Google Search Settings
Press "Get Search Results" on the Google search icon.
Since the title and action are already set, press Next as is.
↓

Enter the search engine ID.
Copy and paste the ID obtained according to the contents of the red frame into the box.
The search query below has already been set, so try pressing the test button.
If "Test Successful" is displayed, click Save.
Summarize
Next, set up the content to be summarized.
Click "Summarize" and press Next.

Fill in the required items, but since the Flowbot is created using a template, the settings are already complete.
If you want to change the number of characters to be summarized, make the necessary adjustments.
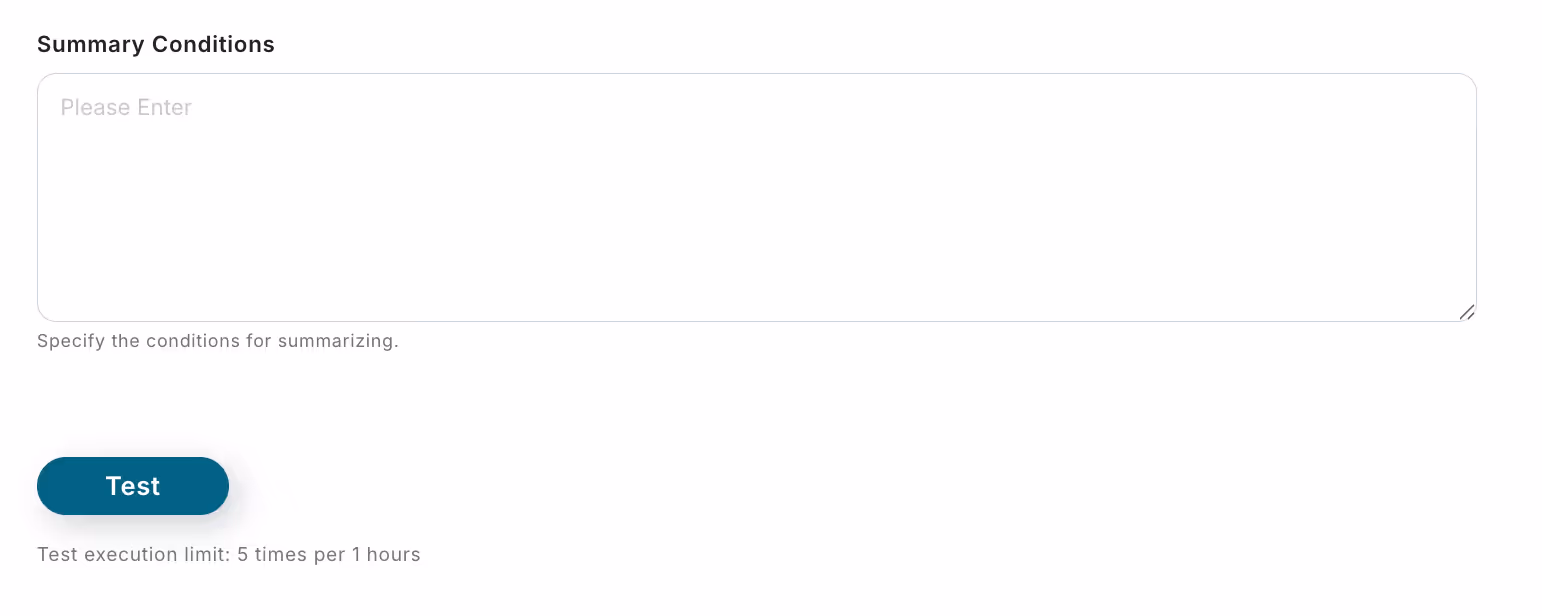
Scroll down to find the section to set the conditions for summarization.
Since the summarization prompt can be modified, if desired, input something like:
"If the founding date of the company is known, be sure to include it."
"If the number of years since the current president took office is known, please add it."
Once the necessary items are set, press the test button here as well.
If the test is successful, press Save.
For more information on how to set up "Summarize", please check this page.
*Since it is determined by AI, the summary may not be exactly the specified number of characters, or it may be significantly shorter than the specified number of characters.
Notion Settings
Press "Update Record" on the Notion icon.
Check the account information to be integrated, and if there are no issues, click Next.
↓
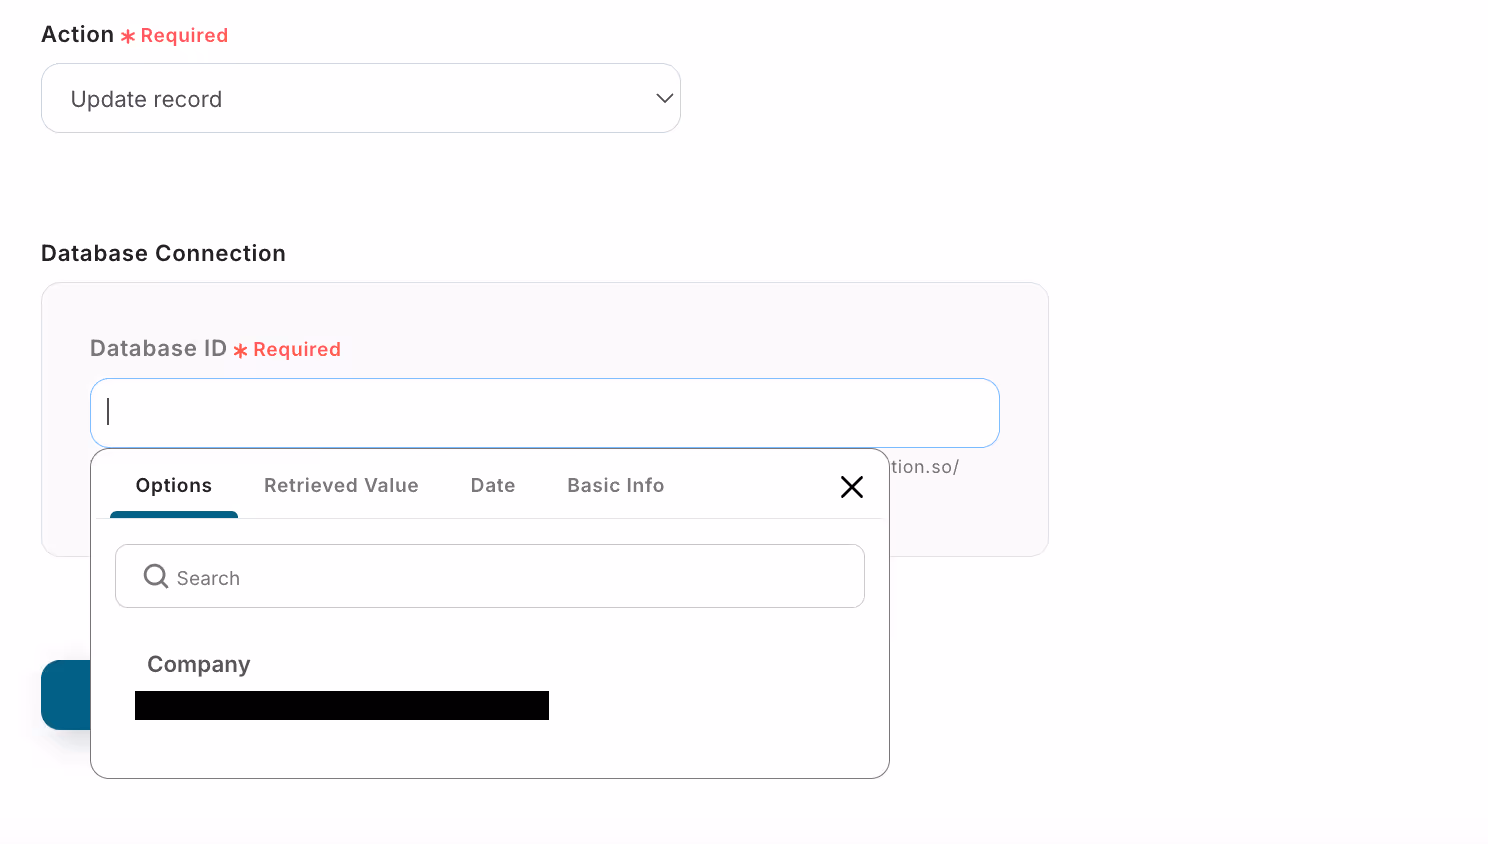
Enter the database ID.
By clicking inside the box, a list will be displayed, so select the database where you want to add the summarized content.
Select from the displayed options by clicking inside the box.
↓
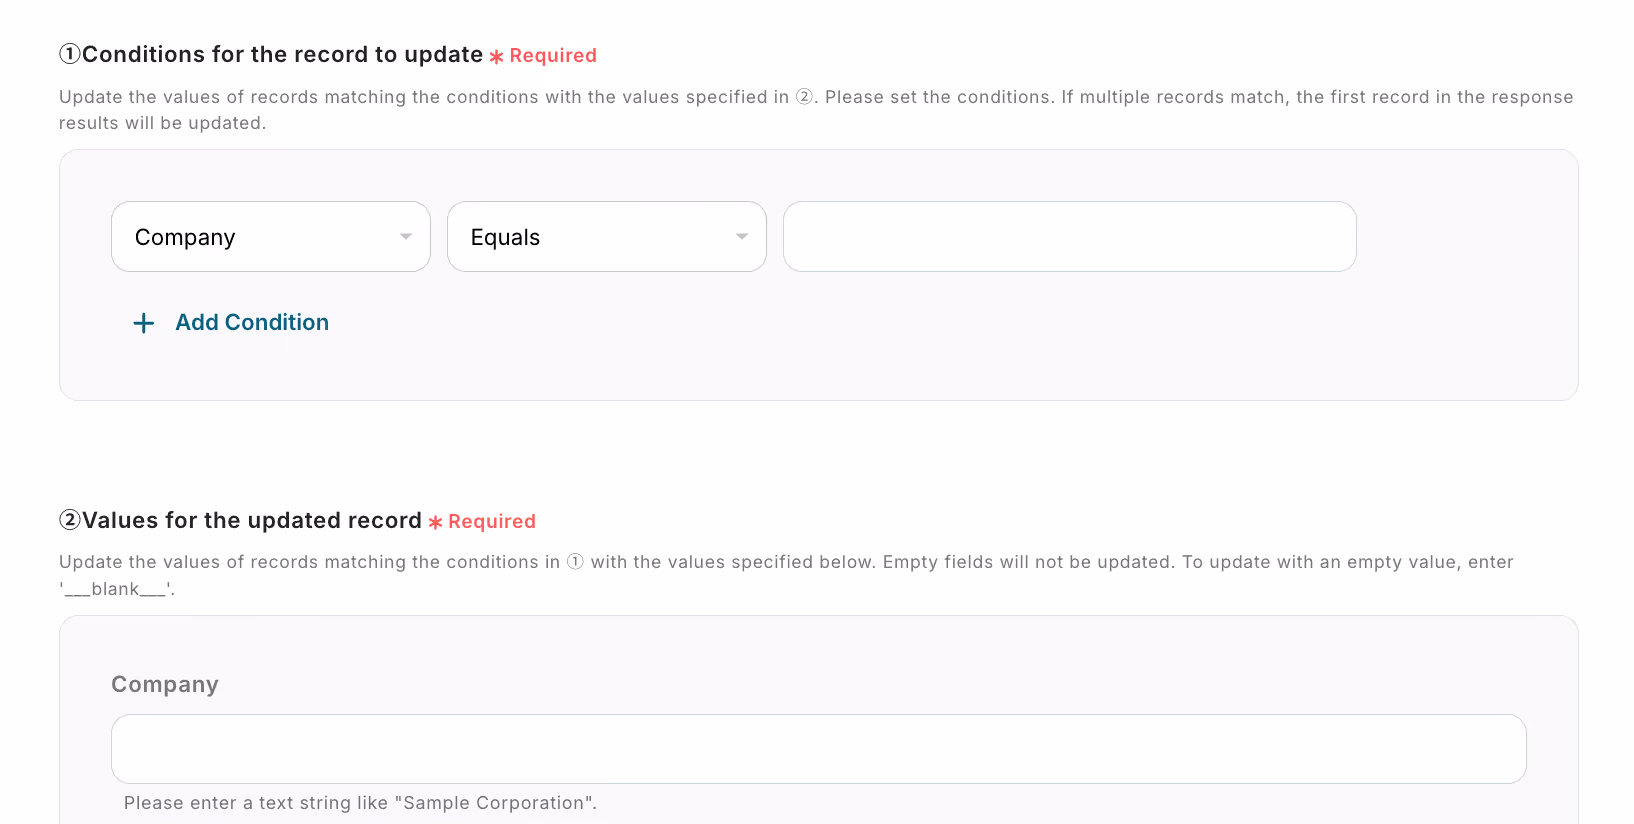
Set the conditions for the record you want to update.
The record that can be updated is the one at the top, as shown in the red frame.
Setting it as shown in the image will update the record where the company name is not empty on the specified Notion page.
In other words, in the above Notion, the red frame is the "Company Name" field.

Records where that field is "not empty" will be updated.
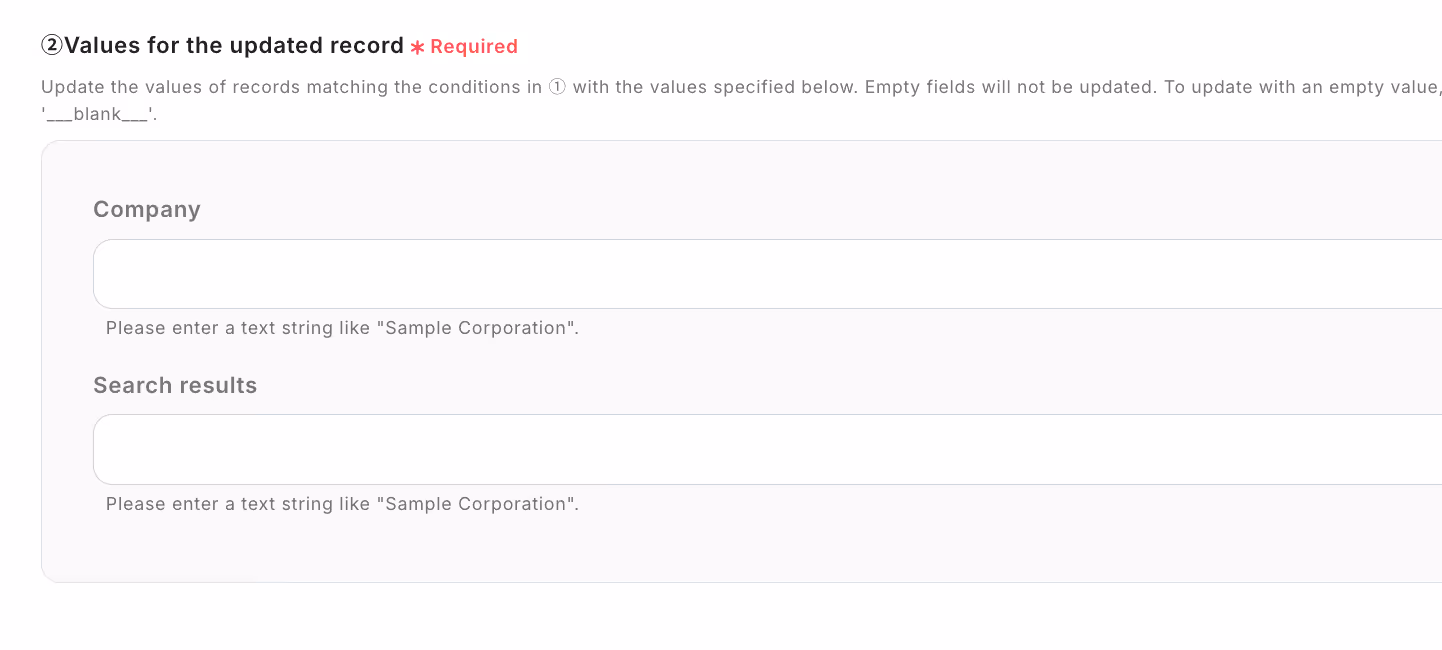
Next, set the values for the record after the update.
The items in the image above depend on the items designed in Notion. Therefore, click inside the box of the item where you want to add the summarized content.
A list will be displayed as shown above, so select Summary Results
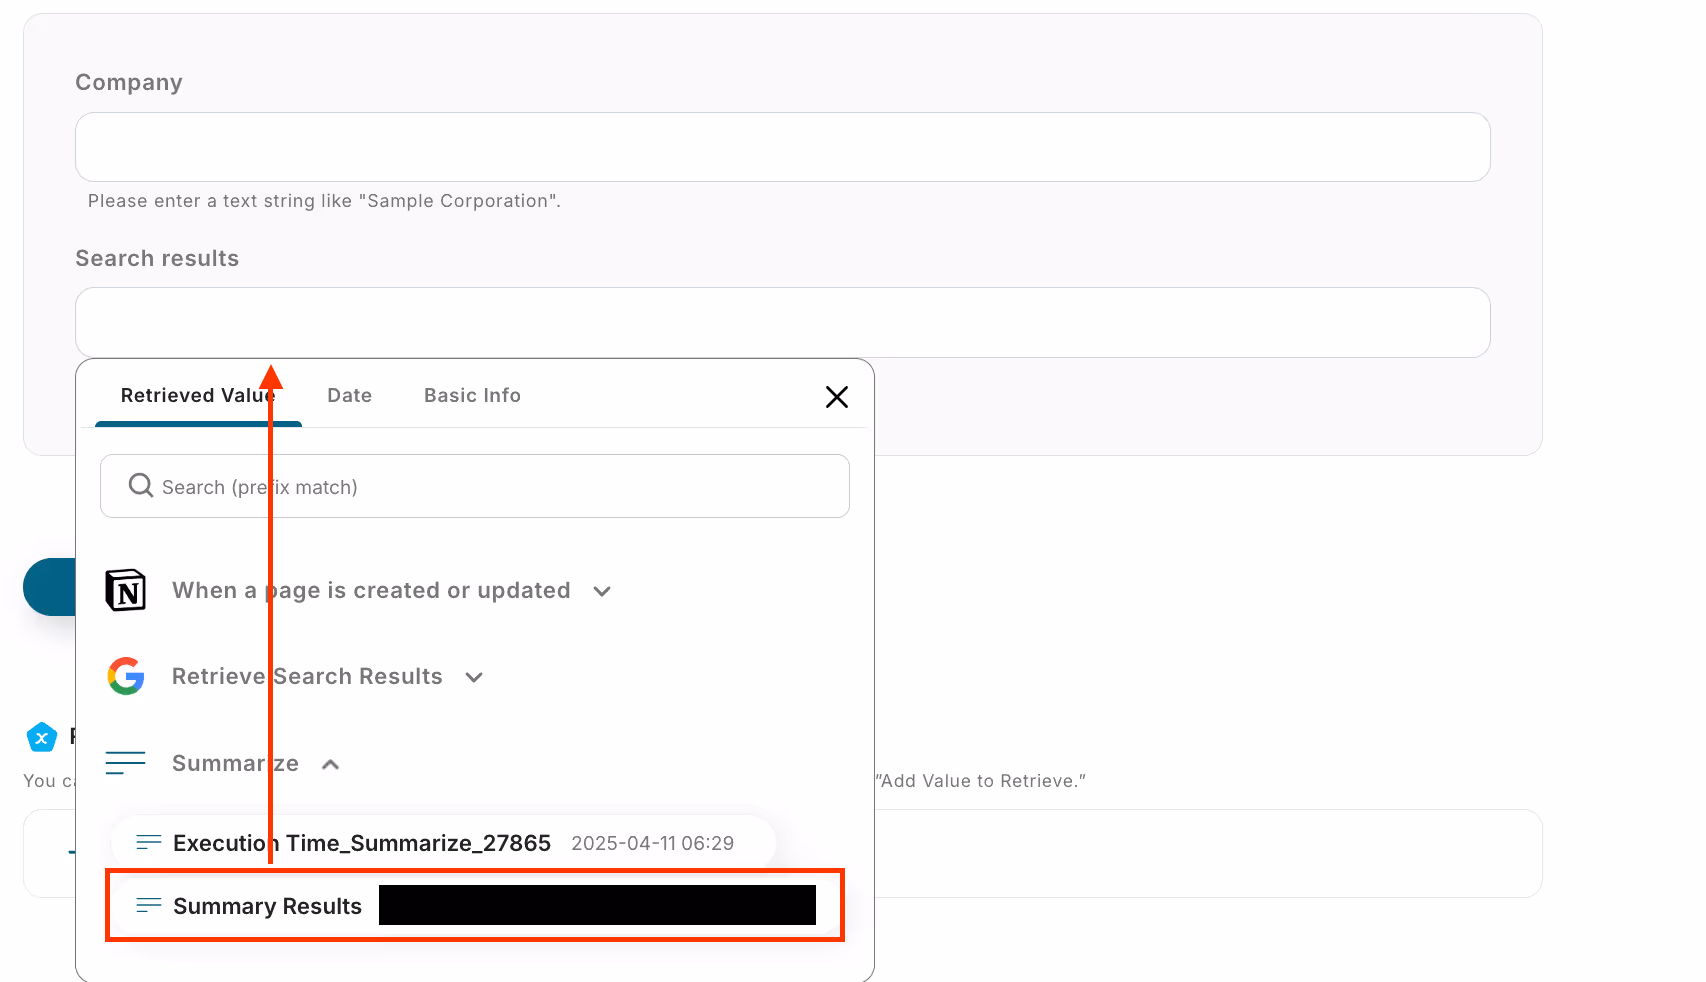
Then, click the summary result and you're good to go!
Once the settings are complete, perform a test. If successful, the setup is complete.
Don't forget to press Save.
↓

Once the Flowbot is created, it will be displayed as shown above.
The trigger is initially set to OFF, so turn it ON.
With this, the creation of a Flowbot using Notion and Google search is complete.
The template used this time is as follows. If you're interested, please check it out.


.avif)


