.png)
・

When you receive a lot of emails every day, it can be quite a hassle to save files to Dropbox each time.
Moreover, many people might have experienced the struggle of missing a file save or saving a file in the wrong folder, making it difficult to find later.
In this article, we will introduce a method to automatically save files received in Gmail to Dropbox!
By using no-code tools, you can easily set up automation between Gmail and Dropbox.
You can start using it right away, so be sure to give it a try!
In this article, we will introduce the integration method using the no-code tool "Yoom".
No complicated settings or operations are required, and even non-engineers can easily achieve it.
You can start right away using the template below, so please give it a try!
Bubble is a tool that allows you to build and manage apps in the cloud. It requires no installation and can be accessed from anywhere, making it convenient for remote development and collaboration with teams.
However, if you need to create a folder in Microsoft SharePoint every time a Thing is newly created in Bubble, it might feel cumbersome.
This article explains the benefits and setup process of integrating Bubble with Microsoft SharePoint.
The content introduced here is recommended for the following people!
・Those who are utilizing Bubble and Microsoft SharePoint and aiming to improve work efficiency
・Those who feel challenged by the manual effort and errors in folder creation during project management
・Those who seek to improve the efficiency and accuracy of folder management across the entire team
By enabling automatic folder creation in Microsoft SharePoint when a Thing is created in Bubble, there is no longer a need to manually create folders.
For example, many companies routinely perform the task of manually creating corresponding folders in SharePoint every time a new project is registered in Bubble.
This task requires setting folder names according to appropriate naming conventions, which can be time-consuming and burdensome for personnel.
By introducing automation, folders following the specified naming conventions are automatically created as soon as a new project is registered.
This allows personnel to reduce the time spent organizing folders and focus on strategic tasks and analysis work.
In operations where folders are created manually, human errors such as naming mistakes or incorrect storage locations are more likely to occur.
Especially in companies where accurate folder creation is required for each task, such mistakes can lead to significant problems.
For example, when the sales department manages new customer information, there is a risk of naming folders incorrectly or making storage mistakes that mix data with other customers when manually creating customer-specific folders in Microsoft SharePoint after registering customer data in Bubble.
Utilizing automation can help reduce the occurrence of human errors.
For companies that manage data in Bubble and use Microsoft SharePoint for centralized file management, it is important to unify folder creation rules.
However, when folders are created manually, issues such as different naming rules for each person in charge and dispersed storage locations can arise.
For example, when managing the onboarding process for new employees, HR and recruitment team members typically need to manage the necessary documents for each employee.
In this case, if folders are created manually, problems such as "naming rules not being unified" and "storage locations being scattered" are more likely to occur.
By automating folder creation, all members can access folders managed under the same rules, creating an environment where work can be carried out efficiently.
This article will proceed with integration using Yoom.
If you haven't used it yet, please take a look at Getting Started with Yoom.
Now, let's explain how to use the no-code tool Yoom to create a folder in Microsoft SharePoint when a Thing is created in Bubble.
[What is Yoom]
It is possible to achieve this by receiving the creation of a Thing in Bubble using Bubble's API and using the API provided by Microsoft SharePoint to create a folder corresponding to the Thing registered in Bubble in a specified file in Microsoft SharePoint.
Generally, programming knowledge is required to achieve this, but with the no-code tool Yoom, it can be easily accomplished without programming knowledge.
If the following display appears, the template copy was successful.

1. First, click on "When a Thing is Created" at the top.

2. You can set the title freely.
Enter the account information to integrate with Bubble.
Select "When a Thing is Created" as the trigger.
Once you have finished entering, click "Next".

3. Set the Trigger Activation Interval and Data Type Name.
The trigger can be set to activate at intervals of 5 minutes, 10 minutes, 15 minutes, 30 minutes, or 60 minutes.
Note: The shortest activation interval varies depending on the plan, so please be careful.
Also, if you want to obtain output from Bubble, you can use JSONPath. For more details on JsonPath, please refer to the links below.
How to Write JSON PATH
How to Obtain Output Using JSON PATH
Once the settings are complete, click "Test" and if there are no issues, click "Save".

1. Finally, click the "Create Folder" icon.

2. Enter the account information to integrate with Microsoft SharePoint.
Select "Create Folder" as the action.
Once you have finished entering, click "Next".

3. Set Each Item.
Be sure to enter all required fields.
When you click on each input field, suggestions and outputs will be displayed.
Site ID, Drive ID, Parent Folder Item ID should be selected from the suggestions.
Parent Folder Name and Folder Name should make use of the output as appropriate.
Once the settings are complete, click "Test" and if there are no issues, click "Save".

4. With this, the flow of [Creating a Folder in Microsoft SharePoint When a Thing is Created in Bubble] is complete.
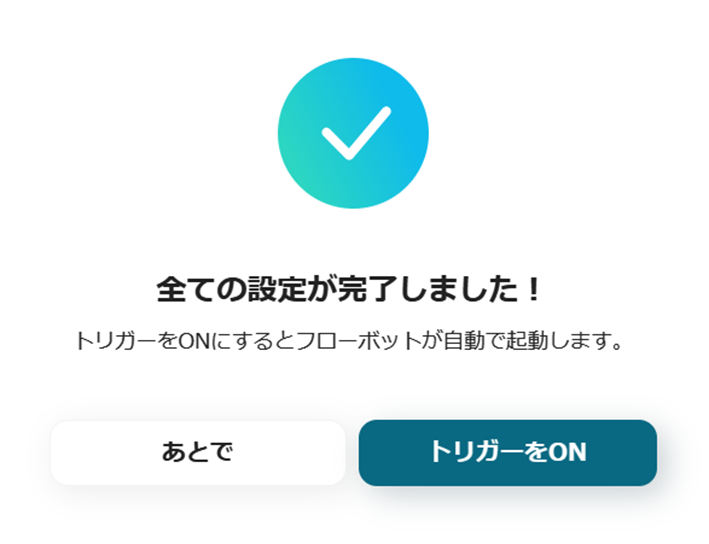
Once the setup is complete, the following screen will be displayed.
Click the "Turn On Trigger" button to activate the flow bot.
With Yoom, you can proceed with tasks even without advanced IT skills.
Try this convenient flow from the link below.
There are many other examples of automation using Bubble in Yoom, so here are a few.
1. A flow to add information registered in Bubble to Salesforce.
By utilizing this template, you can automatically add information registered in Bubble to Salesforce.
This reduces the workload of data entry and makes it easier for employees to have time to focus on more important tasks.
2. This is a flow where a folder is created in Google Drive when a Thing is created in Bubble.
In the flow introduced this time, a folder was created in Microsoft SharePoint, but in this template, a folder is created in Google Drive.
This will make organizing folders easier and data management more manageable.
3. This is a flow that sends an email notification via Gmail when a Thing is created in Bubble.
By utilizing this template, you can automatically receive notifications via Gmail whenever a Thing is created in Bubble.
This can reduce the effort of manual communication and potentially improve information sharing within the team.
By integrating Bubble with Microsoft SharePoint, a folder is automatically created in Microsoft SharePoint whenever a Thing is created in Bubble.
This reduces the manual work involved in folder creation and aims to improve the efficiency of document management.
The appeal of Yoom is that it allows you to easily start automation without difficult settings or special knowledge.
By automating tedious tasks such as document creation and task management, you can create an environment where you can focus on important work.
Please make use of Yoom to streamline your daily operations.
.avif)


.avif)


