

.avif)
Step 1: Integrate My App
First, let's integrate Zendesk and Yoom that you are using.
Select My App → New Connection → Zendesk from the left side of the Yoom page.
Search for it in the app list or by app name.
Set it up when the following screen appears.
※Zendesk is an app that can only be used with the Team Plan and Success Plan.
You can try a 2-week free trial, so if you are considering it, please take this opportunity to try it out.
You will need to register your account name and access token.
Please refer to the help page for registration.
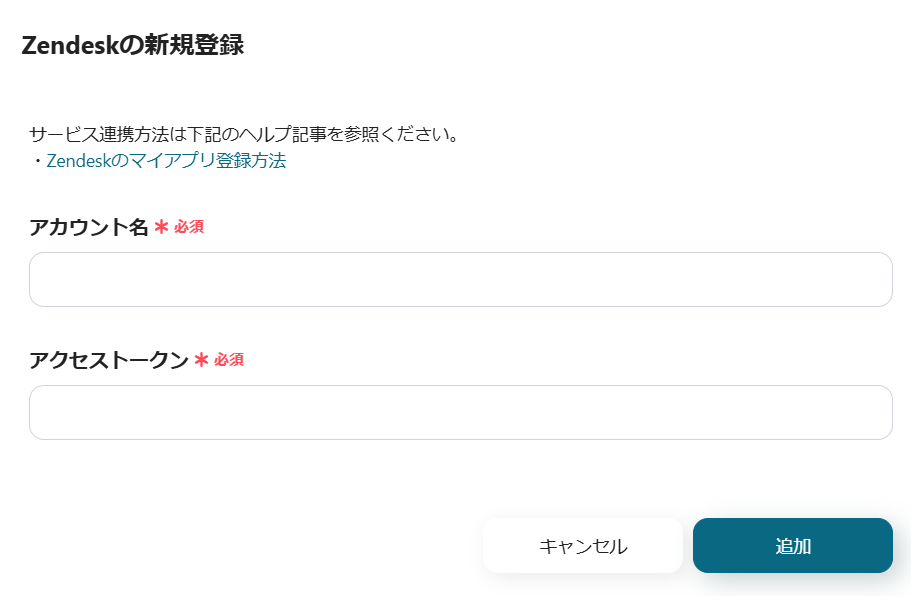
Once entered, press Add.
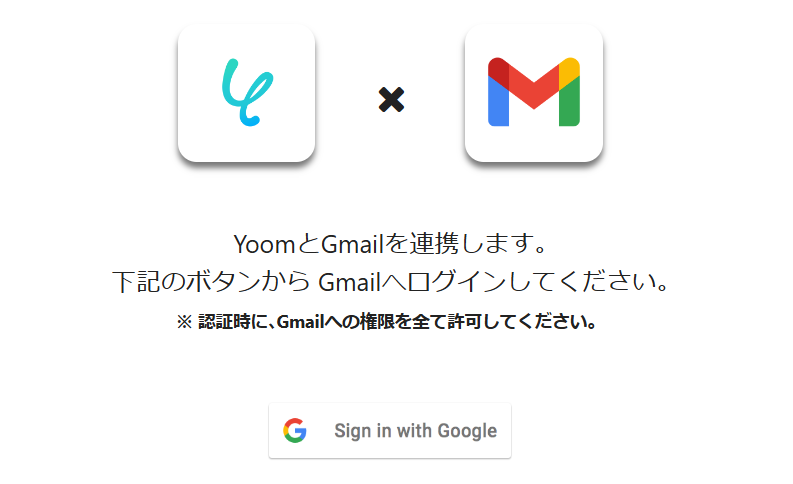
Next, integrate Gmail.
Click Sign in with Google.
※Please allow all permissions to Gmail during authentication.
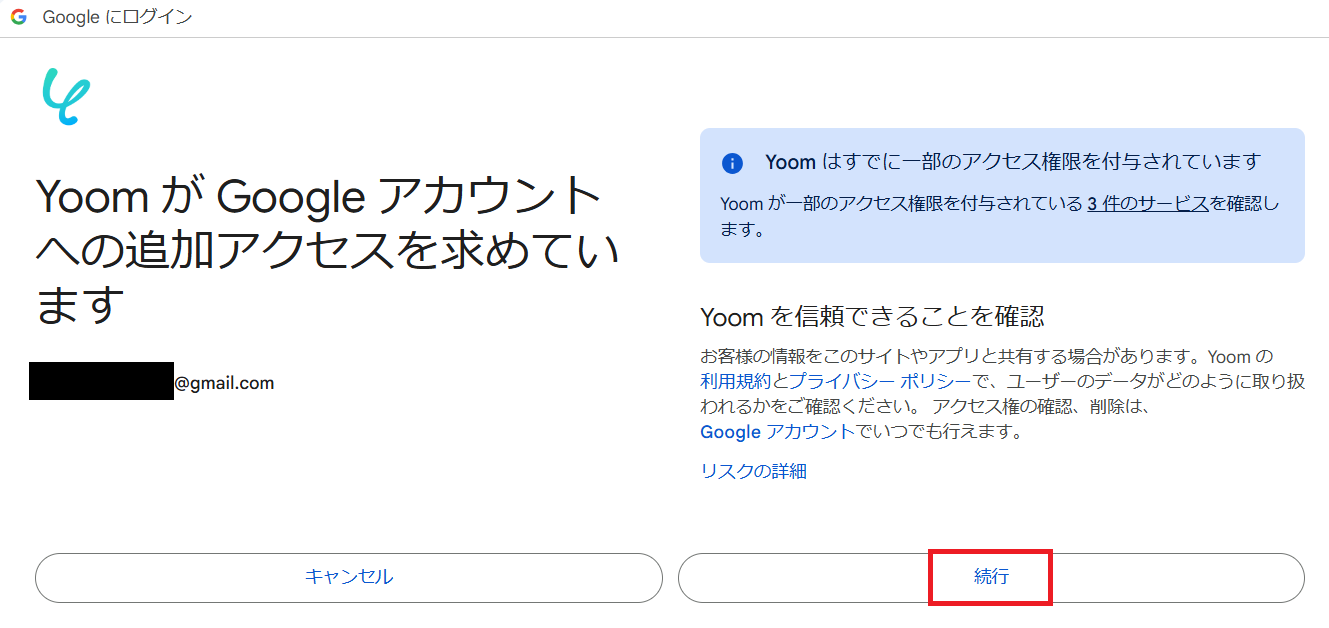
As you proceed with the login, you will see this screen, so click Continue after confirming.
Once the two apps are displayed in My Apps, you're done.
Step 2: Set Triggers and Actions
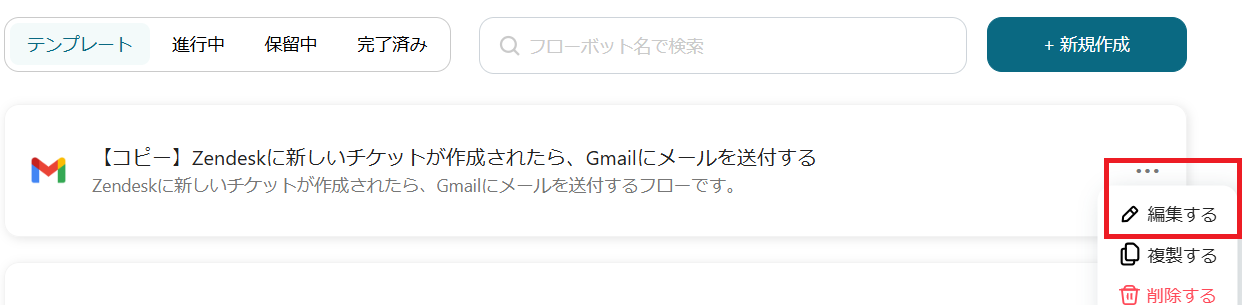
This time, we will use the prepared template.
When you open the template page, select Try this template.
If you are using Yoom, log in, and if you are new, please register as a member.
As you proceed, the template will be copied to your workspace.
If necessary, you can change the name of the template.
Click My Projects on the left, and the copied template will appear.
Click the ellipsis (...) on the right → select Edit.
Now let's set up the app trigger.
Select "When a new ticket is created".
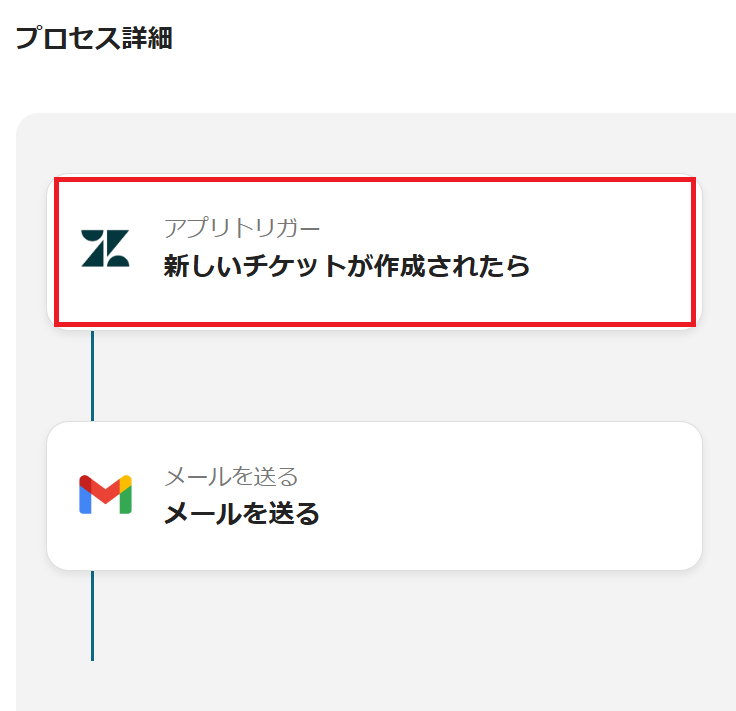
Check the account information to be linked with Zendesk, and proceed to the next step with the trigger action as it is.
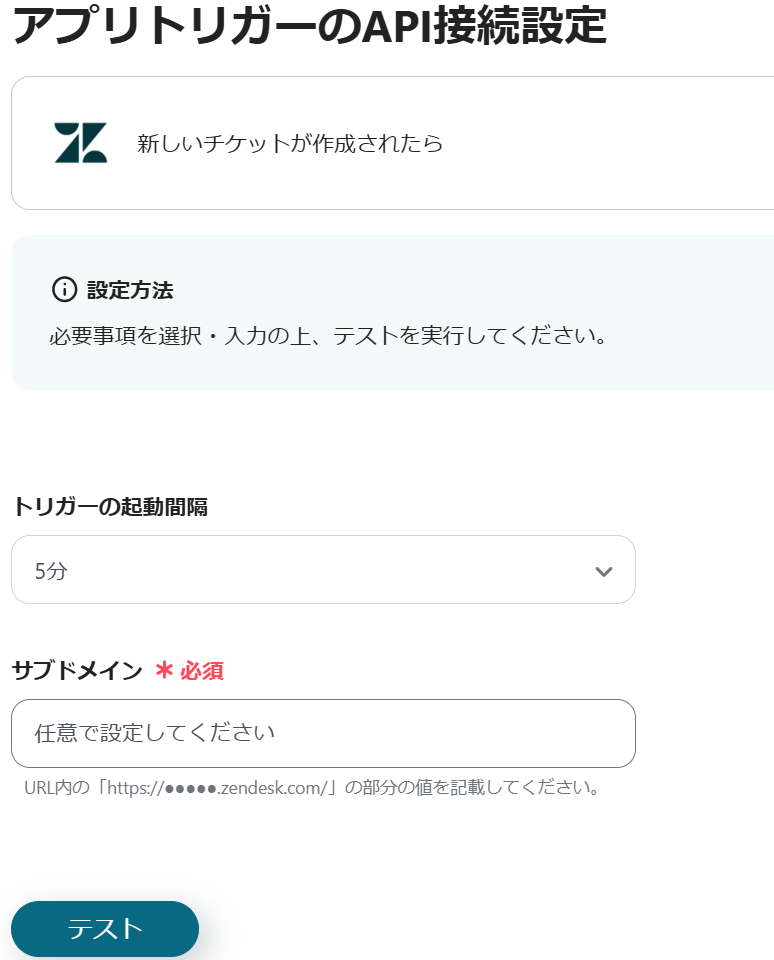
The API connection settings for the app trigger will appear.
You can choose the trigger activation interval from 5 minutes, 10 minutes, 15 minutes, 30 minutes, or 60 minutes.
※The selection of activation intervals varies depending on the plan.
Set the subdomain.
Enter the value of the part in the URL "https://●●●●●.zendesk.com/".
Test here, and if there is no error, save it.
Next, click "Send Email".
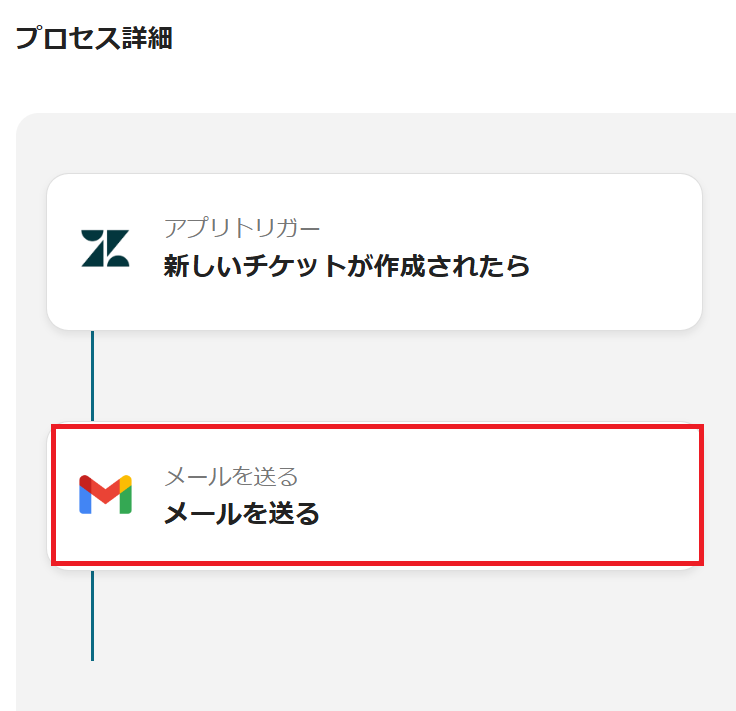
Check the account information to be linked with Gmail.
Let's set up the email content.
To: Enter the address where you want to receive the email
Subject: Optional
Body: This time, I set it up like the image, but you can also customize it by selecting the output, etc.
If you have a job with a lot of fieldwork and can't check Zendesk often, it's recommended to select {{details}} from the output so you can check the ticket details in the email.
Once set, proceed to the next step.

The email sending content you set earlier will be displayed.
If there are no issues, let's test it.
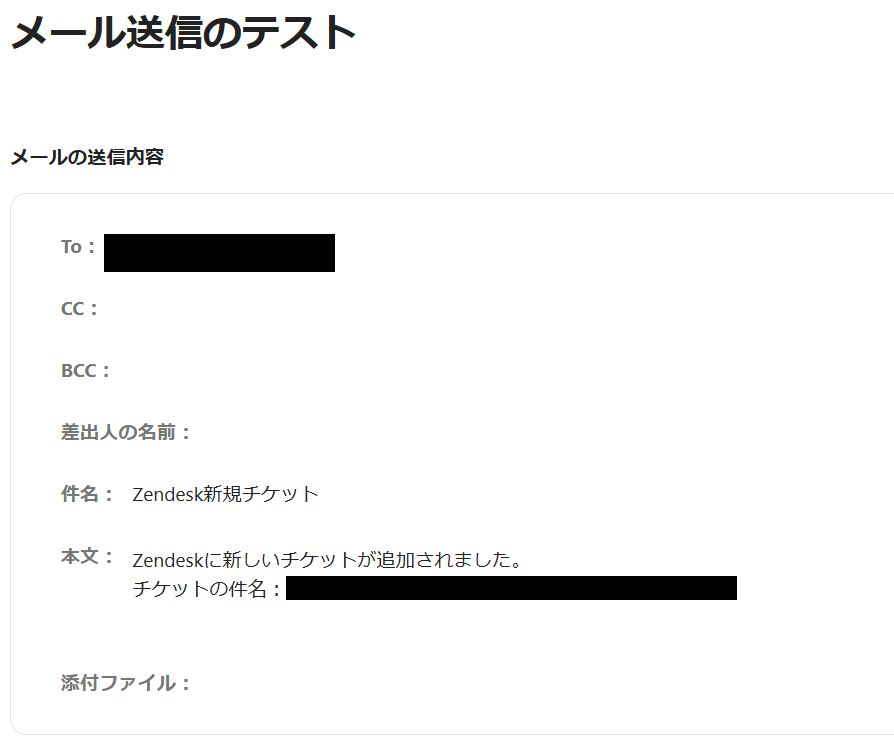
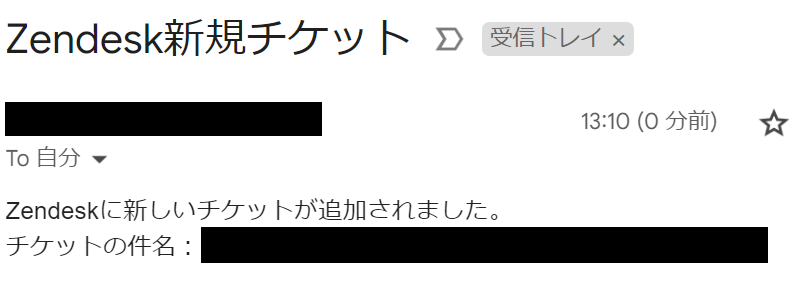
The actual email reception screen looks like this.
You can now see at a glance what has been added.
Finally, turn on the app trigger to complete.
Thank you for your hard work!
Summary
By integrating Zendesk and Gmail, customer support operations have been greatly streamlined.
The appeal of Yoom is that even non-engineers can easily set it up.
Being able to know the addition of new tickets in real-time will reduce missed confirmations and delays in response, improving customer satisfaction.
Let's say goodbye to the days of reloading the page to check if tickets have been added by utilizing this flow.
Additionally, automation can be expected to improve operational efficiency, allowing the support team to focus on more important tasks as the time spent on manual tasks is secured.
By using Yoom, let's maximize these benefits and conduct efficient support operations.


.avif)
.avif)


