[Easy Setup] How to Automatically Link Google Form Data to Zoom
How to Integrate Applications
・
2025-05-12
[Easy Setup] How to Automatically Link Google Form Data to Zoom
y.katagiri-
"It's a hassle to manually enter information collected from Google Forms into Zoom every time..."
"Using multiple tools makes it difficult to manage scattered information..."
Do you have such concerns? When using multiple tools, it takes time and effort to coordinate information between them, causing essential tasks to be delayed... Many people must be facing such challenges.
To solve these issues, integrating Google Forms and Zoom is recommended!
By integrating, you can automate various tasks such as automatically creating Zoom meetings based on information collected from forms or automatically registering webinar participant information. This article clearly explains how to easily integrate Google Forms and Zoom without any coding. You can start easily without relying on engineers or having programming knowledge, so please read to the end!
For those who want to try it quickly
By using Yoom, you can easily integrate Google Forms and Zoom without any coding. Yoom provides templates for integrating Google Forms and Zoom in advance, so you can achieve integration immediately just by registering, without any API knowledge. If you want to try it right away, let's get started from the banner below!
What You Can Do by Integrating Google Forms with Zoom
By integrating Google Forms with the Zoom API, you can automatically transfer data from Google Forms to Zoom! For example, you can automatically perform data transfers like the ones below without any manual intervention.
1. Create a Zoom Meeting Based on Google Form Submissions
This flow automatically creates a Zoom meeting based on responses received from Google Forms. It is recommended for HR or recruitment personnel who receive interview or meeting requests via forms and conduct interviews or meetings on Zoom.
2. Automatically register for a Zoom webinar when information is submitted via Google Forms
It is possible to automatically register webinar participants who have expressed interest via Google Forms for a Zoom webinar. This can eliminate the need for manual registration tasks and streamline the management of webinar participants.
3. Automatically Grant Zoom License Upon Approval of Google Form Application
This flow automatically sends an approval request upon receiving an application from Google Forms, and grants a Zoom license automatically after approval. By automating this series of processes, it is expected to significantly reduce the workload and allow more focus on core tasks.
Let's Create a Google Forms and Zoom Integration Flow!
Now, let's create a flow that integrates Google Forms with Zoom!
This time, we will use Yoom to proceed with the integration of Google Forms and Zoom without any coding. If you don't have a Yoom account yet, please create one using the registration form here.
[What is Yoom]
This time, we will create a flow bot that automatically creates a Zoom meeting based on the submission content of Google Forms! The creation process is broadly divided into the following steps.
Integrate Google Forms and Zoom with My Apps
Copy the template
Set the trigger for Google Forms and the action for Zoom
Set the trigger to ON and verify the operation
Step 1: Register My Apps
First, register Google Forms and Zoom as My Apps for this process. By registering them in advance, the subsequent setup of the integration flow will be smoother.
Click on "My Apps" on the left side of the Yoom screen, then click on "New Connection" displayed on the right side.
[Register Google Forms as My App]
After clicking, search for Google Forms in the search box and select it from the displayed options. Once selected, the following screen will appear, so click the red frame to proceed.
An account selection screen will appear. Please select the Google account to link with Yoom.
This completes the registration of Google Forms as My App!
[Register Zoom as My App]
Similarly, search for Zoom in the search box and select Zoom (OAuth) from the displayed options. Refer to this article to enter the "Client ID" and "Client secret".
If Google Forms and Zoom are displayed in My Apps, the registration is complete!
Step 2: Copy the Template
Now, let's create the flow! To make it easy, we will use a template. Click the "Try it" banner below to copy the template.
Once the copy is complete, the following screen will be displayed. Click "OK" to proceed with the setup!
Step 3: App Trigger Settings
First, set up the app trigger to activate the Flowbot. Click on "When an interview is scheduled" in the copied template.
When clicked, the following screen will be displayed. The account linked in Step 1 will be shown in "Account Information". Keep the trigger action as is and click "Next".
Next is the API connection settings.
Select the trigger activation interval from the dropdown. Note: The shortest activation interval varies depending on the plan, so please be careful.
Enter the ID of the Google Form you are using in "Form ID". The part "●●●●●●" in "https://docs.google.com/forms/d/●●●●●●/edit" is the Form ID.
After entering, send an actual response to the form set in the Form ID for testing. This time, we prepared a form like the one below and sent a response for testing!
After sending, return to the Yoom screen and execute "Test". If the test is successful, the content of the response will be obtained as output.
About Output Output refers to the values obtained when executing "Test" during trigger or operation settings. The obtained output can be used as a value during subsequent operation settings, and it will be a fluctuating value each time the Flowbot is activated. For more details, please refer to here.
After the test is successful, the "Response ID" and other outputs are obtained, but the information for each form item, such as "Name" and "Interview Date", is not obtained. To obtain the response information for each form item, you need to manually add it from "Add value to obtain". Click "+ Add value to obtain".
Add the information you want to obtain from the form responses, such as "Name" and "Interview Date", by clicking the "+" button. Once you have added all the information you want to obtain, click "Add" at the bottom right.
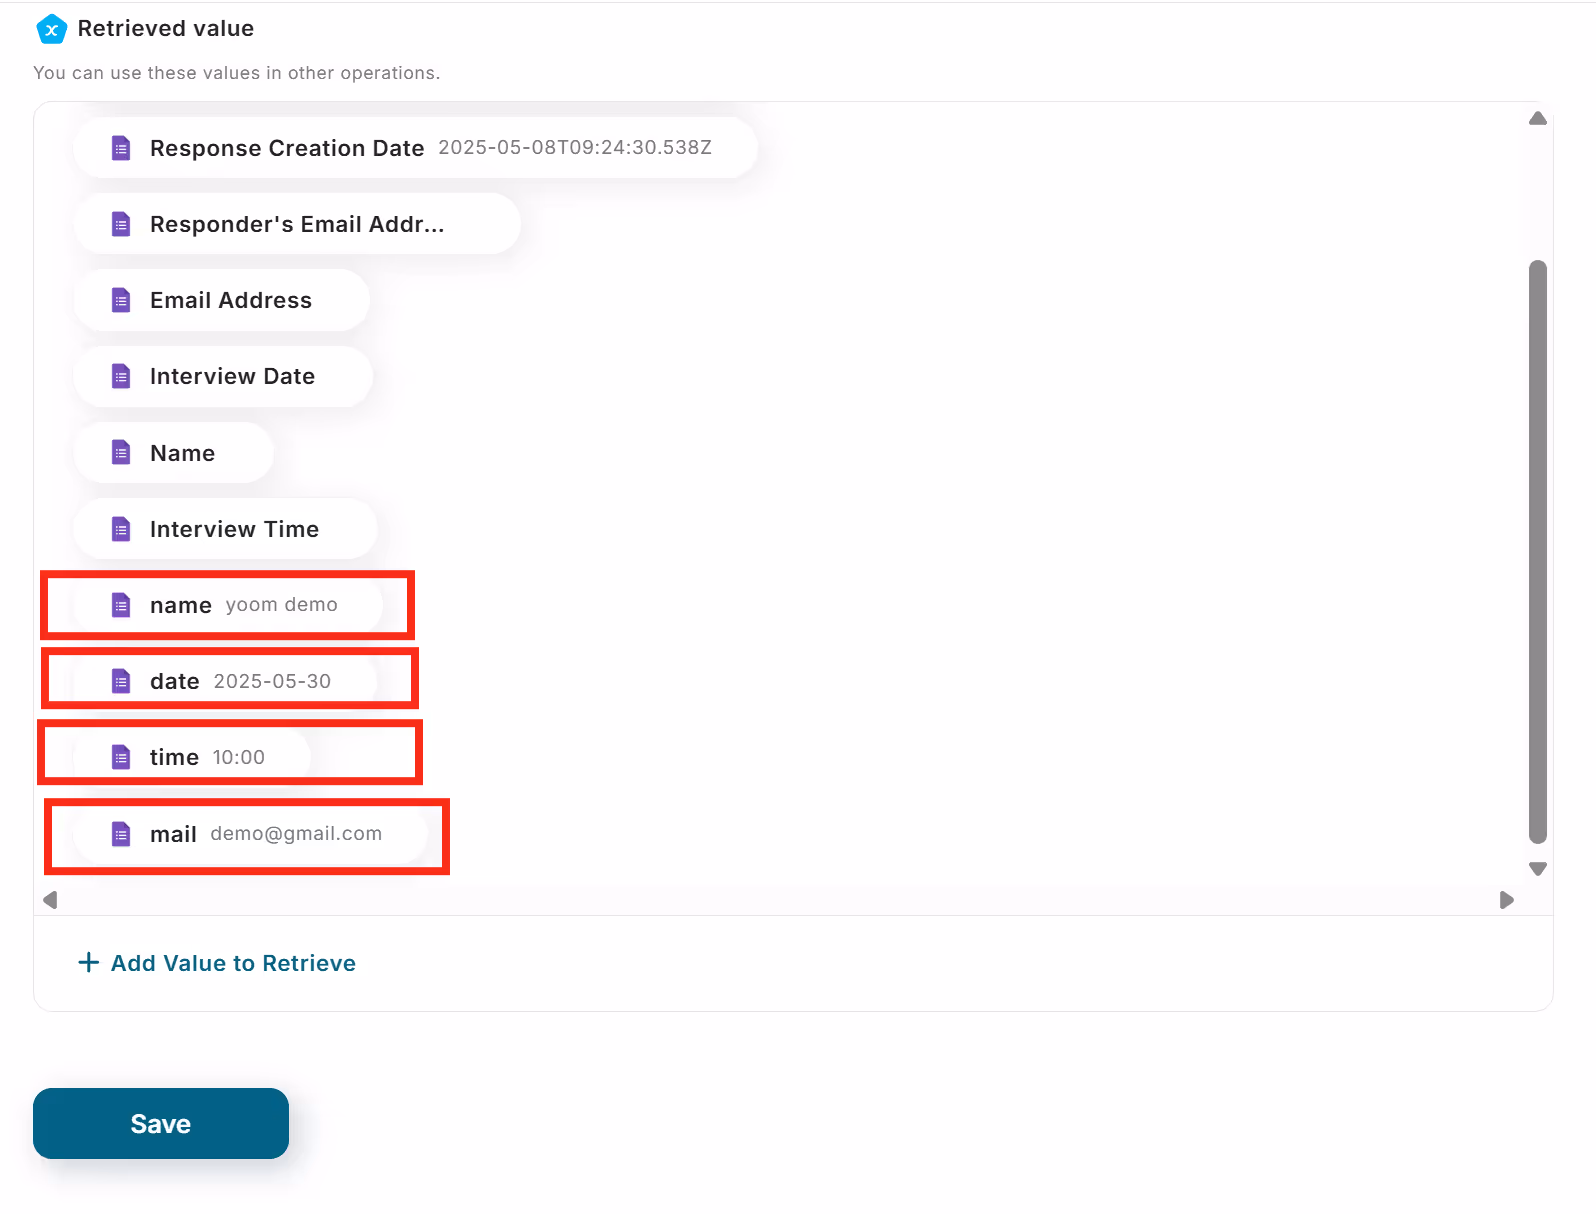
All the added items have been added with the item name "Value".
In the subsequent flow settings, you will utilize the output obtained here, but it's hard to understand what each value represents... To make it easier to understand what information each item value represents, click the "pencil mark" and change the item name.
Change the "Item Name" to something easy to understand, such as "Name" or "Interview Date", and click "Save".
Once you have changed the item names for all the added items, save them.
For more details on how to obtain response information when using Google Forms as an app trigger, please refer to here.
Step 4: Setting Up Automatic Zoom Meeting Creation
Next, set up the automatic creation of Zoom meetings. Click "Create Meeting".
The following screen will be displayed. As before, the account linked in Step 1 is listed in "Account Information". Keep the action as is and click "Next".
Next is the API connection settings.
Enter the email address of the Zoom account linked with Yoom in "Email Address".
Enter the meeting title in "Topic". For example, specify according to the content of the responses received in Google Forms, such as "Interview", "Meeting", "MTG", "Business Negotiation", etc.
Also, set "Password" and "Meeting Description" as needed. When setting the meeting description, use fixed phrases and outputs to automatically create a description that matches the content of the form responses.
For example, enter fixed text such as "Mr./Ms. Interview" as a fixed value for text used every time. For information that varies for each meeting, such as "Name" or "Date", use outputs to set values based on the form response information.
Set "Date" using the output obtained from Google Forms. This way, you can automatically create meetings with dates based on the form response content.
Similarly, select "Interview Time" from the output for "Start Time".
Enter the Zoom meeting time in "Meeting Duration". Enter a reference time based on your usual meetings. If the average meeting time is 30 minutes, enter "30". This time, we assumed 60 minutes and entered "60"!
After completing the settings, execute "Test" and confirm that the meeting is correctly created in Zoom.
After confirming, save it.
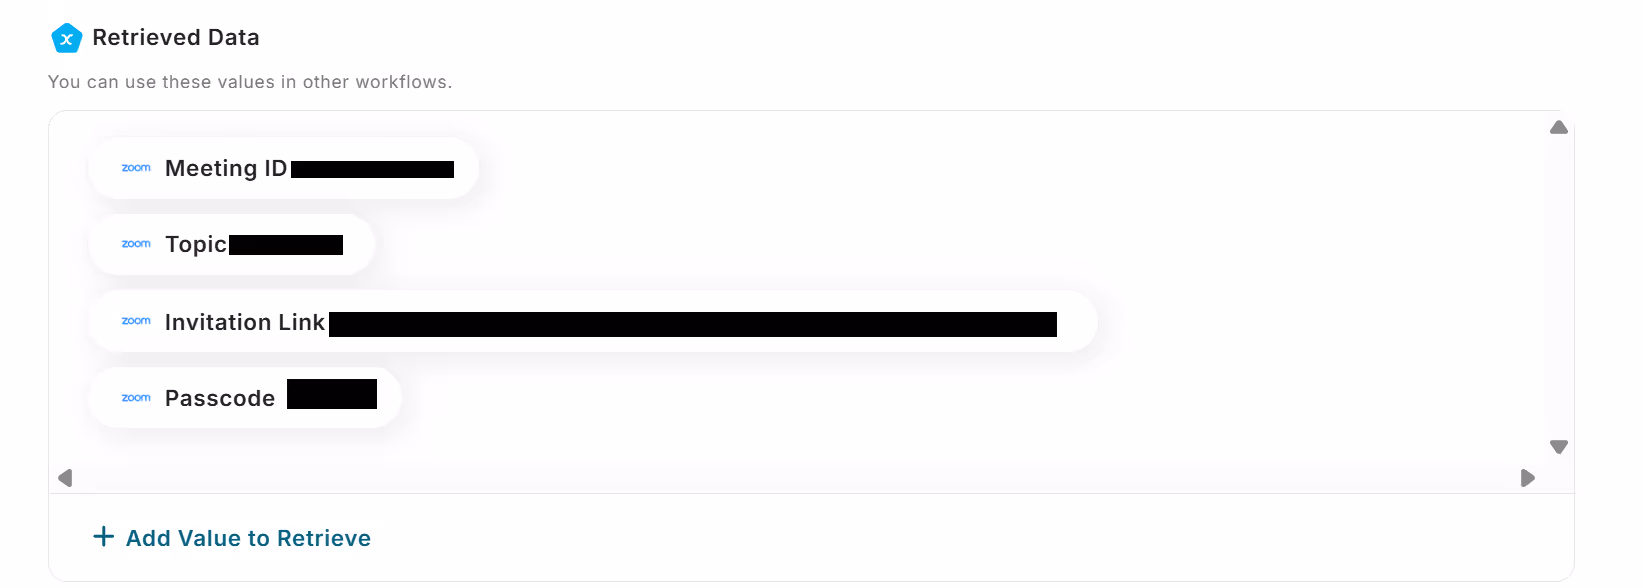
The following outputs obtained here can also be utilized in the integration flow!
For example, after "Create Meeting", you can add a flow to "Send Email" and send the automatically created "Meeting ID" or "Invitation Link" to the email address obtained from the Google Form responses. Please try using it!
Step 5: Turn On the Trigger and Confirm Operation
Once all settings are complete, the following screen will be displayed. Click "Turn On Trigger" to confirm that the Flowbot is activated correctly.
All settings are now complete!
Other Automation Examples Using Google Forms and Zoom API
Besides integration with Zoom, it is possible to automate various tasks using the Google Forms API. If you find something interesting, please try it out!
Convenient Automation Examples Using Google Forms
It is possible to create schedules based on Google Forms data, notify chat tools, and update information in other databases. You can also create contracts and invoices based on the information received in Google Forms.
Convenient Automation Examples Using Zoom
After a Zoom meeting ends, it is possible to send meeting information and minutes to communication tools or automatically create transcription data and save it to a database. Additionally, participant information can be automatically added to other databases.
Conclusion
How was it? By automatically integrating the information collected from Google Forms with Zoom, you can significantly reduce the time and effort spent on manual tasks. Incorporating automation allows you to focus more on core tasks, potentially improving overall work efficiency.
With Yoom, anyone can easily achieve integration between Google Forms and Zoom without any programming skills. For those wondering, "Is it really that easy...?" or "What else can be automated?" Why not create a free account and see for yourself? Registration takes just 30 seconds! Once registered, you can immediately experience the automatic integration of Google Forms and Zoom.
The flow can be customized, so try creating an integration flow that suits your company's operations! Improving work efficiency requires the accumulation of small improvements. Why not start by incorporating automation into your workflow through app integration to make your daily tasks easier and more efficient? Please refer to this article to set up integrations without code and experience the improvement in work efficiency.
The person who wrote this article
y.katagiri-
I've been a writer for 8 years. I like writing. I will do my best to bring the appeal of Yoom to many people!
Conventional RPA can only automate simple repetitive tasks, and the setup process was very complicated. With “hyperautomation,” which combines various technologies such as AI, API, RPA, and OCR, it is possible to automate many tasks that could not be realized until now more easily than before.
Most tools simply connect one app to another, leaving the complex tasks to you. Yoom goes much further: From document creation and browser automation to OCR and generative AI, Yoom handles it all seamlessly in one platform.
Why settle for basic integrations? Streamline your entire workflow with Yoom’s powerful hyperautomation.


.avif)


.avif)

.avif)


