

.avif)

Now, let's get started with the setup.
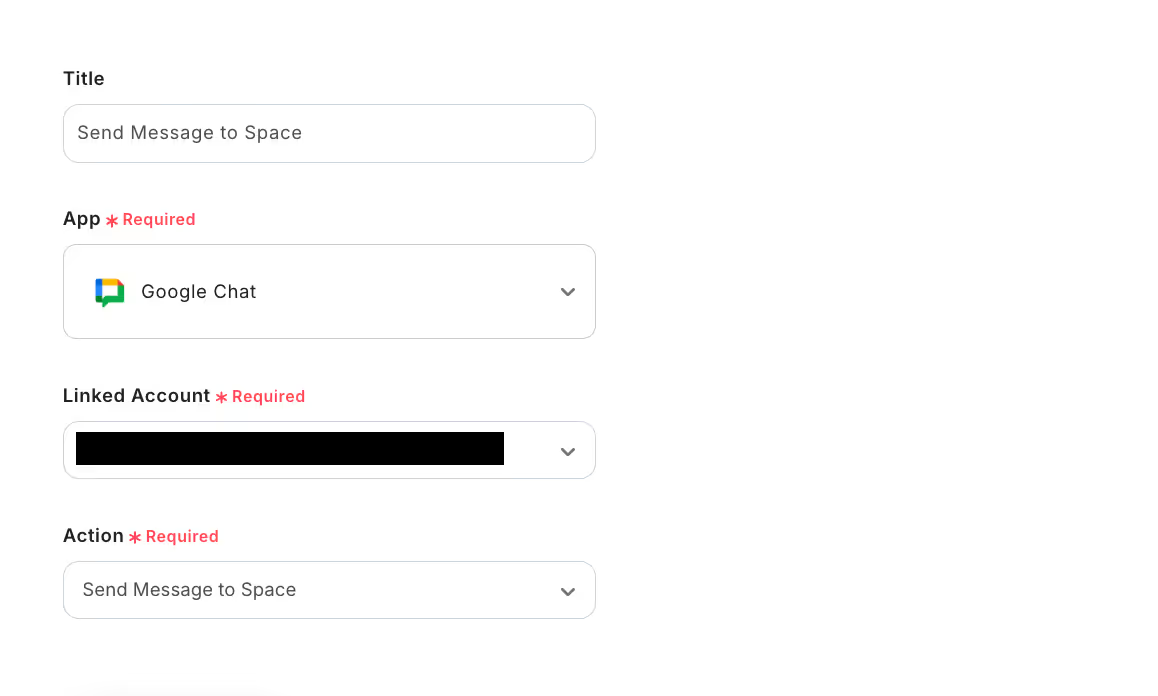
③ Trigger Settings
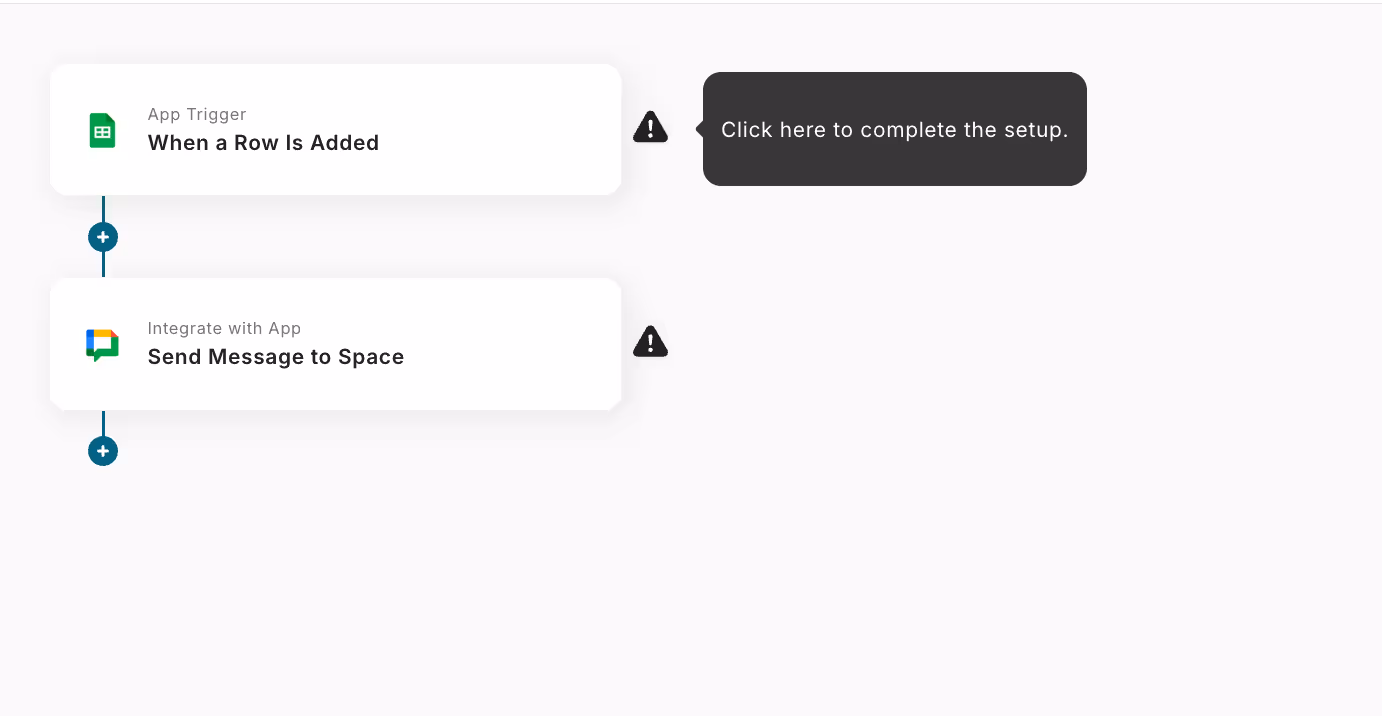
First, select "When a row is added" and enter the necessary information to set it up.
Please enter the account information (email address) to be linked.
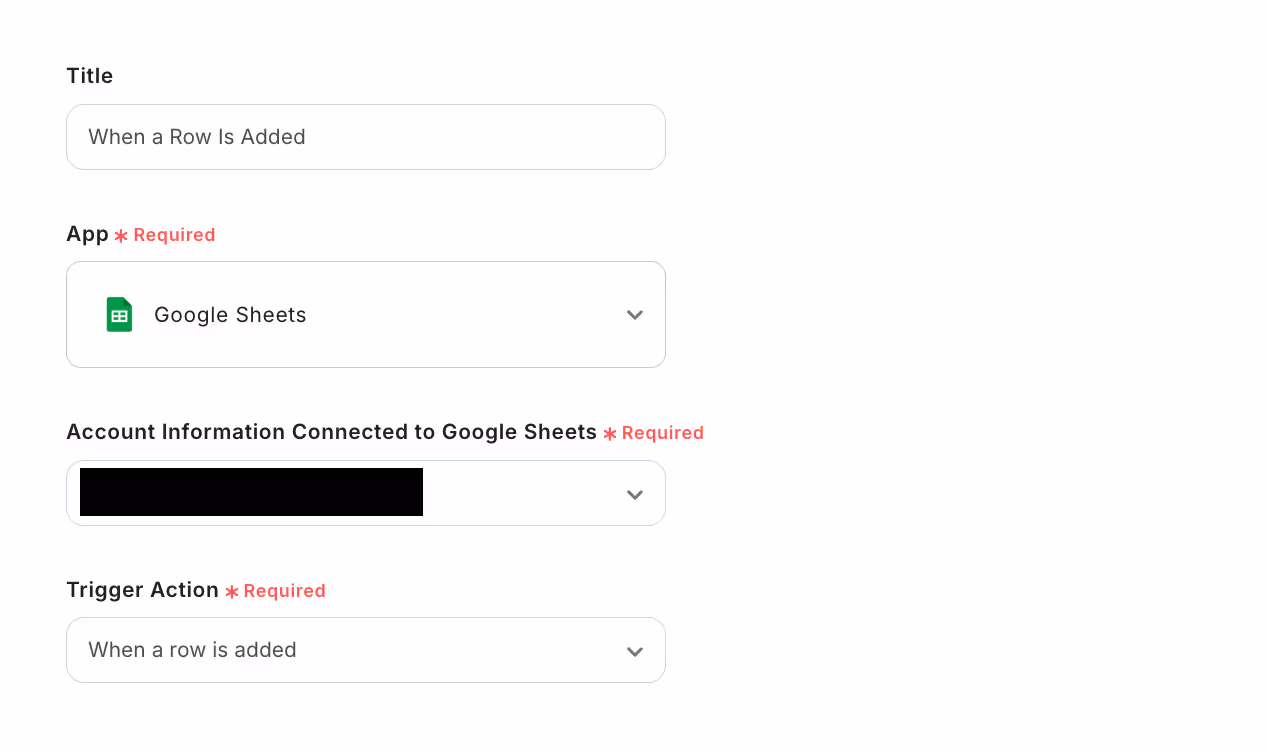
[How to Set]
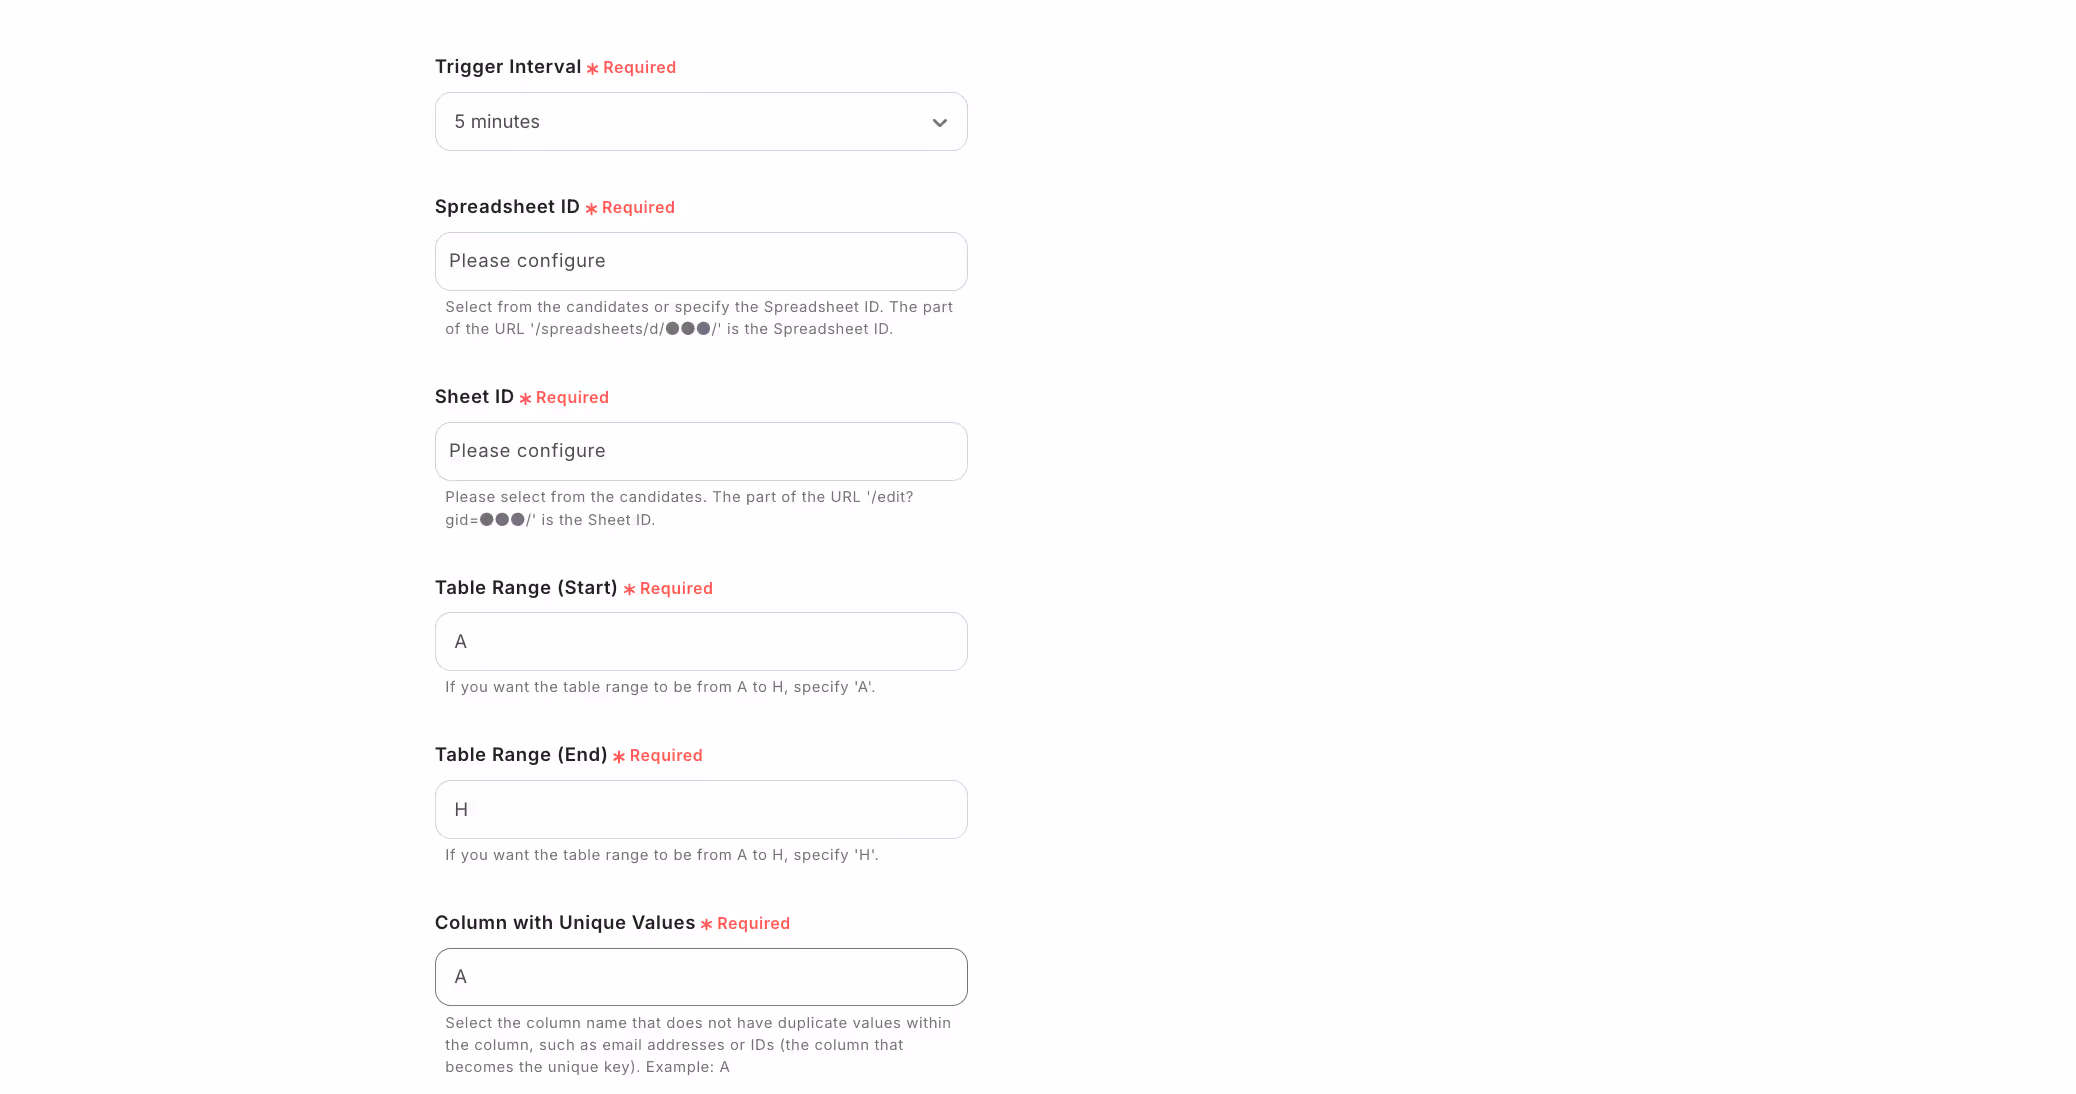
Please enter the required fields and run the test.
※ Additional information about the input content is provided below the input field.
- The flow bot will be activated when a row is added to the table (spreadsheet) in the spreadsheet.
- Please make sure to enter values from the first row of the sheet.
- If the data size of the sheet exceeds 4MB, an error may occur.
- Do not include empty rows or columns in the table.
- There is a limit to the range of tables that can be set for each plan.
If there are no issues with the test results, scroll to the bottom of the screen and press "Save".
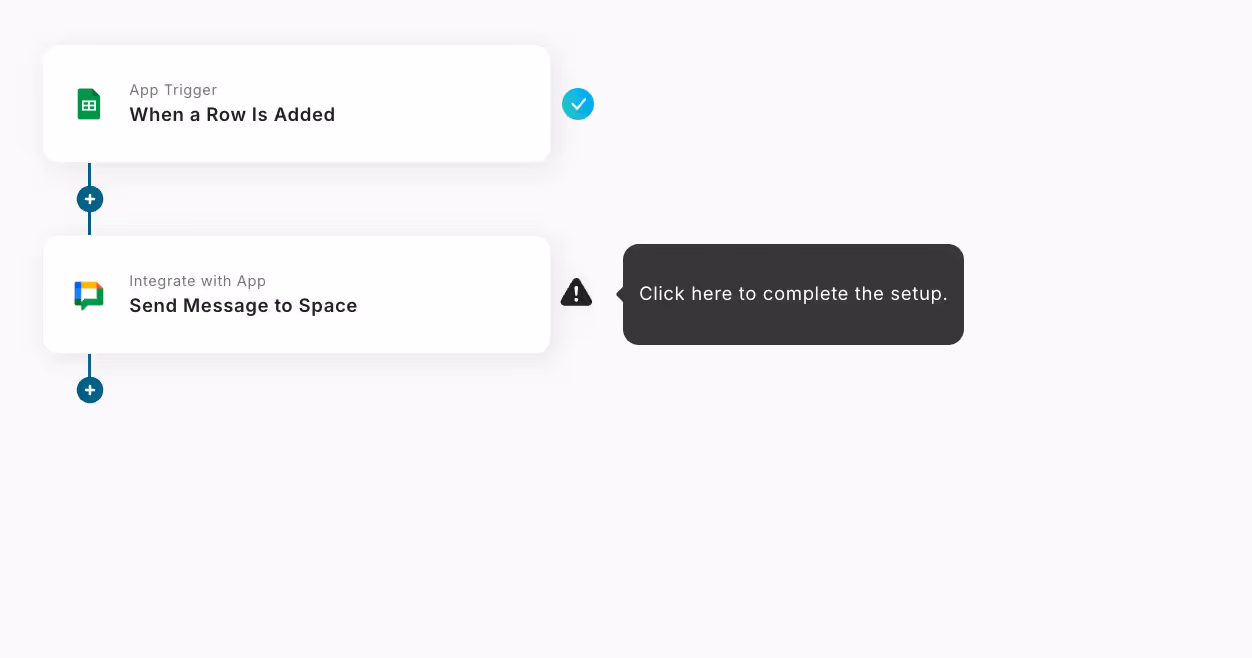
Then, return to the initial integration flow screen and confirm that the error mark next to "When a row is added" has disappeared.
If the error mark has not disappeared, the settings have not been configured correctly.
Next, set up "Send a message to space".
Enter the necessary information as before, enter the account information (email address) to be linked, and press "Next".
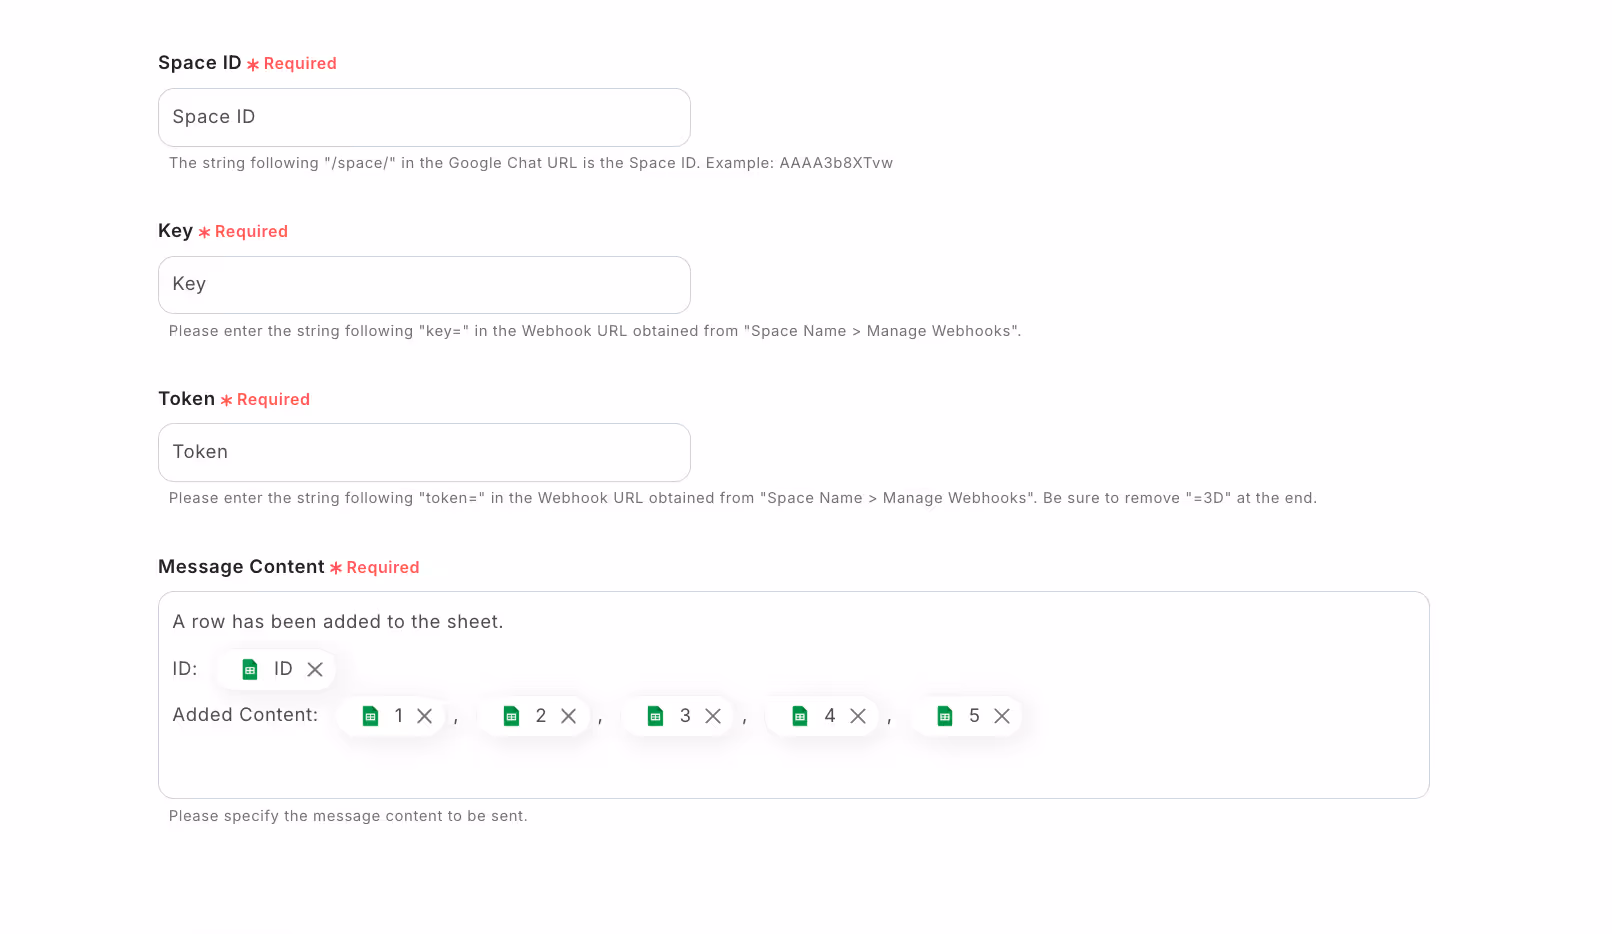
When the screen transitions, the following screen will be displayed, so fill in all the required fields: "Space ID", "Key", "Token", "Message Content". Additional information about each item is provided directly below the input fields, so please proceed while checking.
Space ID
→The string after "/space/" in the Google Chat URL is the Space ID. Example) AAAA3b8XTvw
Key
→Please enter the string after "key=" in the Webhook URL obtained from "Space Name > Manage Webhooks".
Token
→Please enter the string after "token=" in the Webhook URL obtained from "Space Name > Manage Webhooks". In doing so, please remove the trailing "%3D".
Message Content
→Please set the message content you want to send as desired.
Once you have completed entering the required fields, you can test the output by pressing "Test". If there are no issues with the results, scroll to the bottom of the screen and press "Save" to return to the initial screen.
[Notes]
・You can send messages to a specific space.
・For information on how to set it up, please refer to this manual.
・For information on how to set up mentions, please refer to this manual.
Finally, please turn ON the trigger setting next to "When a row is added".

This completes all the settings for the "Notify Google Chat when a row is added in Google Sheets" template.
Well done!


.avif)
.avif)
.avif)


