Google スプレッドシート×HubSpotの連携イメージ
How to Integrate Applications

2025-04-16

How to Create a Contact in HubSpot When a Row is Added in Google Sheets

m.i

Managing contact information is crucial for efficiently conducting sales and marketing activities, isn't it?
However, if you're manually entering information from Google Sheets into HubSpot, it can be time-consuming and cumbersome.

In such cases, why not automate the registration process by integrating Google Sheets with HubSpot?
This automation can be a significant advantage, especially for those spending time on manual data entry and customer information management.
In this article, we will explain in detail how to automatically create contacts in HubSpot when new customers are registered in Google Sheets using no-code tools, so be sure to give it a try!

Recommended for

  • Those managing customer information in Google Sheets while conducting sales activities in HubSpot
  • Those facing challenges in sharing customer information with sales or marketing teams
  • Those looking to quickly import information of event or seminar participants into HubSpot
  • Those aiming to streamline business processes by improving data entry efficiency and reducing errors
  • Those wanting to enhance inter-departmental information sharing by integrating Google Sheets and HubSpot

For those who want to try it immediately

This article introduces the integration method using the no-code tool "Yoom".

No complicated settings or operations are required, making it easy for non-engineers to implement.

You can start right away using the template below, so be sure to give it a try!

[What is Yoom]

How to Create a Workflow Connecting Google Sheets and HubSpot

So far, we have introduced the benefits of integrating Google Sheets with HubSpot.
Now, let's quickly connect the apps we'll be using with Yoom!
After completing the registration of My Apps, we will create a flowbot that "adds a task to HubSpot when a row is added in Google Sheets."

This time, the process is as follows.
Let's set it up together!

  • Connect Google Sheets and HubSpot with My Apps.
  • Copy the template.
  • Set the trigger in Google Sheets as the starting point of the flow and configure the subsequent operations in HubSpot.
  • Turn on the trigger button and verify the operation of the integration flow between Google Sheets and HubSpot.

Step 1: Connect My Apps

Connecting My Apps first will make the subsequent settings proceed smoothly.
First, connect your Google Sheets with Yoom.
Select My Apps → New Connection from the left side of the Yoom page.

Search for Google Sheets and log in with your Google account.
When you reach this screen, click continue if there are no issues.

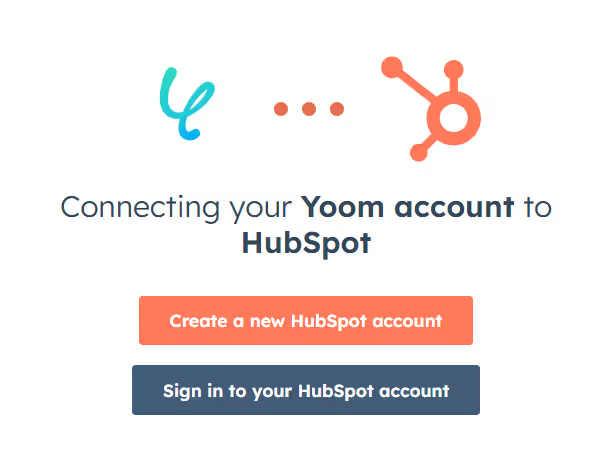
Next, connect with HubSpot.
Please register or log in.

If Google Sheets and HubSpot are connected to My Apps, you're good to go.

Step 2: Set Triggers and Actions

This time, we will proceed using this template.

Let's click on 'Try it' on the banner above.
If you are using Yoom, please log in, and if you are new, please register.
If you proceed, the template will be automatically copied to your workspace.
Please change the template name as needed.
Click on My Projects on the left to display the template you just copied.
Click on the ellipsis (...) on the right and select Edit.

Things to Prepare

・A Google Spreadsheet where you can enter contact information.
Please refer to the image for the header.
(Information will be entered during testing.)

Now, let's set up the app trigger.
Select "When a row is added".
You can change the title as you like.
After confirming the account information to be linked, proceed to the next step.

  • Trigger Interval: You can choose from intervals of 5 minutes, 10 minutes, 15 minutes, 30 minutes, or 60 minutes. A shorter setting is generally recommended.
    The plan may change the available interval options.

Set the table range to include everything, including the header.

  • Column with Unique Values
    ※ Be sure to select a column where values do not duplicate!

Now, please move to the Google Spreadsheet for contact information.
Leave the contact ID in column F blank. (The HubSpot contact ID will be added in the last action of the flow bot.)
Enter the other items.

Return to the flow bot and test it.
If the information you want to add to HubSpot is reflected in the output, save it.

Next, click on "Create Contact".
Please also confirm the account information to be linked.
Proceed to the next step and configure the items.
Select from the output as follows.

Set the remaining items.

You can select the lifecycle stage from the images.

The lead status is as follows.

The above two are optional for contact creation, so please select as needed.
Test this as well, and if the created contact ID is obtained in the output, save it.

Next, click on "Update Record". Let's link the database.

Set the conditions for the record you want to update.

Since we want to update the contact ID obtained earlier, select the output as follows.

If the test is successful, click Save. Let's check HubSpot.

The contact has been successfully created.
Thank you for your hard work. Even someone like me, who is not familiar with programming, was able to proceed easily.

Here is the flow bot used this time ↓

Other Automation Examples Using Google Sheets and HubSpot

In addition to the integrations introduced today, various automations can be achieved by utilizing the APIs of Google Sheets and HubSpot.

If you find something interesting, please give it a try!

Automation Examples Integrating Google Sheets and HubSpot

It is possible to set up an integration where updating a row in Google Sheets also updates contact information in HubSpot.
Additionally, you can add new contact information registered in HubSpot to Google Sheets, or add responses submitted to a HubSpot form to Google Sheets.

Automation Example Using Google Sheets

Notify Chat Tools When a Row is Added in Google Sheets

Automatically notify Slack, Discord, etc., when a row is added in Google Sheets.

Register Survey Results Received by Email into Google Spreadsheet

Automatically register survey results received via Gmail or Outlook into a Google Spreadsheet.

Issue documents based on information from Google Sheets

Automatically create documents such as Google Docs based on the content registered in Google Sheets.

Examples of Automation Using HubSpot

Create tasks in a task management tool based on actions in HubSpot

Automatically create tasks in Asana, Trello, etc., based on deals won in HubSpot.

Generate a Meeting URL in HubSpot When Specific Conditions are Met

Automatically generate a meeting URL in Google Meet or Zoom when specific conditions are met in HubSpot.

Create a folder in cloud storage when a new company is created in HubSpot

Automatically create a folder in Google Drive, OneDrive, etc., when a new company is created in HubSpot.

Benefits and Examples of Integrating Google Sheets with HubSpot

Benefit 1: Streamlining Data Entry

In traditional business processes that rely on manual entry, data input can be time-consuming and prone to errors. By implementing a system where a contact is automatically created in HubSpot every time a row is added to Google Sheets, these challenges can be addressed. This automation can save time and effort by eliminating the need for manual data entry. For example, when you input a participant list collected at an event into Google Sheets, it automatically reflects in HubSpot, allowing the sales team to efficiently approach leads based on accurately registered contact information. Additionally, it can prevent errors associated with manual tasks, such as input mistakes and duplicate registrations, thereby improving data quality.

Benefit 2: Timely Customer Registration

Delays in registering customer information can lead to missed follow-up opportunities and potential loss of business. However, by automating the process, information can be smoothly reflected, eliminating delays in customer registration and enabling prompt responses. For instance, when new leads are entered into Google Sheets, they are smoothly reflected in HubSpot, allowing sales representatives to send follow-up emails immediately. In situations where speedy responses are required, such as seminars or campaigns, smooth handling through automation could be key to successful negotiations.

Benefit 3: Facilitating Information Sharing

Smooth information sharing between departments can strengthen collaboration and lead to more efficient operations. In many companies, sales, marketing, and customer support teams use separate tools and databases, often making it time-consuming to find necessary information. However, when data entered into Google Sheets is automatically consolidated in HubSpot, it becomes easier to verify information. For example, when the sales team registers data in Google Sheets, if customer information is automatically registered in HubSpot managed by the support team, the support team can smoothly approach customers. In this way, automation can facilitate information sharing, leading to strengthened interdepartmental collaboration.

Conclusion

This time, we introduced a flowbot that "adds a contact to HubSpot when a row is added in Google Sheets." By integrating Google Sheets with HubSpot, you can expect to streamline data entry and facilitate information sharing between departments. This can improve sales and marketing processes, allowing for more efficient operations.

By utilizing the no-code tool Yoom, these automations can be easily achieved.

We encourage you to try integrating Google Sheets with HubSpot!

The person who wrote this article
m.i
I have experienced finance-related work for about 3 years since I graduated as a new graduate. Due to the industry, there are so many tasks that are done manually, and I came across Yoom when I thought that if automated, I could do more other work. I'm impressed every day by the convenience of Yoom while writing a blog. I try to make the structure easy to understand.
Tags
Automation
Integration
Google Sheets
HubSpot
Automatic
App integration
What is Yoom hyperautomation?
Conventional RPA can only automate simple repetitive tasks, and the setup process was very complicated.
With “hyperautomation,” which combines various technologies such as AI, API, RPA, and OCR, it is possible to automate many tasks that could not be realized until now more easily than before.
Don't Just Connect Apps—Automate Everything
Most tools simply connect one app to another, leaving the complex tasks to you. Yoom goes much further: From document creation and browser automation to OCR and generative AI, Yoom handles it all seamlessly in one platform.

Why settle for basic integrations? Streamline your entire workflow with Yoom’s powerful hyperautomation.
Learn more about Yoom
Helpful Materials
I understand Yoom! 3-piece set of materials
Download materials
Understand in 3 minutes! Yoom service introduction materials
Download materials
Find out by Before After! Yoom Case Study Collection
Download materials
See a list of useful materials