


Step 2: Select and Copy the Template
1) Open the template above and click the icon for "Try this template".
2) The following display will appear.
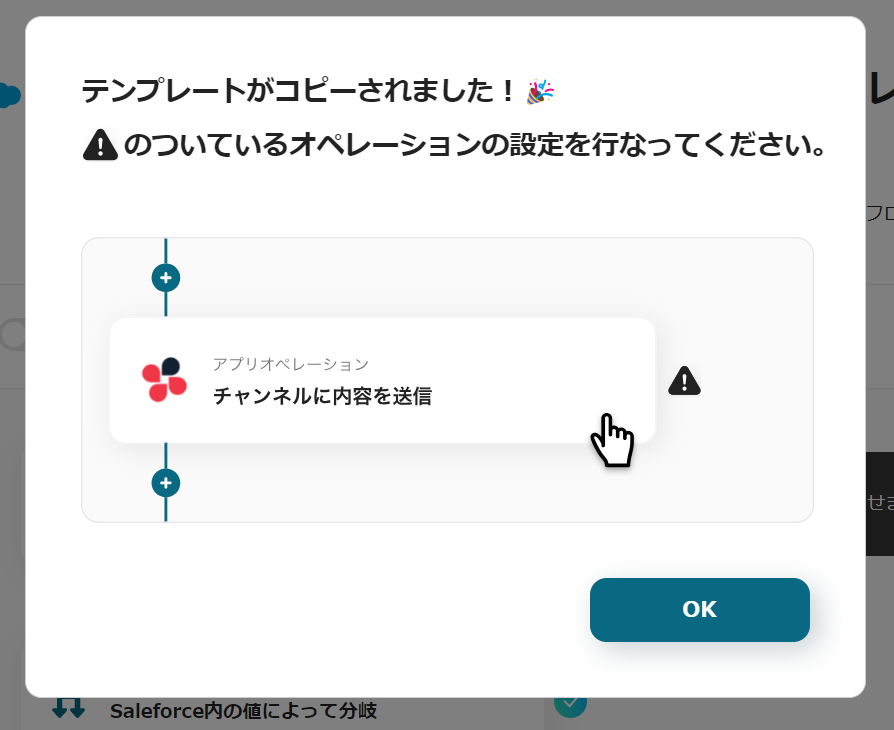
Click the icons with "!" on the right in order to set up the operations.
Titles and details can be edited by clicking, so please change them as needed.

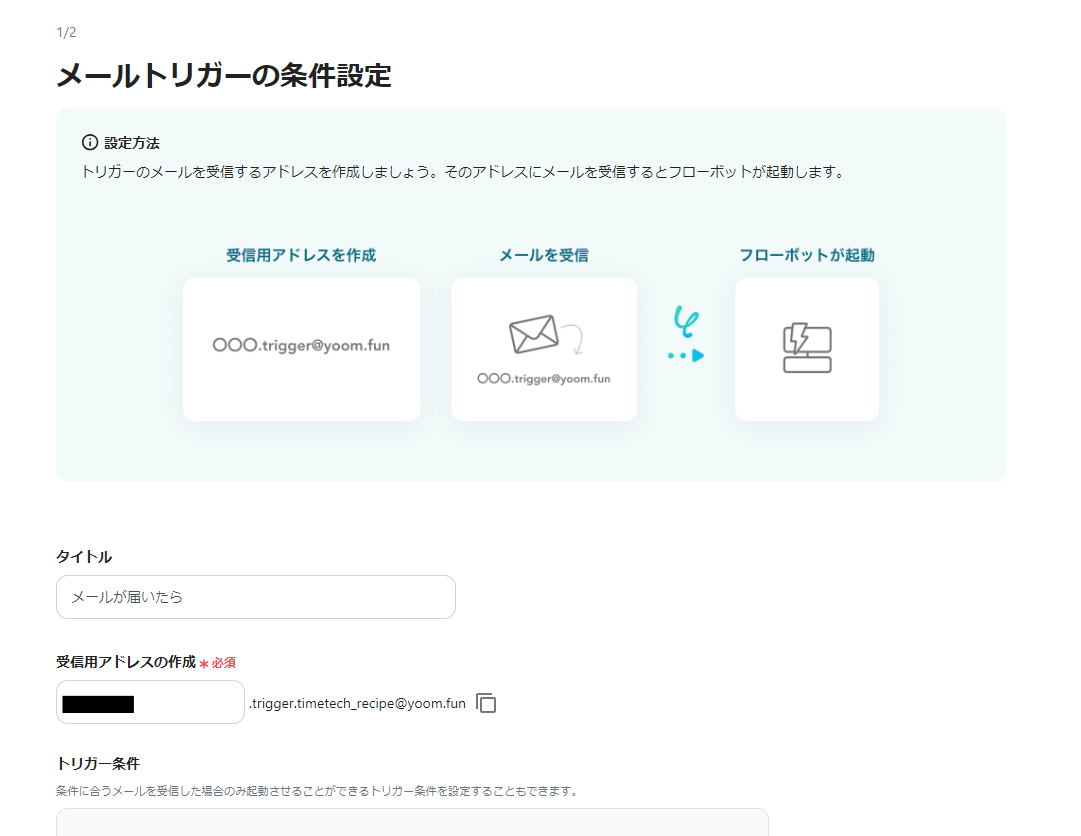
Step 3: Set the Trigger
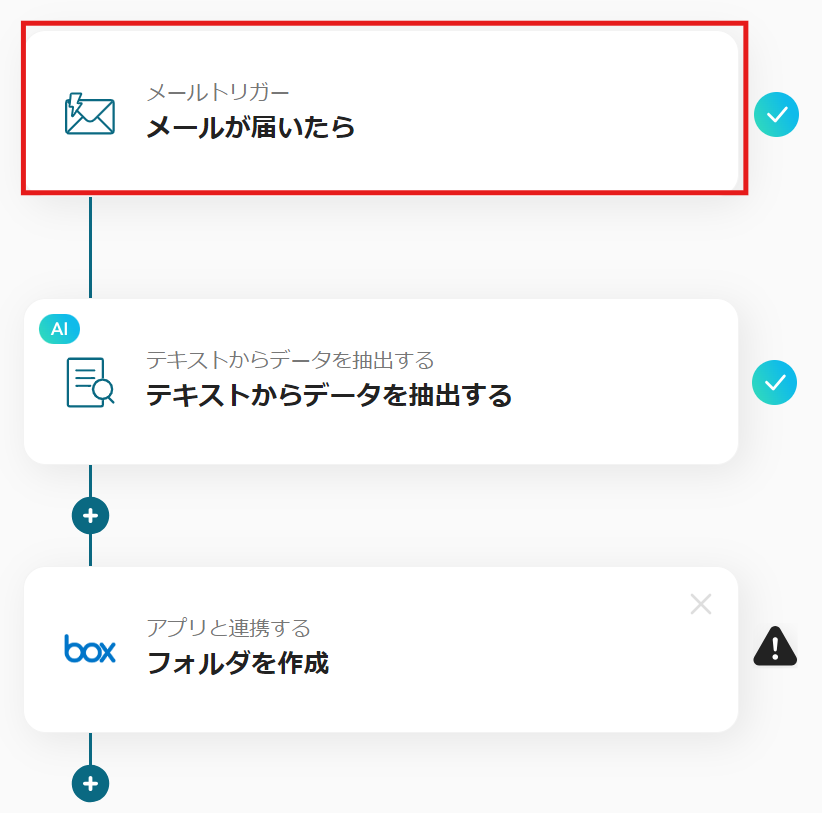
Click "Email Trigger: When an email arrives".
1) Create an address to receive the trigger email.
When an email arrives at that address, the flowbot will activate.
Once entered, click "Next".
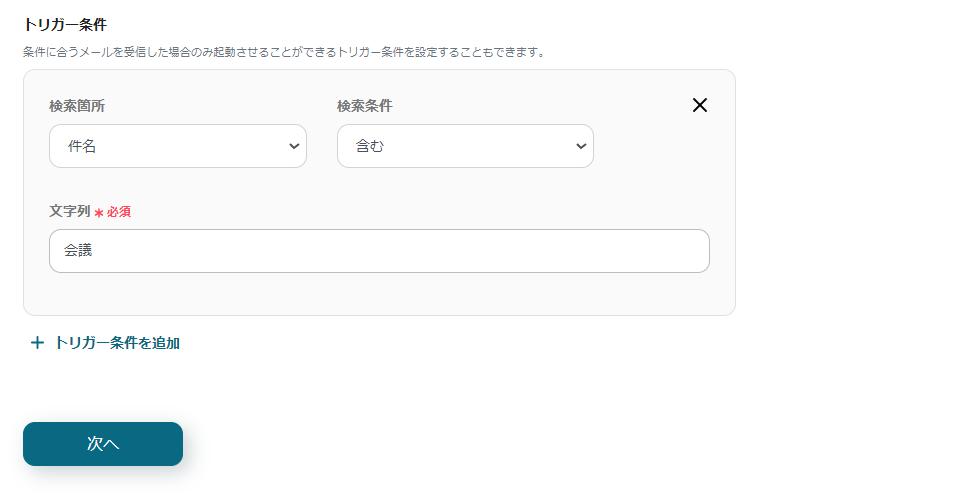
2) Send an email that matches the conditions to the address you just set, then click Test.
If the test is successful, click "Save".

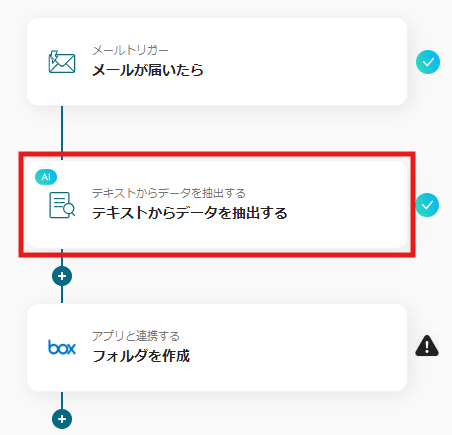
Step 4: Set AI Operations
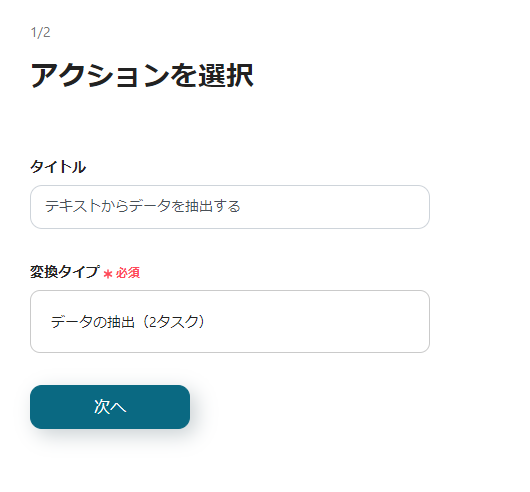
1) Return to the flow and click the icon for "Extract Data from Text".
2) Set the action to "Extract Data from Text" and choose the conversion type "Data Extraction (2 tasks)", then click "Next".
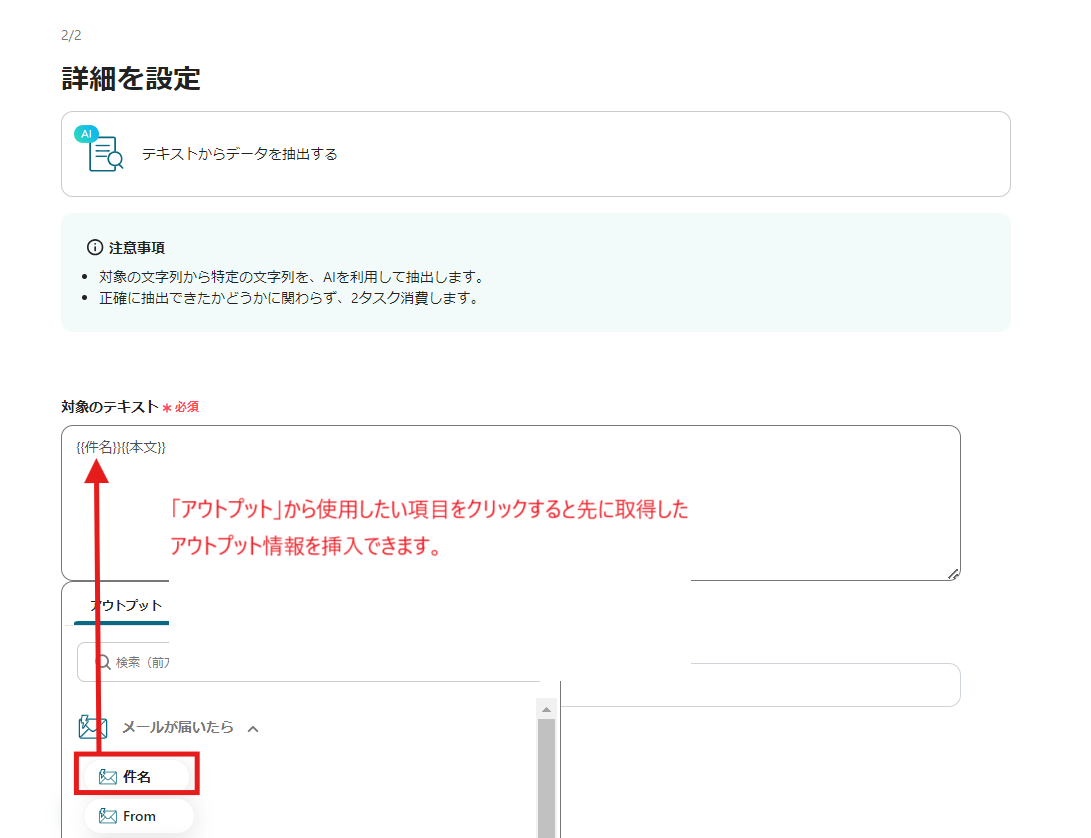
3) Enter the required fields.
The target text can be entered using the output information.
Once completed, click "Test" and after a successful test, click "Save".
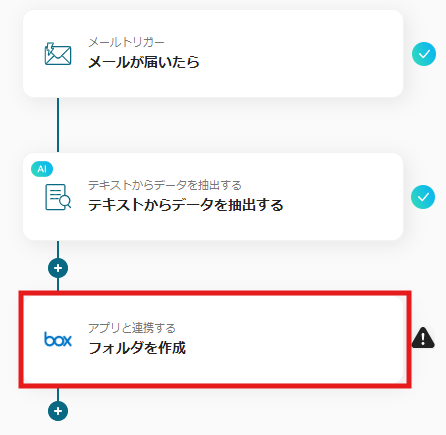
Step 5: Set Box Actions
1) Return to the flow and click the icon for "Integrate with App: Create Folder".
2) Select the action "Create Folder" and click "Next".

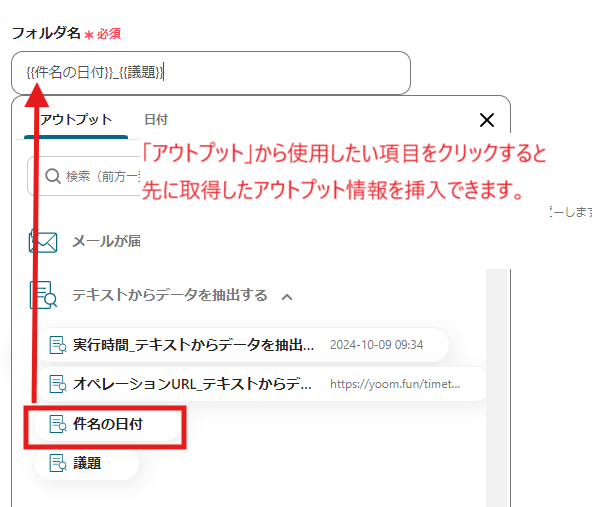
3) The folder name can be entered using the output information.
Once completed, click "Test" and after a successful test, click "Save".
This completes the flow of [Receiving an email, extracting specific text, and creating a folder in Box].
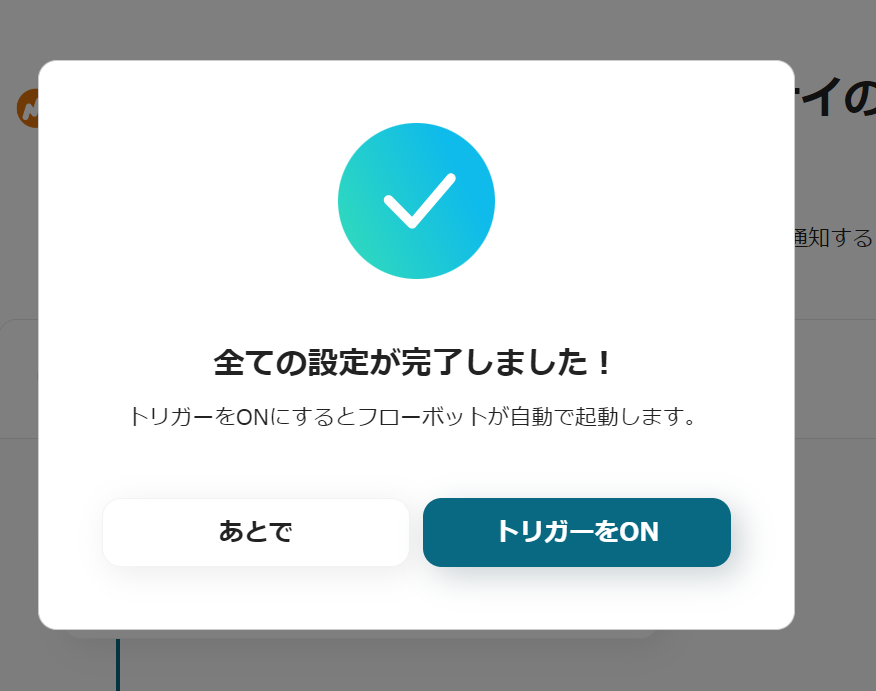
Step 6: Test and Verify
Once everything is set up, the following display will appear, click "Turn on Trigger".
Activate the flowbot and verify that it operates correctly.
Here is the template used this time


.avif)
.avif)


