How to Set Up Gemini Notion Integration for Automatically Summarize Meeting Minutes
How to Integrate Applications
・
2025-07-28
How to Set Up Gemini Notion Integration for Automatically Summarize Meeting Minutes
s.ougitani
Are you struggling with organizing and summarizing meeting minutes?
Is information sharing not going smoothly as you'd like?
Using Notion to create meeting minutes is convenient, but manually summarizing and sharing them with the team can be time-consuming. What if you could automate these tasks?
By integrating Gemini with Notion, you can solve these everyday challenges all at once! For example, Gemini can automatically create meeting minutes based on the notes in Notion.
In this article, we'll show you how the Gemini Notion integration works and guide you through the simple setup process!
Meet Yoom: No-Code Automation
Yoom is a next-generation no-code automation that lets you connect and automate tasks between your favorite apps. Connecting different apps can be challenging for non-engineers, but <span class="mark-yellow">Yoom makes automation accessible to everyone</span>.
🌐 Connect with apps like Gemini, Notion, and more.
📖 Use automation templates - no technical setup required
📈 Boost productivity and reduce human errors
You don't need to go through a complex setup and IT jargon, you can build your automation workflows with just a few clicks :) It's designed for those who want to streamline their daily work and save hours of time and stress from repetitive work.
In this guide, you'll learn the step-by-step process of how to use Yoom to <span class="mark-yellow">create a Flowbot that automatically summarizes and updates meeting minutes by integrating Notion with Gemini.</span>
✔️ For Those Who Want to Try It Right Away
Yoom offers ready-made templates for easy setup when integrating Gemini and Notion. Click the "Try it" button to get started now!
We'll also walk you through the step-by-step process of creating this automation flow in the following section of this article.
🙌 What You Can Do by Integrating Notion and Gemini
By integrating Gemini and Notion, you can automate the flow of data between the two apps. Here are some practical, ready-to-use templates that you can try out.
Just click on the "Try it" button to get started quickly! By integrating the APIs of Notion and Gemini, you can automatically sync Notion data with Gemini!
Summarize Content in Notion When Yoom's Database is Updated
When your database in Yoom is updated, Gemini can automatically summarize the content and add it to Notion.
<span class="mark-yellow">Perfect for those who want to reduce time spent on administrative tasks</span>!
Generate Next Actions with Gemini & Update When Status Changes
Great for teams who want to avoid missing important tasks while moving projects forward.
Gemini can generate next actions based on Notion status updates and append them to your database. <span class="mark-yellow">This helps optimize team collaboration and keeps everything on track with visualized task management</span>.
🚀 Let's Create a Flowbot to Integrate Gemini & Notion!
<span class="mark-yellow">Let's walk through how to set up a flow that automatically summarizes meeting minutes created in Notion using Gemini</span>.
⏱️ Setup time: 10 minutes
🔧 What You’ll Need
A free Yoom account
Access to Gemini & Notion
If you don’t have a Yoom account yet, register now from thisregistration form!
Setup Overview
Register Gemini and Notion in Yoom
Copy the template
Set up triggers and configure actions for Gemini and Notion
Activate the Flowbot
Step 1: Register Gemini & Notion in My Apps
Connect Notion
Go to "My Apps" from the left side menu and click "+ Add".
Search for "Notion" and click on it to connect the app.
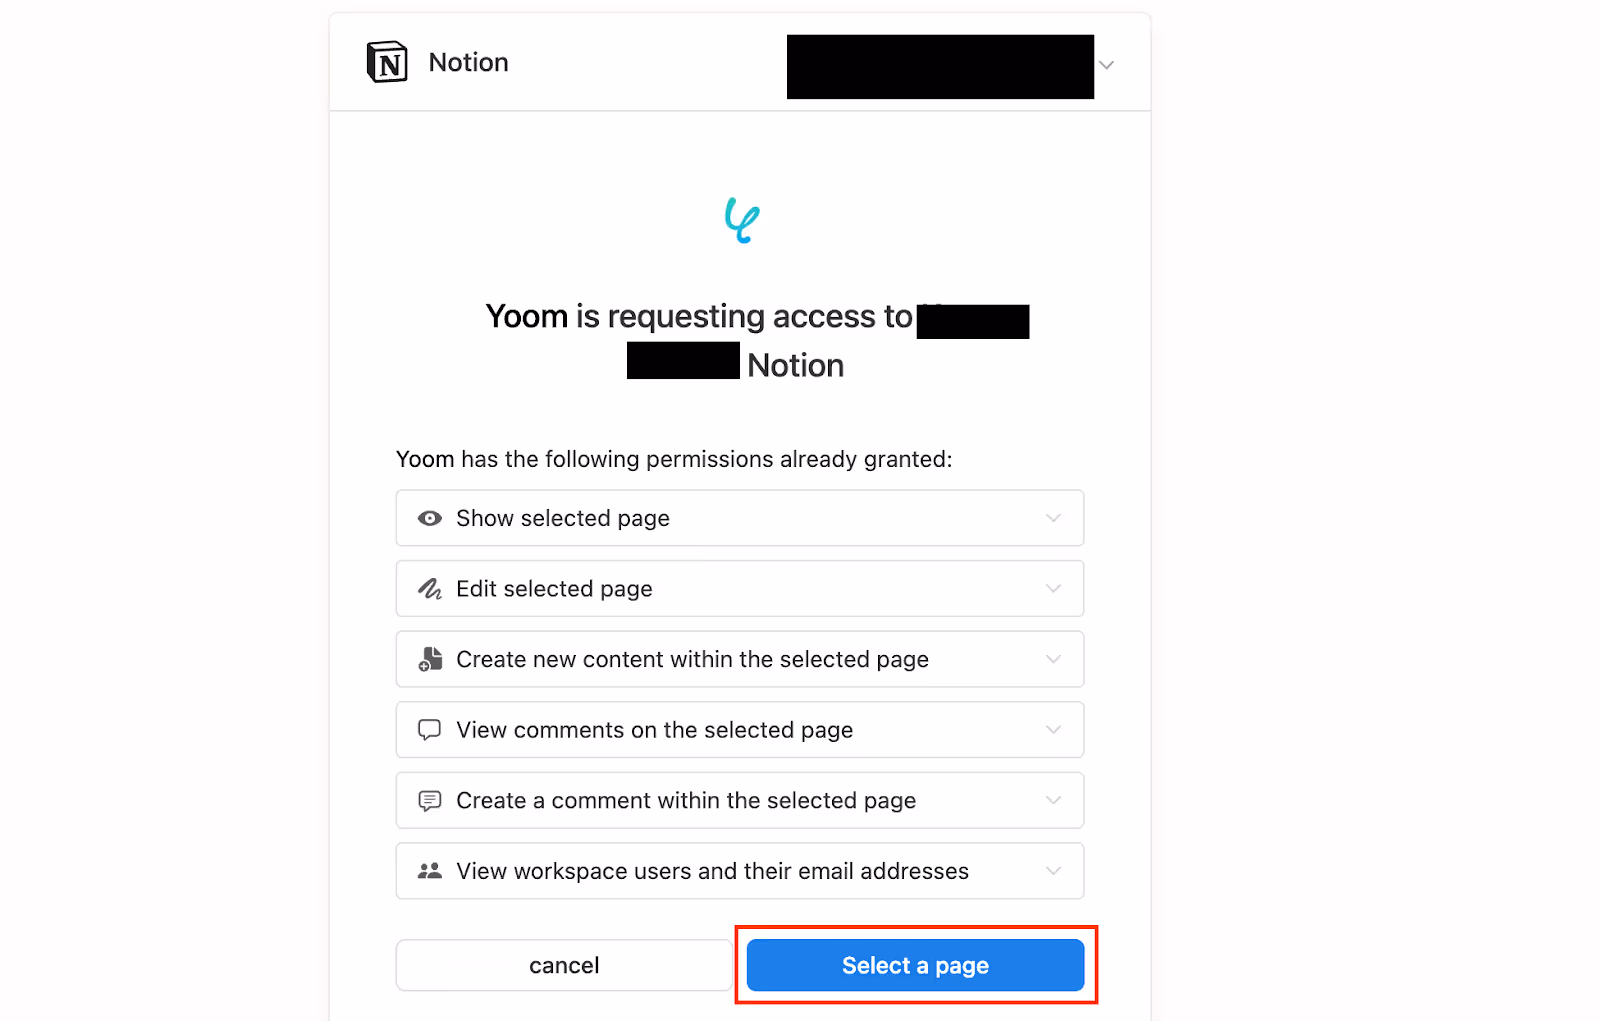
Log in with your Notion account. When the following screen appears, click "Select a Page".
Select the page(s) to grant access to the database and click "Allowing Access".
※If you create a new page after connecting, you will need to reconnect.
Connect Gemini
Similarly, click the "+ Add" button and select Gemini.
Enter the account name. Use a name that's easy to recognize, such as your company name or the person responsible for the account.
To get your access token, go to the Gemini API acquisition page. Review the content and agree to the terms by checking the box. Click the "Continue" button at the bottom right.
Click on the "Get API key" button.
Click on "Create an API key".
Your new API key will appear. Copy it.
Return to Yoom, and paste the copied API key into the access token field.
Once all the required fields are filled in, click "Add" to complete registration.
Step 2: Copy the Template
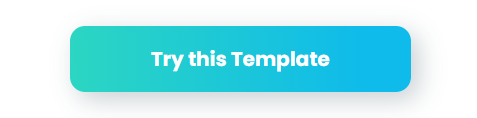
Click the "Try It" button to copy the pre-built template into your project.
Click "Try this template.
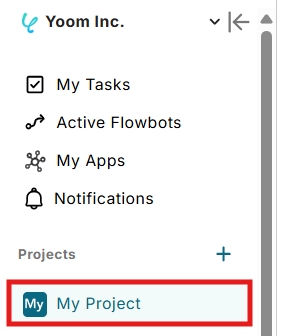
Click "OK" and give the Flowbot a name to recognize.
This template will be copied to your “My Project”.
Step 3: Set Up Chrome Extension Trigger
Click the trigger action labeled "Launch from a specific page".
Install the Chrome extension from here. We recommend pinning the extension to your browser tab for easier access :)
📚 References: For detailed settings, you can refer to the full guide here.
Now, you can launch the Flowbot with one click using the extension from the target page in Notion.
Once the settings are complete, enter the necessary details.
Title: Can be changed as needed.
Account Information Linked with Notion: Confirm if the details are correct.
Action when Launching from the Extension: Select 'Launch from a specific page'.
Enter the "Sample Start Page URL". For testing purposes, we used the URL of the page we created, shown below.
Copy the URL of your Notion page and paste it as below. 📚 References: For instructions on how to enter the URL, refer to this guide here.
Once the setup is complete, click "Test". If successful, the retrieved value section should get updated as below.
Check if it's correct, and click "Save".
📚 Reference: For more details on retrieved values and how to set them up, see the guide here.
Step 4: Retrieve Notion Records
Click on the Notion action labeled "Operate Database."
Title: Can be changed as needed.
Account Information Linked with Notion: Confirm if the details are correct.
Action: Select 'Retrieve record (by ID)'.
Select the "Database ID" retrieved from Step 2. (The options will be displayed under options).
Enter the "Search Conditions" to specify the record you want to retrieve. Use the retrieved value from step 3 to fill in this field :)
For this example, we want to select the "Page ID". 1. Click on the input field. 2. Select "Record ID" "Equals" and "Page ID" from the displayed options.
Once set, click "Test" and check that the retrieved value is displayed correctly. Then click "Save".
Step 5: Generate Content with Gemini
Click on the Gemini action labeled "Generate Content".
Title: Can be changed as needed.
Account Information Linked with Gemini: Confirm if the details are correct.
Action: Select 'Generate Content'.
Select the Gemini model you want to use. You can find the model information by clicking the top left of the Gemini page.
Click the "Prompt" field.
For this example, since we want to create a meeting minute, we'll select "minute" from the previous step's retrieved value.
Below is an example of how to set the prompt and the system instruction.
Check the annotation and modify your prompt and system instruction as needed.
Once set, click "Test" and hit "Save". (The generated text will appear in the retrieved value).
Step 6: Update Notion Records
Click on the action labeled "Operate Database".
Title: Can be changed as needed.
Account Information Linked with Notion: Confirm if the details are correct.
Action: Select 'Update record (by ID)'.
Select the Database ID from the displayed options.
Set the "Conditions for the record to update". Select "Record ID", "Equals" and "Page ID" from the retrieved value.
Next, set the "values of the updated record".
Since only the meeting minutes will be updated this time, use the retrieved value to fill in the minutes field.
Once you've completed the setup, click "Test". If everything works perfectly, click "Save".
Step 6: Turn on the Flowbot
Toggle the "Trigger On" button to activate your flow!
Check if the Flowbot you set up is working properly.
That’s it!
Your Flowbot is complete!
🔁 Want to Link Gemini Data to Notion Instead?
You can also go the other way around, send Gemini data to Notion.
Summarize Email Content with Gemini and Add to Notion
<span class="mark-yellow">Perfect for teams that receive many inquiries</span>!
Gemini can automatically summarize incoming emails and add them to your Notion database. This automation can streamline your daily work process by eliminating the need for manual email reading.
Summarize Form Responses with Gemini and Add to Notion
This automation allows Gemini to automatically summarize form responses and add them to Notion. <span class="mark-yellow">This can ensure that all information is organized in one place - making it easier to track and manage responses</span>!
💡 Other Automation Examples Using Notion and Gemini
You can try out more automations by utilizing Gemini and Notion with Yoom. Here are some more examples you can explore for your next automation!
Automation Using Notion
Automatically create new pages, add and update data within Notion. Perfect for those who want to centralize their data management. You can also set up automatic notifications and data transfers to keep your team up to date!
Automation Using Gemini
Automatically generate texts, summarize, and analyze images. By integrating Gemini with other tools, you can also set up automatic notifications, reducing the manual effort required for sharing and managing information.
📖 Summary
Now you know how to integrate Gemini with Notion to automatically summarize and update meeting minutes with Gemini using the Notion database. By integrating these two apps, you can solve common work challenges like reducing the time spent on organizing meeting minutes and improving information sharing. Best of all, <span class="mark-yellow">no specialized knowledge is needed, and anyone can easily set it up</span>!
Ready to simplify your workflows? Sign up for Yoom and try it today!
After being in charge of sales and CA at a human resources company for about 5 years, I have been involved in jobs such as creating job advertisements and scouting sentences at companies that hire engineers.
I'm fascinated by Yoom's revolutionary service of “automating office work.”
I would like to write so that I can send out information that can be useful to everyone, even a little bit.
Conventional RPA can only automate simple repetitive tasks, and the setup process was very complicated. With “hyperautomation,” which combines various technologies such as AI, API, RPA, and OCR, it is possible to automate many tasks that could not be realized until now more easily than before.
Most tools simply connect one app to another, leaving the complex tasks to you. Yoom goes much further: From document creation and browser automation to OCR and generative AI, Yoom handles it all seamlessly in one platform.
Why settle for basic integrations? Streamline your entire workflow with Yoom’s powerful hyperautomation.


.avif)


.avif)


