Are your daily tasks being overwhelmed by the creation and management of invoices? For those managing information in Notion, manually creating invoices with each status change can be a daunting task. The more such tasks you have, the more you worry about the risk of errors and the time spent on them.
That's where the integration of Notion and Money Forward Cloud Invoicing comes in handy. By using Yoom, invoices can be automatically created just by updating the status in Notion, reducing the hassle. This article will detail the simple integration method using Yoom.
Benefits of Integrating Notion and Money Forward Cloud Invoicing
Benefit 1: Reduction of Manual Input Errors
When the status is changed in Notion, Money Forward Cloud Invoicing automatically creates an invoice, preventing manual input errors. Manual invoice creation and information transfer are prone to errors, but with this integration, an accurate invoice is automatically created in Money Forward Cloud Invoicing just by changing the status to "Completed" in Notion.
This reduces errors and effort associated with manual input during invoice creation, potentially improving the overall accuracy of operations. Similarly, since invoices are issued effortlessly when the status is changed, the time available to focus on other tasks may increase.
Benefit 2: Time Reduction in Invoice Creation
By automatically utilizing pre-set invoice templates, the time spent on invoice creation can be significantly reduced. By setting up invoice templates, necessary information is automatically reflected from Notion to Money Forward Cloud Invoicing, eliminating the need to create from scratch.
Especially for companies with a high frequency of invoice creation, the integration can reduce the effort of format creation and data entry each time, allowing them to benefit from the app integration.
How to Create an Integration Flow Between Notion and Money Forward Cloud Invoicing
From here, we will integrate Notion and Money Forward Cloud Invoicing using Yoom. The flow this time is "Create an invoice in Money Forward Cloud Invoicing when the status is updated in Notion."
Integrate Yoom with Notion and Money Forward Cloud Invoicing as My Apps
Set up an App Trigger in Notion
Set up to Obtain Record ID in Notion
Set up Invoice Creation in Money Forward Cloud Invoicing
The flow has branches, so it may seem complicated, but you don't need programming knowledge. You can set it up by following the displayed content, so let's proceed together by copying from the "Try it" banner below.
Branches are a feature (operation) available in plans of Mini Plan or higher. In the case of the Free Plan, the operation of the flow bot being set will result in an error, so please be careful.
Some paid plans offer a 2-week free trial. During the free trial, you can use restricted apps and AI features (operations).
[What is Yoom]
Step 1: Connect Notion and Money Forward Cloud Invoice with My Apps
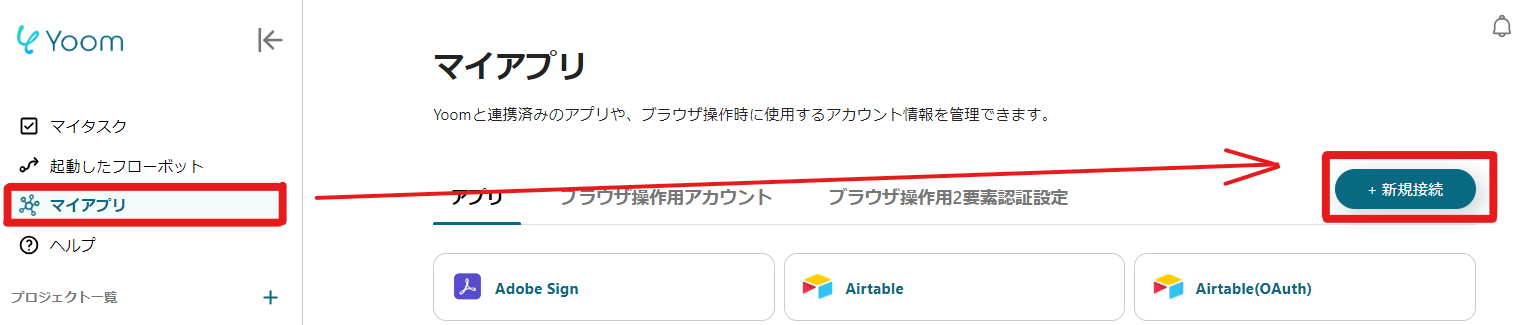
First, let's connect the apps we will use this time with Yoom. After logging into Yoom, click on "+ New Connection" from "My Apps" in the left menu.
Search for Notion and Money Forward Cloud Invoice respectively and enter the necessary information. Once each connection is made, it will be displayed in the My Apps list, so please check.
If Money Forward Cloud Invoice is also displayed similarly, the My Apps connection is complete. Let's start setting up the app details.
If you haven't copied it yet, please copy the Flowbot template from below.
1. Hover over the banner and click "View Details" 2. Click "Try this template" on the redirected page 3. Register for Yoom * If you have already completed registration, the login screen will be displayed, so please log in.
Step 2: Setting up the App Trigger in Notion
Click on the first flow "When a specific database is created or updated". On the first page, the Notion account information linked with My Apps is reflected.
You can also make the title easy to understand for later confirmation and correction. After checking the account information, proceed to the next step without changing the trigger action.
Next, set the trigger interval.
Set the interval to check for database updates every few minutes. Note that the trigger interval may not be selectable depending on the plan.
After setting the Notion database ID, click "Test" to obtain the output.
Once confirmed, click "Save" to complete the app trigger setup.
Step 3: Setting up Record Retrieval
Next, click "Retrieve Records". As before, the Notion account information is displayed on the first page.
Below the execution action, there is a setting to specify the database destination to link with, so select from the options and click "Next".
On the next page, narrow down the conditions for retrieving records.
Enter the conditions for the records you want to retrieve on the specified database ID. In the above image, the condition for updating is that Record ID (Notion item) = Object ID.
After specifying the conditions, click "Test" to obtain the output.
Once the necessary output is confirmed, click "Save" to complete the ID retrieval setup.
Step 4: Setting Branch Conditions
Next, click on the "Command Operation" flow. Here, set the criteria to determine whether the information obtained from Notion should create an invoice.
Branch conditions can be set according to the output settings of the branch target. In the above image, it indicates that the output of "Status" obtained in the "Record Retrieval Flow" is "Completed" is the target for invoice creation.
Once the settings are complete, click "Save" to complete the branch settings.
* If the status is not completed, the flow will not proceed beyond this point.
Step 5: Setting up Invoice Creation in Money Forward Cloud Invoice
Click on the final flow "Create Invoice (New Format)". On the first page, check the account information as with Notion.
If necessary, correct the title and proceed to the next step.
On the next page, select the output for invoice creation.
Enter the obtained output and other necessary items in the required fields, then click "Test".
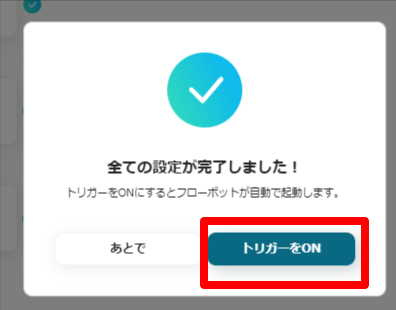
Once the output is obtained, click "Save" to complete all settings. Well done! Finally, turn on the trigger to activate the flow.
Flowbot template used this time Create an invoice in Money Forward Cloud Invoice when the status is updated in Notion
Other Automation Examples Using Notion and Money Forward Cloud Invoicing
There are many other examples of automation using Notion and Money Forward Cloud Invoicing on Yoom, so let me introduce them.
1. By integrating Notion with Money Forward Kessai, you can automatically add records to Notion as soon as the credit limit review is completed. Since the data is automatically reflected, the risk of errors is reduced, allowing you to work more efficiently.
2. By integrating Notion with Money Forward Cloud Invoice and utilizing the Google Chrome extension, you can create invoices. In this flow, there are no status change conditions, so you can create invoices for all parties in the database.
Summary
It seems that by integrating Notion with Money Forward Cloud Invoicing, you can expect improved work efficiency. Invoices are automatically generated just by updating the status, freeing you from tedious manual tasks and preventing errors. Moreover, with Yoom, anyone can easily integrate apps without programming knowledge. Why not register for Yoom for free now and make your work more efficient?
I have been an SEO writer for 5 years and have continued to write under the motto “easy to read” and “easy to convey.”
I want to bring the convenience of Yoom, which can be linked to apps without programming knowledge, to many people!
Conventional RPA can only automate simple repetitive tasks, and the setup process was very complicated. With “hyperautomation,” which combines various technologies such as AI, API, RPA, and OCR, it is possible to automate many tasks that could not be realized until now more easily than before.
Most tools simply connect one app to another, leaving the complex tasks to you. Yoom goes much further: From document creation and browser automation to OCR and generative AI, Yoom handles it all seamlessly in one platform.
Why settle for basic integrations? Streamline your entire workflow with Yoom’s powerful hyperautomation.


.avif)


.avif)
.avif)

.avif)


