[Easy Setup] How to Automatically Connect Notion Data to Perplexity
How to Integrate Applications
・
2025-05-20
[Easy Setup] How to Automatically Connect Notion Data to Perplexity
k.tsukamoto
It's hard to grasp the overall picture of the information handled in Notion... It takes time to respond to inquiries based on the content of Notion...
Such issues might be resolved by integrating Notion with Perplexity!
By generating text with Perplexity based on data retrieved from Notion, you can automatically summarize the content managed in Notion and respond to inquiries using information within Notion. Leave tasks like identifying key points and text generation to Perplexity, and operate Notion more efficiently! All these integrations can be easily set up with Yoom.
This time, we will explain the specific integration methods of Notion and Perplexity, and how to set up the flow bot with images.</span> We also introduce ways to utilize the APIs of Notion and Perplexity, so please try automating various tasks!
For those who want to try it as soon as possible
By using Yoom, you can easily integrate Notion and Perplexity without any code. Yoom provides templates for integrating Notion and Perplexity in advance, so you can achieve integration immediately just by registering, even without knowledge of APIs.
What You Can Do by Integrating Notion and Perplexity
By integrating the APIs of Notion and Perplexity, you can generate text in Perplexity based on information retrieved from Notion. For example, the following templates apply.
Summarize New or Updated Pages in Notion with Perplexity
When a record in the Notion database is added or updated, the data within the record is automatically summarized and updated. This makes it easier to grasp the information in the database, facilitating smoother information sharing across the team.
Generate Answers from Existing Notion Information for User Questions
Starting with questions received through the form function, information accumulated in the Notion database is retrieved, and the optimal answer is automatically generated using Perplexity. This flow helps improve the efficiency of customer support and help desk operations.
Let's Create a Workflow to Integrate Notion and Perplexity
Let's get started by creating a workflow that integrates Notion and Perplexity!
This time, we'll use Yoom to proceed with the integration of Notion and Perplexity without any coding. If you don't have a Yoom account yet, please create one from the Yoom account registration link.
[What is Yoom]
In this article, we will create a flow bot that summarizes pages created or updated in Notion using Perplexity! The creation process is broadly divided as follows:
Integration of Notion and Perplexity with My Apps
Copying the template
Setting up triggers, retrieving and updating records, and summarizing records
Preparing for flow operation (setting the trigger to ON)
Prerequisite
In this flow bot, we retrieve the "① column to be summarized" from the Notion database and update the summarized content in the "② summarized column". ※Refer to the attached image for ①② Please prepare a database where each column exists.
Step 1: Integrating Notion and Perplexity with My Apps
Register Notion and Perplexity in My Apps and integrate them with Yoom.
1. Select "My Apps" from the sidebar of the Yoom management screen. 2. Click "+ Add" on the right side.
3. Let's first integrate Notion. When the "App List" is displayed, search for and select Notion.
4. Once you transition to the next screen, log in using any method.
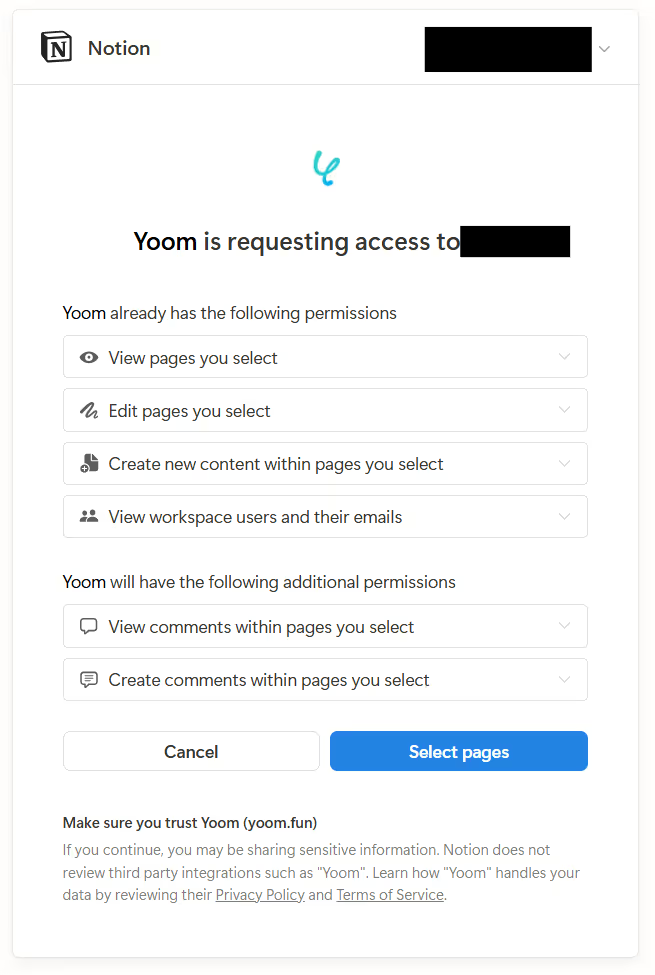
5. Click "Select Pages" to request Yoom to access Notion.
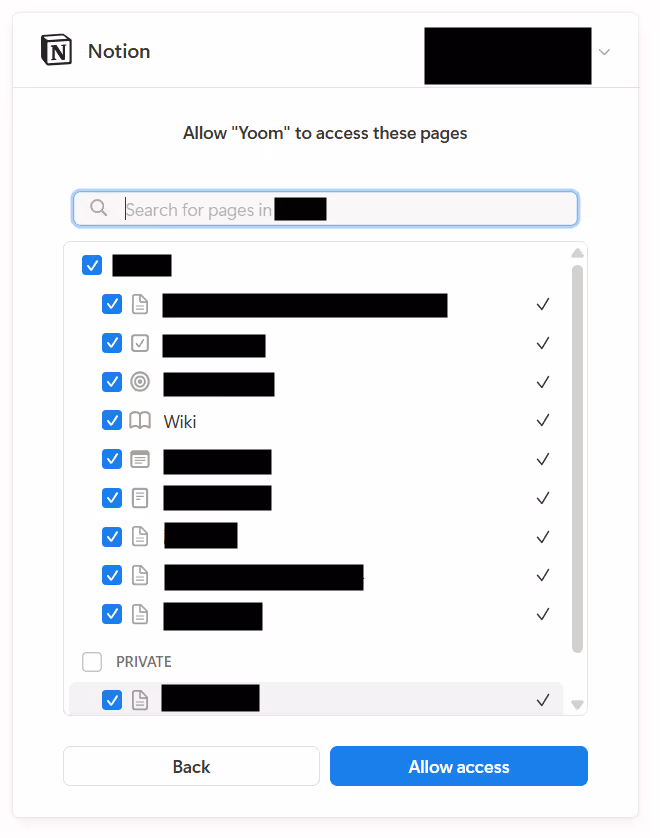
6. Select the page to allow access and click "Allow Access". At this time, the database from which you want to retrieve records must be selected.
7. Return to the "My Apps" screen, and if Notion has been added, the integration is complete.
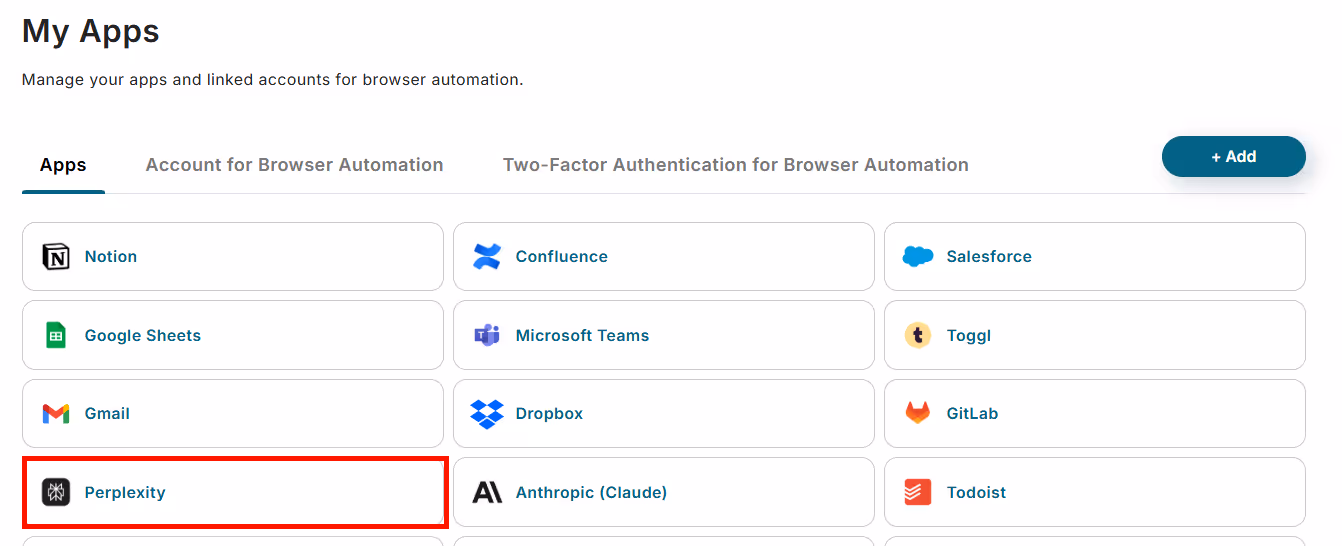
8. Next, let's integrate Perplexity. After clicking "+ Add" in "My Apps", when the "App List" is displayed, search for and select Perplexity.
9. Once you transition to the next screen, set the "Account Name" and "Access Token", and click "Add". Set any name for the account name and the API key issued here for the access token.
10. Return to the "My Apps" screen, and if Perplexity has been added, the integration is complete.
Step 2: Copy the Template
Once the integration with Notion and Perplexity is complete, let's proceed to the flow settings.
1. First, copy the template. After logging into Yoom, click "Try it" on the banner below.
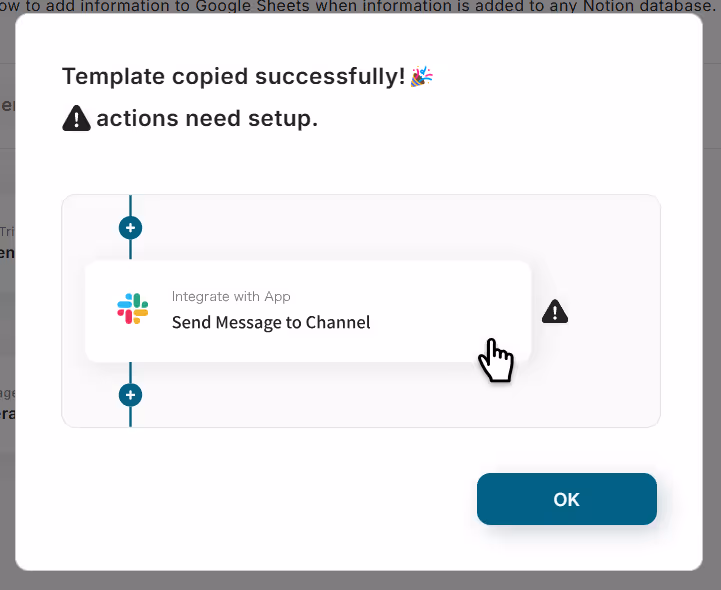
2. The template will be copied to your Yoom management screen. Click "OK" to proceed to the flow settings.
Step 3: Notion Launch Settings
Set the trigger action that will be the starting point of the flow. This flow will be triggered when a record in the Notion database is created or updated.
1. Click "When a page in a specific database is created or updated".
2. Check the displayed items and click "Next" without changing the trigger action.
3. Select the desired interval from the "Trigger Interval" dropdown.
4. Enter the "Database ID" according to the instructions below the input field.
5. Click "Test" to run a connection test. If "Test Successful" is displayed, scroll down and click "Save".
6. Return to the flow screen and if there is a checkmark next to "When a page in a specific database is created or updated", you are done.
Step 4: Setting Records to Retrieve from Notion
Next, retrieve the records created or updated in Notion.
1. Click "Retrieve Records (ID Search)".
2. Enter the database ID of the target database (the same as entered in Step 3, Procedure 4) and click "Next".
3. Set the conditions for the records you want to retrieve. Select "Object ID" from the dropdown output to ensure that created or updated records are retrieved.
4. Click "Test" to run a retrieval test. If "Test Successful" is displayed, scroll down and click "Save". You can also use the output obtained here to ask questions to Perplexity.
5. Return to the flow screen and if there is a checkmark next to "Retrieve Records (ID Search)", you are done.
Step 5: Setting Perplexity Actions
Summarize the records retrieved from Notion with Perplexity.
1. Click "Summarize Information".
2. For "Model Name", select and enter the model name you want to use from here.
3. In "System Prompt", enter instructions for the type of summary you want to perform.
4. In "User Prompt", enter the content to be summarized. To summarize records retrieved from the database, click to select the item you want to summarize from the dropdown output.
It will look like the image when entered.
5. Various other settings are possible.
6. Click "Test" to run a summary test. If "Test Successful" is displayed, scroll down and click "Save".
7. Return to the flow screen and if there is a checkmark next to "Summarize Information", you are done.
Step 6: Setting Records to Update in Notion
Finally, reflect the content summarized by Perplexity in the Notion database.
1. Click "Update Record".
2. Enter the database ID of the target database (the same as entered in Step 3, Procedure 4) and click "Next".
3. Set the conditions for the records you want to update.
Select "Record ID" from the dropdown output to ensure that summarized records are updated.
4. As the value of the updated record, select the content summarized by Perplexity from the dropdown and click to enter it in any column. Note that the content of the message = summarized data.
5. Click "Test" to run an update test. If "Test Successful" is displayed, scroll down and click "Save".
Step 7: Preparing to Operate the Flow (Set Trigger to ON)
Return to the flow screen and if "All settings are complete!" is displayed, the flow setup is complete. If you want to operate the flow immediately, click "Set Trigger to ON".
If you want to operate it later, you can set the trigger to ON by clicking the trigger switch on the flow screen.
Based on this flow bot, you can automate various other tasks.
If You Want to Link Perplexity Data to Notion
This article introduced a flow that operates Perplexity starting from Notion, but if you want to operate Notion starting from Perplexity, please use the following template.
Automatically Answer Inquiry Form Content with Perplexity and Accumulate Q&A History in Notion
This workflow generates answers to inquiries using Perplexity and automatically records the interaction in Notion's Q&A. It streamlines customer inquiry handling.
Draft a New Article Request in Notion with Perplexity and Reflect it in Notion
This workflow reduces the workload and achieves smooth content management by generating article drafts with Perplexity. By streamlining the initial stages of article creation, you can allocate more time to creative tasks.
Other Automation Examples Using Notion and Perplexity APIs
By leveraging the APIs of Notion and Perplexity, various automations can be achieved! How about the following automations, for example?
Automation Examples Using Notion
Information managed in Notion can be automatically registered in a calendar app. Additionally, you can notify status changes and integrate with CRM or task management tools.
Automation Example Using Perplexity
It is possible to integrate data summarized by Perplexity with other tools for management and notifications! Depending on the prompts given to the AI, a wide variety of practical applications become possible.
In Conclusion
By integrating data from Notion and Perplexity, we have shown that not only can automatic summarization using Notion's data be achieved, but the input of response results can also be automated! This makes it easier than ever to utilize AI, potentially enabling faster data management and creation.
Additionally, the data integration introduced here can be easily accomplished using Yoom. <span class="mark-yellow">Even beginners can start with confidence, and intuitive operations allow for flow automation without specialized knowledge!</span> Be sure to register with Yoom to link Notion and Perplexity, and create a more comfortable working environment!
Registration takes only 30 seconds, so try it out in your spare time. Experience the convenience of automation!
The person who wrote this article
k.tsukamoto
Having worked as a system engineer for four years, I often struggled with manually entering attendance data into Excel and digitizing receipts. I wish I had discovered Yoom sooner. Although I have only just begun using Yoom, I am committed to providing information that will help fulfill everyone's wish for automation.
Conventional RPA can only automate simple repetitive tasks, and the setup process was very complicated. With “hyperautomation,” which combines various technologies such as AI, API, RPA, and OCR, it is possible to automate many tasks that could not be realized until now more easily than before.
Most tools simply connect one app to another, leaving the complex tasks to you. Yoom goes much further: From document creation and browser automation to OCR and generative AI, Yoom handles it all seamlessly in one platform.
Why settle for basic integrations? Streamline your entire workflow with Yoom’s powerful hyperautomation.


.avif)


