

Add information to Salesforce when the status is updated in Notion
By integrating Notion with Salesforce, you can reduce the effort of manual data entry. Additionally, it decreases the likelihood of input errors, enabling accurate data management.
.avif)
・

"Do I have to enter the same information by hand again...? Isn't there a way to fix this?"
Copying and pasting information compiled in Notion into Salesforce. Amidst various tasks, spending time on such repetitive work is honestly a waste, isn't it? There's also the risk of input errors, which means you might have to double-check the information later. The solution to these concerns is the app integration between Notion and Salesforce. For example, what if adding new data to Notion automatically reflects in Salesforce? Such a convenient system can be easily used by anyone without any coding.
In this article, we will introduce in detail what can be done by integrating Notion and Salesforce, as well as the specific setup methods. By reducing the hassle of confirmation and sharing, you can streamline your workflow and prevent any oversights. Please read through to the end.
By using Yoom, you can easily integrate Notion and Salesforce without any code. Yoom provides templates for integrating Notion and Salesforce, so you can achieve integration immediately just by registering, even without any API knowledge.
By integrating the APIs of Notion and Salesforce, you can automatically link Notion data to Salesforce! For example, you can automatically perform data integration like the one below without human intervention.
Simply click "Try it out" on the automation example you're interested in and register your account information to immediately experience the integration of Notion and Salesforce.
Registration takes just 30 seconds, so feel free to give it a try!
Integrating Notion and Salesforce offers the advantage of smooth data addition. Additionally, by managing information centrally, sharing information becomes easier, improving the efficiency of the entire team.
By integrating Notion with Salesforce, you can reduce the effort of manual data entry. Additionally, it decreases the likelihood of input errors, enabling accurate data management.
By integrating Notion with Salesforce, you can quickly transcribe information, which is a significant advantage. Additionally, it eliminates the hassle of manual data entry, thereby improving operational efficiency.
Let's get started by creating a flow that integrates Notion and Salesforce! This time, we'll use Yoom to proceed with the integration of Notion and Salesforce without any coding. If you don't have a Yoom account yet, please create one from the Yoom registration form.
[What is Yoom]
This time, we will create a flow bot that adds data to Salesforce when it is added to Notion!
The creation process is broadly divided into the following steps.
Here, we will connect Yoom with each app to enable operations.
1. Connect Notion to My Apps
First, before connecting to My Apps, let's create the data page to be used in the flow.
After logging into Yoom, click on My Apps on the left side of the Yoom page screen, and select "+ Add"on the right.
Enter "Notion" in the search box at the top right, and select Notion from the search results.

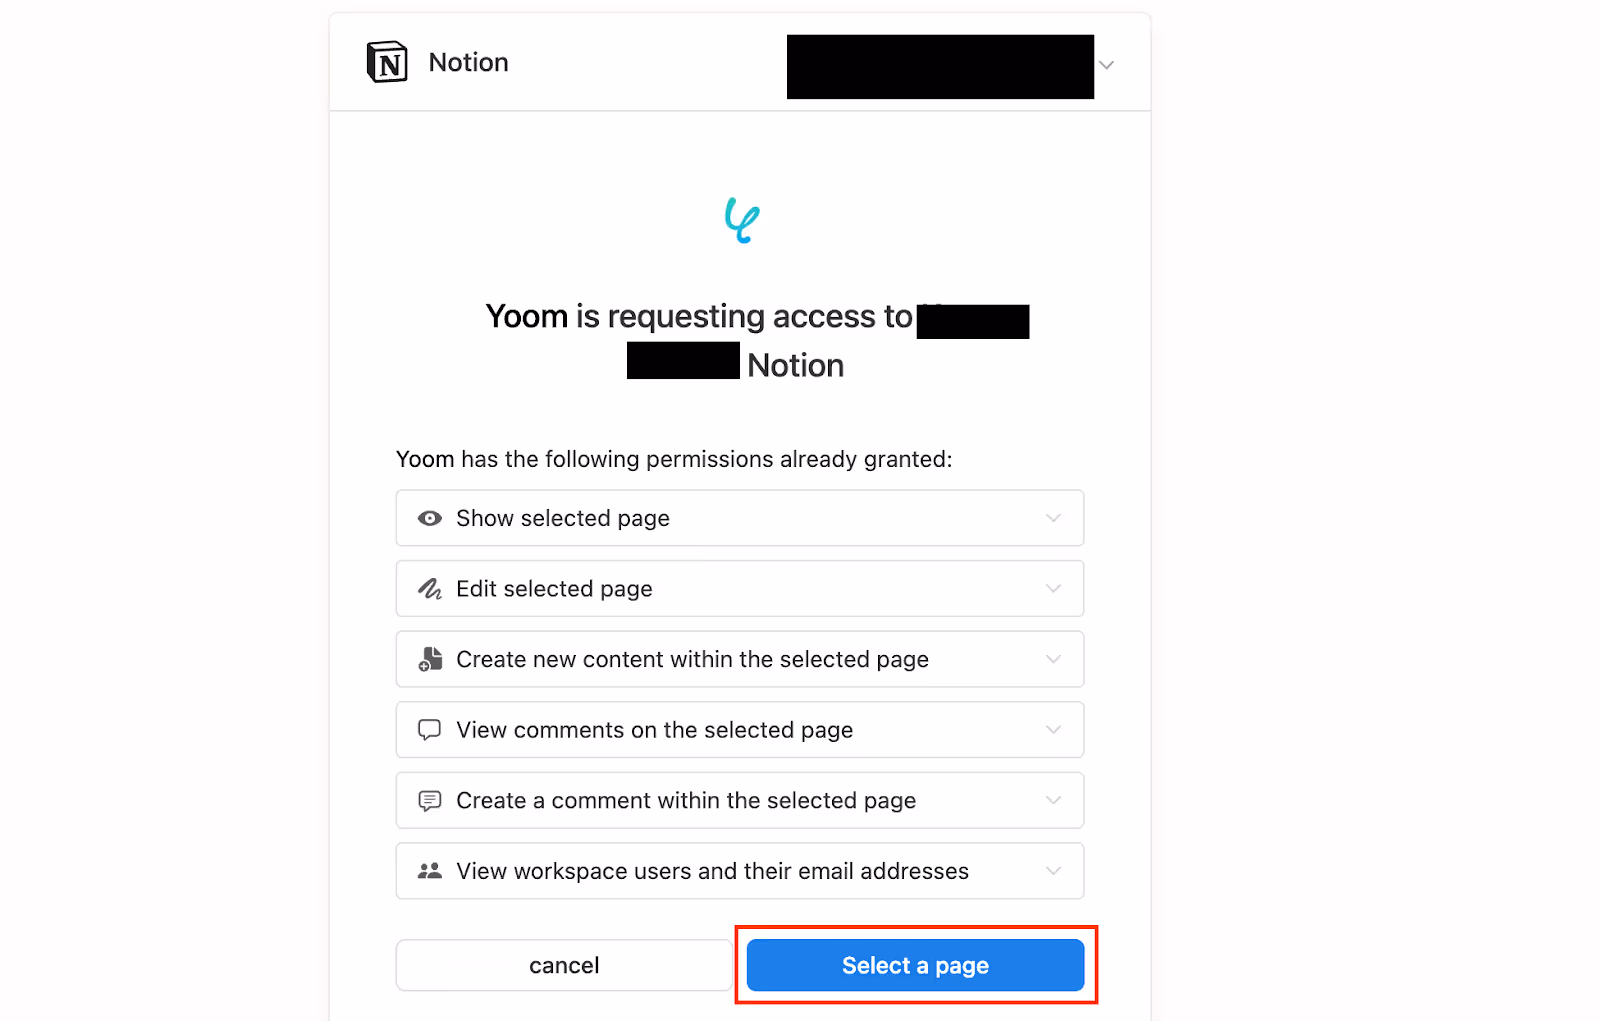
When the following screen appears, click on "Select Page" in the red frame.
When the following screen appears, check the page you want to allow access to, and click "Allow Access".
*If you create a page to be used in the flow after connecting to My Apps, you will need to reconnect and check it.

For testing purposes, we created the following red-framed section in Notion.

2. Connect Salesforce to My Apps
Similarly, after logging into Yoom, click on My Apps on the left side of the Yoom page screen, and select "+ Add" on the right.
Enter "Salesforce" in the search box at the top right, and select Salesforce from the search results.
Enter "Salesforce" in the search box at the top right, and select Salesforce from the search results.
Next, in the "New Connection to My Apps" screen, search for Salesforce.
If two apps are displayed here, click on the Salesforce that does not have (Sandbox environment) written next to it.
Then, you will be taken to the Salesforce login page, where you should log in with the account you want to use and allow access.
This completes the connection of Salesforce to My Apps.

*Please note that Salesforce is an app available only with the Team Plan and Success Plan.
If you are on the Free Plan or Mini Plan, operations and data connections set in Flowbot will result in errors, so please be careful.
Paid plans such as the Team Plan and Success Plan offer a 2-week free trial. During the free trial, you can use apps that are subject to restrictions.
This completes the connection of Salesforce to My Apps!
If Notion and Salesforce are displayed in My Apps, registration is complete!
Now, we will finally create the flow! We are using a template to make it easy to set up, so let's start by copying it.
Log in to Yoom and click on "Try it" in the banner below.
When you copy, the template will be copied to your Yoom management screen as shown below, so press "OK" to proceed with the setup.

This is the first memorable setup! First, click "When a specific database page is created or updated".

Clicking will take you to the following screen. The account information section contains the information from when you linked your My App in Step 1.
Keep the title and trigger action as they are and proceed to the next step!

Please enter the required fields.
The trigger activation interval varies depending on the subscription plan. Please refer to this for details on each plan.
List of feature restrictions and usage limits for each plan | Yoom Help Center (intercom.help)
The "Database ID" can be obtained from within the Notion URL.
※ The part "/workspace name/●●●/" in the URL is the Database ID.
※ For details, please check here.

Once the setup is complete, click "Test".
※ Before testing, a page must be created or updated in Notion.
Scroll down the screen and check if the output is displayed correctly.
If "Test Successful" is displayed, the Notion trigger setup is complete!
※ If the value you want to retrieve does not exist in the output item, you can add the value from the response result obtained after pressing the "Test" button to the output.
You can add it to the output by pressing the "+" button next to the value you want to add.

If there are no issues, click "Save".
Next, we will set up to retrieve records. Click "Retrieve record (by ID)".

First, confirm that the account information to be linked is correct. The title and execution action are set by default.

The Database ID can be selected from the suggestions displayed when you click the input bar.

Once the input is complete, click "Save".
Proceed to the next step, and the following screen will be displayed. Here, you will make detailed settings for database operations.

In this section, set the "conditions for the record you want to retrieve".
The condition for the record you want to retrieve is "Record ID equals {{Object ID}}".
{{Object ID}} can be entered using the Notion output information obtained earlier. Select from the suggestions, and once the input is complete, click "Test".

Once the test is successful, check if the output is displayed correctly.
Finally, click "Save".
Finally, the last setup! Click "Add record".

Proceed to the next step, and the following screen will be displayed.
Check if the account information is correct.

Scroll down and you can easily select your object's API from the suggestions by simply entering the correct "My Domain" URL.
Once you're done, click "Next".

On the next page, enter temporary values in Notion to test if they are correctly reflected in Salesforce.
Once the test is successful, click "Save" to complete all settings.

This completes the Flowbot! Well done!

Finally, turn the trigger ON. With this, all settings are complete, so check if data added to Notion is also added to Salesforce!
This was the method to add data to Salesforce when it is added to Notion!
This time, we introduced how to link data from Notion to Salesforce, but if you want to link data from Salesforce to Notion, please also use the template below.
By linking Salesforce and Notion, you have the advantage of quickly sharing lead information.
Additionally, by centrally managing lead information on Notion, information sharing and collaboration among team members can be carried out smoothly. This will enable efficient work and effective teamwork.
When the status in Notion is updated to any desired value such as "Completed" or "Done," data can be automatically added to Salesforce.
This flow is recommended for those who want to prevent missing data additions, as it allows for automatic data addition triggered by status updates.
By leveraging the APIs of Notion and Salesforce, various automations can be achieved.
You can add Gmail content to Notion or automatically notify Slack when a page is created or updated in Notion.
It is possible to notify Slack with Salesforce report information daily and send template emails via Gmail from the Salesforce lead information page.
How was it? By integrating Notion and Salesforce, you can potentially solve issues such as "eliminating manual data entry," "centralizing information management," and "preventing input errors." Automating business processes can help achieve both accuracy and speed in tasks, which is likely to enhance the overall productivity of your team.
<span class="mark-yellow">By utilizing the no-code tool Yoom, you can easily integrate Notion and Salesforce without any programming knowledge!</span> If you're interested, start by creating a free account and see how it works for yourself. Registration takes just 30 seconds! You can experience automatic integration right away.
Why not make your work smarter with the automatic integration of Notion and Salesforce?

.avif)


