

.avif)


1. Open the top banner and click "View Details"
2. Click "Try this template" at the bottom of the migrated screen
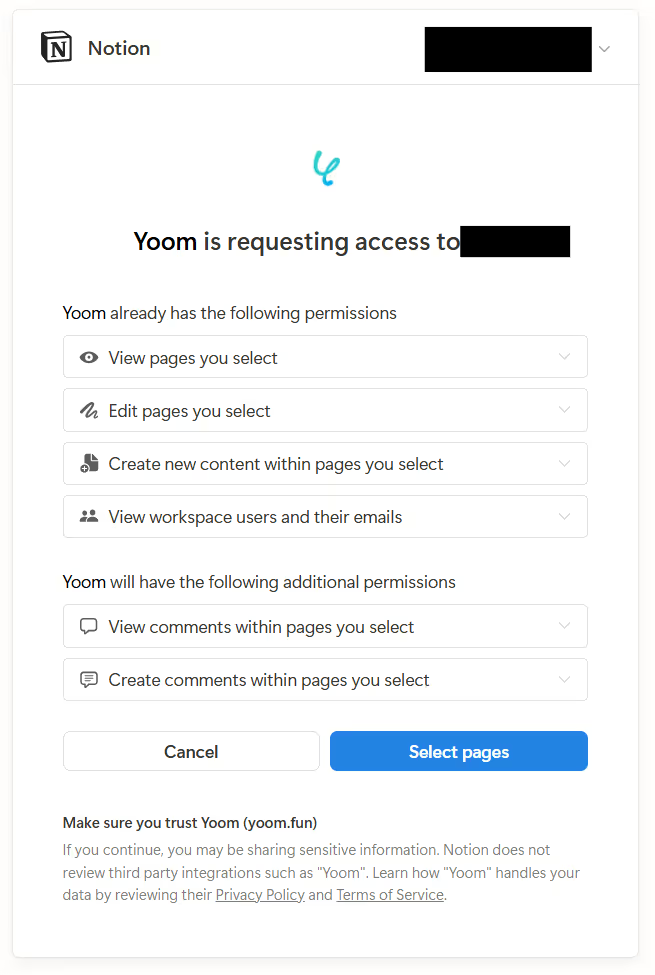
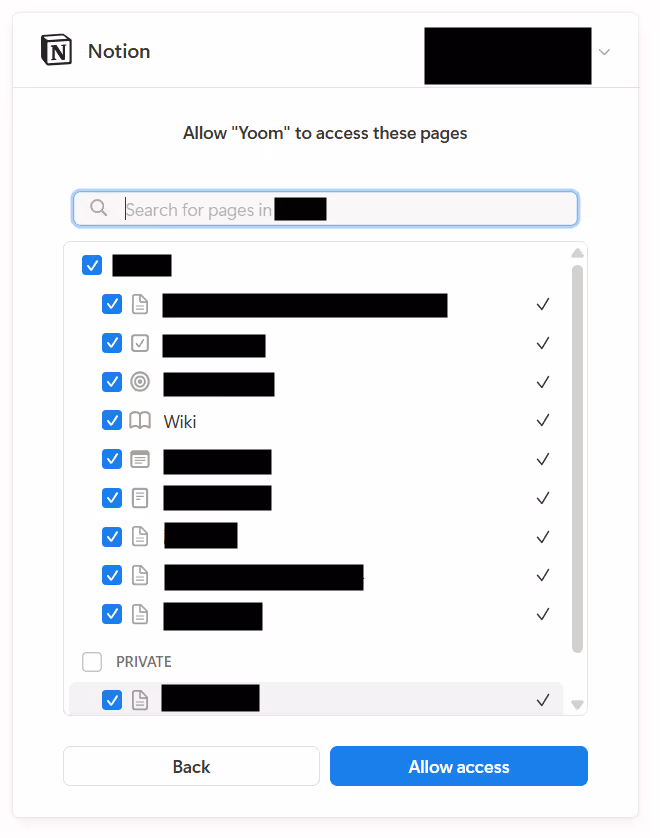
3. If you haven't registered with Yoom yet, please register
※ If you have already completed registration, the login screen will be displayed, so please log in.
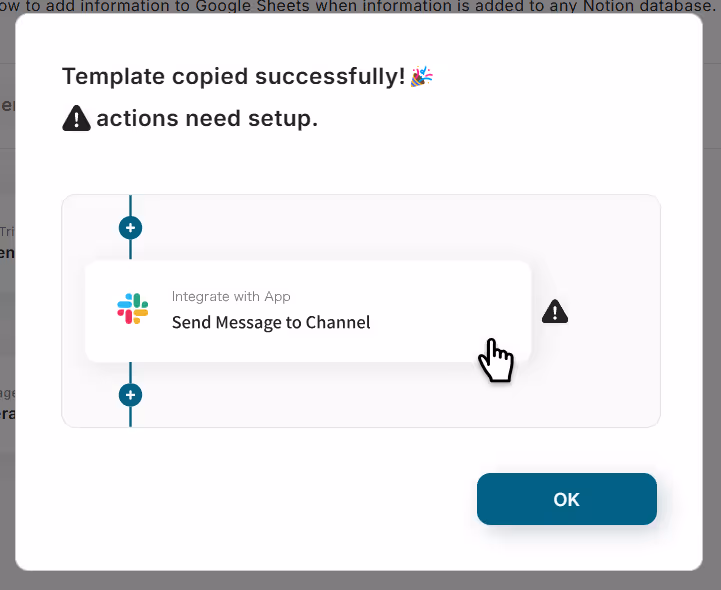
When the Flowbot template is copied to "My Projects", the above display will appear.
You will be taken to a page like the image, so let's proceed with detailed settings.
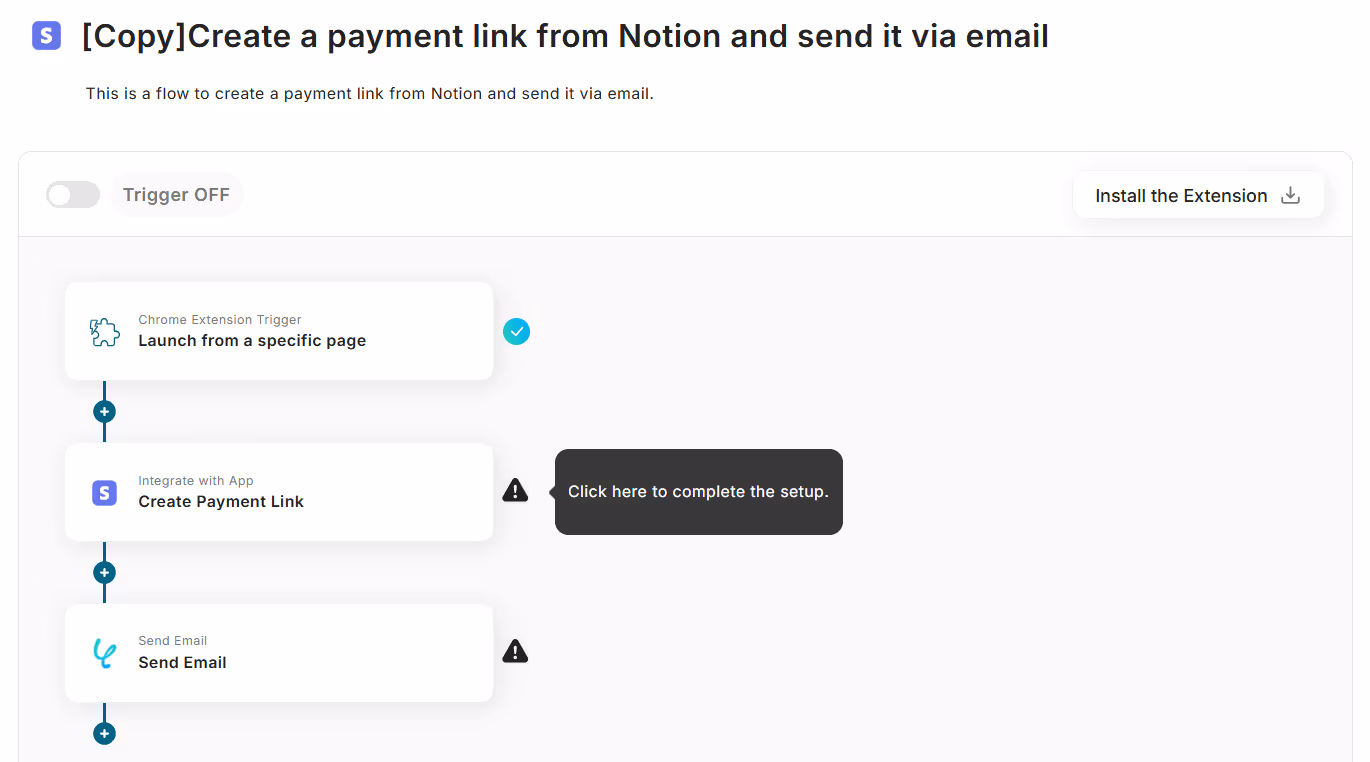
Step 3: Setting to launch the Chrome extension from the Notion page
1. Open My Projects
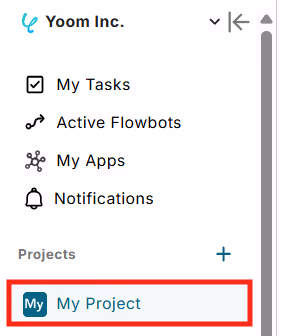
Open "My Projects" from the menu on the left side of the screen.
2. Open the copied template
Click "【Copy】Create a payment link from Notion for Stripe and send it by email".
3. Chrome Extension Trigger
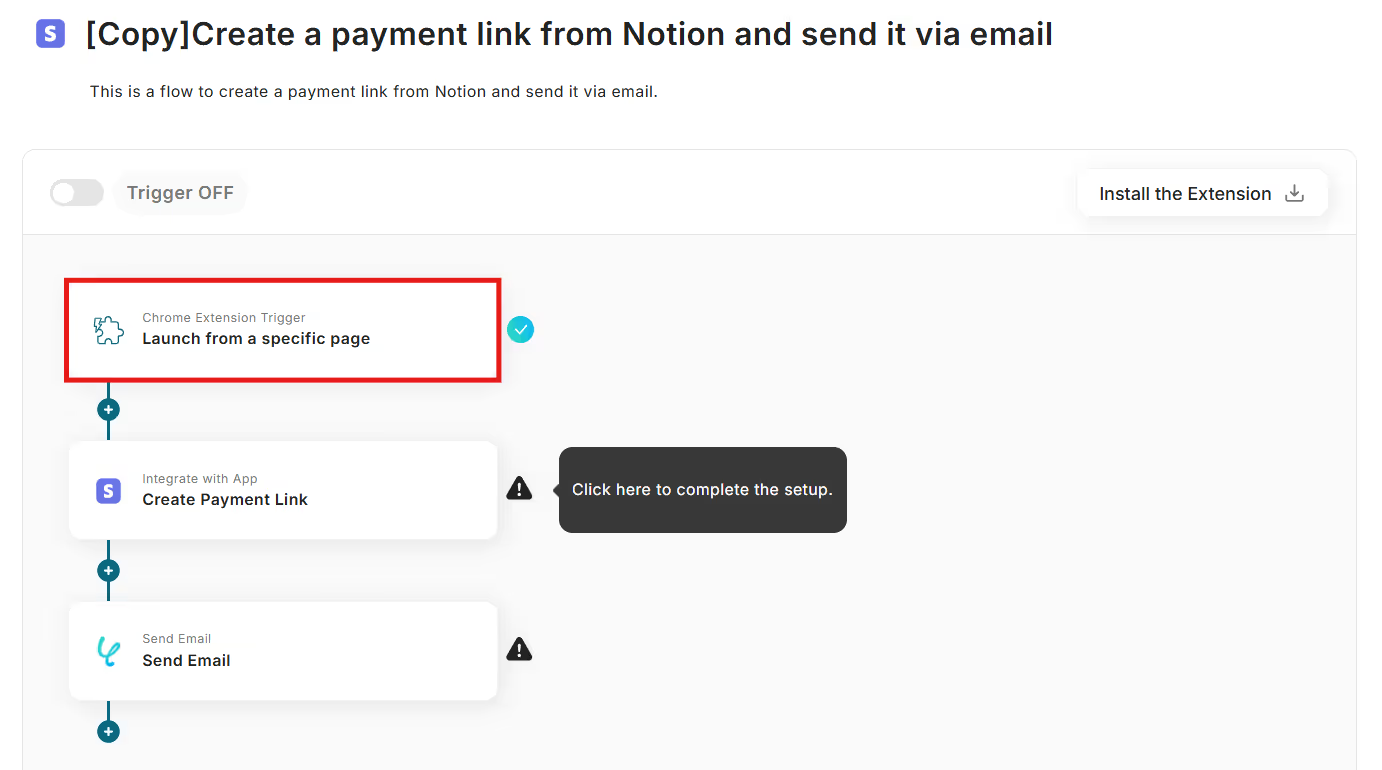
Select "Launch from a specific page" from the Chrome extension icon.
4. Install the Chrome Extension
Please proceed with the installation of Yoom's Chrome extension.
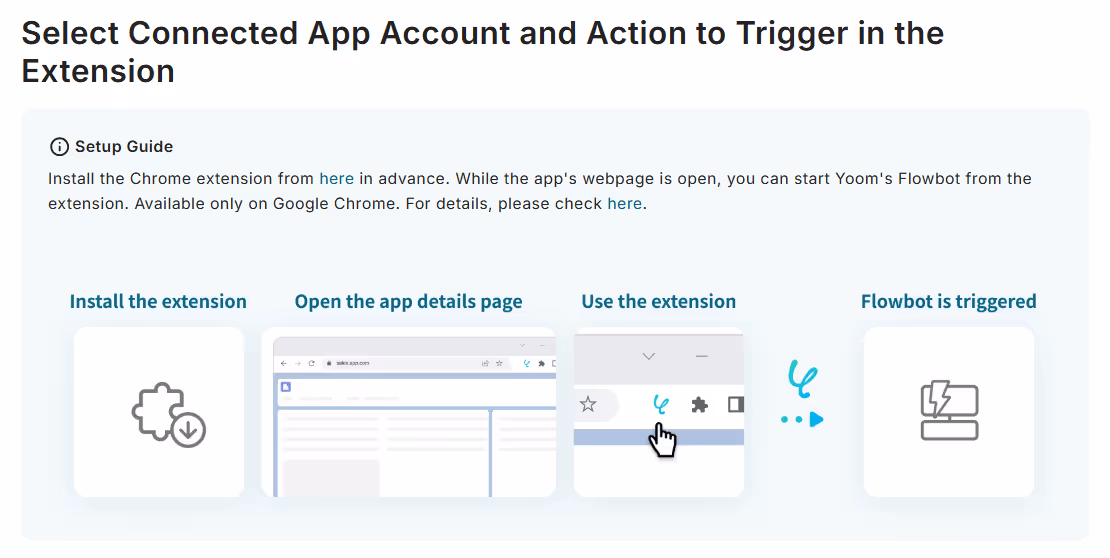
For more details, please check How to set up triggers using the Chrome extension.
Once the installation of the Chrome extension is complete, press Next.
※ By using triggers with the Chrome extension, you can launch triggers with a single click from the Notion screen. You can operate it easily without returning to the app page, allowing you to proceed with your work more smoothly.
5. Enter a sample URL for the launch page
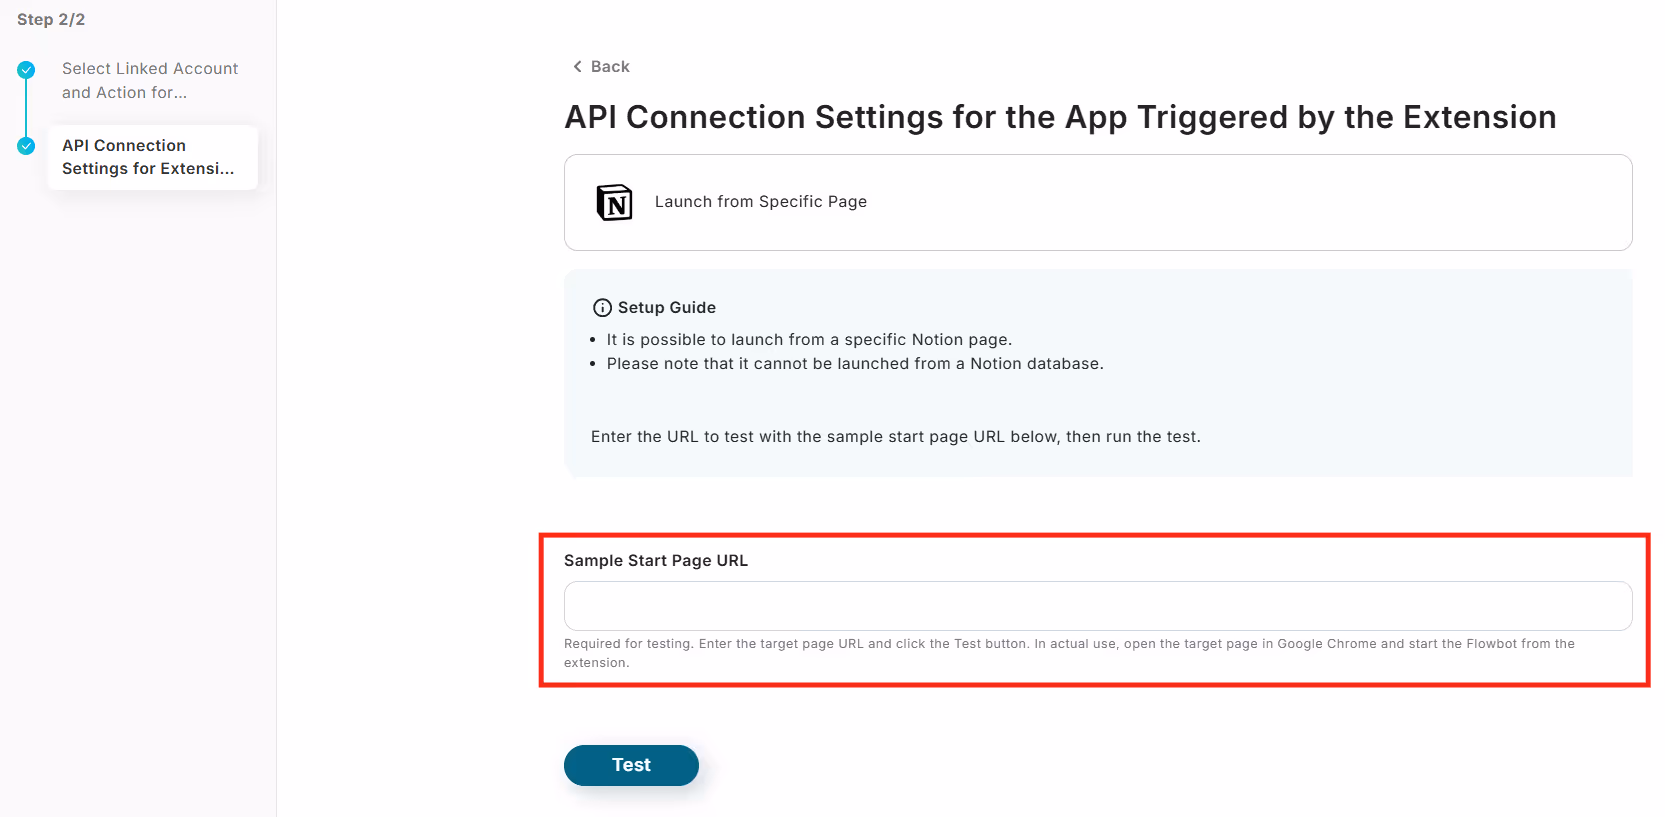
To launch the Chrome extension from the Notion page, enter the Notion page URL.
For more details, please check How to check sample URLs when using Notion.
6. Execute the test
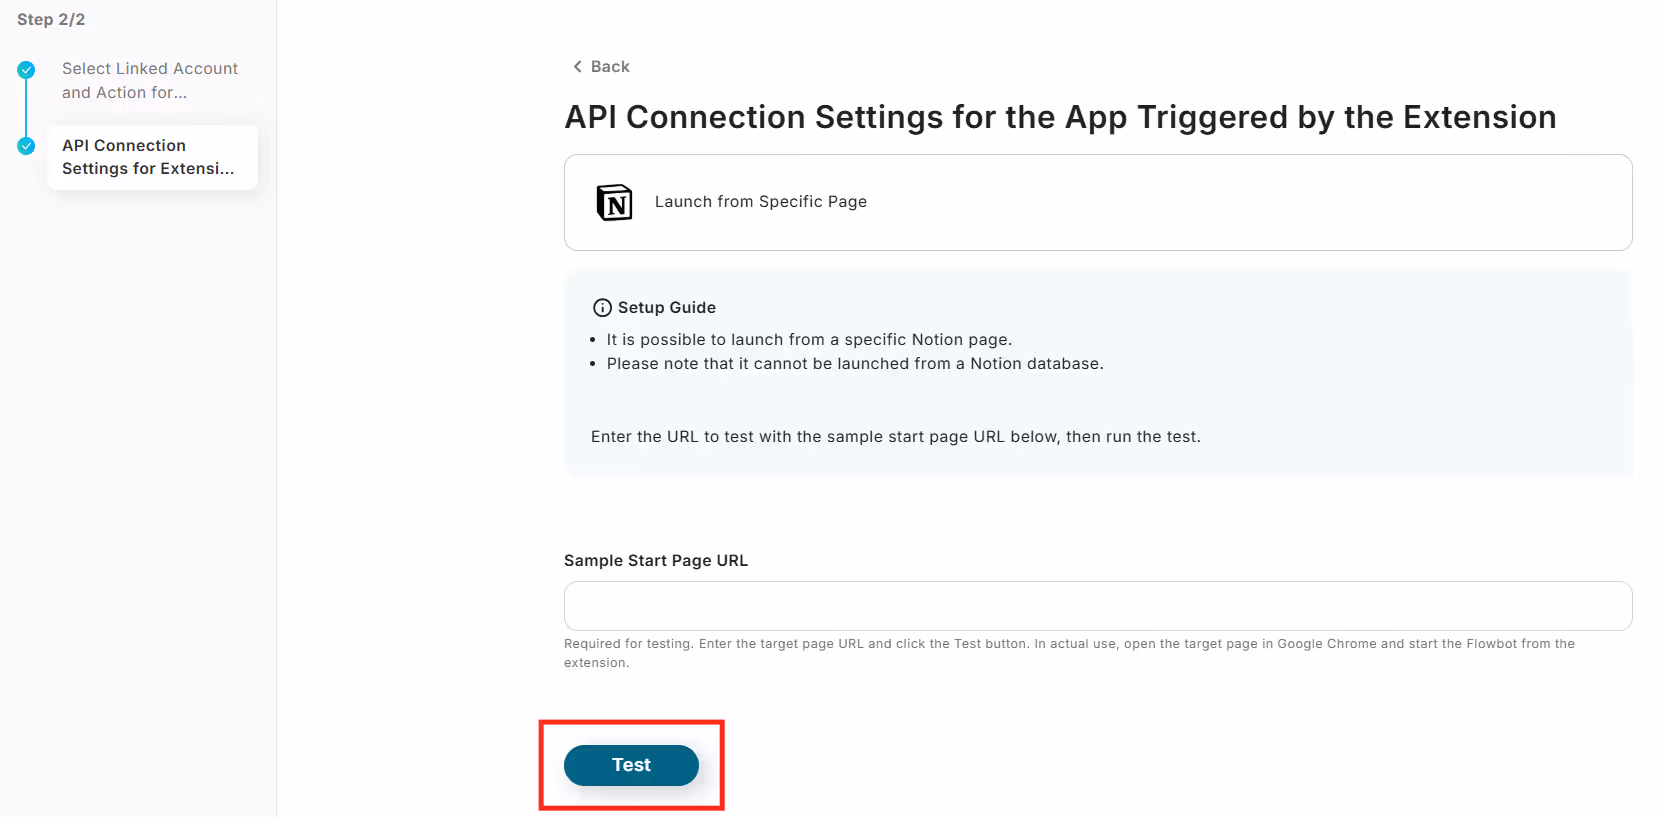
Press the test button, and if "Test Successful" is displayed in blue, press Save.
Step 4: Create a Stripe payment URL and set up sending messages
1. Connect with the app

Select "Create Payment Link" from the Stripe icon.
Proceed to the next step.
2. Set required fields
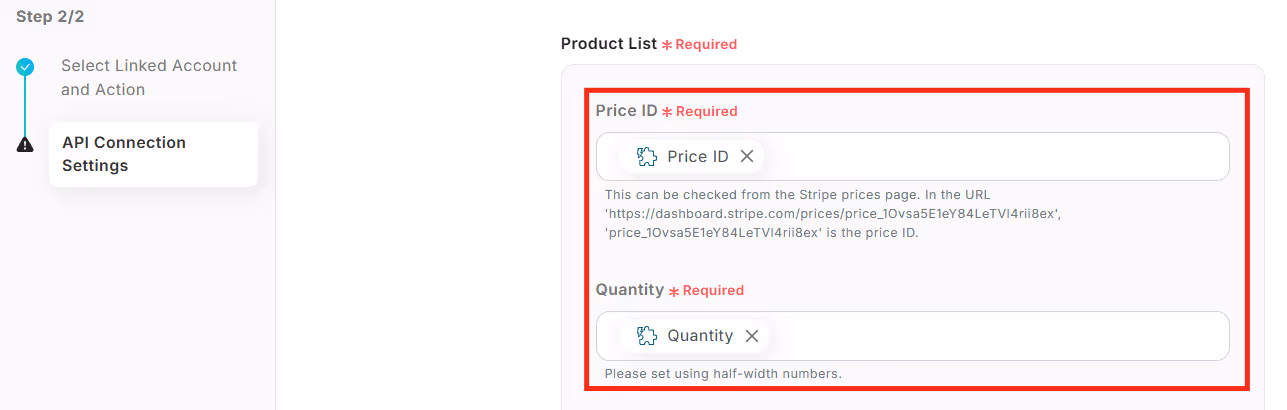
Set the required fields in the red frame.
Since you are using a template, it is already completed, so please check if it is in the same state as the image.
3. Execute the test
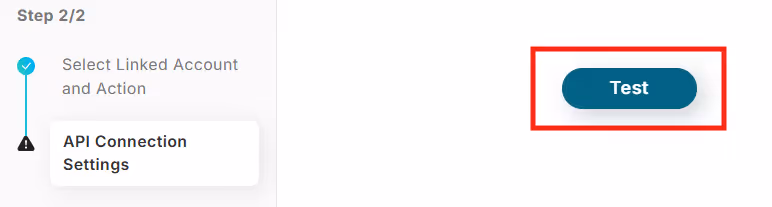
Press the test button and confirm that "Test Successful" is displayed in blue, then press Save.
Proceed to set up sending emails.
4. Send an email

Select "Send Email" from the Yoom icon.
For sending emails from Yoom's address, please also check How to set up "Send Email".
Scroll down the screen.
5. Set the content
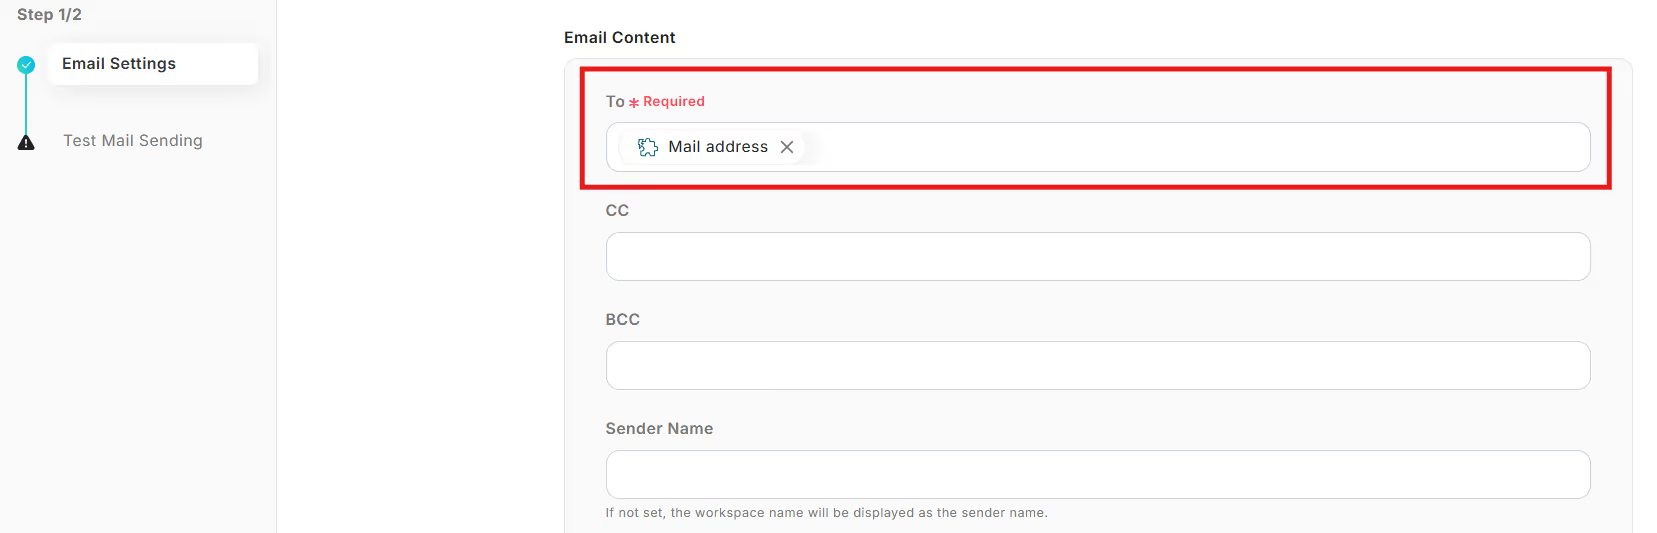
Since you are using a template for this setting as well, there is no need to enter required fields.
The "Address" in the image is in a state where the data has been replaced, so it is different from the actual email address, but in reality, the address stored in Notion will be used. Therefore, there is no need to change it.
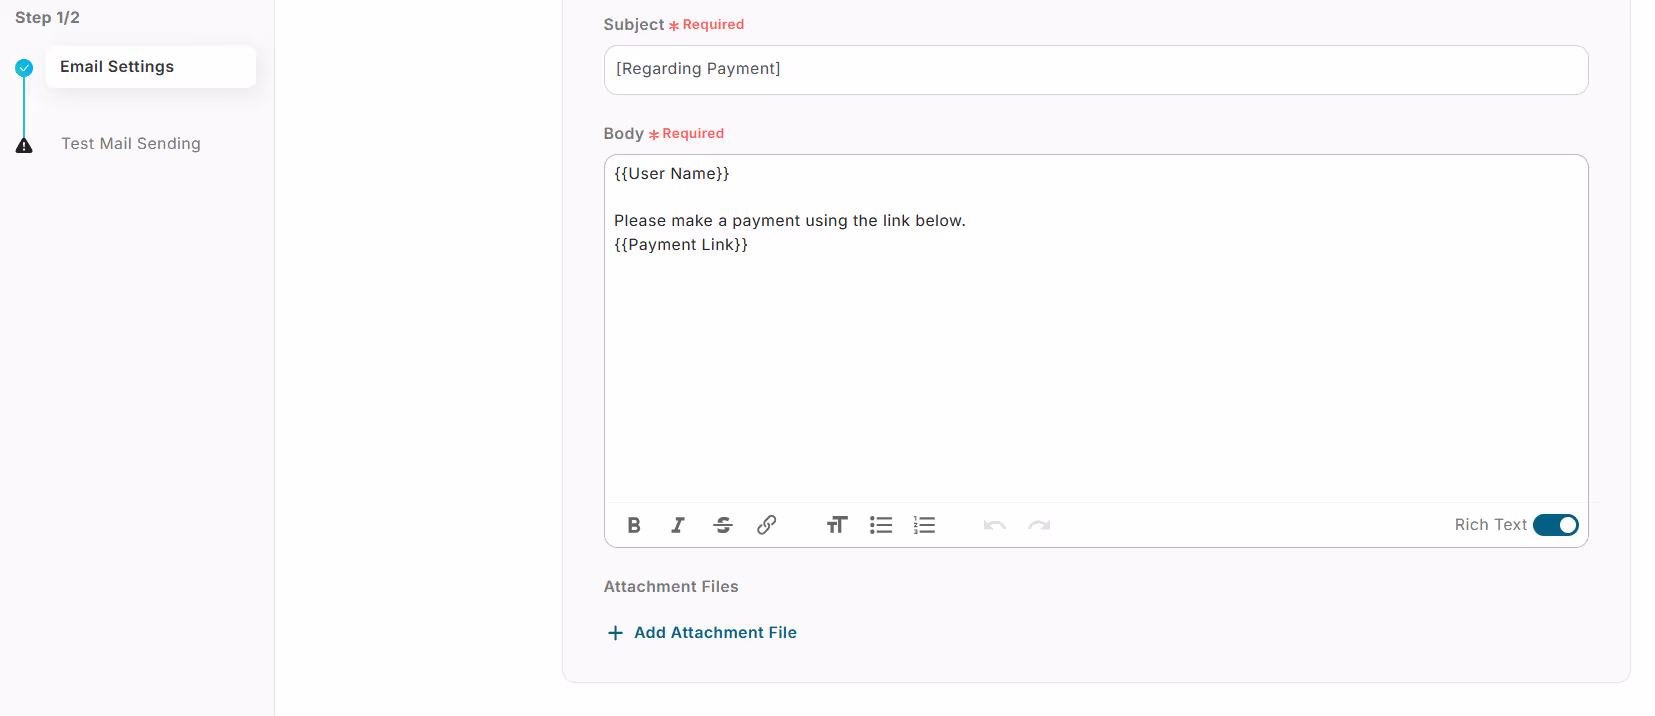
The subject and body are the same. If you want to insert data, please follow the steps below.
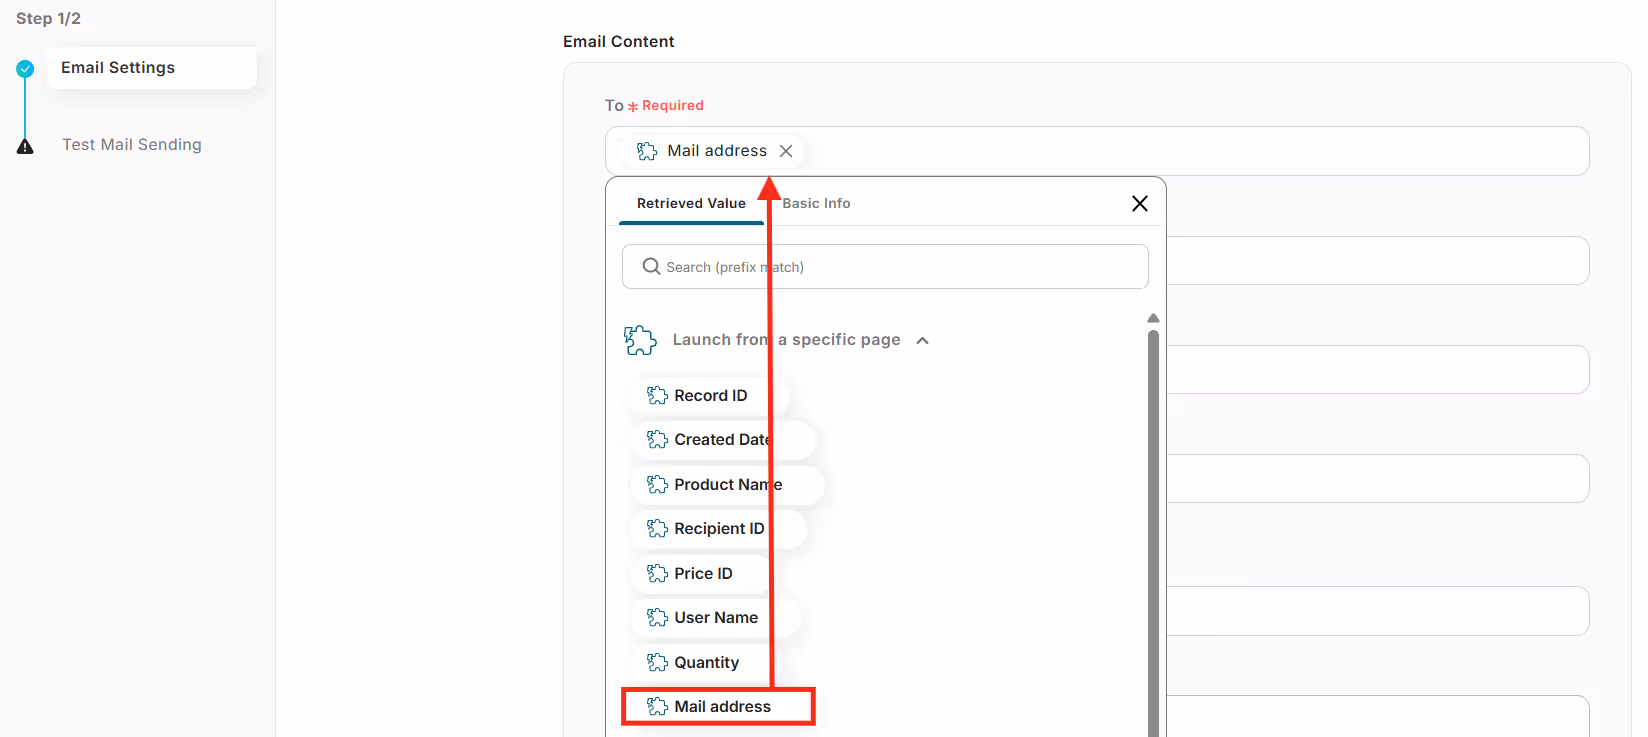
First, click the box where you want to insert the data.
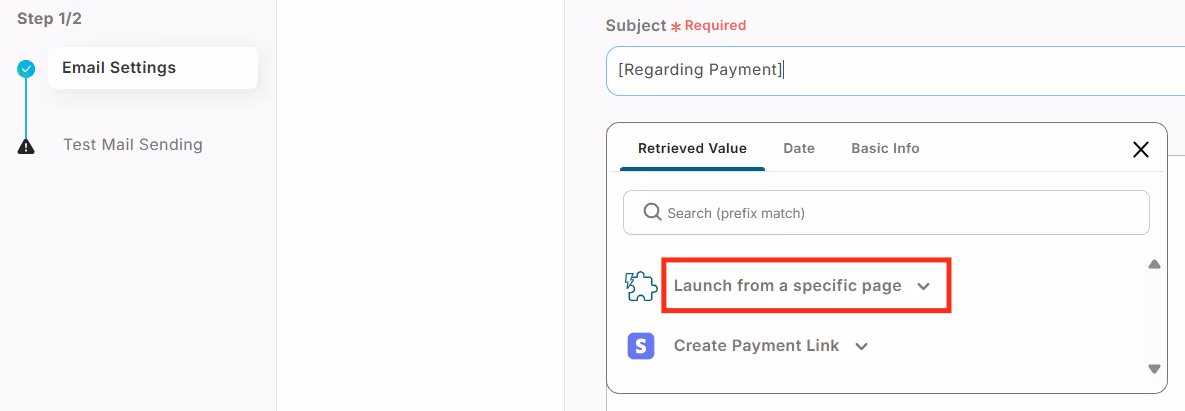
Click the Chrome extension icon.

The data managed on the Notion page where the Chrome extension was launched will be displayed in a list.
Click to select the data you want to insert.

Once inserted, it will look like the image.

Modify the text as desired.
Once creation is complete, press Next.
6. Confirmation and test execution
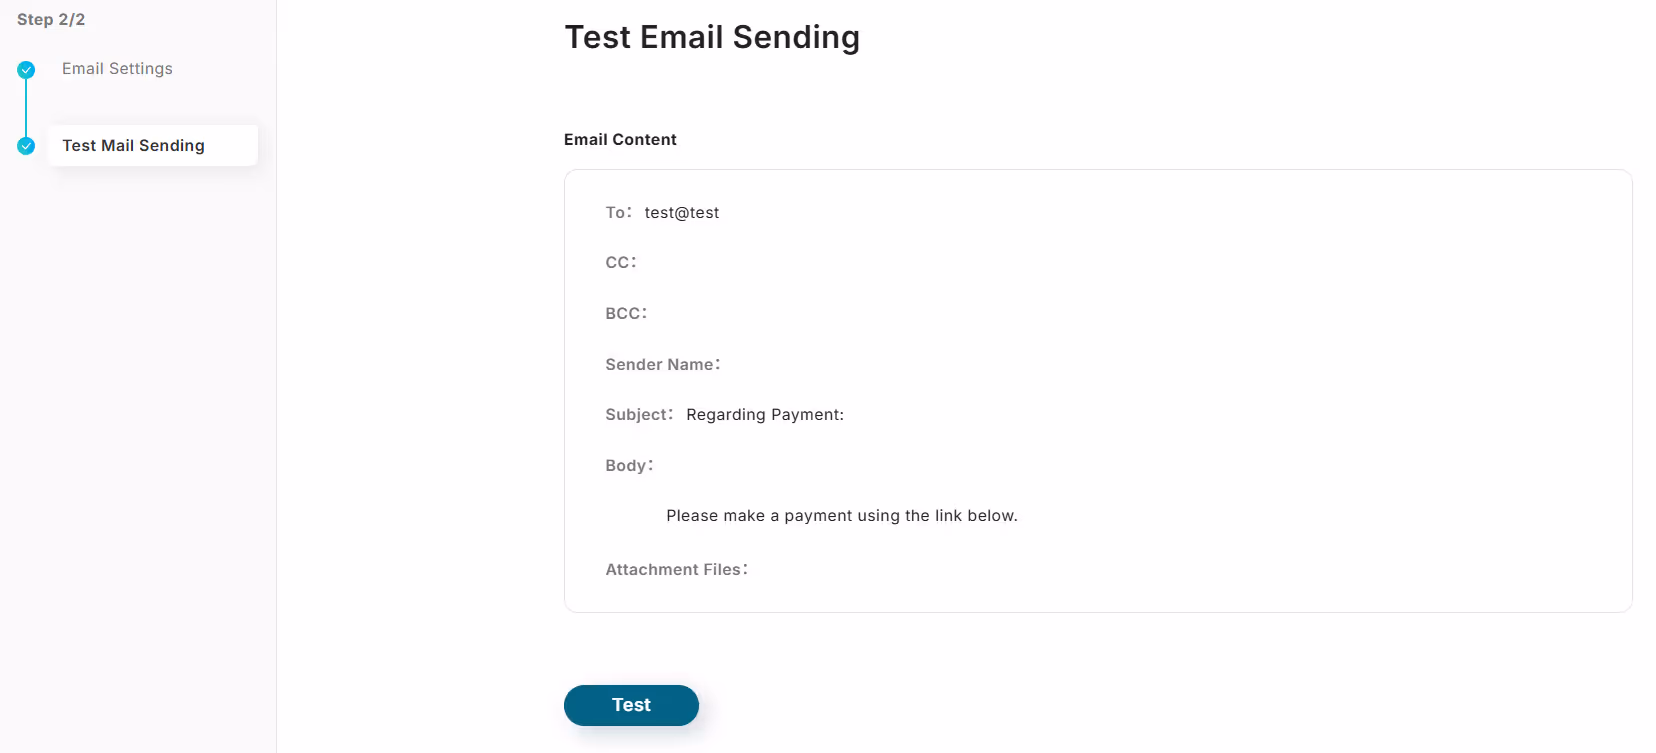
The details of the created email will be displayed.
After confirming that there are no mistakes, press the test button.
※ Please note that the email will actually be sent.
7. Turn on the trigger

When the creation of the Flowbot is complete, the above display will appear. The trigger is initially set to OFF, so turn it ON.
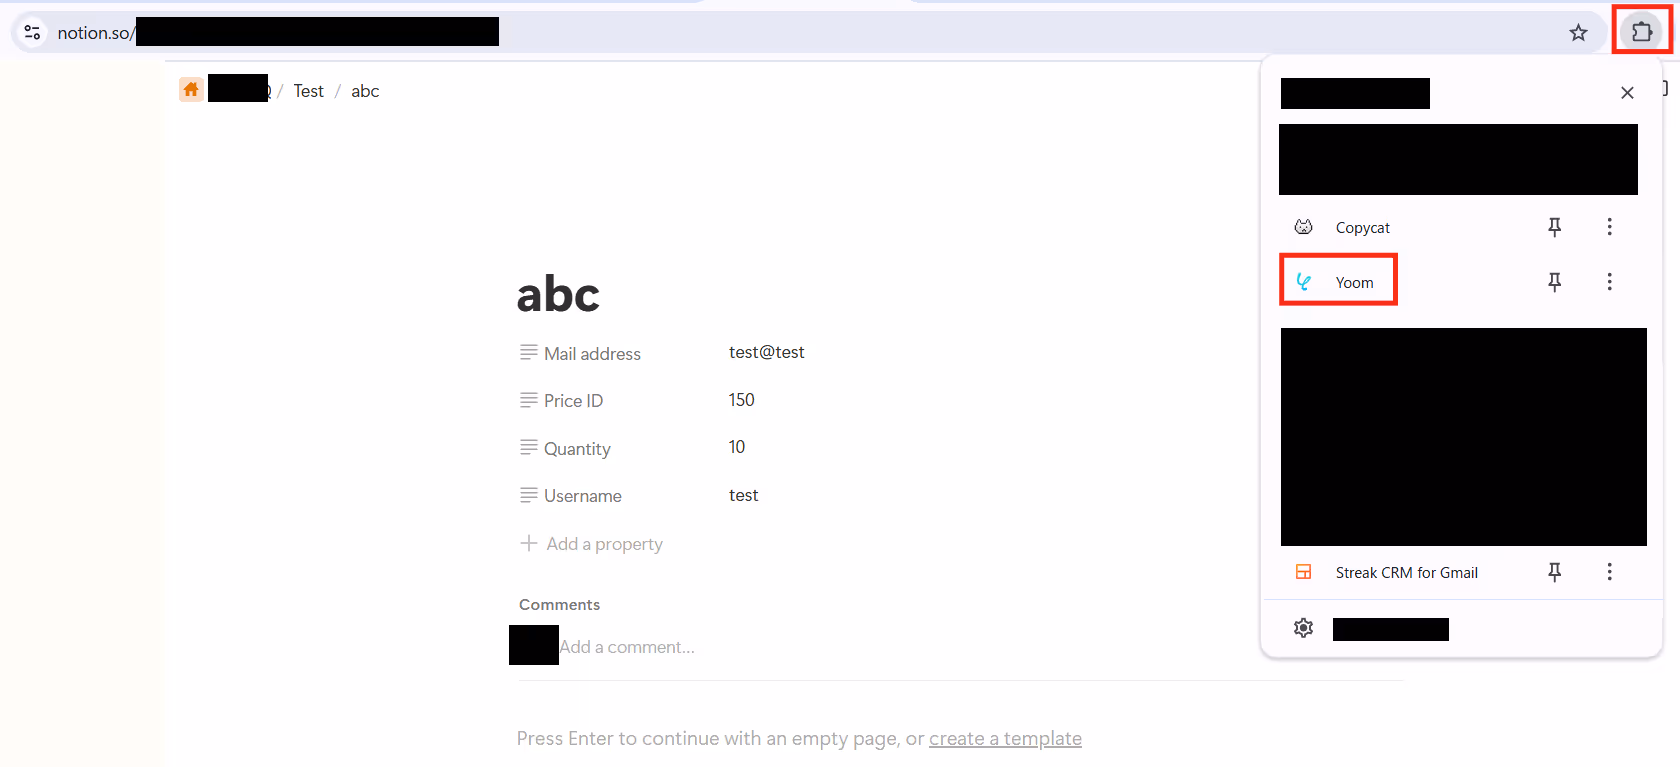
Then access Notion and select Yoom from the Chrome extension button at the top right.
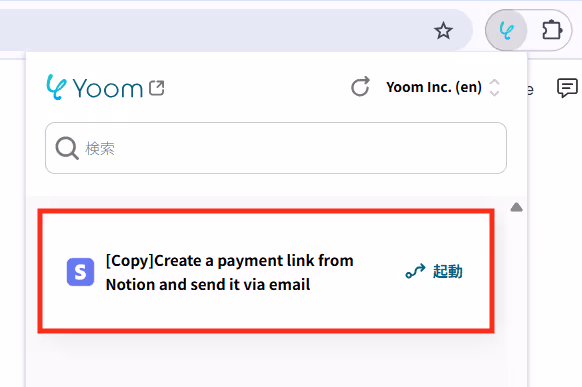
The title of the created Flowbot will be displayed. Clicking it will launch the Flowbot.
Flowbot template used this time
Create a payment link from Notion for Stripe and send it by email


.avif)


