OutlookとMicrosoft SharePointの連携イメージ
How to Integrate Applications

2025/01/28

How to integrate Outlook with Microsoft SharePoint and upload files received in Outlook to Microsoft SharePoint

s.kumagai

In the business scene, are you overwhelmed with processing numerous emails and files every day? Manually downloading files received in Outlook and uploading them to Microsoft SharePoint consumes a significant amount of time and effort. In this article, we will introduce a method to automate the upload of received files to SharePoint by integrating Outlook and Microsoft SharePoint. This automation can greatly improve work efficiency. It is a no-code automation, so please read to the end.

Recommended for

  • Those who want to efficiently manage incoming emails in Outlook and reduce manual work
  • Those who want to utilize Microsoft SharePoint to smoothly share files within a team
  • Administrators of companies looking to enhance security and compliance through centralized management of attachments
  • Project leaders who want to speed up information sharing across multiple departments and streamline business processes
  • Back office personnel who want to focus on important tasks by reducing repetitive work through automation

Now, let's explain how to use the no-code tool Yoom to upload attachments received in Outlook to Microsoft SharePoint.

[What is Yoom]

How to Upload Files Received in Outlook to Microsoft SharePoint

It is possible to achieve this by receiving records registered in the Outlook database using an API and uploading attachments received in Outlook to Microsoft SharePoint using the API provided by Microsoft SharePoint.
Generally, programming knowledge is required to achieve this, but with the no-code tool Yoom, it can be easily accomplished without programming knowledge.

This flow will be created in four main processes.

  • Register Outlook and Microsoft SharePoint as My Apps
  • Copy the template
  • Set the trigger for Outlook, which will be the starting point of the flow, and configure the subsequent operations for Microsoft SharePoint
  • Turn on the trigger button and verify the integration operation between Outlook and Microsoft SharePoint

If you are not using Yoom, please register for free from here.
If you are already using Yoom, please log in.

Step 1: Register Outlook and Microsoft SharePoint in My Apps

First, register Outlook in My Apps.
Click "My Apps" and select "New Connection" on the right side of the screen.

* If you are not subscribed to a general business plan for Microsoft365 (formerly Office365), authentication may fail.

The following screen will be displayed, so click the Microsoft365 account linked to the Outlook you want to integrate this time.

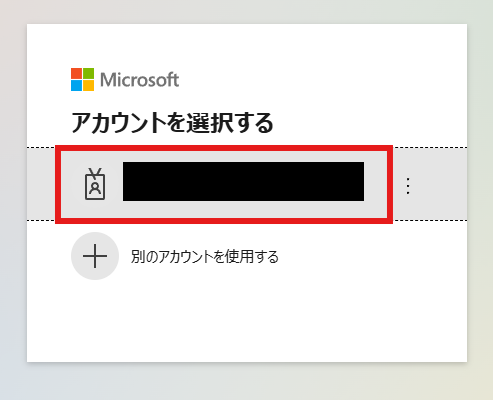
Enter your account password on the password entry screen and click Sign In.

Next, register Zoom in My Apps.

Then, register Microsoft SharePoint in My Apps.
Click "My Apps" on the left side of the screen, then click "New Connection" on the right side of the screen.

Enter Gmail in the search box and click the displayed suggestion.

The Microsoft365 account selection screen will be displayed, so click the account you want to integrate this time.


Once sign-in is complete, you will return to the My Apps screen, and Microsoft SharePoint will be displayed.
This completes the My Apps integration of the necessary apps.
Let's proceed to the next step.

Step 2: Copy the Template

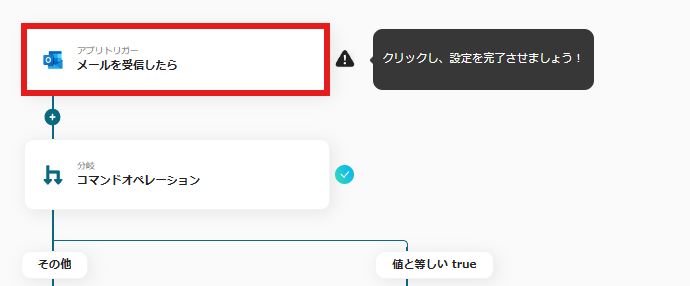
Next, copy the Yoom template.
Click the "Try this template" icon on the banner template below.

The template copy is complete when the screen shown in the image below is displayed.

Step 3: Set the Outlook trigger that starts the flow and the subsequent Microsoft SharePoint operation settings

*Branching is a feature (operation) available in the Mini Plan or higher. In the Free Plan, the operations set in the flow bot will result in an error, so please be careful.

Let's operate the flow bot.
Click on the area in the red frame in the image below.

Enter the area in the red frame.
Trigger Interval: You can choose from 5 minutes, 10 minutes, 15 minutes, 30 minutes, or 60 minutes.
Keyword: Enter something like "attachment".

Once you have entered the information, click "Test" → "Save".

Click "Get email attachment information" at the branch.

The API connection settings screen will be displayed.

Clicking on the input field will display the output.
As shown in the screen below, the content obtained from the linked app will be displayed under the input field, so enter the necessary information.
Once the input is complete, click "Test" → "Save".

Proceed with the settings to retrieve the attachment.
Click within the red frame below.

The API settings screen shown below will be displayed.
If you want to make changes, you can also use the output to enter information.
Since it is already entered, click "Test" → "Save".

Finally, configure the settings to upload to Microsoft SharePoint.

The following API connection settings screen will be displayed.
You can also use the output to enter information in this input field.

Once the input is complete, click "Test" → "Save".

Step 4: Turn on the trigger and confirm the integration automation

By clicking the "Turn on Trigger" section in the red frame on the screen below, the flow bot will start automatically.

Here is the template used this time.

Other Automation Examples Using Outlook and Microsoft SharePoint

① Create a Zoom Meeting When an Appointment is Registered in Outlook

This is a flow to create a Zoom meeting when an appointment is registered in Outlook. It is recommended for those who frequently conduct online meetings or business negotiations and share team members' schedules in Outlook.

② Register the content of inquiry emails received in Outlook to kintone

This is the flow to register the content of inquiry emails received in Outlook to kintone. It is recommended for customer support representatives who use Outlook to receive inquiries and for those who want to accumulate inquiries from customers in kintone for data analysis and other purposes.

③ Upload the contract signed with freee Sign to Microsoft SharePoint

This is the flow for uploading contracts signed with freee Sign to Microsoft SharePoint. By uploading contracts signed with freee Sign to Microsoft SharePoint, centralized management of contracts becomes possible. This allows for quick search and reference of necessary contracts, which is expected to improve operational efficiency.

Benefits and Examples of Integrating Outlook with Microsoft SharePoint

Benefit 1: Reduction of Manual Upload Tasks

By automatically uploading attachments received in Outlook to SharePoint, you can significantly reduce the burden of manual tasks. For example, the accounting department processes numerous invoices and receipts daily, but this automation eliminates the need for downloading and uploading. This allows employees to dedicate more time to important analytical tasks and decision-making. Additionally, the risk of manual errors is reduced, leading to improved accuracy in operations.

Benefit 2: Faster File Sharing Among Teams

Automatic uploads to SharePoint ensure that all relevant parties have immediate access to the latest files. Specifically, contracts received by the sales team are automatically shared with the legal department, speeding up the approval process. This prevents project delays and ensures no business opportunities are missed. Real-time information sharing is expected.

Benefit 3: Enhanced Security and Compliance

Automatic uploads from Outlook to SharePoint enhance the security level of data management. For instance, files containing highly confidential personal information received by the HR department can be viewed only by authorized members through access permissions. This reduces the risk of information leaks and meets compliance requirements. Additionally, it is easy to track file modification histories and access logs, facilitating audit responses.

Conclusion

The automation achieved by integrating Outlook with Microsoft SharePoint dramatically improves daily operational efficiency. The benefits of reducing manual tasks, speeding up information sharing, and enhancing security are key to increasing a company's productivity and competitiveness. If you are looking to improve your business productivity, try setting up the integration by following the steps outlined in this article.
At Yoom, we aim to automate various business processes, so be sure to check out our other templates!

The person who wrote this article
s.kumagai
I worked for a web marketing company as customer support for about 3 years. I spent time managing customer information and internal data, and when I was worried, I came across Yoom. I have a strong feeling every day that I wish I could come across Yoom sooner, which is easy to use even without programming knowledge... I hope it will help those who have similar problems with improving work efficiency!
Tags
Outlook
Microsoft SharePoint
Automatic
Automation
Integration
App integration
No items found.
What is Yoom hyperautomation?
Conventional RPA can only automate simple repetitive tasks, and the setup process was very complicated.
With “hyperautomation,” which combines various technologies such as AI, API, RPA, and OCR, it is possible to automate many tasks that could not be realized until now more easily than before.
Don't Just Connect Apps—Automate Everything
Most tools simply connect one app to another, leaving the complex tasks to you. Yoom goes much further: From document creation and browser automation to OCR and generative AI, Yoom handles it all seamlessly in one platform.

Why settle for basic integrations? Streamline your entire workflow with Yoom’s powerful hyperautomation.
Learn more about Yoom
Helpful Materials
I understand Yoom! 3-piece set of materials
Download materials
Understand in 3 minutes! Yoom service introduction materials
Download materials
Find out by Before After! Yoom Case Study Collection
Download materials
See a list of useful materials