・
[No Code Required] How to Automatically Integrate Slack Message Data into Outlook

Would you like to integrate Slack and Outlook to improve work efficiency?
Do you want to receive notifications in Outlook for interactions on Slack, but find "manual transcription cumbersome" or feel anxious about "information sharing gaps"? Especially between teams using different tools, delays in information transmission can lead to decreased work efficiency.
In this article, we introduce a method to automatically integrate Slack data into Outlook using the no-code tool Yoom. It's easy to set up without programming, so you can feel at ease even without IT expertise!
By smoothly integrating Slack and Outlook, you can reduce manual workload and enable accurate information sharing.
This article provides a detailed explanation from basic setup procedures to practical use cases, so please read to the end.
For those who want to try it quickly
By using Yoom, you can easily integrate Slack and Outlook with no code.
Yoom offers pre-prepared templates for integrating Slack and Outlook, allowing you to achieve integration immediately just by registering, even without API knowledge.
■Overview
The "Notify via Outlook when a message containing specific keywords is posted on Slack" workflow is an automation tool designed to ensure that important communications within the team are not missed. For example, when a message containing specific keywords, such as project progress or urgent notices, is posted on Slack, a notification is automatically sent to Outlook.
This facilitates smooth integration between email and chat, improving the efficiency of information sharing.
■Recommended for
- Those who use Slack and Outlook regularly and want to prevent missing information
- Administrators who wish to streamline team communication and promptly catch important notices
- IT personnel who spend time on manual notification settings
- Business professionals who want to improve work efficiency through workflow automation
- Those who want to clarify work priorities by utilizing notifications based on specific keywords
■Benefits of using this template
Since messages containing specific keywords posted on Slack are automatically notified via Outlook, it eliminates the hassle of manually filtering emails and setting notifications.
Being notified through Outlook prevents missing information and allows for quick responses.
Automation prevents human errors in manual tasks, enabling smooth business operations.
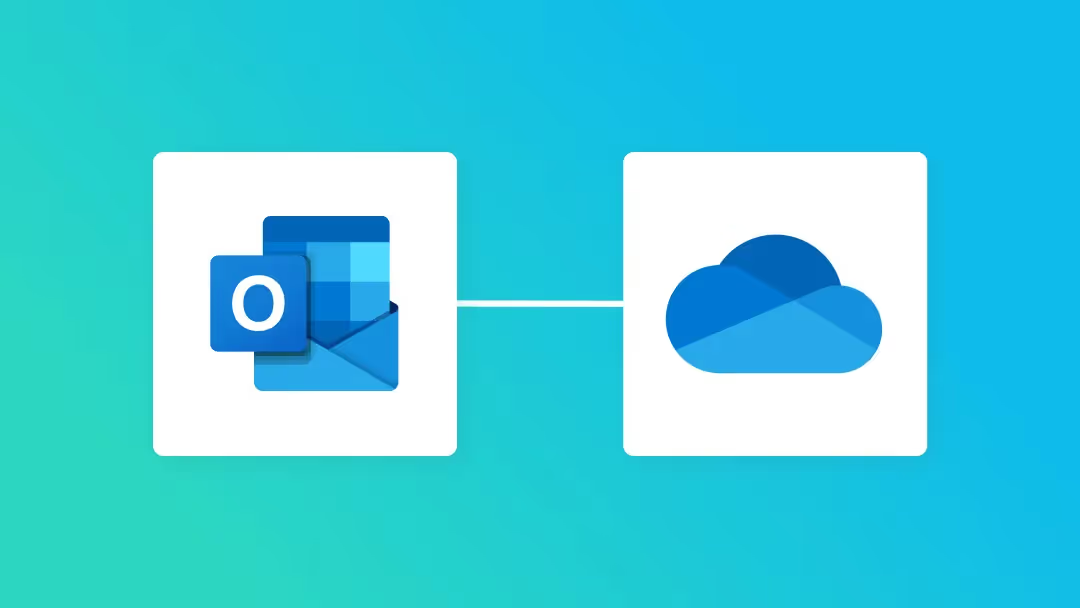
What You Can Do by Integrating Slack and Outlook
By integrating the APIs of Slack and Outlook, you can automatically sync Slack data with Outlook! For example, you can automatically perform data synchronization like the ones below without any manual intervention.
Simply click "Try it out" for the automation example you're interested in and register an account to immediately experience the integration of Slack and Outlook.
Registration takes just 30 seconds, so feel free to give it a try!
Notify Outlook When a Message Containing Specific Keywords is Posted in Slack
This flow is recommended for those using Slack as a communication tool and wanting to notify messages to Outlook.
■Overview
The "Notify via Outlook when a message containing specific keywords is posted on Slack" workflow is an automation tool designed to ensure that important communications within the team are not missed. For example, when a message containing specific keywords, such as project progress or urgent notices, is posted on Slack, a notification is automatically sent to Outlook.
This facilitates smooth integration between email and chat, improving the efficiency of information sharing.
■Recommended for
- Those who use Slack and Outlook regularly and want to prevent missing information
- Administrators who wish to streamline team communication and promptly catch important notices
- IT personnel who spend time on manual notification settings
- Business professionals who want to improve work efficiency through workflow automation
- Those who want to clarify work priorities by utilizing notifications based on specific keywords
■Benefits of using this template
Since messages containing specific keywords posted on Slack are automatically notified via Outlook, it eliminates the hassle of manually filtering emails and setting notifications.
Being notified through Outlook prevents missing information and allows for quick responses.
Automation prevents human errors in manual tasks, enabling smooth business operations.
Send files posted on Slack via integrated Outlook
This flow is recommended for situations where you use Slack as a communication tool and want to manage files with Outlook.
■Overview
This is a flow that automatically sends an attachment URL to Outlook when a file is posted on Slack.
■Recommended for
1. Those who need to manage and process images or PDF files from client companies
・Sales assistants or accounting staff
・Administrative staff or office managers
2. Those who use email and chat for internal and external communication
・Field sales representatives working outside the office
3. Those who want to reduce manual input tasks and automate processes
・Owners of small and medium-sized enterprises aiming for operational efficiency
・Administrative and clerical staff with a lot of data entry tasks
・Marketing personnel utilizing digital tools for their work
■Benefits of using this template
・By triggering the flow bot based on file attachments and automatically sending emails, it reduces manual tasks such as data sorting and email creation, leading to improved operational efficiency.
・The entire process is automated, preventing any operational oversights.
・By adding further operations to this flow bot, it is possible to store files and convert data into text.
■Notes
・Please integrate both Slack and Outlook with Yoom.
・Microsoft365 (formerly Office365) has a personal plan and a general business plan (Microsoft365 Business). If you are not subscribed to the general business plan, authentication may fail.
Let's Create a Slack and Outlook Integration Flow
Let's get started by creating a flow that integrates Slack and Outlook! This time, we'll use Yoom to proceed with the integration of Slack and Outlook without any coding. If you don't have a Yoom account yet, please create one using the registration form here.
[What is Yoom]
In this session, we will create a flow that integrates data into Outlook when a specific message is received in Slack!
The creation process is broadly divided into the following steps.
- Integrate Slack and Outlook with My Apps
- Copy the template
- Set up Slack triggers and Outlook actions
- Turn on the trigger and check the operation
■Overview
The "Notify via Outlook when a message containing specific keywords is posted on Slack" workflow is an automation tool designed to ensure that important communications within the team are not missed. For example, when a message containing specific keywords, such as project progress or urgent notices, is posted on Slack, a notification is automatically sent to Outlook.
This facilitates smooth integration between email and chat, improving the efficiency of information sharing.
■Recommended for
- Those who use Slack and Outlook regularly and want to prevent missing information
- Administrators who wish to streamline team communication and promptly catch important notices
- IT personnel who spend time on manual notification settings
- Business professionals who want to improve work efficiency through workflow automation
- Those who want to clarify work priorities by utilizing notifications based on specific keywords
■Benefits of using this template
Since messages containing specific keywords posted on Slack are automatically notified via Outlook, it eliminates the hassle of manually filtering emails and setting notifications.
Being notified through Outlook prevents missing information and allows for quick responses.
Automation prevents human errors in manual tasks, enabling smooth business operations.
Step 1: Connect Slack and Outlook with My Apps
First, let's connect Slack and Outlook with My Apps.
After logging into Yoom, click "New Connection" from "My Apps" in the left menu.

[For Slack]
1. Search for "Slack" and select Slack from the list of apps.

2. Sign in to the Slack account you want to connect with Yoom. Then, configure the following settings:
- Workspace you want to connect (selectable from the dropdown at the top right)
- Channels within the workspace
After completing the settings, click "Allow".

If administrator approval is required, please refer to the help page.
This completes the My Apps connection for Slack.
[For Outlook]
Note: Microsoft365 (formerly Office365) has plans for home use and general business use (Microsoft365 Business). If you are not subscribed to the general business plan, authentication may fail.
1. Search for "Outlook" and select Outlook from the list of apps.

2. Enter the email address of the Microsoft account you want to connect with Yoom.

3. Enter the password.

This completes the My Apps connection for Outlook.
For the registration procedure and precautions for My Apps in Microsoft365 services, please also refer to this page.
Step 2: Copy the Template
Once the My Apps connection is complete, let's quickly set up the template.
Click "Try it" on the banner below to copy the template.
■Overview
The "Notify via Outlook when a message containing specific keywords is posted on Slack" workflow is an automation tool designed to ensure that important communications within the team are not missed. For example, when a message containing specific keywords, such as project progress or urgent notices, is posted on Slack, a notification is automatically sent to Outlook.
This facilitates smooth integration between email and chat, improving the efficiency of information sharing.
■Recommended for
- Those who use Slack and Outlook regularly and want to prevent missing information
- Administrators who wish to streamline team communication and promptly catch important notices
- IT personnel who spend time on manual notification settings
- Business professionals who want to improve work efficiency through workflow automation
- Those who want to clarify work priorities by utilizing notifications based on specific keywords
■Benefits of using this template
Since messages containing specific keywords posted on Slack are automatically notified via Outlook, it eliminates the hassle of manually filtering emails and setting notifications.
Being notified through Outlook prevents missing information and allows for quick responses.
Automation prevents human errors in manual tasks, enabling smooth business operations.
When the template is copied to Yoom, the following screen will appear, so press "OK".

Step 3: Set Slack Trigger
(1) Click on "When a new message is posted in the channel" at the top of the template.

(2) Enter the account information of the Slack you want to integrate with and click "Next".
The information of the account you integrated with is automatically entered by default.

(3) Configure Slack's [API Connection Settings].
Select thetrigger interval will be activated from 5 minutes, 10 minutes, 15 minutes, 30 minutes, or 60 minutes.
※ The activation interval varies depending on the plan, so please be careful.

(4) Set the channel ID where the messages that will trigger the flowbot will be received in "Channel ID".
A list of channel IDs in the integrated Slack will be displayed under "Optiomns".
Select the channel ID you want to set in the flow.

Once the settings are complete, send a message on Slack and click "Test" to conduct a test.
If the test is successful, click "Save" to complete the settings.
Step 4: Set Branching
(1) Click on "Command Operation" in the template.

(2) It is automatically set, but confirm that the following contents are set.
- Title: Set as desired (default is "Command Operation")
- Operation: Select "When a new message is posted in the channel"
- Retrieved value: Select "Message Text"
※ Branching is a feature available in plans above the mini plan. If you are on a free plan, the operation of the flowbot you set will result in an error, so please be careful. During the free trial, branching settings are possible.

(3) Set the conditions for the branching process in "Branch Condition".
For example, if you set "Equal to" and "Issue", the branching process will only occur if the word "Issue" is included in the message body of Slack.
- "Equal to" section: Can be set arbitrarily from the dropdown
- "Example: Issue" section: Can set any message that will be the target of branching
Additionally, by clicking "+ Add Another Condition", you can set up to 5 branching conditions.

Please set it according to your business needs.
Once the settings are complete, click "Save" to complete the settings.
Step 5: Set to Send Email with Outlook
(1) Click on "Send Email" in the template.

(2) Select the account information to integrate.

(3) Set the Email cContent.
- TO: Set the email address to be notified
- CC/BCC: Set email addresses to be notified other than To
- Subject: Set the subject of the notification as desired
- Body: Set the content of the notification as desired (can quote message text or user ID from "Retrieved value")


(4) Confirm the content of the email to be sent.
If there are no issues, try executing "Test".

In practice, the obtained output will be reflected in the email body.
If the test is successful, the settings are complete.
Step 6: Turn on the Trigger and Check Operation
With this, all settings are complete.
Once the settings are complete, a pop-up like the one below will be displayed, so turn on the trigger.
Check to see if the flow operates correctly!

If You Want to Integrate Outlook Data with Slack
This time, we introduced how to integrate data from Slack to Outlook, but if you want to integrate data from Outlook to Slack, please also use the following template.
Notify Slack When a Specific Email is Received in Outlook
This flow is recommended for those who share information using Outlook and want to notify Slack to understand the content of tasks or meetings, etc.
Share Files on Slack When Receiving Emails with Attachments in Outlook
This flow is recommended for those who use Outlook to share information and want to ensure smooth collaboration by sharing files on Slack.
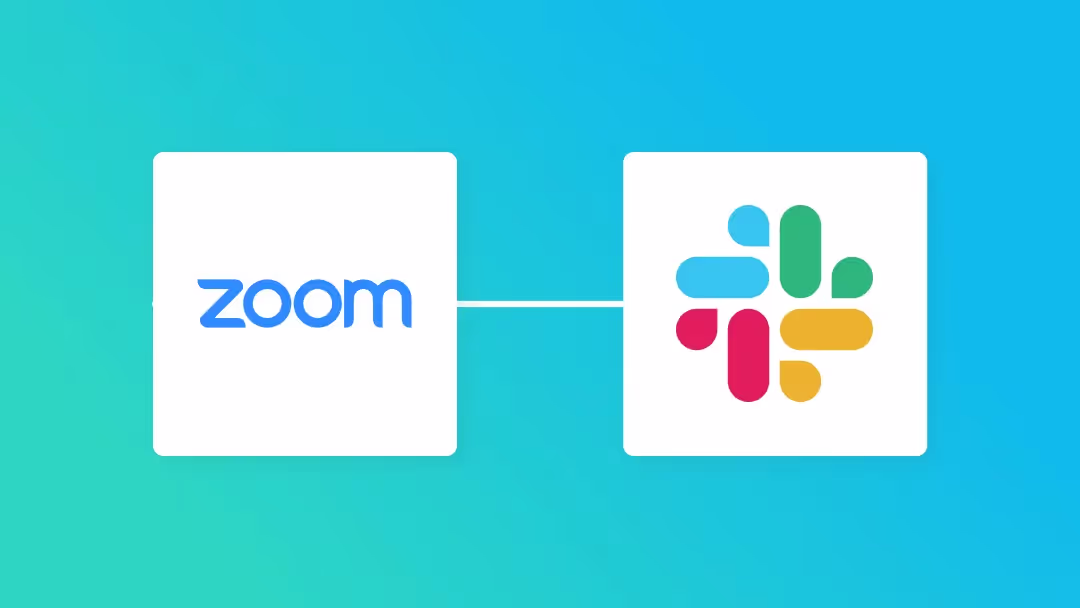
Other Automation Examples Utilizing Slack and Outlook Integration
The integration of Slack and Outlook can be used not only for automating message notifications but also for improving the efficiency of various tasks. If you find something interesting, please try these automation flows!
Convenient Automation Examples Using Slack
You can automate notifications for form responses, file saving, and even update information in other apps triggered by posts in Slack!
■Overview
The "Notify Slack when an event is created in Google Calendar" flow is a business workflow that streamlines schedule management and team communication.
■Who should use this template
- Teams that use Google Calendar and Slack on a daily basis
- Business professionals who want to automate schedule sharing and notifications
- Managers and team leaders looking to improve information sharing efficiency
- Those who spend time on manual notification tasks
■Benefits of using this template
- Faster schedule sharing: Events in Google Calendar are automatically notified in Slack, allowing you to smoothly keep up with the latest information.
- Prevention of information sharing omissions: Eliminates the need for manual sharing, preventing information leaks due to human error.
- Improved communication efficiency: Receiving schedule notifications on Slack makes it easier to coordinate with other tasks.
■Overview
The "Share HubSpot Deal Stage Changes on Slack" flow is a business workflow that streamlines communication for sales teams.
When a deal stage is updated in HubSpot, a notification is automatically sent to Slack.
This allows the entire team to understand the progress of deals in real-time, enabling prompt responses.
■Recommended for
- Sales representatives managing deals using HubSpot
- Team leaders who want to share information with their team in real-time via Slack
- Executives looking to improve sales efficiency through deal progress visualization
- IT personnel who want to automate operations by integrating multiple SaaS applications
■Benefits of using this template
Since changes in HubSpot deal stages are automatically shared on Slack, manual notification tasks can be eliminated.
Additionally, automatic notifications prevent missed information and overlooked confirmations.
Automation prevents human errors in manual tasks and strengthens information sharing.
■Overview
The "Add Members to a Google Workspace Group from Slack Posts" workflow is a business workflow that automatically adds members to a specified group in Google Workspace, triggered by specific posts on Slack.
This flow enables accurate member management and contributes to improved business productivity.
■Recommended for
- IT personnel who regularly use Slack and want to strengthen integration with Google Workspace
- Administrators who want to streamline team member management and are spending time on manual additions
- Business users who want to automate Google Workspace group management and optimize business workflows
- Those who want to introduce further automation into existing business workflows using Yoom
- Executives who want to centralize team communication and management tasks to enhance business efficiency
■Benefits of using this template
- Improved business efficiency: Automatically adding members from Slack posts eliminates the need for manual management tasks, saving time.
- Reduced error risk: Automation prevents human errors and maintains accurate group management.
- Consistent management process: A standardized workflow ensures the same results regardless of who operates it, maintaining management consistency.
■Overview
The flow "Register inquiries received on Slack into Shopify's customer information" is a business workflow that streamlines customer support and customer management.
By automatically adding inquiries received on Slack to Shopify's customer database, it reduces the hassle and errors of manual input, enabling prompt responses.
■Recommended for
- Customer support representatives who use Slack as their main inquiry channel
- Business owners who manage customers on Shopify and want to efficiently integrate inquiry information
- Team leaders who are considering automating tasks due to time-consuming manual data entry
- IT personnel at companies looking to improve the speed and accuracy of customer response
- Business owners aiming to optimize business workflows using Yoom
■Benefits of using this template
Since inquiries received on Slack are automatically registered into Shopify's customer information, it eliminates the hassle of manual data entry.
By automatically registering inquiry details into customer information, you can centralize customer support and customer management.
Automation prevents human errors in data entry and improves the accuracy of information.
■Overview
The "Notify Slack when an event is created in Google Calendar" flow is a business workflow that streamlines schedule management and team communication.
■Who should use this template
- Teams that use Google Calendar and Slack on a daily basis
- Business professionals who want to automate schedule sharing and notifications
- Managers and team leaders looking to improve information sharing efficiency
- Those who spend time on manual notification tasks
■Benefits of using this template
- Faster schedule sharing: Events in Google Calendar are automatically notified in Slack, allowing you to smoothly keep up with the latest information.
- Prevention of information sharing omissions: Eliminates the need for manual sharing, preventing information leaks due to human error.
- Improved communication efficiency: Receiving schedule notifications on Slack makes it easier to coordinate with other tasks.
■Overview
The "Share HubSpot Deal Stage Changes on Slack" flow is a business workflow that streamlines communication for sales teams.
When a deal stage is updated in HubSpot, a notification is automatically sent to Slack.
This allows the entire team to understand the progress of deals in real-time, enabling prompt responses.
■Recommended for
- Sales representatives managing deals using HubSpot
- Team leaders who want to share information with their team in real-time via Slack
- Executives looking to improve sales efficiency through deal progress visualization
- IT personnel who want to automate operations by integrating multiple SaaS applications
■Benefits of using this template
Since changes in HubSpot deal stages are automatically shared on Slack, manual notification tasks can be eliminated.
Additionally, automatic notifications prevent missed information and overlooked confirmations.
Automation prevents human errors in manual tasks and strengthens information sharing.
■Overview
The "Add Members to a Google Workspace Group from Slack Posts" workflow is a business workflow that automatically adds members to a specified group in Google Workspace, triggered by specific posts on Slack.
This flow enables accurate member management and contributes to improved business productivity.
■Recommended for
- IT personnel who regularly use Slack and want to strengthen integration with Google Workspace
- Administrators who want to streamline team member management and are spending time on manual additions
- Business users who want to automate Google Workspace group management and optimize business workflows
- Those who want to introduce further automation into existing business workflows using Yoom
- Executives who want to centralize team communication and management tasks to enhance business efficiency
■Benefits of using this template
- Improved business efficiency: Automatically adding members from Slack posts eliminates the need for manual management tasks, saving time.
- Reduced error risk: Automation prevents human errors and maintains accurate group management.
- Consistent management process: A standardized workflow ensures the same results regardless of who operates it, maintaining management consistency.
■Overview
The flow "Register inquiries received on Slack into Shopify's customer information" is a business workflow that streamlines customer support and customer management.
By automatically adding inquiries received on Slack to Shopify's customer database, it reduces the hassle and errors of manual input, enabling prompt responses.
■Recommended for
- Customer support representatives who use Slack as their main inquiry channel
- Business owners who manage customers on Shopify and want to efficiently integrate inquiry information
- Team leaders who are considering automating tasks due to time-consuming manual data entry
- IT personnel at companies looking to improve the speed and accuracy of customer response
- Business owners aiming to optimize business workflows using Yoom
■Benefits of using this template
Since inquiries received on Slack are automatically registered into Shopify's customer information, it eliminates the hassle of manual data entry.
By automatically registering inquiry details into customer information, you can centralize customer support and customer management.
Automation prevents human errors in data entry and improves the accuracy of information.
Convenient Automation Examples Using Outlook
You can automate tasks such as sending the details of created tasks or meetings to Outlook, or sending and saving the contents of emails and files received in Outlook to other applications!
■Overview
This is a flow that adds a record to Microsoft Excel when a new email arrives in Outlook.
By integrating Outlook with Microsoft Excel, you can avoid the need to manually add received email content to Microsoft Excel, ensuring up-to-date information and preventing any lapses in sharing.
■Notes
・Please integrate both Outlook and Microsoft Excel with Yoom.
・Microsoft365 (formerly Office365) has plans for home use and general business use (Microsoft365 Business). If you are not subscribed to the general business plan, authentication may fail.
■Overview
The "Notify Discord when an email is received in Outlook" flow is a business workflow that automatically sends notifications to a specified Discord channel when a new email is received in Outlook. This automation allows important email information to be shared with the team in real-time, enabling prompt responses and effective communication.
■Recommended for
- Business teams that regularly use Outlook and Discord
- Managers who want to share email notifications with the entire team in real-time
- Corporate personnel aiming to improve information sharing efficiency and facilitate smooth communication
■Benefits of using this template
Since notifications are automatically sent to Discord when an email is received in Outlook, it eliminates the need for manual notification tasks.
By notifying Discord when an email is received in Outlook, important information can be quickly shared with the team, allowing for smooth business operations.
Automation prevents human error in notifications, ensuring smooth information transmission within the team.
■Overview
This is a flow bot that adds a task to Asana when an email arrives in Outlook.
Please use it for managing email-related tasks in Asana.
The flow bot is triggered when an email with a specific subject arrives in Outlook.
Feel free to change the subject settings and the information registered in Asana.
■Notes
・Please integrate Yoom with both Asana and Outlook.
・Administrator approval from Office365 may be required for Outlook integration.
・If so, please refer to this article to request approval from the administrator.
・Microsoft365 (formerly Office365) has both a home plan and a general business plan (Microsoft365 Business), and if you are not subscribed to the general business plan, authentication may fail.
■Overview
Send a template email from Outlook using specific lead detail pages in Salesforce.
Feel free to change the email content to any desired value.
Additionally, attachments can be freely configured.
■Notes
・This can only be used on Chrome as it requires a Chrome extension.
・Salesforce is an app available only on the Team Plan and Success Plan. If you are on the Free Plan or Mini Plan, the operations and data connections set in Flow Bot will result in errors, so please be careful.
・Paid plans such as the Team Plan and Success Plan offer a 2-week free trial. During the free trial, you can use apps that are normally restricted.
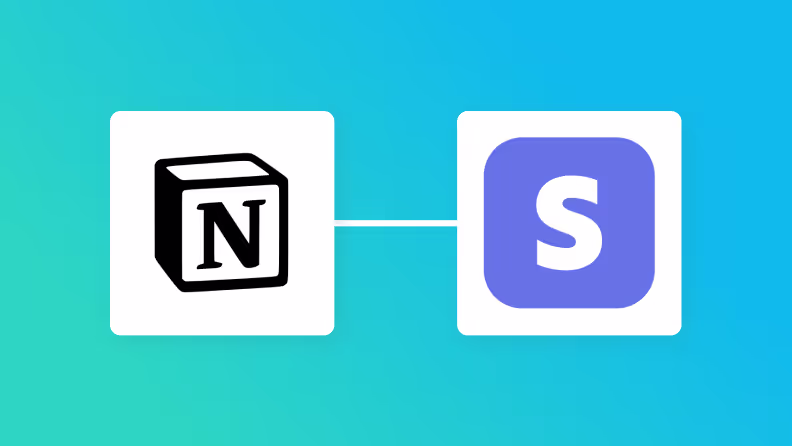
■Overview
This is a flow to create invoices using information from a Notion database and send emails via Outlook.
By using a trigger with a Chrome extension, you can directly activate the trigger from Notion.
■Recommended for
1. Companies utilizing Notion for business
・Those who register detailed billing information in the database
・Those who register information about client companies
2. Companies using Outlook as their main communication tool
・Those who use it as a means of communication with client companies
■Benefits of using this template
Notion is a tool that can manage not only data related to customers but also detailed information about invoices.
However, manually entering the information registered in Notion every time to create invoices and sending them via email can be time-consuming and may lead to decreased customer satisfaction.
This flow is suitable for those who want to build a good relationship with client companies through prompt invoice issuance.
By utilizing this flow, you can automatically add information from Notion to a Google Sheets template to create invoices and send them via email.
Automating the series of tasks related to invoices can significantly reduce manual work and improve operational efficiency.
By providing quick customer responses, you can lead to improved customer satisfaction.
■Notes
・Please integrate Notion, Google Sheets, and Outlook with Yoom.
・For instructions on setting up triggers using the Chrome extension, please refer to here.
・Microsoft365 (formerly Office365) has both a home plan and a general business plan (Microsoft365 Business), and if you are not subscribed to the general business plan, authentication may fail.
■Overview
This is a flow that adds a record to Microsoft Excel when a new email arrives in Outlook.
By integrating Outlook with Microsoft Excel, you can avoid the need to manually add received email content to Microsoft Excel, ensuring up-to-date information and preventing any lapses in sharing.
■Notes
・Please integrate both Outlook and Microsoft Excel with Yoom.
・Microsoft365 (formerly Office365) has plans for home use and general business use (Microsoft365 Business). If you are not subscribed to the general business plan, authentication may fail.
■Overview
The "Notify Discord when an email is received in Outlook" flow is a business workflow that automatically sends notifications to a specified Discord channel when a new email is received in Outlook. This automation allows important email information to be shared with the team in real-time, enabling prompt responses and effective communication.
■Recommended for
- Business teams that regularly use Outlook and Discord
- Managers who want to share email notifications with the entire team in real-time
- Corporate personnel aiming to improve information sharing efficiency and facilitate smooth communication
■Benefits of using this template
Since notifications are automatically sent to Discord when an email is received in Outlook, it eliminates the need for manual notification tasks.
By notifying Discord when an email is received in Outlook, important information can be quickly shared with the team, allowing for smooth business operations.
Automation prevents human error in notifications, ensuring smooth information transmission within the team.
■Overview
This is a flow bot that adds a task to Asana when an email arrives in Outlook.
Please use it for managing email-related tasks in Asana.
The flow bot is triggered when an email with a specific subject arrives in Outlook.
Feel free to change the subject settings and the information registered in Asana.
■Notes
・Please integrate Yoom with both Asana and Outlook.
・Administrator approval from Office365 may be required for Outlook integration.
・If so, please refer to this article to request approval from the administrator.
・Microsoft365 (formerly Office365) has both a home plan and a general business plan (Microsoft365 Business), and if you are not subscribed to the general business plan, authentication may fail.
■Overview
Send a template email from Outlook using specific lead detail pages in Salesforce.
Feel free to change the email content to any desired value.
Additionally, attachments can be freely configured.
■Notes
・This can only be used on Chrome as it requires a Chrome extension.
・Salesforce is an app available only on the Team Plan and Success Plan. If you are on the Free Plan or Mini Plan, the operations and data connections set in Flow Bot will result in errors, so please be careful.
・Paid plans such as the Team Plan and Success Plan offer a 2-week free trial. During the free trial, you can use apps that are normally restricted.
■Overview
This is a flow to create invoices using information from a Notion database and send emails via Outlook.
By using a trigger with a Chrome extension, you can directly activate the trigger from Notion.
■Recommended for
1. Companies utilizing Notion for business
・Those who register detailed billing information in the database
・Those who register information about client companies
2. Companies using Outlook as their main communication tool
・Those who use it as a means of communication with client companies
■Benefits of using this template
Notion is a tool that can manage not only data related to customers but also detailed information about invoices.
However, manually entering the information registered in Notion every time to create invoices and sending them via email can be time-consuming and may lead to decreased customer satisfaction.
This flow is suitable for those who want to build a good relationship with client companies through prompt invoice issuance.
By utilizing this flow, you can automatically add information from Notion to a Google Sheets template to create invoices and send them via email.
Automating the series of tasks related to invoices can significantly reduce manual work and improve operational efficiency.
By providing quick customer responses, you can lead to improved customer satisfaction.
■Notes
・Please integrate Notion, Google Sheets, and Outlook with Yoom.
・For instructions on setting up triggers using the Chrome extension, please refer to here.
・Microsoft365 (formerly Office365) has both a home plan and a general business plan (Microsoft365 Business), and if you are not subscribed to the general business plan, authentication may fail.
In Conclusion
By automating the integration of Slack and Outlook, you can reduce manual workload and enable smoother information sharing. Even without programming knowledge, you can easily set it up using Yoom, making it accessible for anyone to use immediately.
If you find it tedious to manually transfer information every time or often miss notifications, why not try Yoom? By registering for free, you can immediately experience the convenience of integrated workflows. Register now and start streamlining your tasks!