Integrate TimeRex with Salesforce to automatically add a lead to Salesforce when a schedule is registered in TimeRex.
How to Integrate Applications
・
2025-04-16
Integrate TimeRex with Salesforce to automatically add a lead to Salesforce when a schedule is registered in TimeRex.
y.matsumoto
To automate daily tasks and create an environment where you can focus on more essential work, streamlining operations is effective. In particular, by automating the task of adding leads to Salesforce, you can achieve accurate and swift processing, thereby improving operational efficiency. In this blog, we will introduce how to integrate TimeRex with Salesforce to automatically add leads to Salesforce by referencing the information once a schedule is registered in TimeRex. By utilizing this integration, you can reduce the hassle and errors of manual data entry, and expect an overall improvement in productivity. We will explain the actual integration method and specific benefits in detail, so please read to the end.
Recommended for
Those who are already using TimeRex and Salesforce and want to streamline data entry tasks
Sales representatives who want to automate quick follow-ups after meetings
Those considering improving data accuracy in lead management and reducing human errors
From here, we will explain how to use the no-code tool Yoom to "add a lead to Salesforce when a schedule is registered in TimeRex."
[What is Yoom]
How to Automatically Convert Scheduled Appointments in TimeRex into Leads in Salesforce
This can be achieved by receiving the registration of a schedule in TimeRex using TimeRex's API and creating a record in Salesforce's lead object using Salesforce's API. Generally, programming knowledge is required to achieve this, but with the no-code tool Yoom, it can be easily accomplished without programming knowledge.
The process to complete the flow will proceed with the following steps.
Integrate TimeRex and Salesforce with My Apps
Copy the template
Set the trigger in TimeRex, then set the action in Salesforce
Turn on the trigger
You can issue a Yoom account from here. If you are already registered, please log in!
Step 1: TimeRex and Salesforce My App Integration
1. How to Register TimeRex
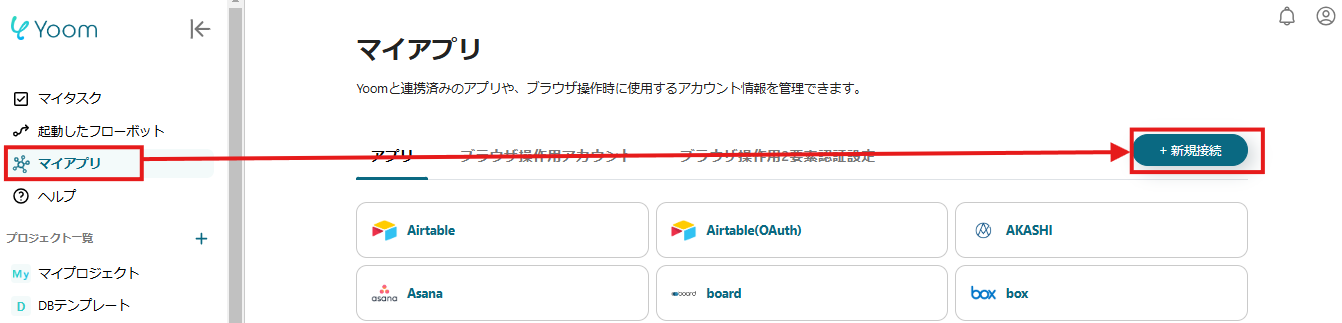
After clicking "My Apps," search for TimeRex from "New Connection."
The above screen will be displayed, so set the account name and access token respectively. Once the setup is complete, click "Add."
2. How to Register Salesforce Next, search for Salesforce from "New Connection."
Once you log in to Salesforce, the registration to My Apps will be complete. ※Note: Salesforce is a feature available only on some paid plans, and a 2-week free trial is available. ※Please be careful not to use accounts linked with other services.
This completes the My App integration of TimeRex and Salesforce!
Step 2: Copy the Template
Once you have confirmed that the new connection of the target app is complete in your Yoom account, click "Try this template" below.
Step 3: Setting Up a Trigger to Activate When a Webhook from TimeRex is Received
First, click on "When a Webhook is Received" to begin the setup.
Please ensure there are no errors in the "Account Information to Integrate with TimeRex". The title can be edited. Click "Next" without changing the trigger action.
After copying the Webhook URL from the above screen, please configure it in the TimeRex management screen.
Once the setup is complete, register a test schedule in TimeRex.
If the test at the bottom of the screen is successful, the output of the schedule registered in TimeRex will be displayed. After confirming there are no errors in the retrieved information, click "Save".
Step 4: Branching When the Event Type is Not Schedule Confirmation
Next, set up the item "When the Event Type is Not Schedule Confirmation". The branching feature is available only in some paid plans, with a 2-week free trial available.
In this step, conditions are set so that the flow does not proceed except for schedule registration.
Since the "Branch Target Output" and "Branch Conditions" are already set, there is no need to change them, but please confirm that they are set as shown on the above screen.
After confirming, click "Save".
Step 5: Add a Lead to Salesforce
Next, click "Add a Lead" and set up the action.
Ensure there are no errors in the "Account Information to Integrate with Salesforce". The title can be edited. Click "Next" without changing the action.
Set "Name" as shown in the image above. By setting it this way, when a schedule is registered in TimeRex, the "Name" will be automatically retrieved and a lead will be added to Salesforce.
Similarly, set "Company Name" and "Email Address".
Refer to the annotations outside the frame to set the Lead Owner ID and My Domain URL.
After completing the setup, click "Test". If "Test Successful" is displayed, save the settings.
Step 6: Turn ON the Trigger
Finally, click "Turn ON the Trigger". Check to see if the flow bot starts correctly.
This completes the flow of "Adding a Lead to Salesforce When a Schedule is Registered in TimeRex".
Introduction to Other Examples of Automation Using TimeRex
There are many other examples of automation using TimeRex, so let me introduce a few.
1. This is a flow where customer information can be automatically added to Sansan when a schedule is registered with TimeRex. By utilizing this flow, manual data entry becomes unnecessary. This automation improves work efficiency, allowing employees to focus on other important tasks.
2. This is a flow that automatically adds scheduled events from TimeRex to Microsoft Excel. By utilizing this flow, you can automatically sync schedule and participant data to Microsoft Excel whenever an event is registered in TimeRex. This allows you to frequently check the management screen and notification emails, potentially reducing the risk of input errors and missed registrations.
3. This is a flow where you can automatically receive notifications via Gmail when a schedule is registered in TimeRex. By utilizing this flow, you can automatically receive notifications in Gmail every time a schedule is registered. This automation may contribute to improving work efficiency by allowing you to respond quickly to schedules.
Benefits and Examples of Integrating TimeRex with Salesforce
Benefit 1: Improved Productivity through Operational Efficiency
By integrating TimeRex with Salesforce, you can reduce the effort and time required for tasks, as you no longer need to manually add information to Salesforce when you add a schedule to TimeRex. This system, where schedules registered in TimeRex are automatically recorded as lead information in Salesforce, reduces the risk of duplicate entries and data omissions, thus streamlining operations. This allows staff to allocate more time to important tasks such as customer service and strategic planning.
Benefit 2: Achieving Rapid Follow-Up
When TimeRex is integrated with Salesforce, leads can be added to Salesforce the moment a schedule is registered in TimeRex, allowing staff to quickly start follow-ups. This enables swift action after meetings with new clients, potentially improving customer satisfaction and preventing lost opportunities. This automation is expected to facilitate rapid follow-up with customers.
Benefit 3: Reduction of Human Errors
Integrating TimeRex with Salesforce can prevent input errors and data inconsistencies that often occur when manually registering lead information in Salesforce. When transferring information registered in TimeRex to Salesforce, there is a risk of human error such as missing information or incorrect entries. However, with this automation, reservation information can be accurately captured without omissions, which is expected to improve data accuracy. This enhances the accuracy of lead information.
Conclusion
In this blog, we introduced how to integrate TimeRex with Salesforce, allowing you to automatically add leads to Salesforce by referencing the information when you register a schedule in TimeRex. How was it? By implementing this automation, you can prevent human errors such as input mistakes and data omissions, and immediately utilize accurate lead information. Additionally, rapid follow-ups become possible, improving data accuracy and supporting team-wide information sharing and decision-making. By utilizing Yoom, you can easily set up app integrations with no code, so please refer to this blog to experience automation!
The person who wrote this article
y.matsumoto
Until now, I have experienced sales and sales office work in the human resources industry.
Based on my experience in my previous job, I feel that the problems faced by various companies can be reduced by “automating operations.”
Through Yoom, we will continue to send out information on a daily basis so that we can solve your problems even a little bit!
Conventional RPA can only automate simple repetitive tasks, and the setup process was very complicated. With “hyperautomation,” which combines various technologies such as AI, API, RPA, and OCR, it is possible to automate many tasks that could not be realized until now more easily than before.
Most tools simply connect one app to another, leaving the complex tasks to you. Yoom goes much further: From document creation and browser automation to OCR and generative AI, Yoom handles it all seamlessly in one platform.
Why settle for basic integrations? Streamline your entire workflow with Yoom’s powerful hyperautomation.


.png)


.avif)
.png)
.png)


