

.avif)

1. Hover over the banner and click "View Details"
2. Click "Try this template" on the page you navigated to
3. Register for Yoom
※ If you have already completed registration, the login screen will be displayed, so please log in.
Step 2: Setting up a trigger to activate when a post is published in WordPress
1. Open the copied template.
※ You can change it to any title from the red frame part in the image below.

2. Click the Flowbot's "App Trigger: When a post is published".

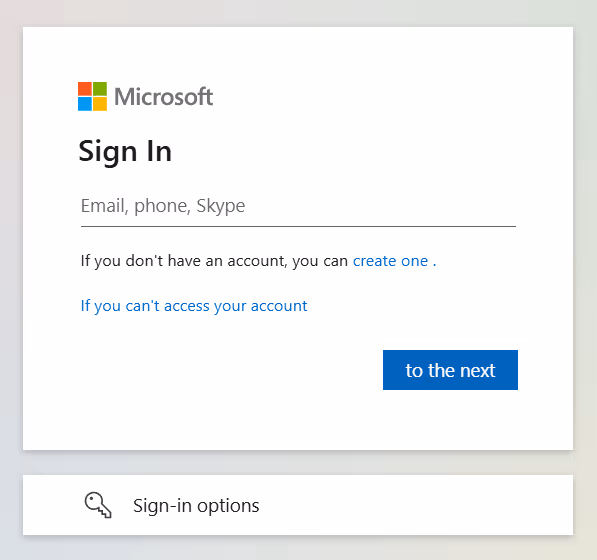
3. Select the linked account and action.
Change the title if necessary and click "Next".

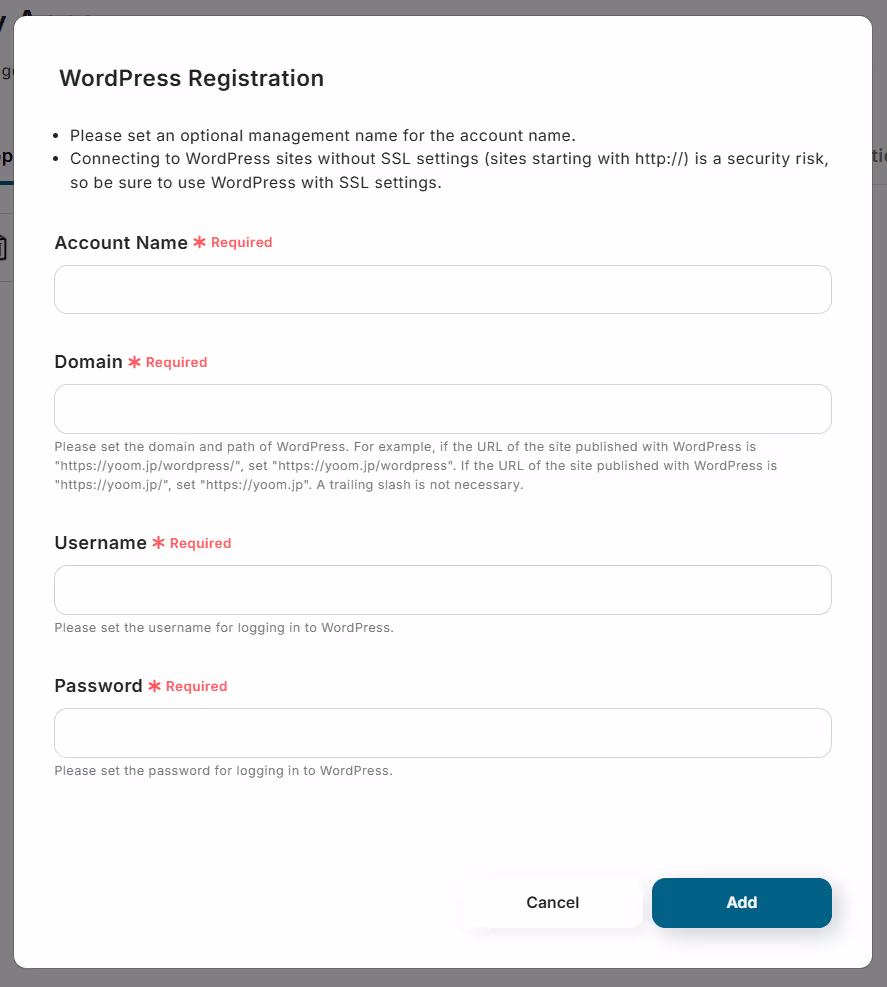
4. Set up the API connection for the app trigger.
Select the trigger activation interval. A shorter setting is generally recommended.
※ The time you can specify varies depending on the plan. Reference: List of feature restrictions and usage limits for each plan

5. Click "Test".
6. If the test is successful, click "Save".
Step 3: Setting up the action to send an email in Outlook
1. Click the Flowbot's "Send Email: Send Email".

2. Set up the email.
・Title: Can be changed if necessary.
・Email settings: Use the output obtained in Step 2 to enter the necessary information in each field.
※ The image below is an example of input.


※ The image below is an example of output reference. When you click the input field, candidates will be displayed, so please select the target item.

3. Click "Next".
4. Check the email content and click "Test".
5. If the test is successful, click "Save".
This completes the flow "Notify by email in Outlook when a post is published in WordPress".
Turn the trigger of the saved flow to "ON" to activate it.
The Flowbot template used this time
Notify by email in Outlook when a post is published in WordPress


.avif)


