How to Integrate Applications

2025-07-30

How to Automate Zendesk Ticket Responses with Dify and Share via Slack

k.hieda

Have you ever wished that you could handle customer inquiries faster and easier?

<span class="mark-yellow">By incorporating AI automation with Zendesk, managing customer support can be made easier and speed up response time while ensuring high-quality replies</span>.

In this article, we'll walk you through how to generate response suggestions with Dify and send them to Slack whenever a ticket is created in Zendesk. This no-code solution can help boost your team's productivity while improving customer satisfaction :)

✨ Recommended For

  • Teams managing a high volume of daily customer inquiries and feeling overwhelmed
  • Anyone struggling to provide quick responses due to complex inquiries
  • Organizations facing inconsistent response quality based on team member experience and skills
  • Anyone who wants to improve the speed and accuracy of customer support
  • Businesses that want to improve team efficiency and make better use of available resources

Meet Yoom: No-Code Automation

Yoom is a next-generation no-code automation that lets you connect and automate tasks between your favorite apps. Connecting different apps can be challenging for non-engineers, but <span class="mark-yellow">Yoom makes automation accessible to everyone</span>.

  • 🌐 Connect with apps like Zendesk, Dify, Slack, and more.
  • 📖 Use automation templates - no technical setup required
  • 📈 Boost productivity and reduce human errors

You don't need to go through a complex setup and IT jargon, you can build your automation workflows with just a few clicks :) It's designed for those who want to streamline their daily work and save hours of time and stress from repetitive work.

👉 Sign Up for Yoom Here – Quick and Easy in Just 30 Seconds!

In this guide, you'll learn the step-by-step process of how to use Yoom to <span class="mark-yellow">send a Dify response to Slack when a Zendesk ticket is created</span>.

✔️ For Those Who Want To Try It Now

Yoom offers ready-made templates for easily setting up an <span class="mark-yellow">automated ticket response process with Zendesk, Dify, and Slack</span>. Click the "Try It" button to get started now!

We’ll also walk you through the step-by-step process of creating this automation flow in the following section of this article.

🚀 How to Create an Automated Ticket Response Process

Let's walk through how to set up a flow that <span class="mark-yellow">automatically creates responses with Dify for the tickets created in Zendesk and shares them via Slack</span>.

⏱️ Setup time: 10 minutes

🔧 What You’ll Need

  • A free Yoom account
  • Access to Dify, Zendesk, and Slack


By using Yoom's trigger function, you can easily obtain the latest ticket information from Zendesk's API and send it to Dify for generating responses. The response is then sent to Slack via its API, creating a smooth workflow from getting inquiry details to notifying the team. Normally, this kind of automation would require programming skills, but with Yoom, anyone can set it up easily!

Step 1: Connect Apps to Yoom

Register the app information to be integrated in Yoom.
Go to "My Apps" from the left side menu, and click the "+ Add" button.

Connect Zendesk

Search for Zendesk from the app list and select it.

Account Name

  • use a name that's easy to recognize, such as your company name or the person responsible for the account.

Email Address

  • enter your email address registered on Zendesk

API Token

  • Open the "Admin Center" in Zendesk's global menu.
  • From the left menu, click "Apps and Integrations", then select "Zendesk API".
  • Click "Add API token".
  • A screen to create a new key will appear. Enter a name for the key and click "Next" to generate and display the API key.
  • The secret key at the bottom is your API token. Copy it and save it.
  • Return to Yoom and paste the copied API token in the API Token field. Then click "Add".

⚠️ Note: Zendesk integration is only available on the Yoom’s paid plans. If you’re using the Free plan, your  Flowbot may face errors due to limited access. But don’t worry - we offer a 2-week free trial! You can try all features without restrictions. For more information about Yoom and its plans, visit our Yoom Help Center.

📚 References: For detailed settings, you can refer to the full guide here.

Connect Dify

Search for Dify in the app list and select it.

Account Name

  • use a name that's easy to recognize, such as your company name or the person responsible for the account.

Access Token

  • Open the app you created and select "Monitoring" from the left menu.
  • Click on "API key" under Backend and Service API.
  • In the API Secret Key popup, click + Create a new secret key to display the access token. Copy the key and paste it into the Access Token field in Yoom. Then click "Add".

📚 References: For detailed settings, you can refer to the full guide here.

Connect Slack

Search for Slack in the app list and select it. 

Select the Slack workspace and the channel where messages should be posted.
Click "Allow" to grant permissions and complete the integration.

📚 Reference: For more detailed steps on how to connect Slack, refer to this guide.

Step 2: Copy the Template

Click the "Try It" button to copy the pre-built template into your project.

Click "Try this template".

Click "OK" and give the Flowbot a name to recognize.

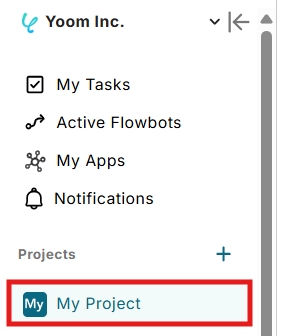
This template will be copied to your “My Project”.

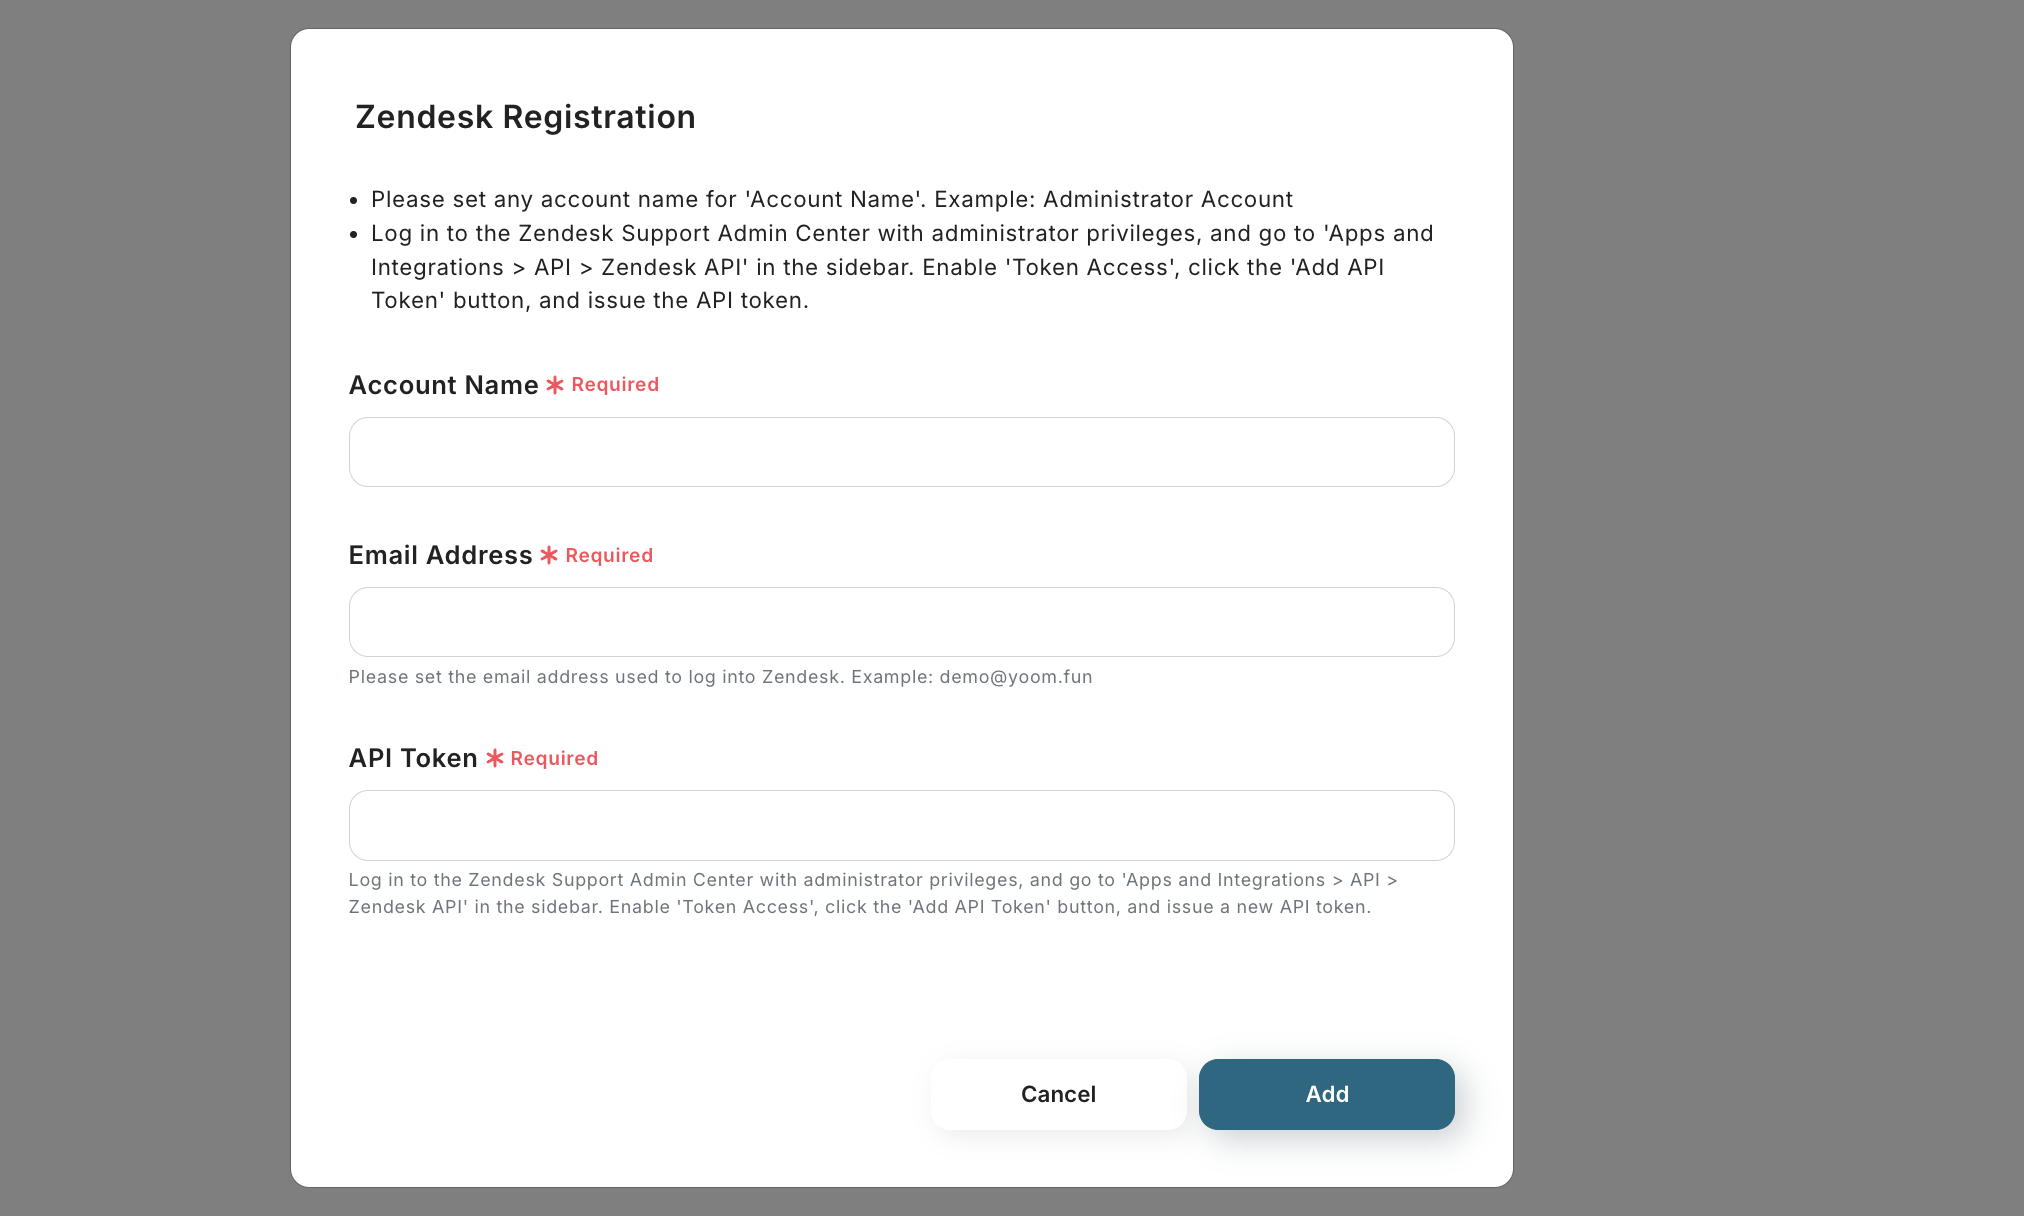
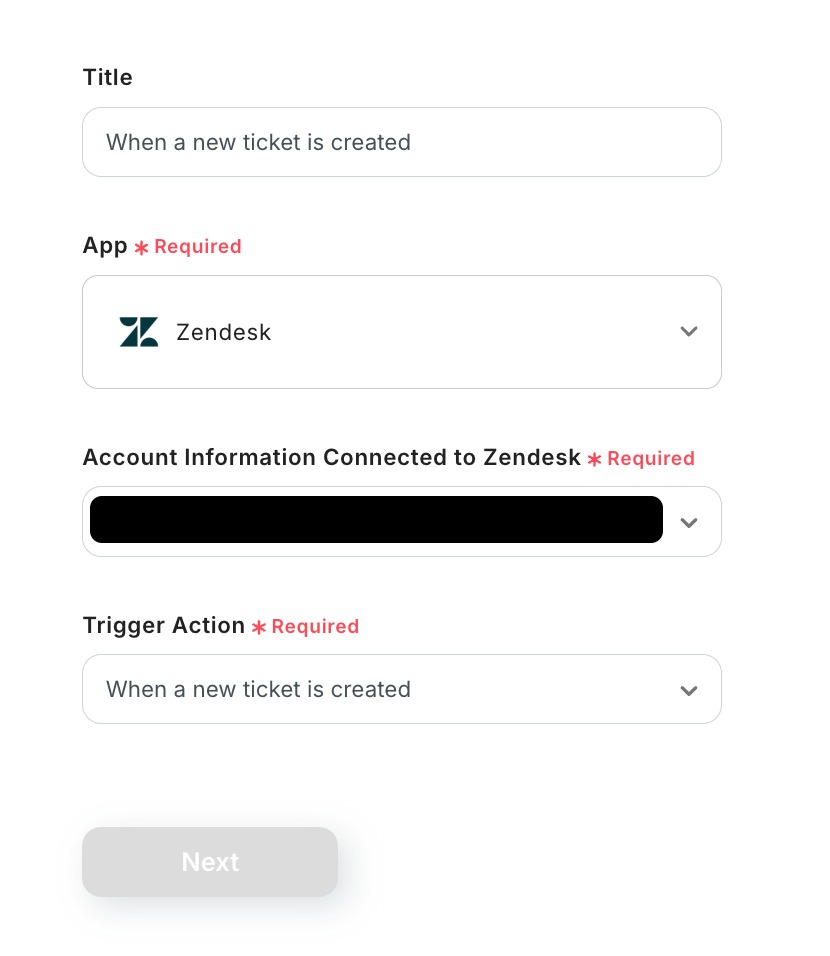
Step 3: Set Up Zendesk Trigger Action

In this step, you will set up to retrieve ticket information issued in Zendesk.

Click on the first step of the template.

The next page is pre-configured. You can change the title if you want.
Then click "Next".

Trigger Interval

  • Set your trigger interval (frequency of sync) to how frequently Yoom checks Zendesk for updates. It can be set to 5 minutes, 10 minutes, 15 minutes, 30 minutes, or 60 minutes.
  • We recommend setting the trigger to the shortest activation interval available for your plan.

⚠️ Note: The trigger interval varies depending on your Yoom plan. Be sure to check your current plan’s limit.

Subdomain

  • Enter the value before ".zendesk.com" in the URL.

Then, click "Test".
If the test is successful, the retrieved value will get updated as below.

We will use these data in the following steps so make sure they are correct :)

Step 4: Send Chat Message

Click on the action labeled "Send Chat Message".

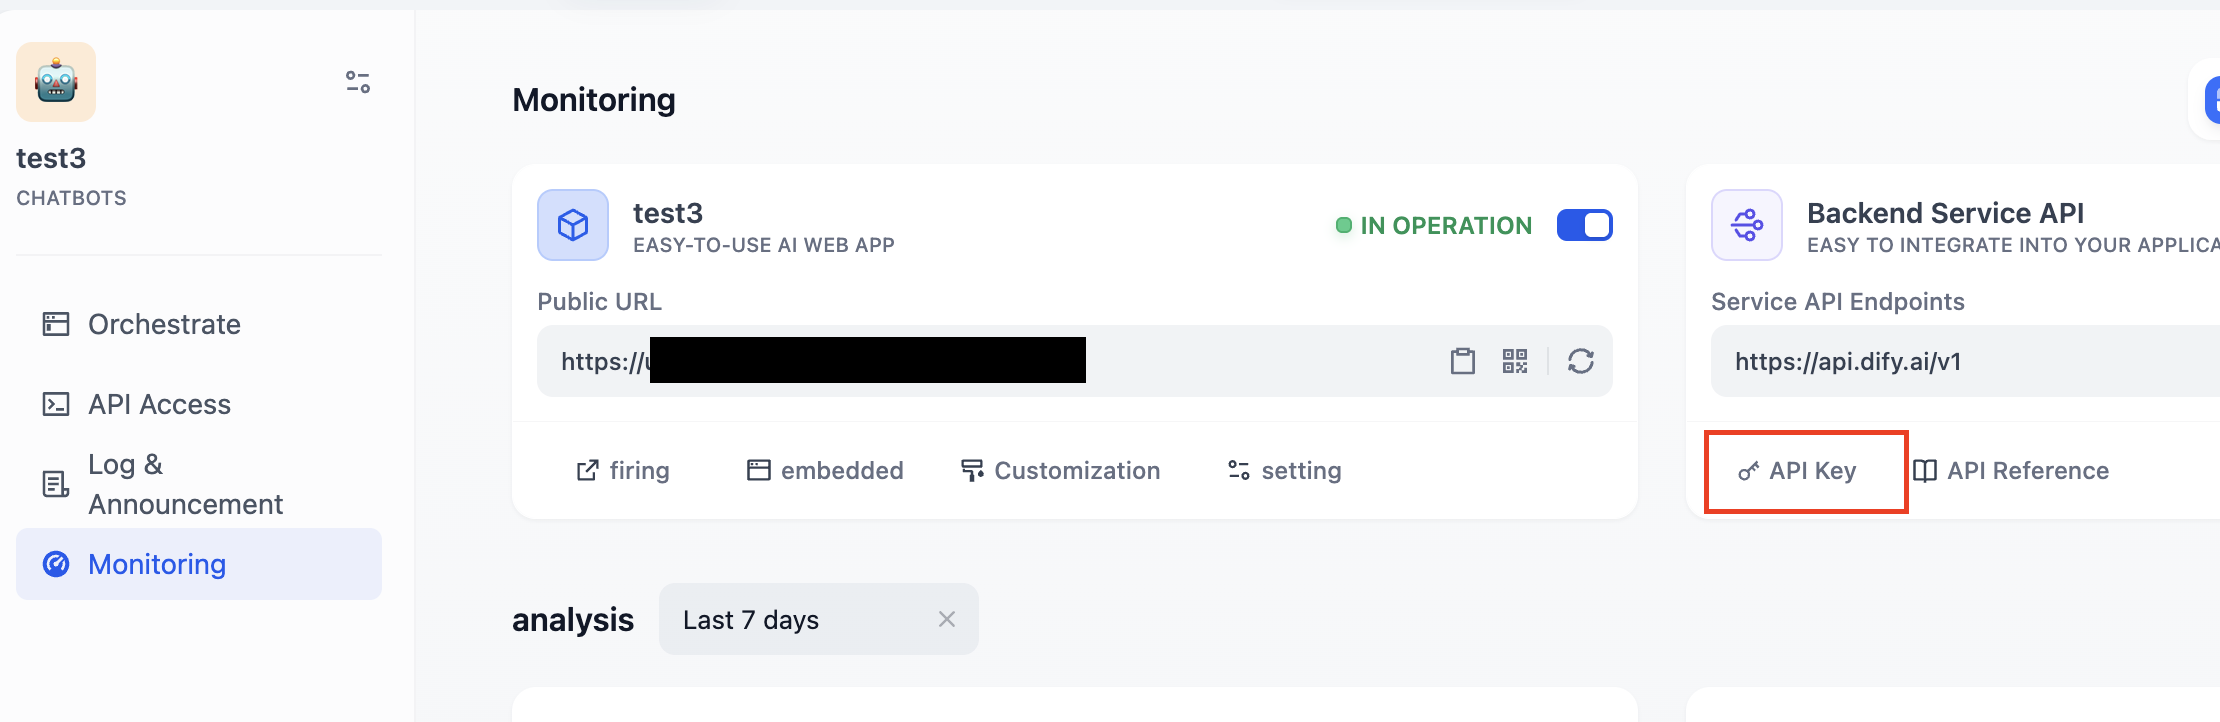
In this step, we will set up the flow to send to Dify.

The next screen is already pre-configured.

  • App Trigger Title: Change it as necessary.
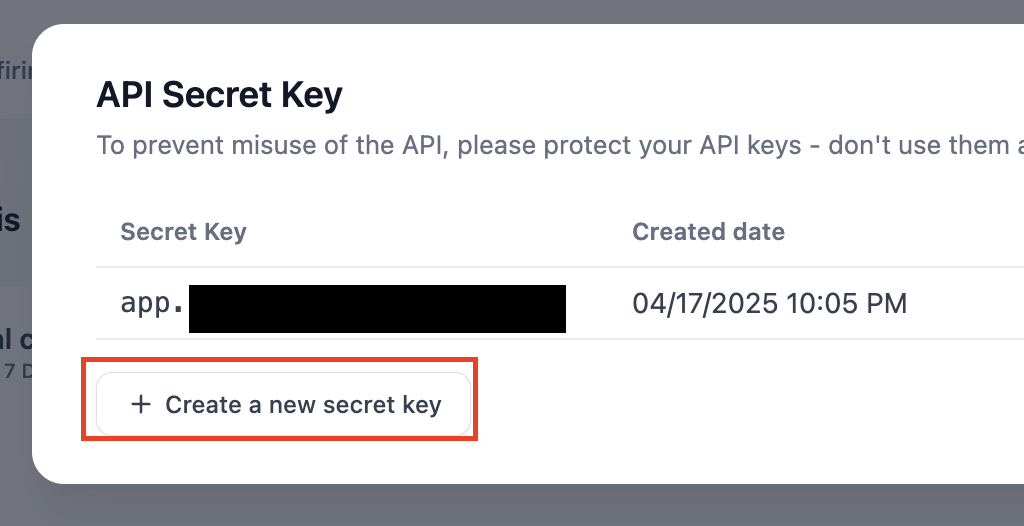
  • App
  • Account connected with Dify
  • Trigger Action

Confirm the setup is ok, then click "Next".

Query

  • Click on the query field to select items to put in it.
  • The retrieved value from Zendesk "Description" is pre-set, but you can customize it by selecting other retrieved values as needed.

User

  • Entering a new value like 'user123' will start a chat as a new user, while entering an existing user's ID will allow you to continue the chat with that user's history.

Variable

  • It's optional, but using them allows for more flexible and efficient prompt and notification settings.  
  • For example, dynamic information like 'name' or 'date' can be automatically reflected in the prompt, reducing setup effort and providing more accurate responses for the user.

Once setup is complete, run a test.
If successful, your retrieved data should get updated as below.

Make sure you save the setting :)

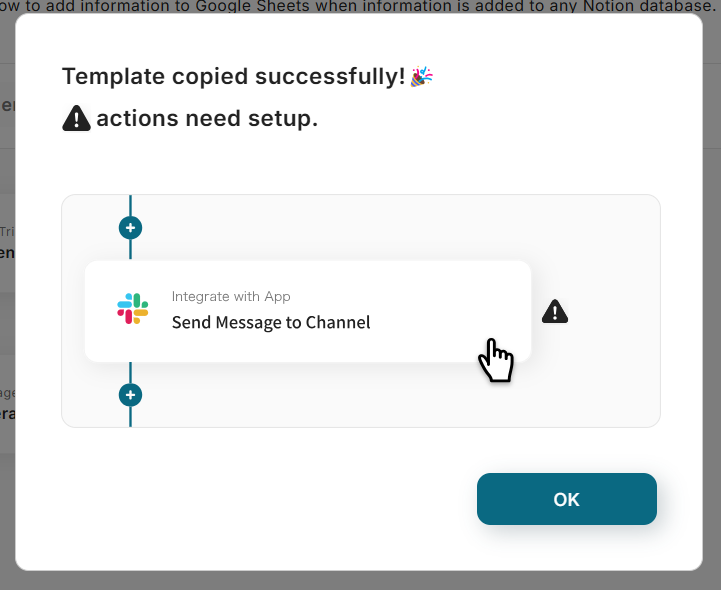
Step 5: Send Message to Channel

Click on the action labeled "Send Messages to Channel".

In this setup, we will make a template message to be sent in Slack.

This screen is pre-configured. Change if as needed, then click "Next".

Destination Channel ID

  • Clicking the field to display a list of available channels from your integrated Slack account.
  • When you select the channel, its ID will be automatically populated.

Message Content

  • Create the template message you want to send.
  • Click the message field to insert values retrieved from previous steps. By quoting Zendesk details and including Dify's response content, you can easily verify consistency.

Run a test and if successful, hit "Save".

Step 6: Activate the Flowbot

Toggle the "Trigger On" button to activate your flow!
Check if the Flowbot you set up is working properly.

That’s it!

The Flowbot is now complete!

💡 Other Automation Examples Using Zendesk, Dify, and Slack

You can try out more automations by utilizing Dify, Slack, and Zendesk with Yoom. Here are some more examples you can explore for your next automation!

Automation Using Zendesk

Add Issues or Tasks When a Ticket is Created

Automatically create tasks or issues whenever a ticket is generated in Zendesk, keeping your workflow seamless without switching between tools.

Notify When a Ticket is Created

Send notifications automatically to keep everyone informed when a new Zendesk ticket is created. This can ensure no important details are missed.

Automation Using Dify

Generate and Respond with Dify Chatbot on Message Posts

Automatically analyze incoming messages with Dify and generate appropiate responses. This can save time and reduce manual input.

Create and Send Responses via Dify When a Chat is Created on Channel Talk

AI-generated responses can be quickly edited if necessary before sending. This can ensure quality and streamlined operations.

Automation Using Slack

Notify Slack When a Task is Updated

Quickly send a notification in Slack when a task is updated, keeping the team updated and reducing delays.

Notify Slack When a Message is Posted

Respond to Slack messages from customers quickly, ensuring no communication is missed.

Add Content Posted on Slack

Automatically add content shared on Slack to the system :)

👏 Benefits of Integrating Zendesk, Dify, and Slack

1. Enhance Customer Satisfaction with Faster Responses

<span class="mark-yellow">When a Zendesk ticket is created, Dify automatically generates a response and notifies through Slack, reducing response times and boosting customer satisfaction</span>. During a busy period, Dify can quickly analyze the ticket content and suggest a response, allowing support representatives to review and send it with minimal delay.

2. Ensure Consistent Response Quality with AI

By using past inquiry data, Dify ensures consistent, high-quality responses. New members on the team no longer need to consult supervisors for difficult inquiries. They can <span class="mark-yellow">rely on Dify to automatically generate appropiate response suggestions, ensuring smooth and standardized responses</span>.

3. Strengthen Team Collaboration with Slack

<span class="mark-yellow">Quickly share response suggestions on Slack to improve team collaboration and resource allocation</span>. If a high-priority ticket arises, your team members can quickly pick it up by reviewing the response suggestions in Slack. By sharing updates on who is working on what, Slack helps prevent missed responses and task duplication.

📖 Summary

Now you know how to integrate Dify, Slack, and Zendesk to automatically generate response suggestions with Dify and share them through Slack when a ticket is created in Zendesk. By integrating these apps with Yoom, you can address challenges like reducing response time, ensuring consistent response quality, and improving team collaboration.

<span class="mark-yellow">Best of all, no technical expertise is needed, and anyone can easily set it up!</span> Ready to simplify your workflows? Sign up for Yoom and try it today!

👉 Create your free Yoom account now

The person who wrote this article
k.hieda
With a decade of experience as a Web Planner and Director, my primary responsibilities at a web production company included proposing and managing revision and operation plans for clients. Currently, I am a parallel worker. In the Content Division at Yoom, I am involved in blog production, while also handling external PR projects for companies as an independent contractor. As I embark on a new venture in the vacation rental industry, I am committed to optimizing routine work efficiency.
Tags
Zendesk
Dify
Slack
Integration
Notification
Automatic
Automation
AI
Related Apps
App integration
What is Yoom hyperautomation?
Conventional RPA can only automate simple repetitive tasks, and the setup process was very complicated.
With “hyperautomation,” which combines various technologies such as AI, API, RPA, and OCR, it is possible to automate many tasks that could not be realized until now more easily than before.
Don't Just Connect Apps—Automate Everything
Most tools simply connect one app to another, leaving the complex tasks to you. Yoom goes much further: From document creation and browser automation to OCR and generative AI, Yoom handles it all seamlessly in one platform.

Why settle for basic integrations? Streamline your entire workflow with Yoom’s powerful hyperautomation.
Learn more about Yoom
Helpful Materials
I understand Yoom! 3-piece set of materials
Download materials
Understand in 3 minutes! Yoom service introduction materials
Download materials
Find out by Before After! Yoom Case Study Collection
Download materials
See a list of useful materials
What is Yoom?
Many tasks that were previously impossible can be automated more easily than before.
see details
See Details