

.avif)

Next, let's integrate Zendesk and Discord with Yoom. This is called "My App Integration".
My App Integration
Click on the template banner, and you'll find a "Try this template" button at the bottom of the screen. Click it.
This will take you to a page called "My Project". From the menu on the left side of the screen, select "My App"!
↓
Let's start with Zendesk's My App integration!
Enter "Zendesk" in the search box, and the Zendesk icon will appear. Click it!

Click on the red-framed Zendesk My App Registration Method to issue an API token.
Once issued, encode it in base64 format along with the email address registered with Zendesk.
Encoding in base64 format is
<span class="mark-yellow">Email Address/token:API Token</span>
which is the email address and the issued API token connected by /token:.
For example, if the email address is 12345ABCD@yoom.co.jp and the API token is abcd7891011
12345ABCD@yoom.co.jp/token:abcd7891011
you can encode it in base64 and you're good to go!
"Encode in base64" might be a term you've never heard before, but if you search for "encode in base64" with a search tool, you'll find many tools that automatically convert it, so using such tools will get it done quickly.
After that, enter an easy-to-understand management name as the account name, copy and paste the encoded one into the API token on Yoom's screen, and press Add at the bottom right to complete the integration of Zendesk and Yoom!
↓
Once the Zendesk My App integration is complete, let's integrate Discord with Yoom next.
Enter "Discord" in the search box, and the Discord icon will appear. Click it!
Two options, Discord and Discord (v2), will be displayed, so please select Discord (v2).
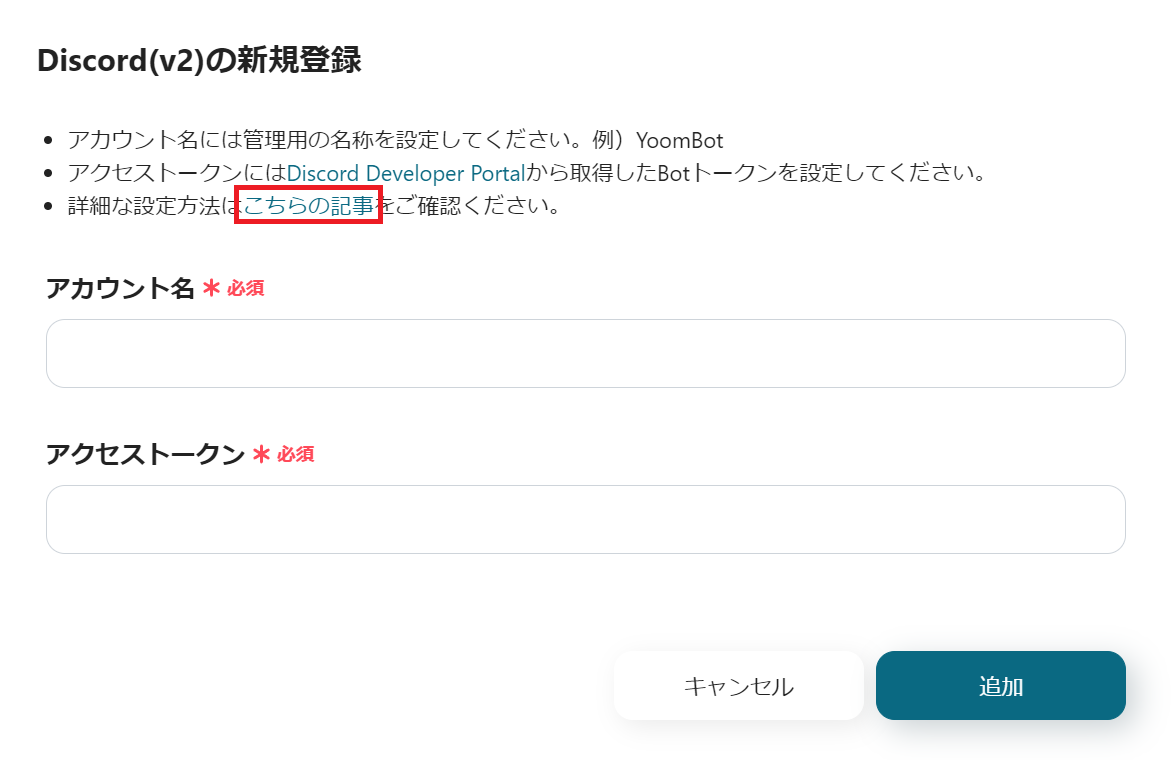
Let's proceed with registration while checking the red-framed Discord (v2) My App Integration Details Page.
Once the two apps, Zendesk and Discord, are integrated with Yoom, the next step is to set up the contents of the flow bot!
The setup procedure for this flow bot is in two stages!
Zendesk Trigger Settings
From My Project on the left side of the screen, click on "【Copy】Notify Discord when a ticket is created in Zendesk"! Click Edit at the top right.
↓
Click on "When a new ticket is created" in the Zendesk icon.
Since the necessary items are pre-entered by using the template, check if the account information to be integrated with Zendesk is correct, and then click Next!
↓

Enter the subdomain as shown in the red frame.
Once the subdomain is entered, press the Test button at the bottom of the screen, and if "Test Successful" is displayed in blue, click Save!
That's all for the Zendesk settings! Didn't it finish surprisingly quickly? Next, let's move on to the Discord settings.
Discord Settings
Click on "Notify Discord" in the Discord icon.
As with the previous step, since the necessary items are pre-entered by using the template, check if the account information to be integrated with Discord is correct, and then click Next.
↓

This is the last setting! Let's decide on the content to notify Discord.
First, enter the channel ID. The channel ID is displayed in the URL of the Discord channel, so you can just copy and paste it!
↓

Next, enter the content of the message. This time, I tried to make it like the image.
Click inside the message box, and the content sent in the test during the Zendesk setup will be displayed in a list.
You can add any content by clicking on it, so choose the content you want to notify.
↓
Once you've decided on the content of the message, press Test at the bottom of the screen, and if "Test Successful" is displayed in blue, you're good to go.
The test also sent a notification to Discord, right? Once you've done this, press Save.
This concludes the integration of Zendesk and Discord. Good job!
Yoom offers a wide variety of templates that allow you to create flow bots in a time-saving manner, so be sure to check them out!


.avif)
.avif)
.avif)


