


Step 2: App Trigger "When the Meeting Ends"
Click on the first process of the template. Here, you will obtain Zoom recording information.

(1/2) Select Linked Account and Action
The items displayed here are pre-configured.
- App Trigger Title
- App
- Account Information Linked with Zoom
- Trigger Action
→ Click Next
(2/2) API Connection Settings for App Trigger

- Trigger Activation Interval
- You can choose from 5 minutes, 10 minutes, 15 minutes, 30 minutes, or 60 minutes.
- Email Address
- Please enter the email address registered with Zoom.
→ Click Test → Success The output has been obtained.
→ Click Save
Step 3: Integrate with the App "Obtain Meeting Recording Information"

Click on the second process of the template! Here, you will set up to obtain information extracted from Zoom.
(1/2) Select Linked Account and Action
Since it is already set up, let's proceed to the next step.
→ Click Next
(2/2) Select Linked Account and Action

- Meeting ID
- The above quoted code is pre-embedded, so no operation is required.
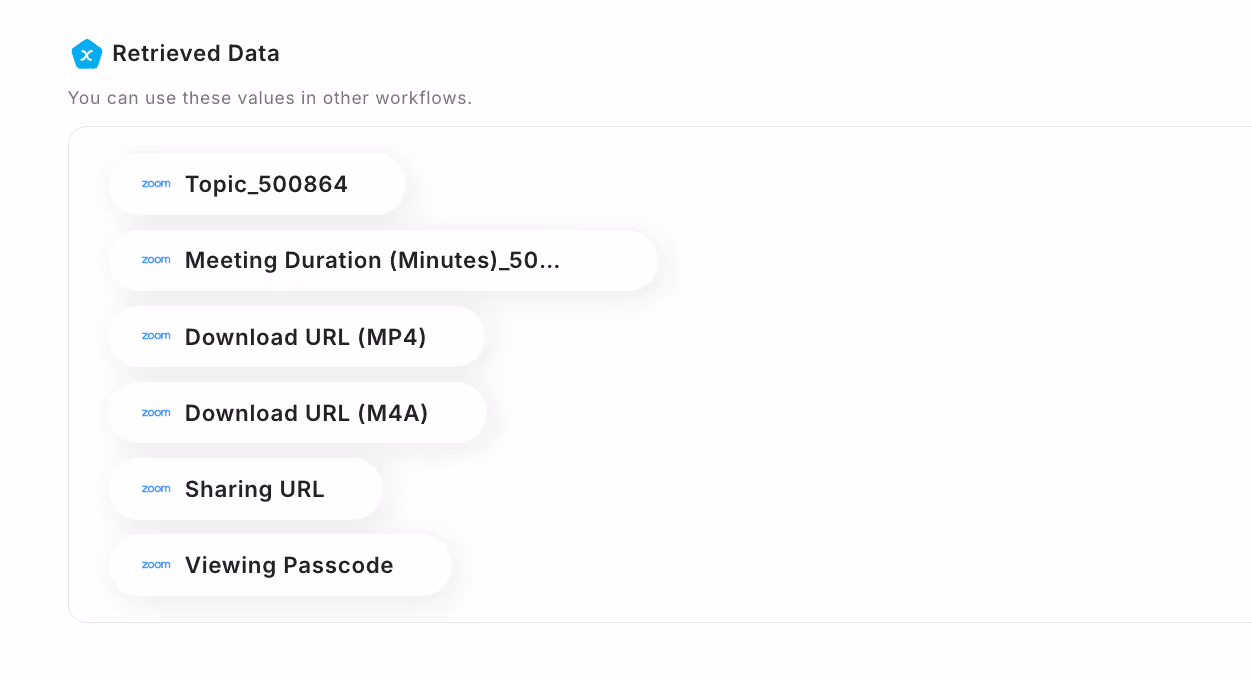
→ Click Test → Success. The output allows you to obtain detailed meeting information.
→ Click Save
Step 5: Integrate with the App "Download Meeting Recording Files"

Click on the third template! In this process, you will set up to download meeting files.
(1/2) Select Linked Account and Action
Since it is already set up, proceed to the next step.
→ Click Next
(2/2) API Connection Settings

- Download URL
- Embed the URL obtained from the previous process. The code is pre-embedded, so no setup is required.
→ Click Test → Success. The output allows you to obtain the downloaded file

.
→ Click Save to proceed to the next step
Step 6: Transcribe Audio Data

Let's click on the fourth process. Although it is displayed as configured, there are necessary settings to confirm.
(1/2) Select Action
- Title
- "Transcribe Audio Data" is already set.
- Action
- Select according to the length of the meeting.

→ Click Next
(2/2) Set Details
- File Attachment Method
- Since the file is downloaded in the previous setting, use that value. Please select "Downloaded File" from the dropdown.

→ Click Test → Success. The output allows you to obtain the analysis results.

→ Click Save
Step 7: Summarize

Click on the fifth process. Although it is displayed as configured, there are necessary settings to confirm.
(1/2) Select Action
- Title
- "Summarize" is already set.
- Action
- Select according to the volume of text.

→ Click Next
(2/2) Set Details
Set using the analysis results obtained from the previous process.


- Text to Summarize
- The quoted code of the analysis result is pre-embedded.
- Number of Characters
- It is pre-set to 1000. Please set it with reference to the number of characters in the analysis result. Although the specified number of characters is instructed to the AI, the final decision is made by the AI, so the summary may not be exactly the specified number of characters.
- * Please note that there is a possibility of a significant summary beyond the specified number of characters.
- Summary Conditions
- You can input instructions to the AI, such as "more concise".
→ Click Test → Success. The output allows you to obtain the summary result.

→ Click Save
Step 8: Integrate with the App "Notify Telegram"
Let's click on the sixth process. Here, you will set up the content to be notified to Telegram.
(1/2) Select Linked Account and Action
The items displayed here are pre-configured.
- App Trigger Title
- App
- Account Information Linked with Telegram
- Trigger Action
→ Click Next
(2/2) API Connection Settings
Create a template message for the chat to be notified to Telegram.
- Chat ID
- The group ID of Telegram is not displayed in the usual UI, but it can be obtained using a Bot. Use the obtained access token (API key) to access the following API endpoint.
- https://api.telegram.org/bot<Access Token>/getUpdates
- Accessing this endpoint will display the group information the bot is participating in, including the group ID. For example, chat":{"id":-123456789,...}, the value of id is the group ID.
- Message
- Click the edit field to display the list of obtained outputs. Create a template message by quoting the obtained outputs.

→ Click Test → Success
→ Click Save
Step 9: Turn the App Trigger [ON]
Once all processes are configured, a complete screen will pop up.
Turn the Trigger [ON] and start the flow bot.

How was it?
<span class="mark-yellow">Automation was achieved in a short time without using programming.</span> Here is the template used this time!


.avif)


.avif)


