How to integrate ClickUp with Zendesk to automatically update the ticket status in Zendesk when a task is completed in ClickUp
How to Integrate Applications
・
2025-04-16
How to integrate ClickUp with Zendesk to automatically update the ticket status in Zendesk when a task is completed in ClickUp
m.wadazumi
When you receive a lot of emails every day, it can be quite a hassle to save files to Dropbox each time. Moreover, many people might have experienced the struggle of missing a file save or saving a file in the wrong folder, making it difficult to find later.
In this article, we will introduce a method to automatically save files received in Gmail to Dropbox!
By using no-code tools, you can easily set up automation between Gmail and Dropbox. You can start using it right away, so be sure to give it a try!
Recommended for
Those who want to automatically upload files attached to Gmail to Dropbox
Those who want to integrate Gmail and Dropbox to facilitate smooth file sharing within the team
Those who want to prevent the loss of attachments and ensure proper document storage
For those who want to try it immediately
In this article, we will introduce the integration method using the no-code tool "Yoom".
No complicated settings or operations are required, and even non-engineers can easily achieve it.
You can start right away using the template below, so please give it a try!
In this article, we will introduce how to integrate ClickUp and Zendesk to automate the update of ticket statuses when tasks are completed. By implementing this automation, you can prevent missed updates while keeping track of progress. Especially for support teams, customer interactions can be streamlined, allowing for smoother operations. This time, we will explain the benefits of integrating ClickUp and Zendesk and the specific integration methods.
Benefits of Integrating ClickUp and Zendesk
Benefit 1: Quick Response Capability
By automating the update of ticket statuses in Zendesk after a task is completed in ClickUp, the support team can quickly grasp the progress. This allows the team to check ticket statuses internally without needing to ask the person in charge for status updates. Additionally, visualizing whether customer interactions are completed will help organize the support system within the team. With such automatic status updates, you can smoothly transition to the next task.
Benefit 2: Reducing the Effort of Status Updates
Automating ticket status updates frees the person in charge from manual update tasks, allowing them to use their time effectively. For example, when using this system for customer interactions, you won't need to manually update the ticket status after completing the interaction, allowing you to focus on other tasks. Especially when handling multiple customer interactions, automation becomes effective as the update tasks increase. It may also prevent human errors such as missed updates or mistakes, resolving any confusion.
[What is Yoom]
How to Create a ClickUp and Zendesk Integration Flow
This time, we will introduce how to set up the following template: "Update Zendesk ticket status when a task is completed in ClickUp." By using this template, you don't need to set up automation from scratch, which is convenient.
The process is as follows and can be set up in 15-20 minutes.
If you are not using Yoom, please register for free here. If you are already using Yoom, please log in.
Step 1: Register ClickUp and Zendesk as My Apps
Register ClickUp and Zendesk as My Apps in Yoom. Registering as My Apps makes automation settings easy.
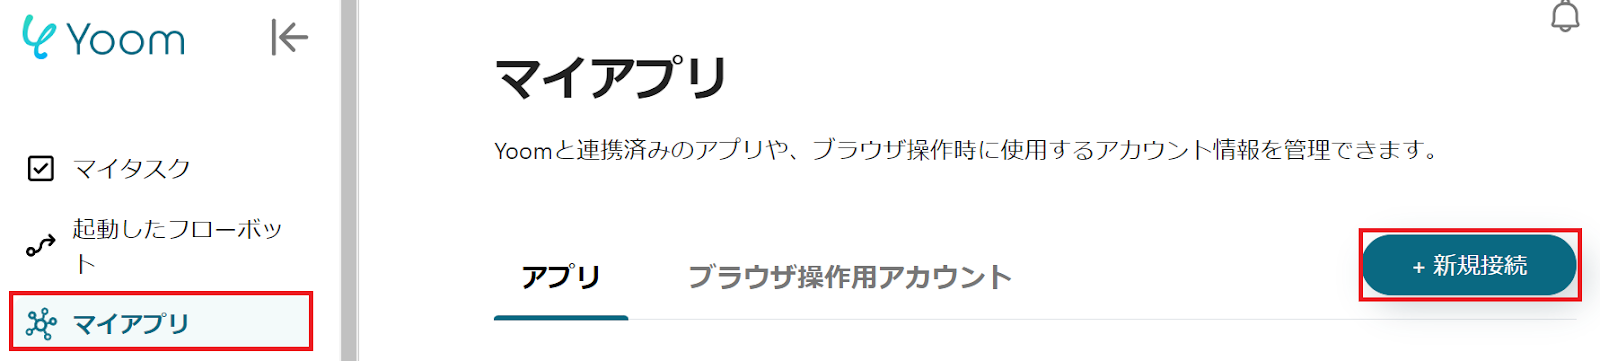
First, register ClickUp as My App. Click "My Apps" → "New Connection" on the left side of the Yoom screen. Search for ClickUp from "Search by App Name" or find it from the app list.
The following screen will be displayed, so enter the information in the red frame and log in to ClickUp.
When the following screen is displayed, click "Connect Workspace".
Next, register Zendesk as My App. Please refer to the Yoom Help Page for registration instructions.
Once both My App registrations are complete, ClickUp and Zendesk will be displayed in My Apps.
Step 2: Set a Trigger to Activate When a Task is Completed in ClickUp
To set up automation, click "Try it" in the banner below.
Read the following screen display and click "OK".
The following screen will be displayed, please check the "Title" and "Description". If you want to make changes, you can do so from the screen below. First, click "When a task is updated" from the ClickUp settings.
The following screen will be displayed, please check the settings.
"Title" → Can be changed freely
"Account information linked with ClickUp" → Check for discrepancies
"Trigger Action" → When a task is updated
The following screen will be displayed, set the "team_id" from the candidates. Select the appropriate candidate from the red frame below. If there are other necessary items, please set them. Once the settings are complete, click "Test" → "Test Successful" → "Save".
Step 3: Set the action to retrieve tasks in ClickUp
To set up retrieving tasks, click "Retrieve Task". Once the following screen is displayed, check the settings.
"Title" → Can be changed freely
"Account information linked with ClickUp" → Check for discrepancies
"Action" → Retrieve Task
The following screen will be displayed, use the output to set the "task_id". Click the arrow in the red frame, the output of "When a task is updated" will be displayed, select "Task ID". Once the settings are complete, click "Test" → "Test Successful" → "Save".
Step 4: Set the branching operation
To update the ticket status when the status is "complete", set up branching. Once the following screen is displayed, check the settings.
"Title" → Can be changed freely
Branching target output
"Operation" → Retrieve Task
"Output" → Status
Branching condition
"Status", "Equal to", "complete"
Step 5: Set the action to update the ticket status in Zendesk
The following screen will be displayed, please check the settings.
"Title" → Can be changed freely
"Account information linked with Zendesk" → Check for discrepancies
"Action" → Update Ticket Status
Once the following screen is displayed, please set it up.
"Subdomain", "Ticket ID" → Check the description and set
"Status" → Resolved
Once the settings are complete, click "Test" → "Test Successful" → "Save".
Finally, click "Turn on Trigger" to complete the automation setup.
Flowbot template used this time Update Zendesk ticket status when a task is completed in ClickUp
Other Examples of Automation Using ClickUp and Zendesk
1. When there is a response to a form, it is linked to ClickUp to create a task and automatically send an email via Gmail. Depending on the content of the form response, tasks are created, making it easier to prioritize work. Additionally, by automatically sending emails, there is no worry about missing tasks.
2. This is a flow that automatically adds a ticket to Microsoft Excel when it is created in Zendesk. By eliminating the need to manually transfer ticket information, you can proceed with your work more efficiently.
3. This flow automatically adds a comment to a Zendesk ticket when a kintone record is updated. This automation saves the effort of entering comments and allows for efficient information sharing.
Summary
By integrating ClickUp and Zendesk, ticket statuses are automatically updated when tasks are completed, eliminating the need for manual updates. This allows team members to easily visualize completed tasks and makes it easier to track progress. Additionally, the automatic updating of ticket statuses prevents missed updates and errors, enabling smooth business operations. Take advantage of this automation to improve the accuracy of your work.
If you want to try using Yoom, please register for free here.
The person who wrote this article
m.wadazumi
I've been working as a writer since my job in child welfare, and I'm currently writing a blog on Yoom.
While being surprised by the work efficiency improvements that can be made with Yoom, I would like to share that excitement with everyone and contribute to society.
I'll tell you about application integration and automation that even I, who has zero programming knowledge, can do.
Conventional RPA can only automate simple repetitive tasks, and the setup process was very complicated. With “hyperautomation,” which combines various technologies such as AI, API, RPA, and OCR, it is possible to automate many tasks that could not be realized until now more easily than before.
Most tools simply connect one app to another, leaving the complex tasks to you. Yoom goes much further: From document creation and browser automation to OCR and generative AI, Yoom handles it all seamlessly in one platform.
Why settle for basic integrations? Streamline your entire workflow with Yoom’s powerful hyperautomation.


.avif)
.avif)
.avif)
.avif)


