

.avif)

Step 3: Setting Up Integration Between Backlog and Zendesk
1) Click the "Try this template" icon on the template introduced earlier to copy it to your project.

2) The following display will appear.

Click the "!" icon displayed on the right in order to edit the flow.
Titles and details can be changed by clicking, so please modify them as needed.

3) Click "App Trigger: Update Issue (Webhook)".
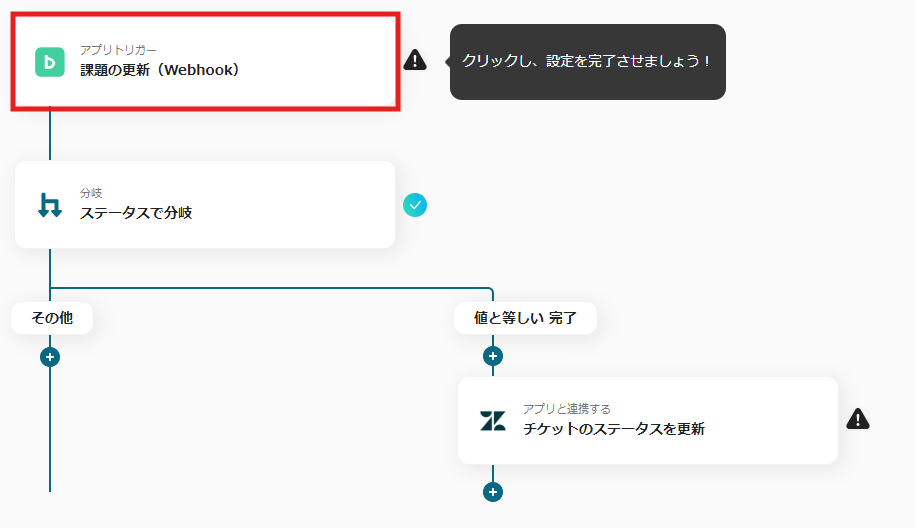
4) Select "Update Issue (Webhook)" for the action and click "Next".

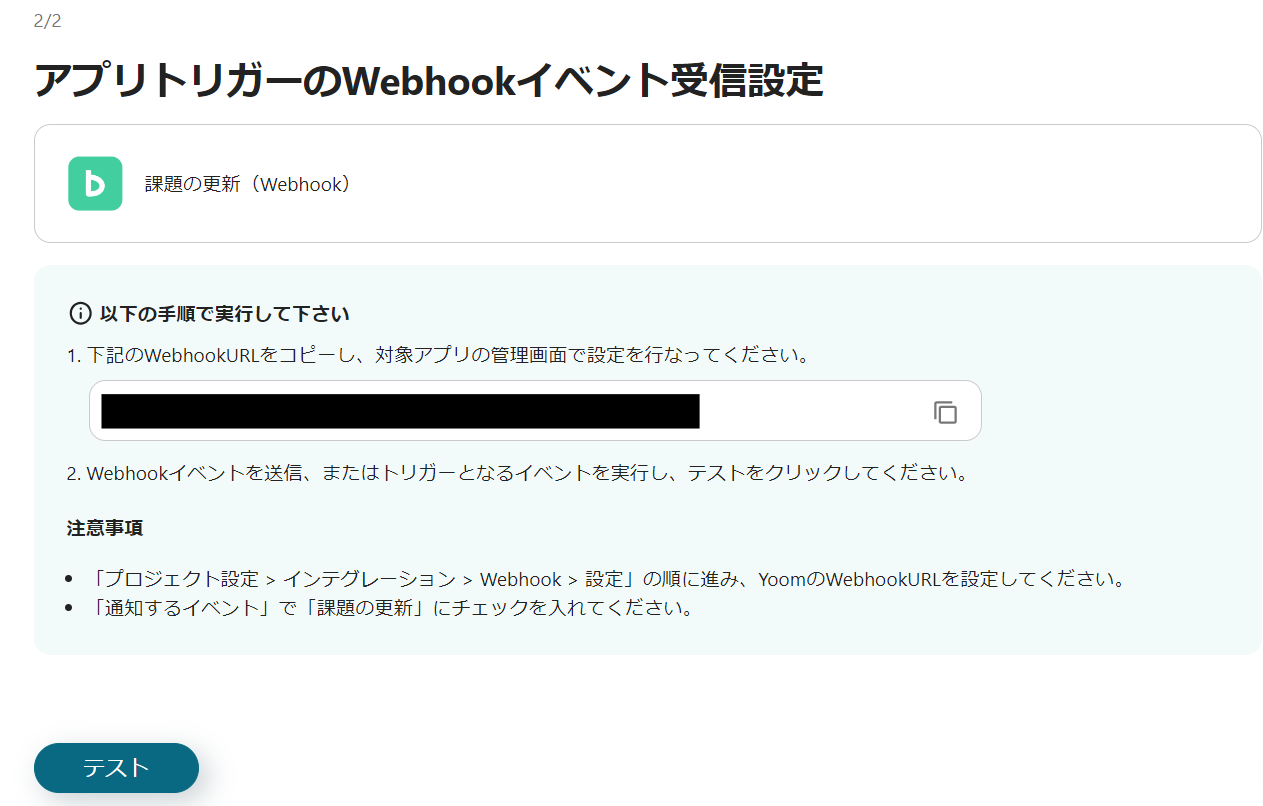
5) Copy the Webhook URL and set it in the management screen of the target app.
Execute the webhook event and click "Test".
After a successful test, click "Save".
6) Return to the flow and click the "Branch by Status" icon.

7) For the operation, select "Update Issue (Webhook)" and for the output, select "Issue Status".
Ensure the branching condition is set to "Issue Status", "Equal to", and "Completed", then click "Save".

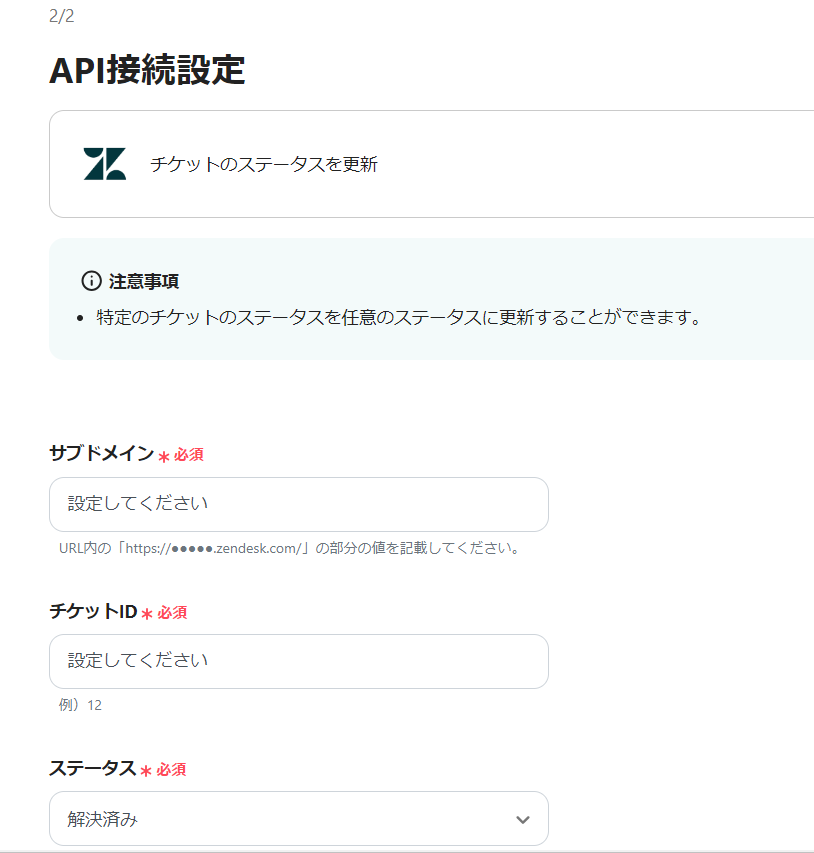
8) Return to the flow and click the "Integrate with App: Update Ticket Status" icon.
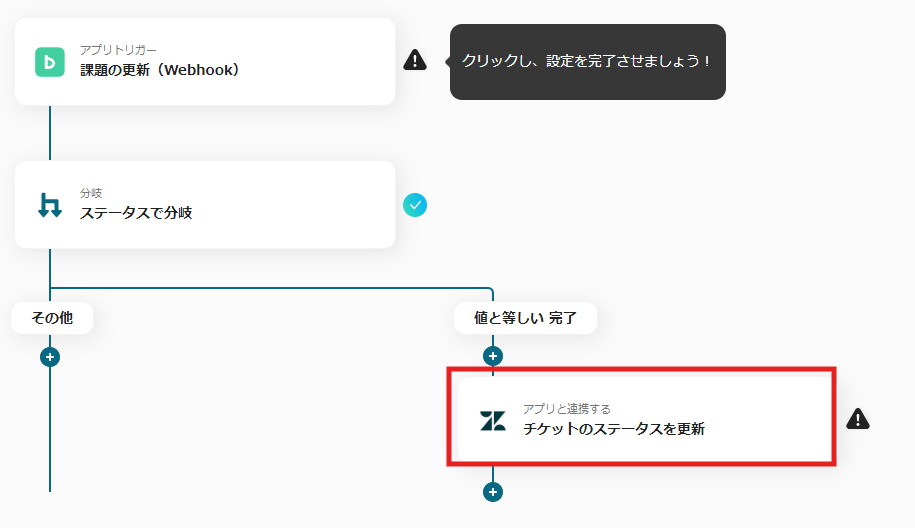
9) Select "Update Ticket Status" for the action and click "Next".
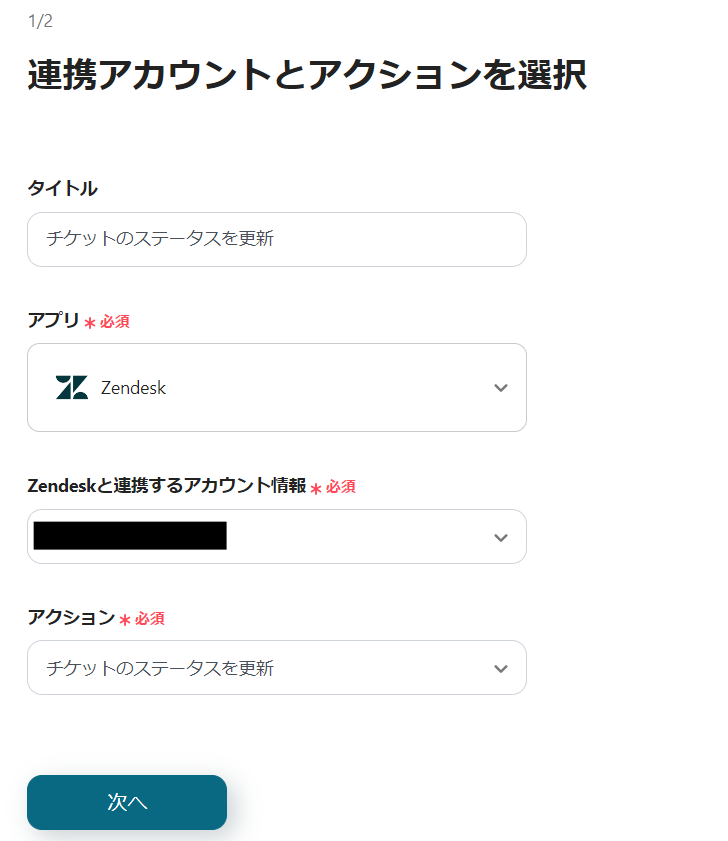
10) Enter the required fields.
If the app registration is complete, you can utilize the output information, so select from the options.
Once the input is complete, click "Save".
11) This completes the flow of [Updating Zendesk Ticket Status When a Task is Completed in Backlog].
Step 4: Testing and Verification
Once the setup is complete, the following display will appear, so click "Turn on Trigger".
Activate the flow bot and verify it is functioning correctly.

Here is the template used this time!


.avif)


