

.avif)
My App Settings for Slack and Jira Software
Open the banner above and press "Try this template" at the bottom of the screen to go to the "My Projects" screen, then click "My Apps" from the menu on the left.
↓
Press "Create New" at the top right and enter "Jira Software" to see the Jira Software icon. Click!
↓
Then "Create New" will appear at the top right, so click!
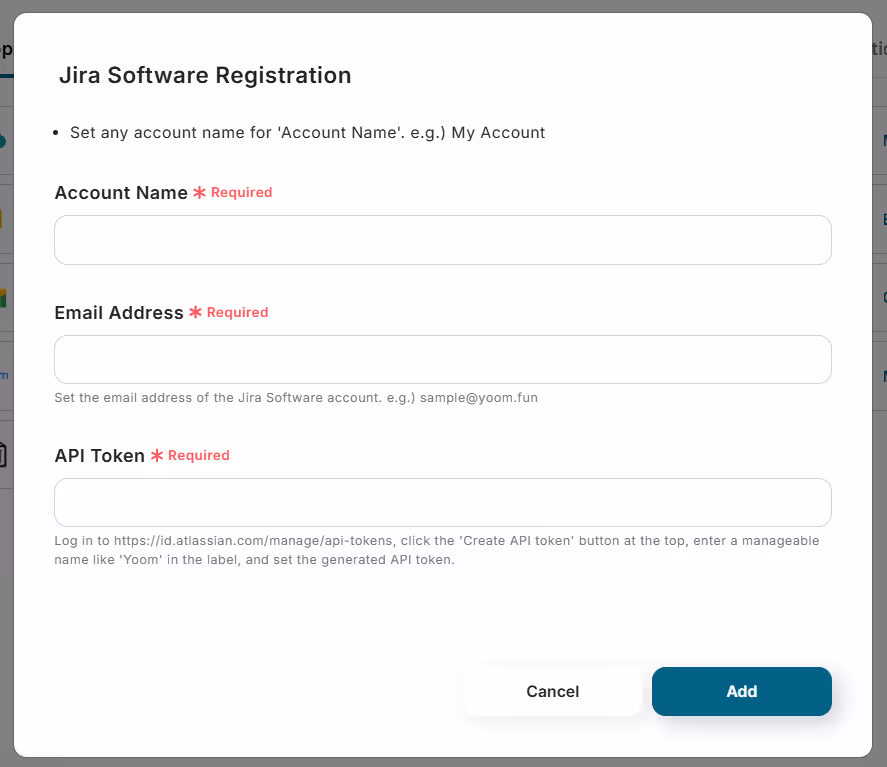
Enter your account name and access token.
There is a page that explains this in detail from here, so let's refer to it!
How to Register My Apps in Jira Software
Once the access token is successfully converted, click Add. Next is the Slack integration.
Enter "Slack" in the search window, and the Slack icon will appear, so click!
↓
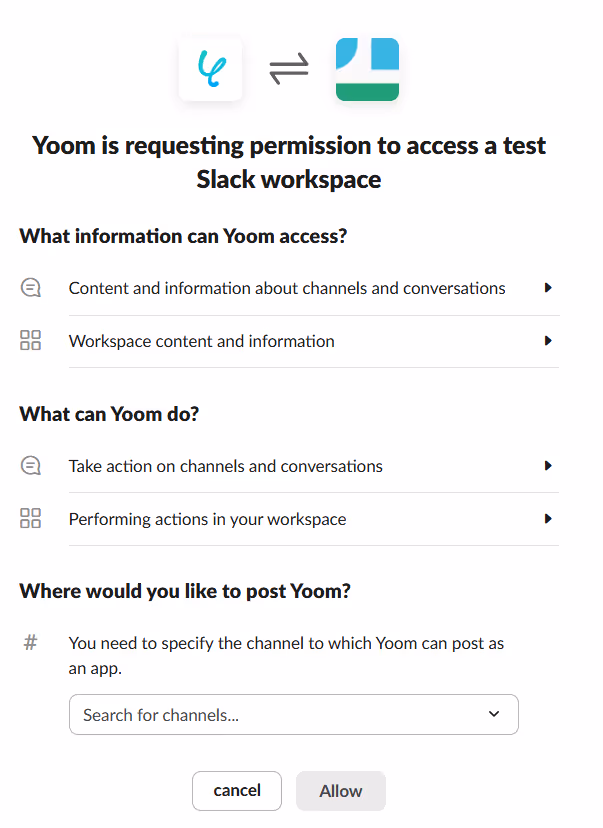
A screen like the above will be displayed, so select the channel you want to send notifications to from Jira Software.
Once the selection is complete, click "Allow"! If Slack is displayed on the My Apps screen, you're done!
Now that the two apps are linked with Yoom, let's move on to creating a Flowbot!
Trigger Settings for Jira Software
First, a test transmission is required while creating the Flowbot. Therefore, let's create a suitable issue in Jira Software.
First, set up Jira Software!
Return to My Projects on the left side of the screen, enter the page "Notify Slack when an issue is added in Jira Software [Copy]", and press Edit at the top right.
↓
Click "When an issue is created"!
↓
Trigger Action should be changed to "When an issue is created or updated".
This way, notifications will be automatically sent to Slack not only when an issue is created but also every time it is updated.
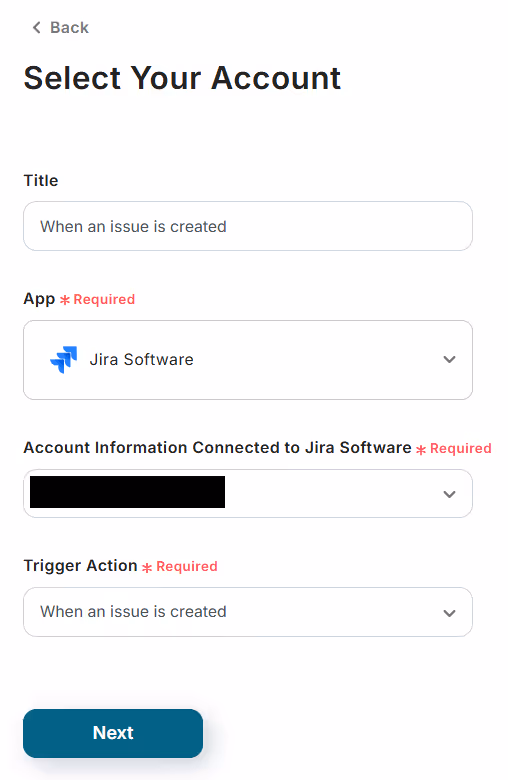
App Trigger Title was also made the same as Trigger Action.
It's easier to understand if they match, so it's definitely recommended to make it look like the image!
↓
Press Next, and set the trigger interval and subdomain.
The subdomain is in the URL of Jira Software, so copy and paste is OK!
* The trigger can be set to activate at intervals of 5, 10, 15, 30, or 60 minutes. The shortest activation interval varies depending on the plan.
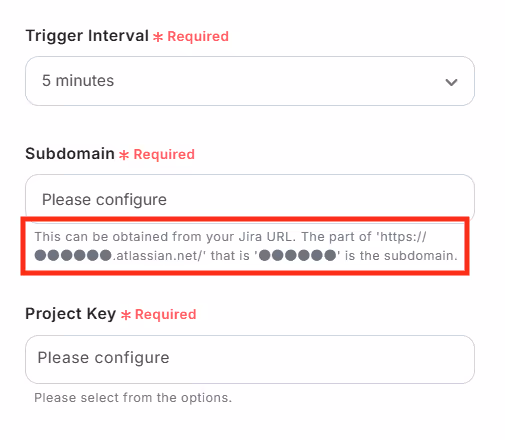
Enter the project key for Jira Software.
The project key differs for each project created, so please enter the key for the project you want to notify Slack about!
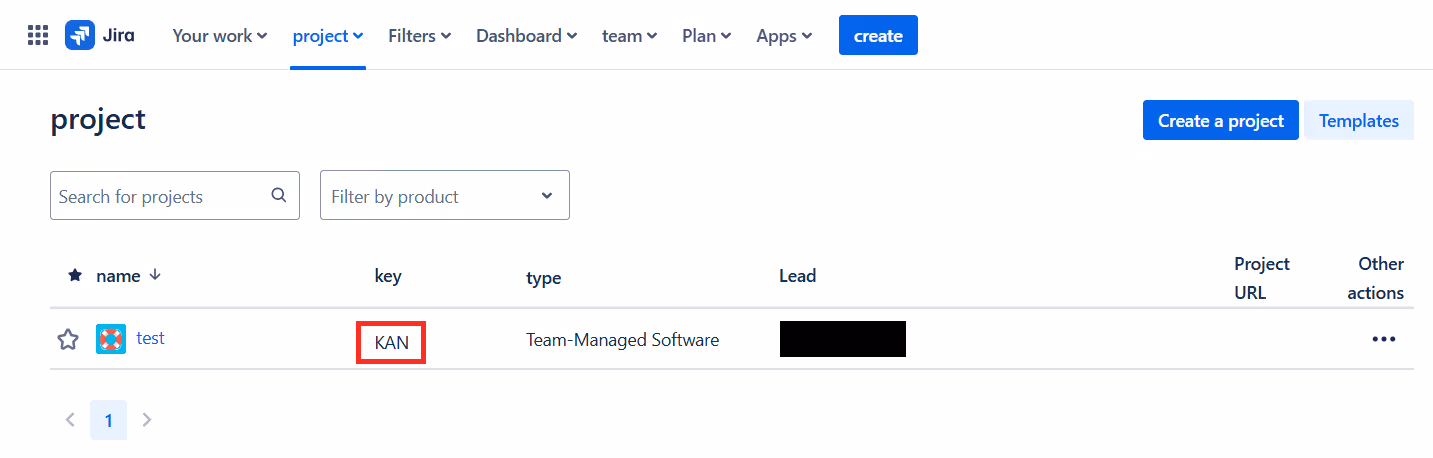
Checking the project key for Jira Software is easy.
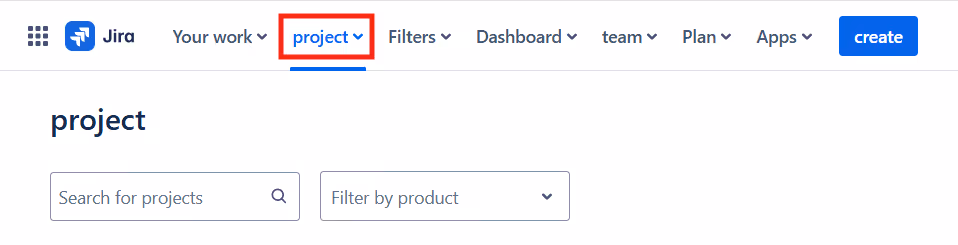
Press Projects at the top of the Jira Software page and click Show All Projects!
↓
Remember that the key is next to the project name.
If there are other projects you want to notify Slack about, it's recommended to keep track of the keys.
When you enter the subdomain, the project keys will be automatically listed, so click the project you want to notify Slack about!
Then press Test just below. Once you confirm that "Test Successful" is displayed in blue, save it.
[Slack Settings]
Next, let's go to the Slack settings. This is the last of the settings. It's quick, isn't it? It's not difficult, so it will be over soon.
Click the Slack icon's "Send a message to the channel". You can press Next as it is!
↓
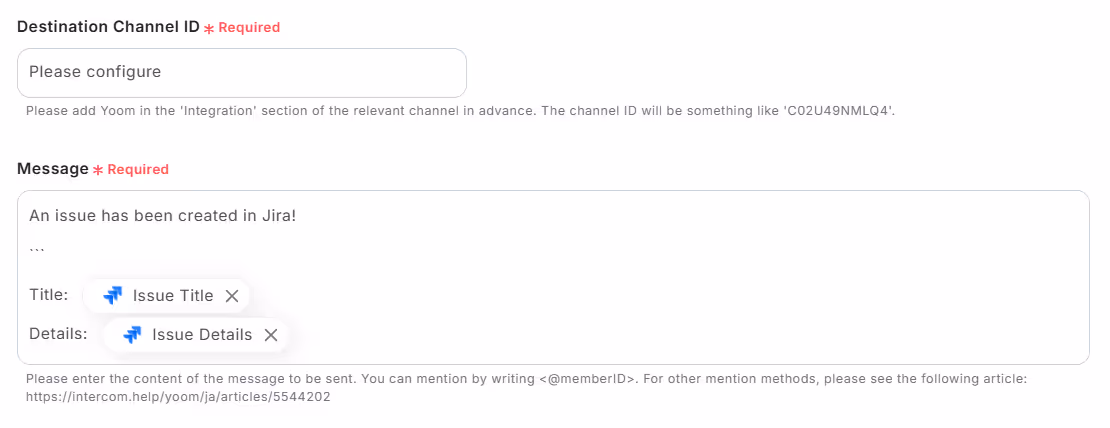
The screen will transition to the above, so select the channel ID to post to. Then decide on the content of the message.
If there is content you want to add, click inside the message box!

It will be in the state like above.
By clicking on the content you want to add to Slack, it will be reflected in the actual message, so feel free to select it.
Once the input is complete up to this point, press Test just below!

Notifications are automatically coming to Slack! This is wonderful... It's very helpful to have such notifications come automatically.
This concludes the creation of the Flowbot. Thank you for your hard work!


.avif)
.avif)
.avif)


