How to Integrate Applications

2025-04-16

How to integrate Calendly with Notion to automatically create a page in Notion when an event is scheduled in Calendly

m.wadazumi

When you receive a lot of emails every day, it can be quite a hassle to save files to Dropbox each time.
Moreover, many people might have experienced the struggle of missing a file save or saving a file in the wrong folder, making it difficult to find later.

In this article, we will introduce a method to automatically save files received in Gmail to Dropbox!

By using no-code tools, you can easily set up automation between Gmail and Dropbox.
You can start using it right away, so be sure to give it a try!

Recommended for

  • Those who want to automatically upload files attached to Gmail to Dropbox
  • Those who want to integrate Gmail and Dropbox to facilitate smooth file sharing within the team
  • Those who want to prevent the loss of attachments and ensure proper document storage

For those who want to try it immediately

In this article, we will introduce the integration method using the no-code tool "Yoom".

No complicated settings or operations are required, and even non-engineers can easily achieve it.

You can start right away using the template below, so please give it a try!

In the business world, efficiently managing your schedule is important.
By integrating Calendly with Notion, you can centralize the creation of appointments and the management of information.
This article will show you how to automate the process of "creating a page in Notion when an appointment is made in Calendly" without using any code.
Incorporating this automation can save time and make schedule management smoother.

Advantages and Disadvantages of Integrating Calendly and Notion

The advantages of integrating Calendly and Notion include efficient schedule management and centralized management of appointment information.
Below is a summary of the advantages and disadvantages for your review.

Advantage 1: Efficient Schedule Management

One advantage of integrating Calendly and Notion is efficient schedule management.
For example, when a meeting is scheduled in Calendly, the meeting details are automatically recorded in Notion.
This makes schedule management easier for those with busy schedules or project managers.
Additionally, having the meeting details recorded in Notion allows for pre-meeting review, which is a significant benefit.

Advantage 2: Centralized Management of Appointment Information

Integrating Calendly and Notion allows for centralized management of appointment information.
For instance, meeting minutes and progress can be consolidated in Notion.
This enables centralized management of appointment information, allowing for quick responses to necessary information.
Centralized data management prevents information from becoming mixed up, making it easier to share information with the entire team.
This is especially recommended for those who manage schedules using digital tools or have a lot of data entry tasks.

Disadvantage: Manual Information Updates Required

Without integrating Calendly and Notion, you must manually update information.
For example, if there is a sudden change in schedule, you need to manually update the appointment information.
Using multiple tools can require significant effort and time to update appointment information.
Automating with Yoom eliminates these concerns.
It simplifies the management of appointment information and allows for single-entry appointment registration.

How to Create a Calendly and Notion Integration Flow

This time, we will set up the following template: "Create a page in Notion when an appointment is made in Calendly."

There are only two steps, so the setup will be completed in 10-15 minutes.

  1. When an appointment is registered
  2. Create a page

Many people might be interested in trying automation but hesitate because it seems complicated...
With Yoom, you can easily set up automation without any coding.
We offer a wide variety of templates that make it easy to set up automation, so even if you're not good with machines, it's not a problem.
This time, we will also use the templates introduced earlier, so you can set it up quickly.

If you are not using Yoom, please register for free here.
If you are already using Yoom, please log in.

How to connect Calendly and Notion with Yoom

Register your app to connect Calendly and Notion with Yoom.
By registering your app, you can easily set up automation.

First, register your app with Calendly.
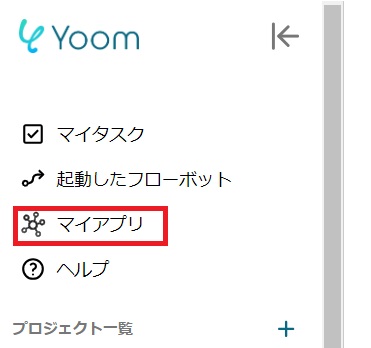
Click "My Apps" → "New Connection" on the left side of the screen.
Find Calendly from the app list or search from "Search by App Name".

When the following screen appears, please log in to your Calendly account.

Next, register your app with Notion, and select Notion as you did earlier.
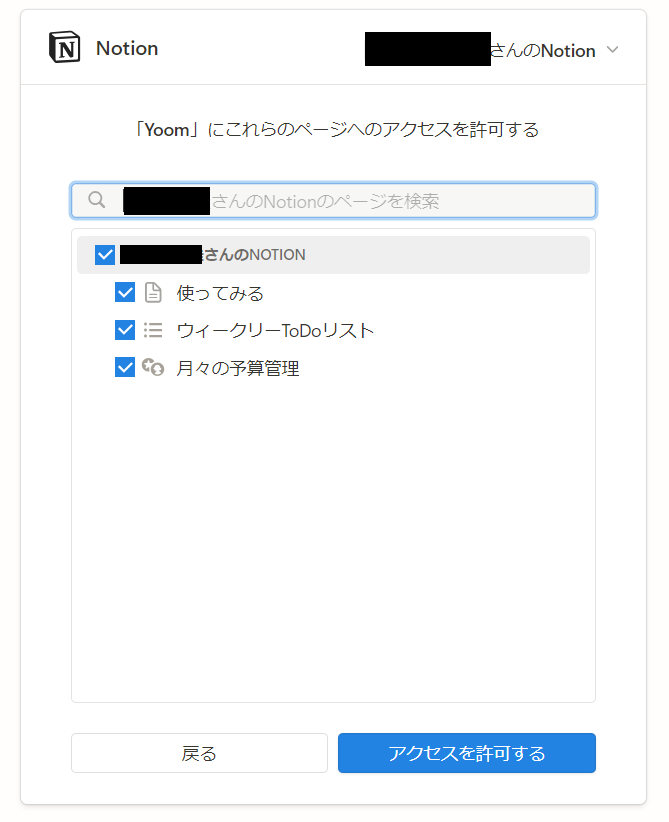
The following screen will appear, so click "Select Page".

Check the page you want to grant access to and click "Grant Access".

If Calendly and Notion are displayed in your My Apps section, registration is complete.

How to create a page in Notion when an appointment is created in Calendly

To set up automation, click "Try it" on the banner below.

The following screen will be displayed, so if you want to change the "Title" and "Description," let's change them from the page below.
First, set up Calendly by clicking "When an event is scheduled (webhook trigger)."

When the following screen is displayed, check the settings.

  • "App Trigger Title" → Can be changed optionally
  • "Account information to link with Calendly" → Check if the account is correct
  • "Trigger Action" → When an event is scheduled (webhook trigger)

The following screen will be displayed, so please select the "Organization URI" from the candidates.
Click "Test" → "Test Successful" → "Save."

When the following screen is displayed, send a Webhook event or execute the trigger event.
Then, click "Test" → "Test Successful" → "Save."

Next, set up Notion by clicking "Create Page."
When the following screen is displayed, check the settings.

  • "Title" → Can be changed optionally
  • "Account information to link with Notion" → Check if the account is correct
  • "Action" → Create Page

Let's set up the following settings.

  • "Database ID" → The database ID can be obtained from the URL
    ※ Please specify the database to link the page.
    The URL format is "www.notion.so/{DatabaseID}?v=xxxxxxxx".
  • "Title Property Name" → Register the column name of the title property such as "Name" or "Title"
  • "Page Title" → Set optionally
  • "Content" → Write optionally
    ※ By using Calendly's output like {{List of Participants}}, schedule information will be updated in Notion.
    Click inside the content frame and click Calendly to use it.
    If there are necessary items, please enter them.

Click "Test" → "Test Successful" → "Save."

Once you turn "ON" the app trigger, the automation setup is complete.

Summary

In this article, we explained the flow of "Creating a page in Notion when an event is scheduled in Calendly."
When using multiple tools, the effort and time required to update schedule information can be a drawback.
However, by integrating Calendly and Notion with Yoom, you can efficiently manage your schedule and centralize your schedule information.
Additionally, for those with busy schedules or project managers, it is a significant advantage to have easier schedule management.
Yoom allows you to easily set up automation without any coding.
Besides the template introduced this time, we have other templates available, so please make use of them.
Start with a free registration and experience the efficiency in your work.

The person who wrote this article
m.wadazumi
I've been working as a writer since my job in child welfare, and I'm currently writing a blog on Yoom. While being surprised by the work efficiency improvements that can be made with Yoom, I would like to share that excitement with everyone and contribute to society. I'll tell you about application integration and automation that even I, who has zero programming knowledge, can do.
Tags
Integration
Automation
Notion
Calendly
Related Apps
App integration
No items found.
What is Yoom hyperautomation?
Conventional RPA can only automate simple repetitive tasks, and the setup process was very complicated.
With “hyperautomation,” which combines various technologies such as AI, API, RPA, and OCR, it is possible to automate many tasks that could not be realized until now more easily than before.
Don't Just Connect Apps—Automate Everything
Most tools simply connect one app to another, leaving the complex tasks to you. Yoom goes much further: From document creation and browser automation to OCR and generative AI, Yoom handles it all seamlessly in one platform.

Why settle for basic integrations? Streamline your entire workflow with Yoom’s powerful hyperautomation.
Learn more about Yoom
Helpful Materials
I understand Yoom! 3-piece set of materials
Download materials
Understand in 3 minutes! Yoom service introduction materials
Download materials
Find out by Before After! Yoom Case Study Collection
Download materials
See a list of useful materials