

.avif)


Step 2: Set Up App Trigger in Freshdesk
The initial setting is "When a ticket is created".
The first page reflects the account information of the Freshdesk integrated with My App.
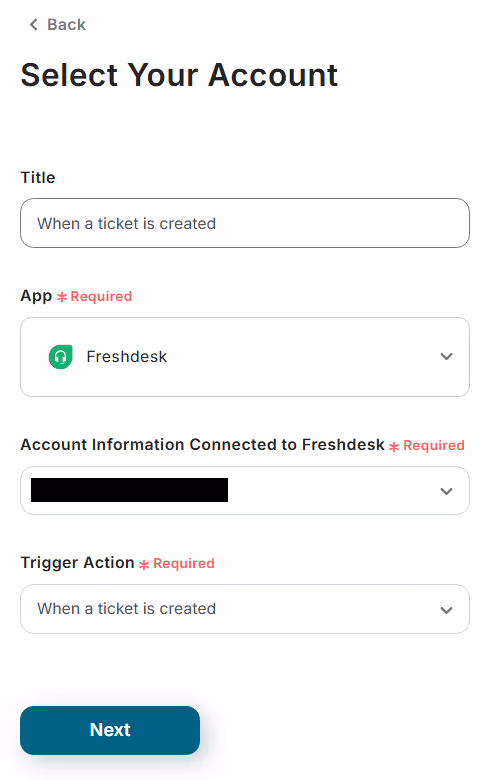
If necessary, modify the title to something more understandable, verify the account information, and proceed to the next step.
On the next page, set the trigger activation interval.
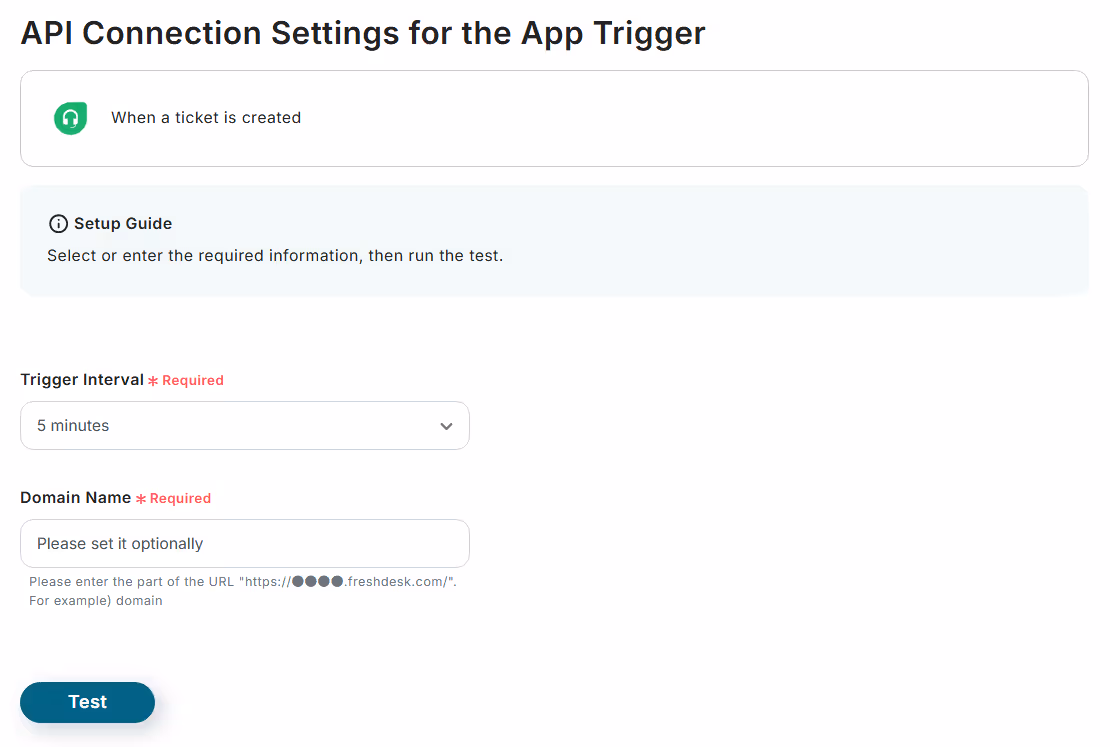
The trigger activation interval can be set from 5 to 60 minutes, but note that Yoom's plan may not allow certain selections. A shorter setting is generally recommended.
Obtain the domain name from the Freshdesk URL and paste it, then click "Test" after creating a ticket for flow setup.
If the test is successful, ticket information can be obtained as output.
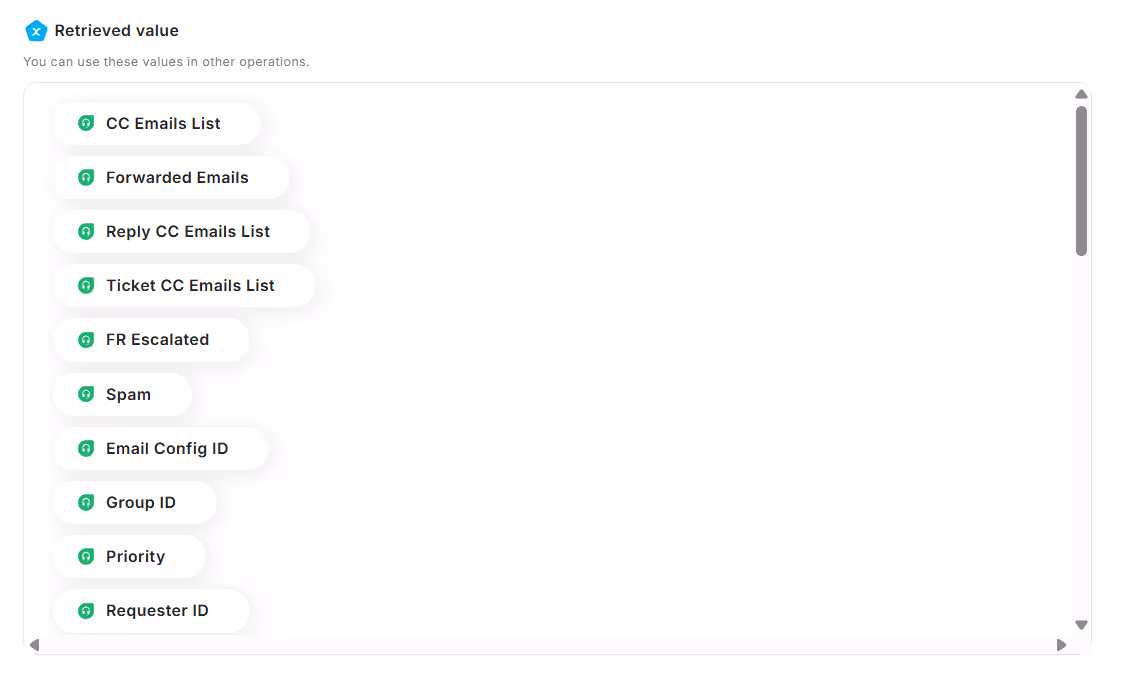
The output values vary depending on the ticket.
Once confirmed, click "Save" to complete the app trigger setup.
Step 3: Set Up Ticket Retrieval
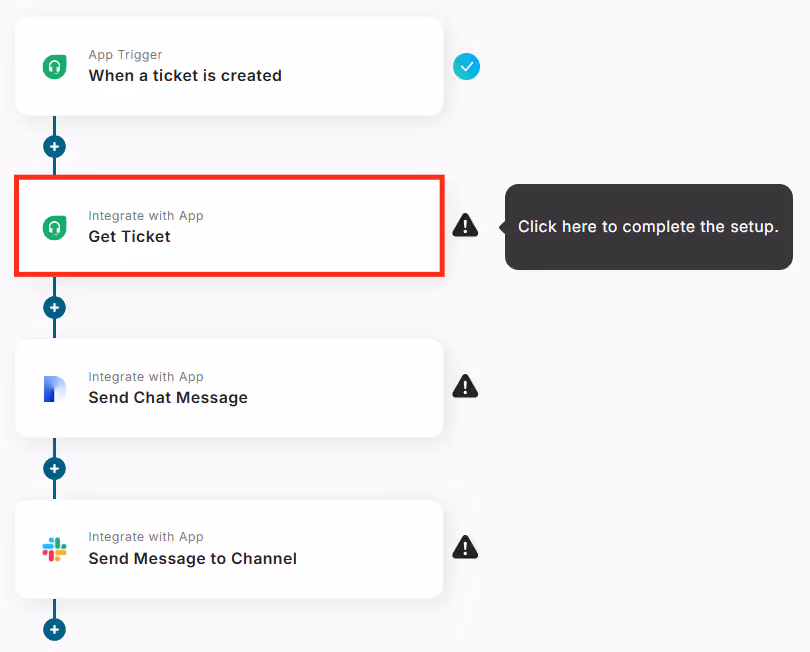
The next setting is "Retrieve Ticket".
Set up to obtain detailed information about Freshdesk tickets.
On the first page, as before, modify the title and verify the account information, then proceed to the next step.

Next, enter each field to retrieve ticket information.
Use the same domain name as in the initial setup. The ticket ID is automatically reflected in the output, so no change is needed.
If necessary, select additional information and click "Test".
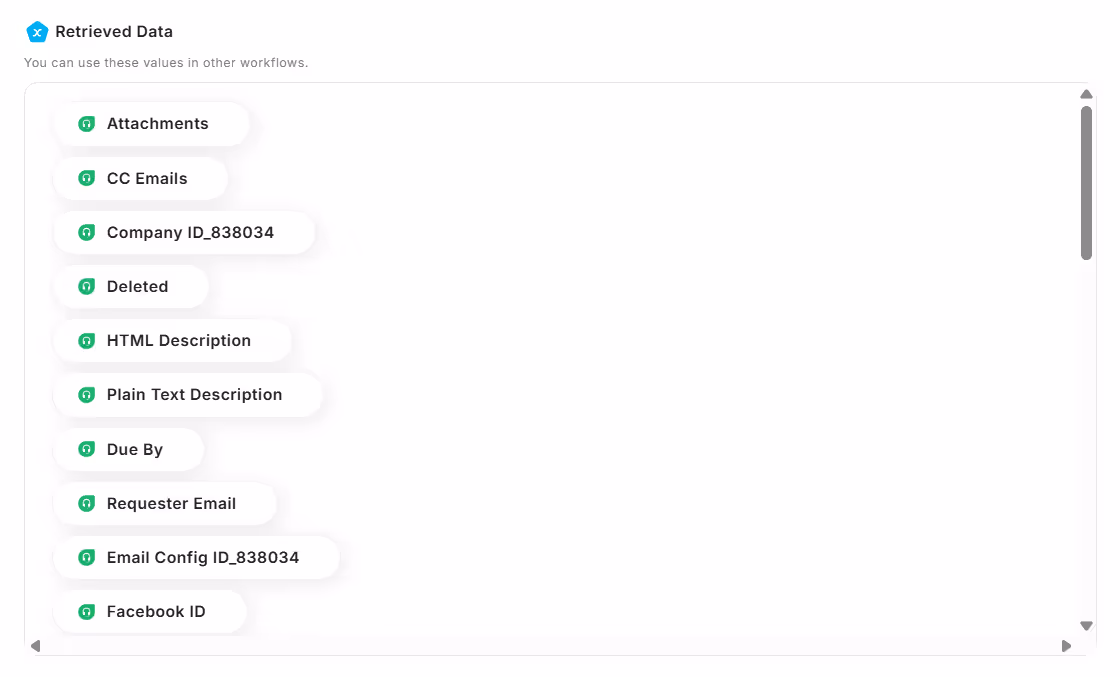
If the test is successful, detailed ticket information can be obtained as output.
Once confirmed, click "Save" to complete the ticket retrieval setup.
Step 4: Set Up Sending Chat Messages
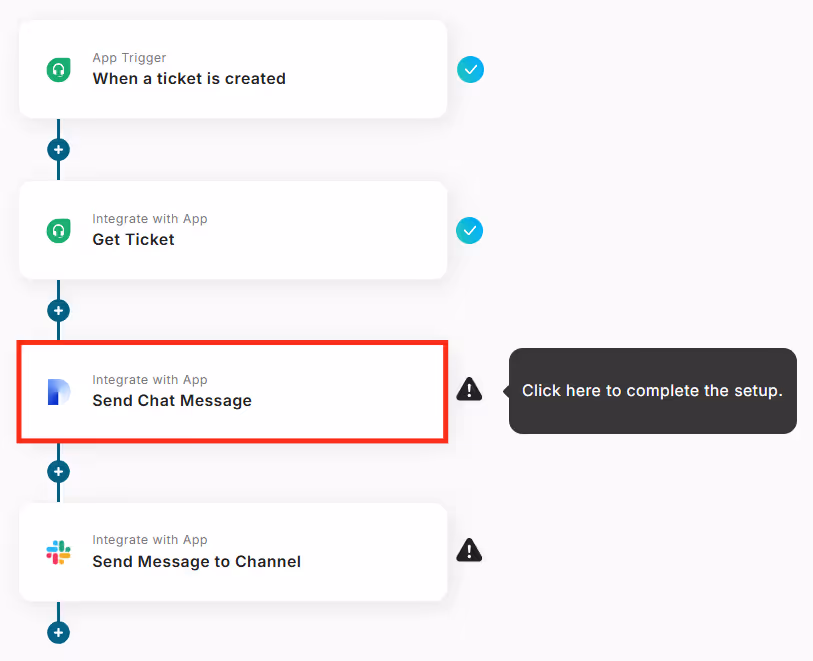
The next setting is "Send Chat Message".
Create a response based on the retrieved ticket information.
On the first page, as before, modify the title and verify the account information, then proceed to the next step.
On the next page, set the content to be sent to Dify.

The "query" is automatically reflected in the output. Set "user" to any value in half-width characters.
This setting allows for automatic response creation based on the ticket content.
Once all inputs are complete, click "Test".

If the test is successful, the response content generated by Dify can be obtained as output values.
Once confirmed, click "Save" to complete the chat message sending setup.
Step 5: Set Up Sending Messages to Slack
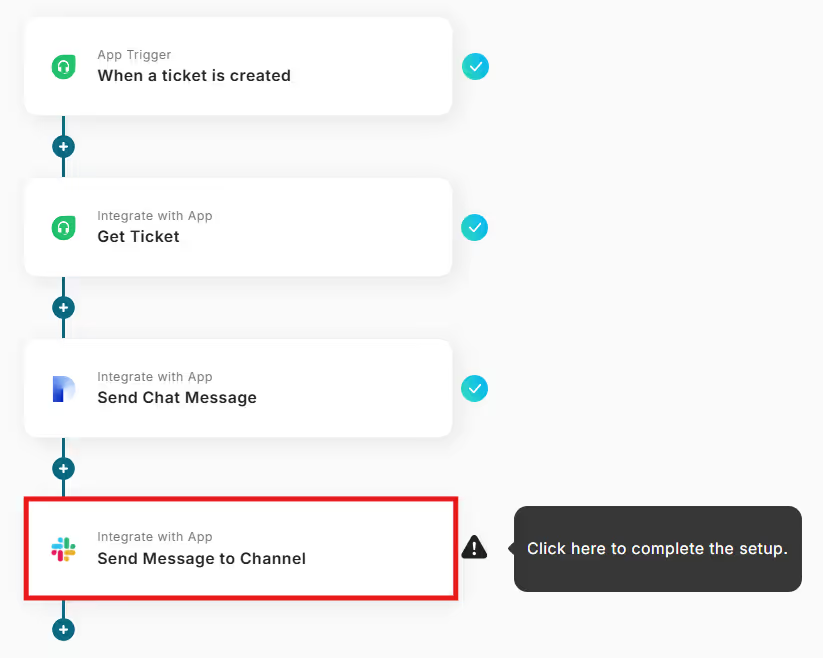
The final setting is "Send Message to Channel".
Notify the generated content to the specified Slack channel.
On the first page, as before, modify the title and verify the account information.
Next, specify the channel and set the details of the message content to be sent.
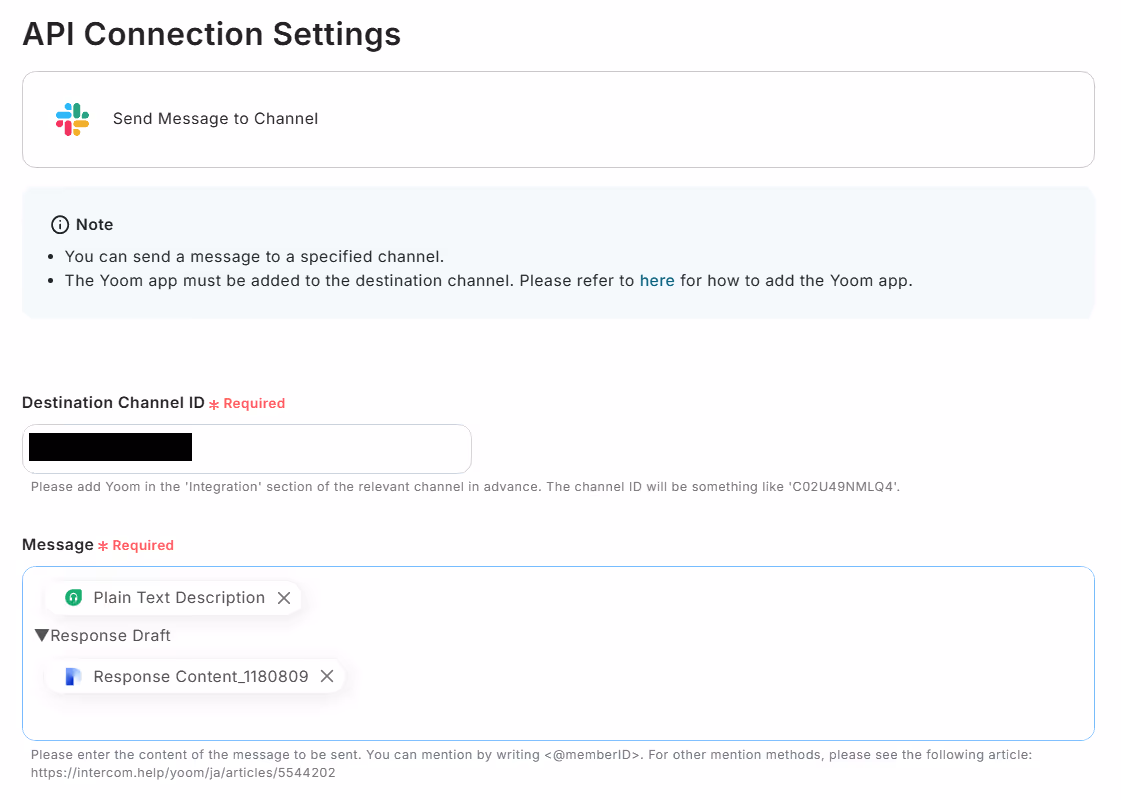
Select the channel ID from the options.
The message content is reflected in the output, so if there are additions, utilize the output to input them.
Once all inputs are complete, click "Test".
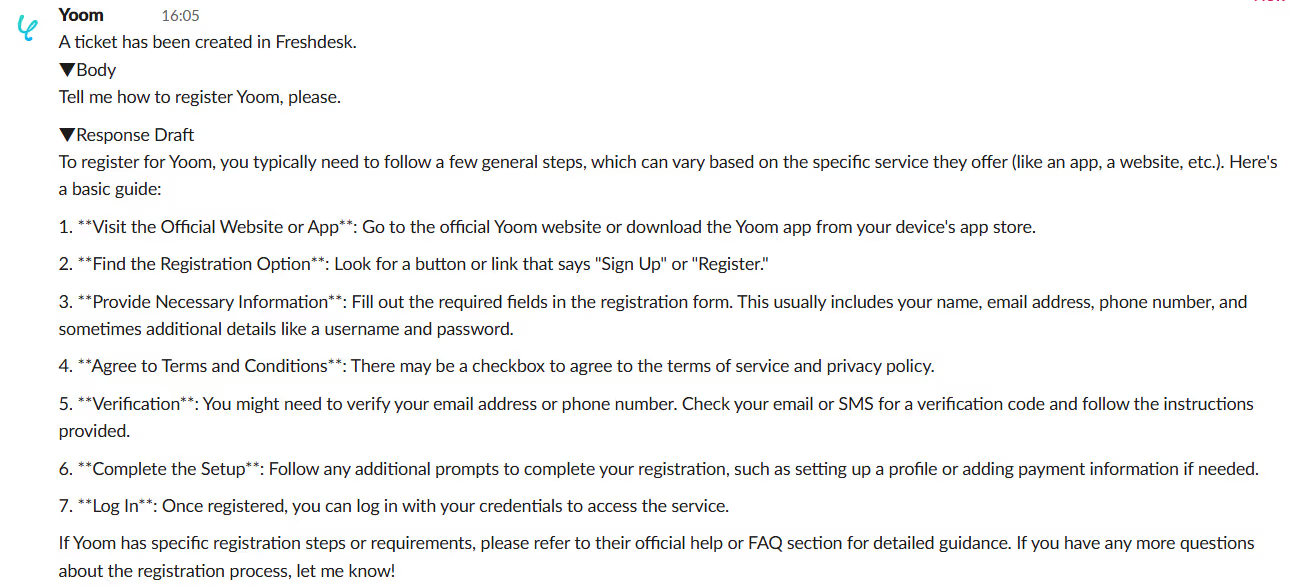
The specified content has been notified to Slack.
With this, all settings are complete, so click "Save".
Finally, turn on the trigger to activate the flow.

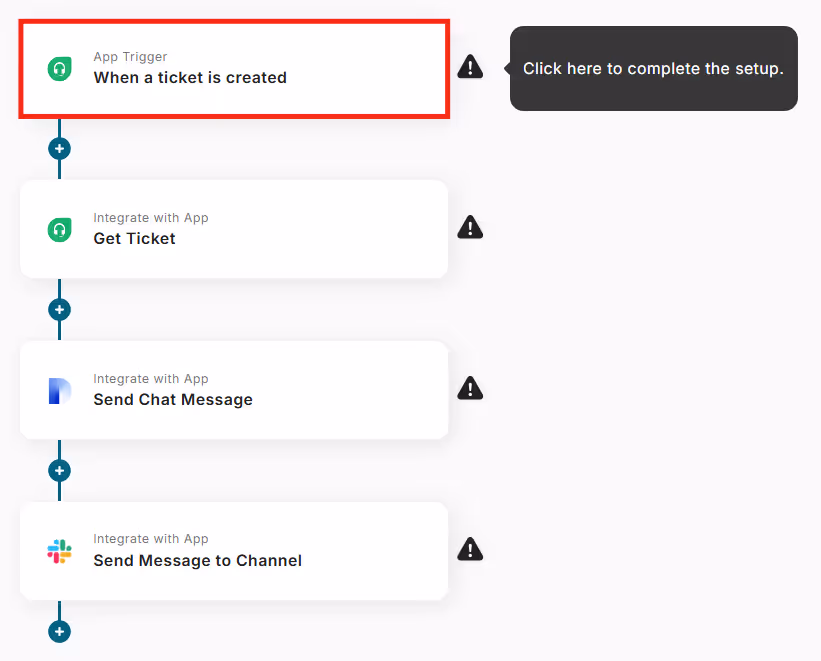
The flow set up this time is as follows.


.avif)
.avif)
.avif)


