

.avif)


Read the following screen display and click "OK".

When the following screen is displayed, check the "Title" and "Description".
If changes are needed, please make them from the page below.
First, go to the HubSpot settings and click "When a new contact is registered".
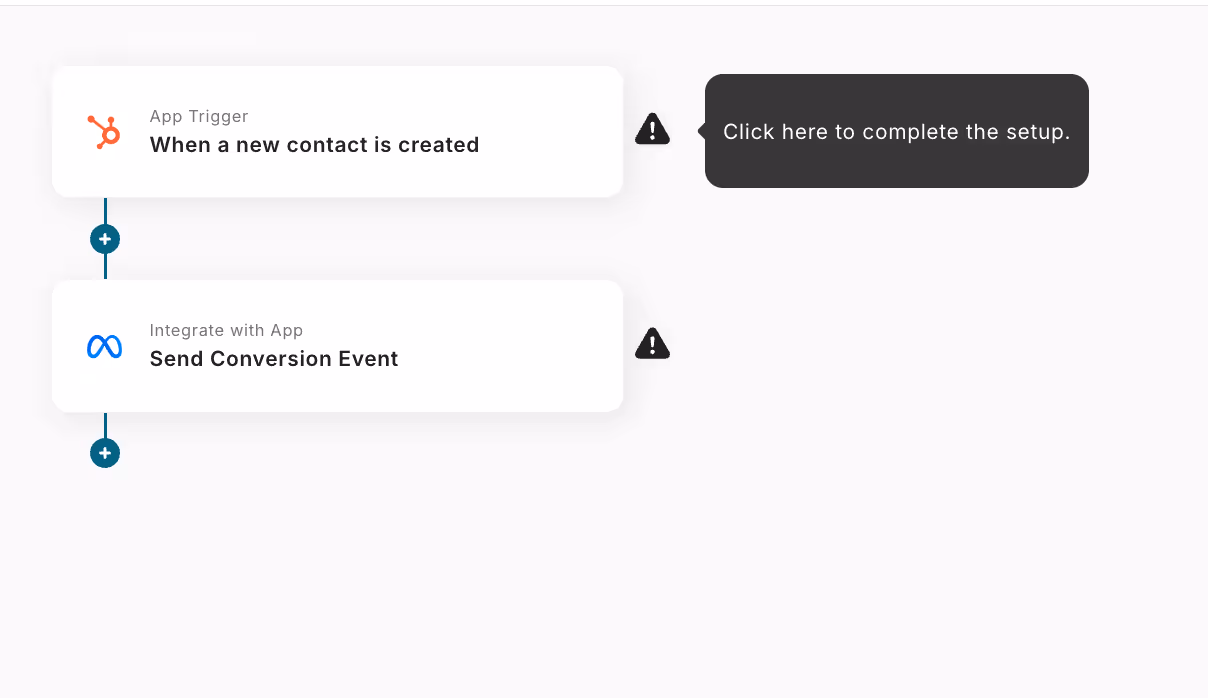
Step 3: Set the HubSpot trigger that starts the flow and the subsequent Meta Conversion API operation settings
The following screen will be displayed, so please check the settings.
- "Title" → Can be changed as desired
- "Account information linked with HubSpot" → Check if the account is correct
- "Trigger action" → When a new contact is created

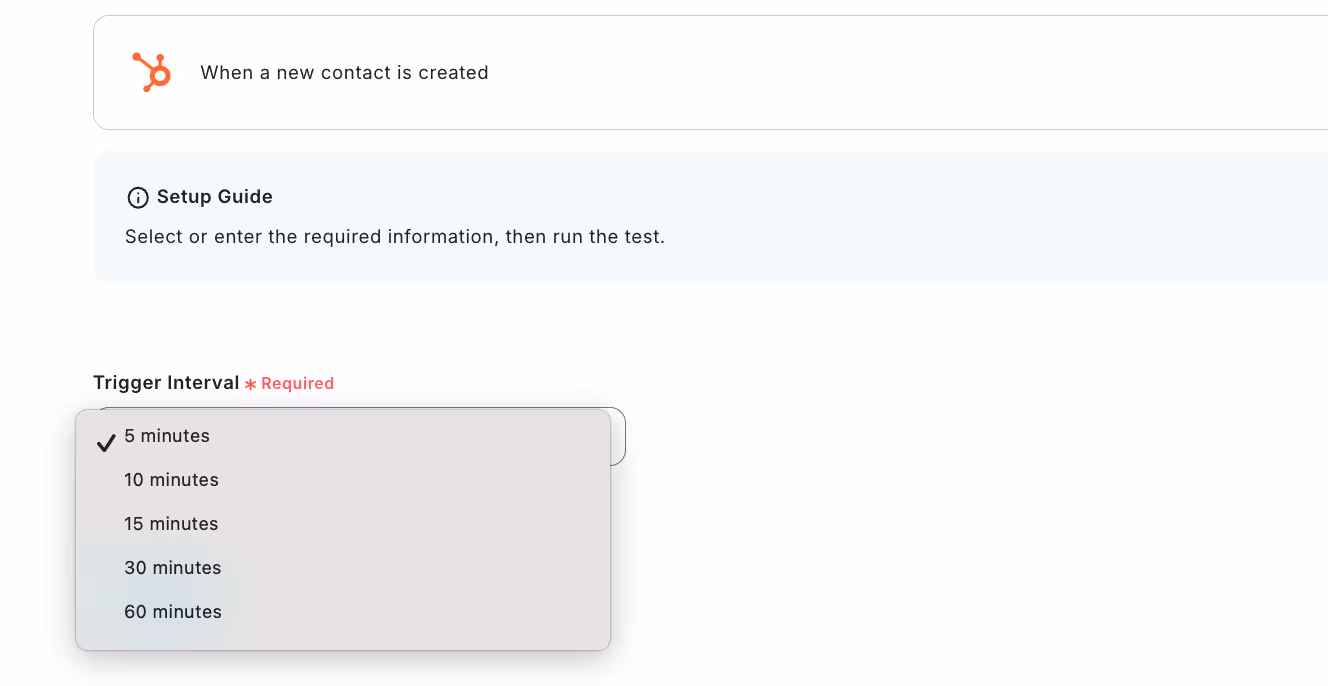
When the following screen is displayed, set the "Trigger Interval".
Select from 5 minutes, 10 minutes, 15 minutes, 30 minutes, or 60 minutes.
* Note that the trigger interval varies depending on the plan.
Once set, click "Test" → "Test Successful" → "Save".
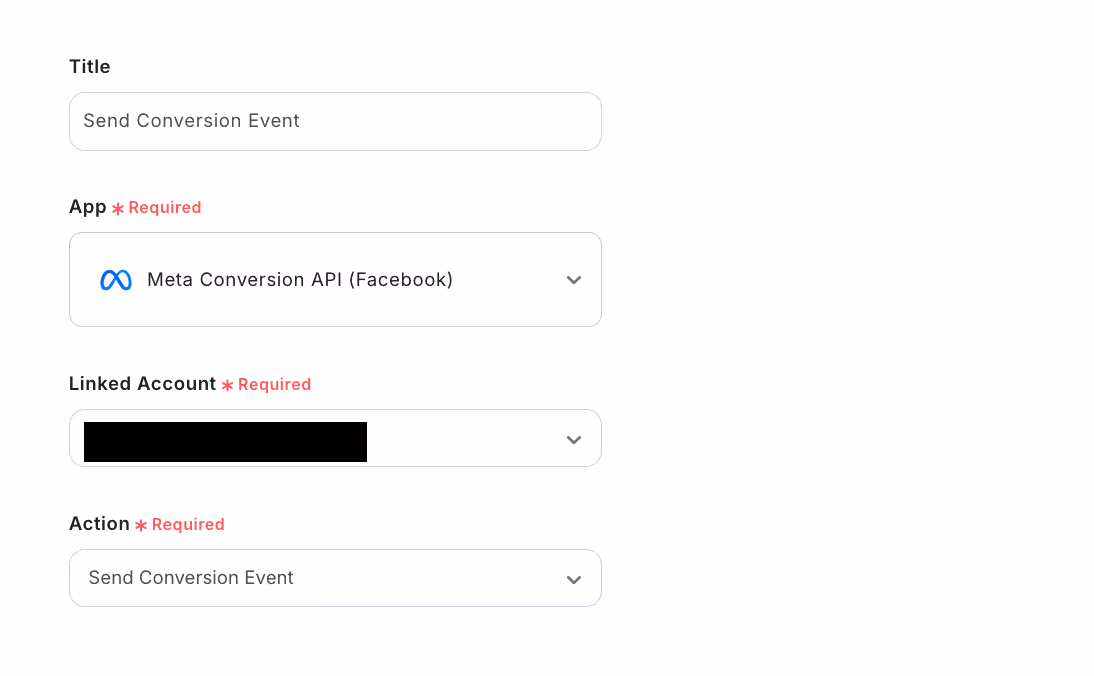
Next, to set up the Meta Conversion API, click "Send Conversion Event".
The following screen will be displayed, so please check the settings.
- "Title" → Can be changed as desired
- "Account information linked with Meta Conversion API" → Check if the account is correct
- "Action" → Send Conversion Event
Scroll down and make the following settings.
- "Pixel ID" → Obtain from Meta Conversion API data source
- "Event Name" → Set as desired
- "Event Occurrence Time" → Set as described
- "Action Source" → Set as desired

Scroll down and set the items.
If there are other necessary fields, set them in the same way.
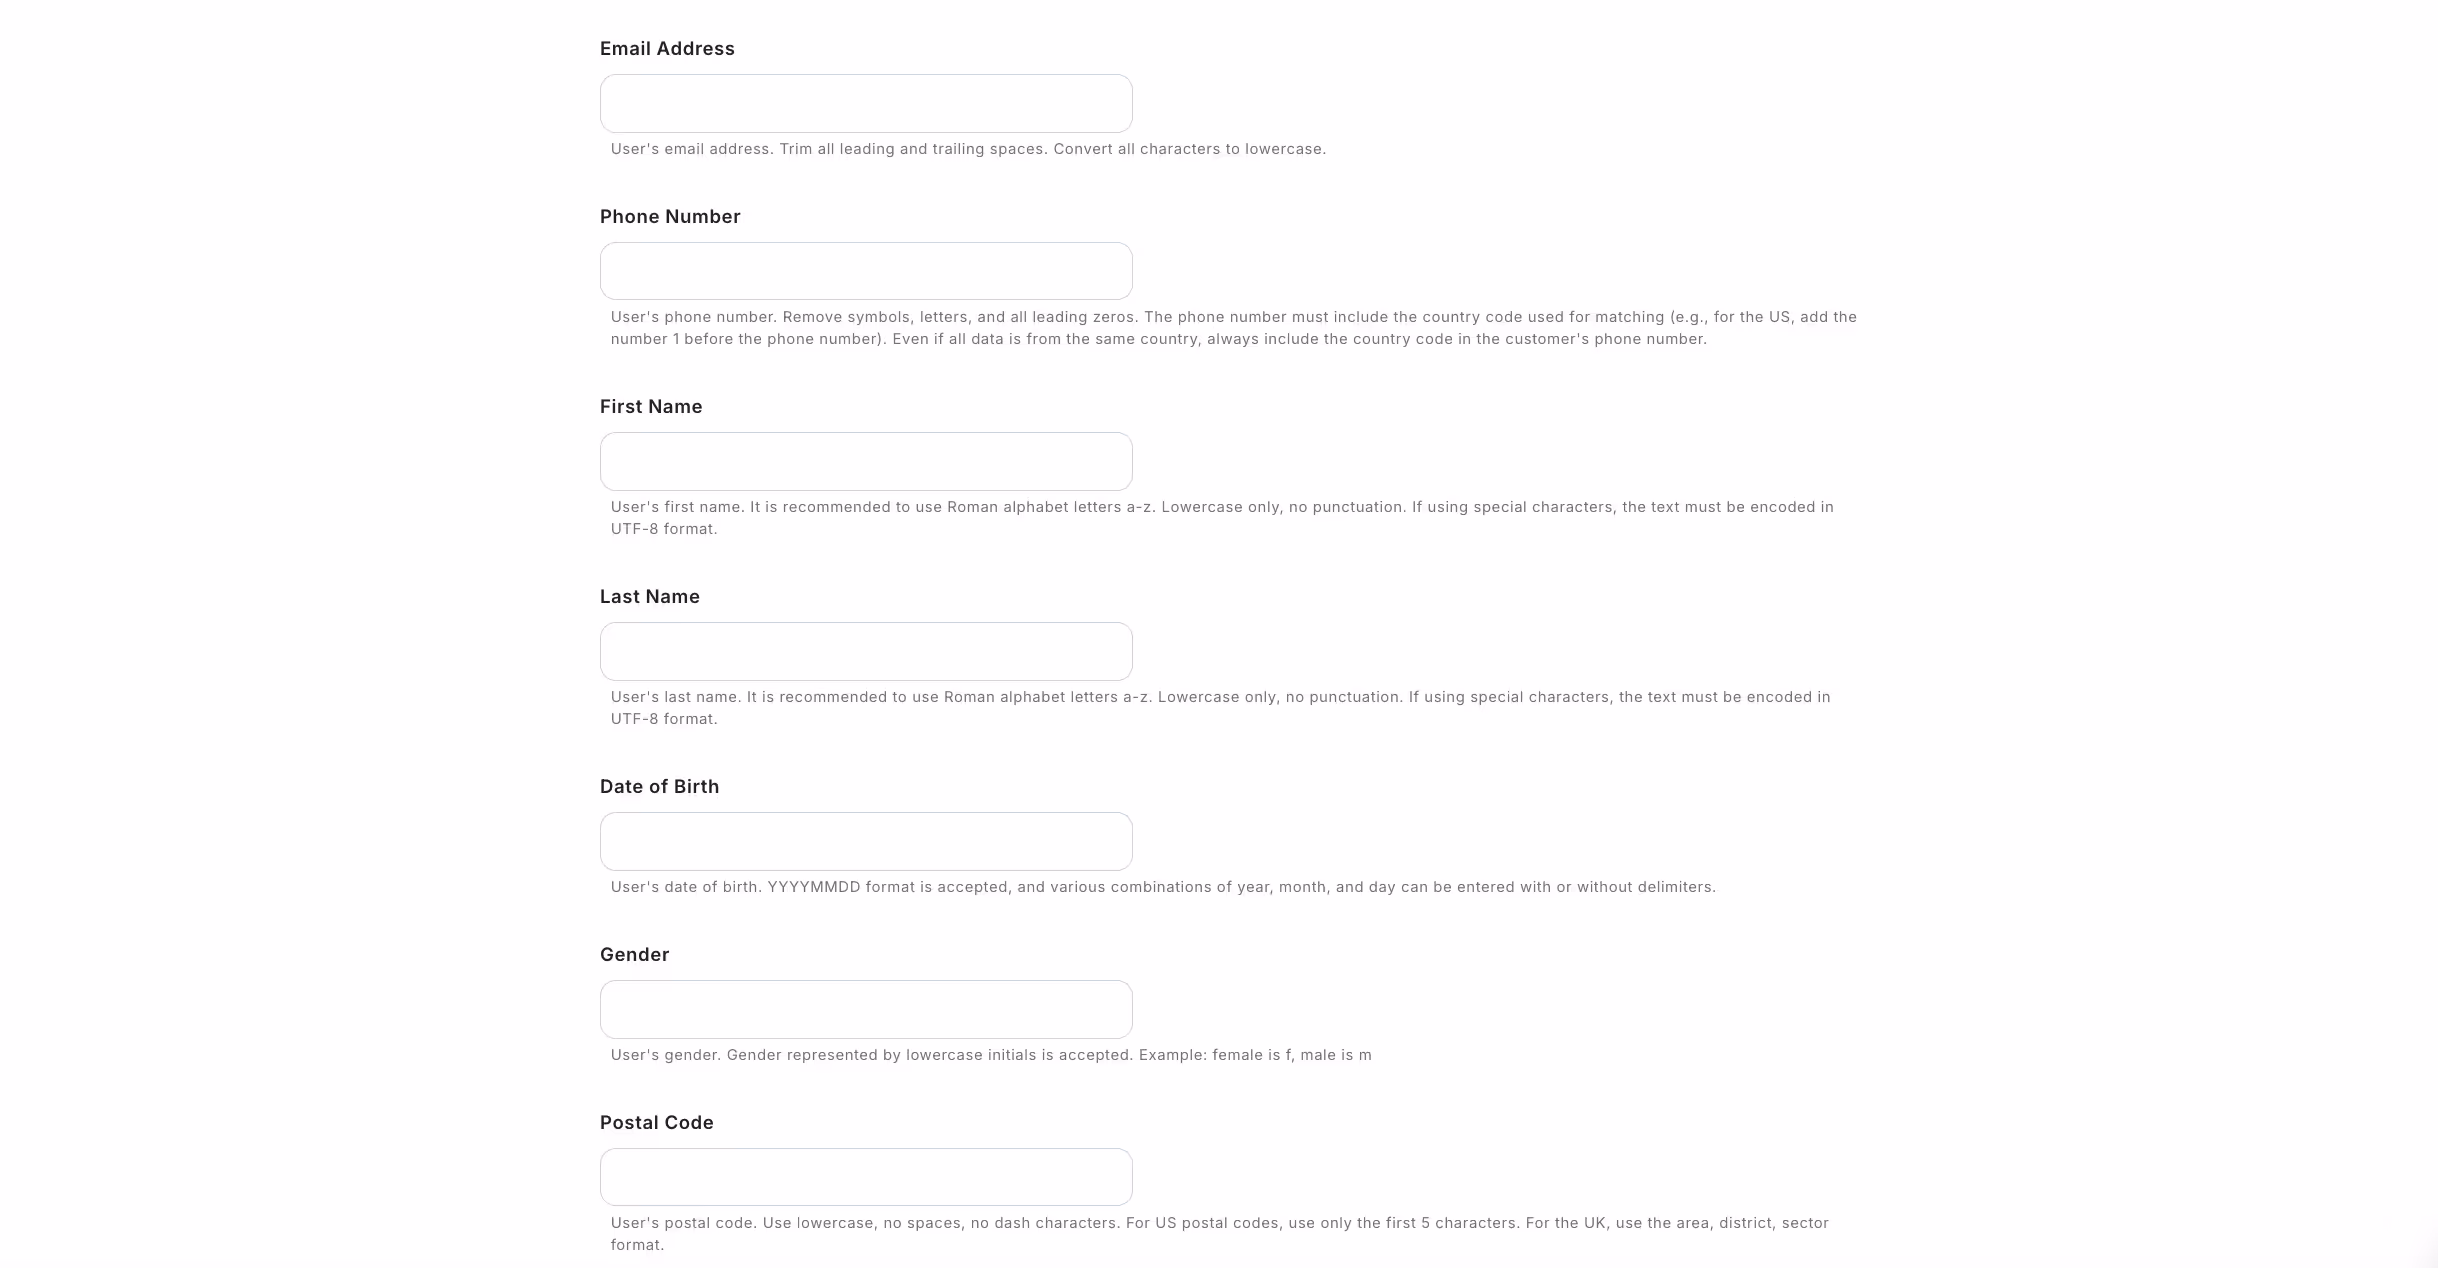
Once you have set them, click "Test" → "Test Successful" → "Save".
Step 4: Turn on the trigger button and verify the integration operation between HubSpot and Meta Conversion API
Finally, click "Turn on Trigger" to complete the automation setup.
Check if the flow bot is operating correctly.

Here is the template used this time.


.avif)

.avif)
.avif)


