


(2) Next, select the project you want from the workspace list.
The copied template is saved in "My Projects" in the project list, so please check it.
(3) Once the following screen is displayed, let's proceed to Step 2.

Step 2: Notion Settings
Next, move on to the Notion settings.
(1) Click "My Apps" on the left side of the screen.
(2) Next, click "+ New Connection" displayed on the right side of the screen.

(1) Select Notion from the list of apps.
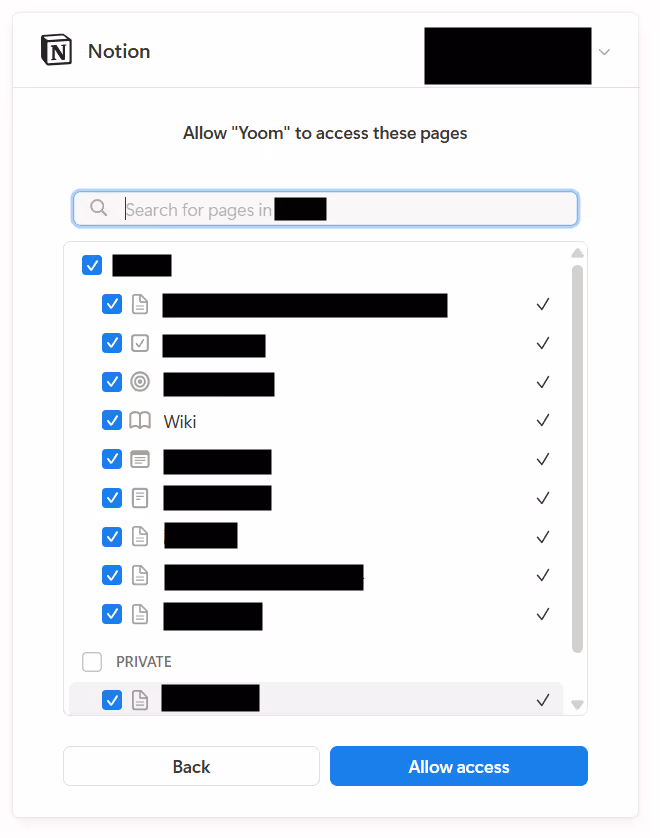
(2) On the screen requesting access, click "Select Page".
(3) After checking the pages you want to allow access to, click "Allow Access".
(4) This completes the registration of Notion in My Apps.
Step 3: Slack Settings
Next, let's also complete the registration of Slack in My Apps.
(1) Select Slack from the list of apps.
(2) On the access permission request screen, select the channel you want to post to.
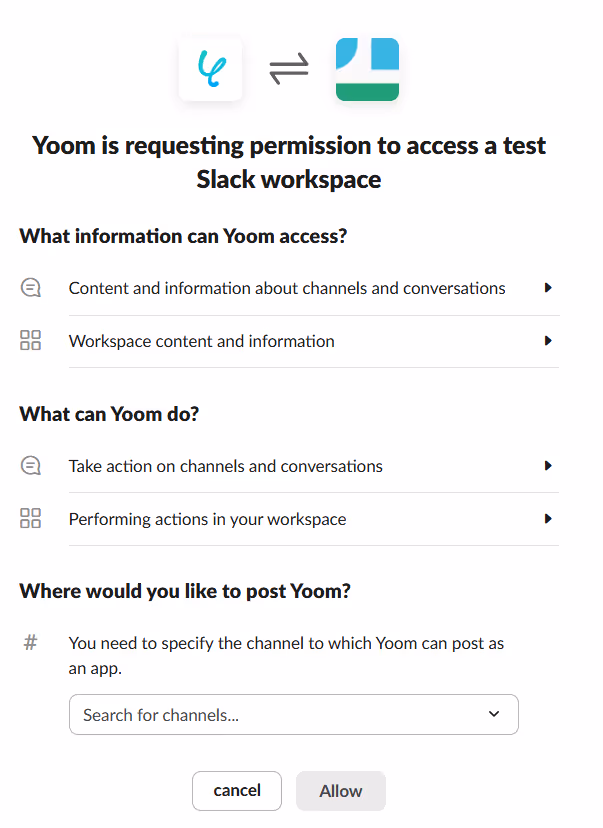
(3) Click "Allow".
This completes the registration of all My Apps, so let's proceed to the next step.
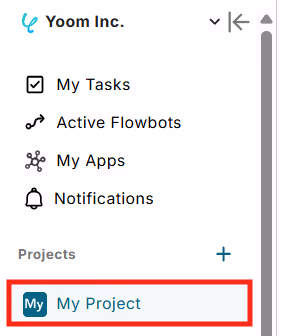
(4) Click "My Projects" from the project list.
(5) Click the copied template.
(6) Click "Edit" at the top right of the flow list screen and proceed to Step 4.
Step 4: Setting Triggers and Actions
(1) Click "Schedule Trigger" from the flow list screen.

(2) Set the title of the schedule trigger.
* You can use the already set title as it is.
(3) As for the schedule setting, this time we will leave it as the existing setting of the copied template (set to start at 6:00 every day).
For schedule settings, please refer to how to set schedule triggers. You can also set specific dates and weekdays only.

(4) Click "Save".
(5) Click "Operate Database" displayed under the schedule trigger.

(6) Set the title.
* You can use the already set title as it is.
(7) Check if the account information linked with Notion is correct.
(8) For the execution action, select "Retrieve multiple records (up to 100)".
(9) For database linkage, select the database ID from the candidates as desired.
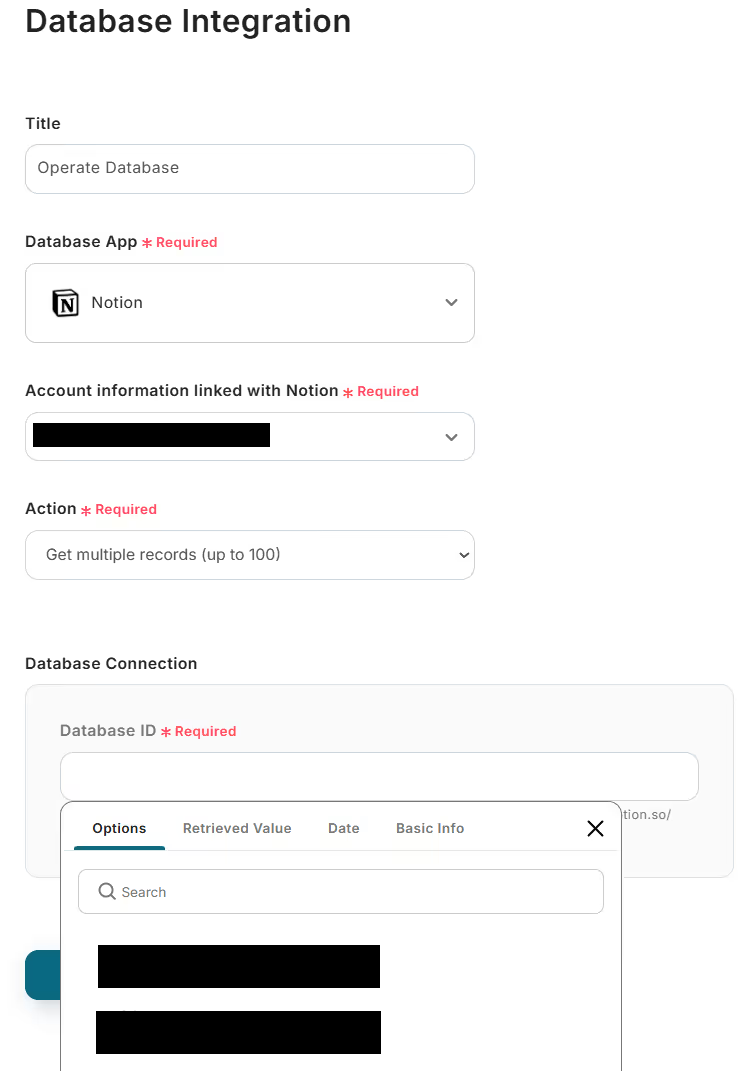
(10) Click "Next".
■ Detailed Settings for Database Operations
(11) Set the conditions for the records you want to retrieve as desired.
- This time, set the condition that Deadline and Today's Date are equal. (By setting the date to the next day, you can also notify tasks due the next day.)
➀ Select the deadline from the pull-down menu (you can select the header items of the database set in 9 from the pull-down).

➁ When checking the Notion linked this time, the date format is "yyyy/mm/dd".

➂ Select today from the dates and set the format to "yyyy/mm/dd", the same as the format on the database this time.

(12) Click "Test" and if no error occurs, click "Save".
* Even if it is set correctly, if there is no today's date in Notion, an error will occur, so create a task with today's date for testing!
The next Slack setting is the last one!
(13) Click "Integrate with App" at the bottom.

(14) Set the title.
* You can use the already set title as it is.
(15) Check if the account information linked with Slack is correct.
(16) For the action, select "Send a message to the channel".

(17) Click "Next".
■ API Connection Settings
(18) Select the channel ID to post to from the candidates as desired.
(19) For the message, we recommend a generic structure that can be sent to anyone.
- Notion information can be set from the output.
- You can also directly input text and combine it with the output to create a structure.

(20) If no error occurs in "Test", click "Save".
(21) Once the following screen is displayed, click "Turn on Trigger".

This completes the integration settings for Notion and Slack. Well done!
The flow bot template introduced this time can be used by registering with Yoom from the following!


.avif)


.avif)


