

.avif)


Step 2: Setting the Trigger to Activate When an Order is Placed on Shopify
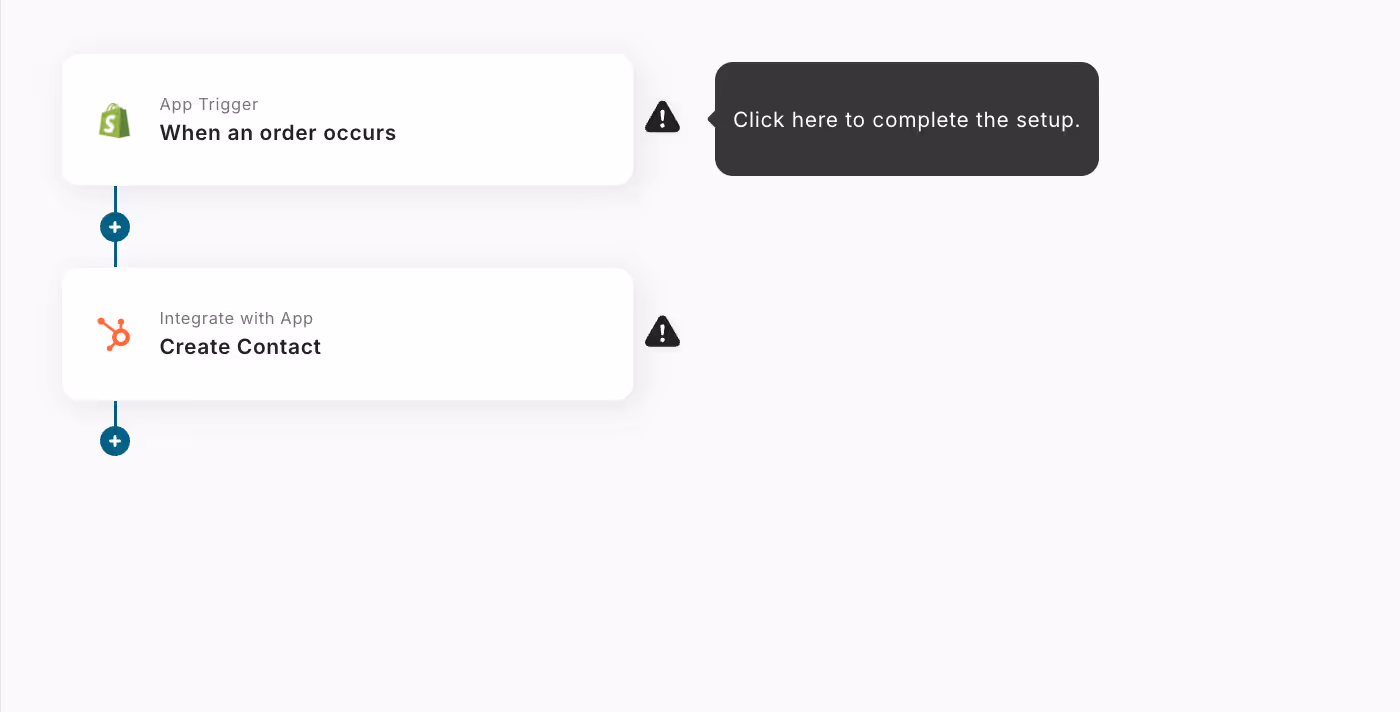
First, click on "When an order is placed".
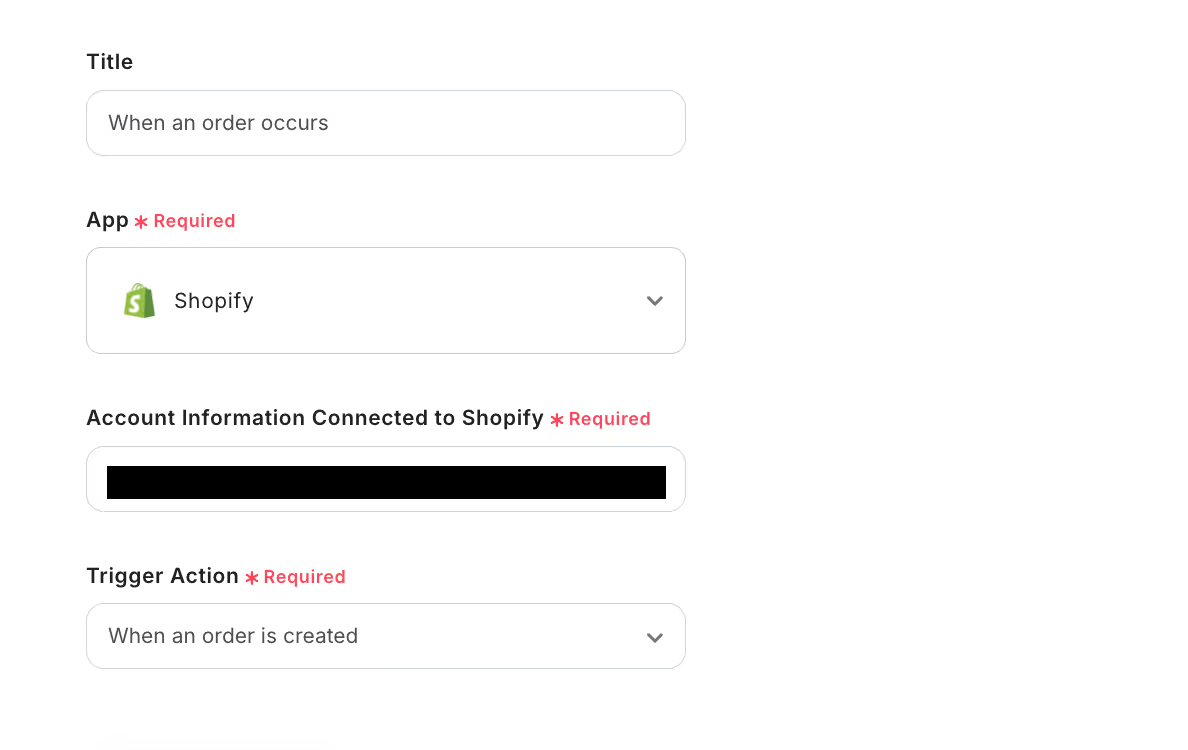
This page is already set up.
Be sure to select "When an order is placed" as the trigger action.
After confirming there are no errors in the settings, click "Next" to proceed.
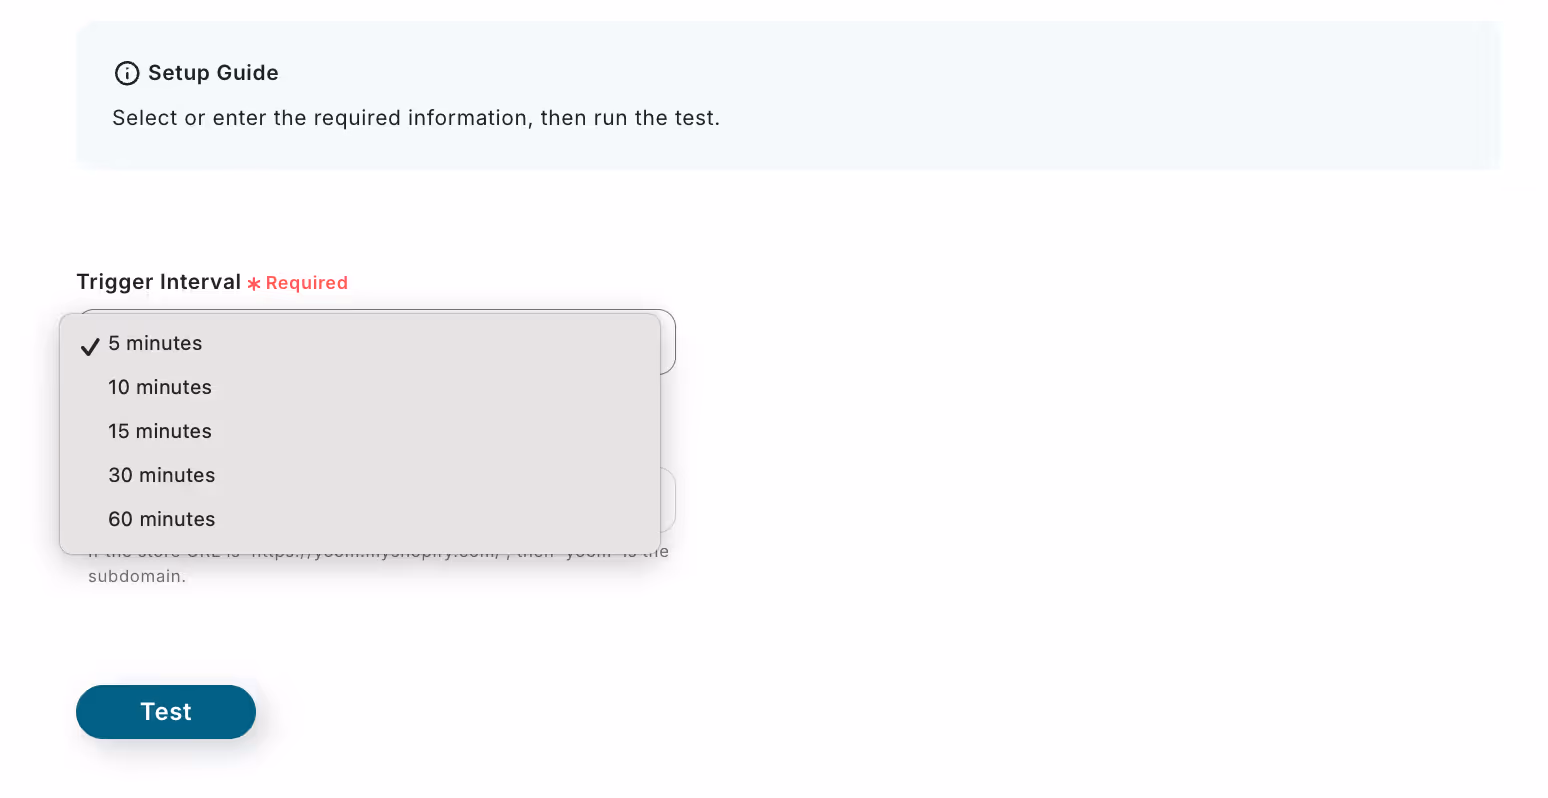
Set the trigger activation interval as desired.
Note: The shortest activation interval varies depending on the plan.
After setting the trigger activation interval, create a test order in Shopify.
Click "Test".
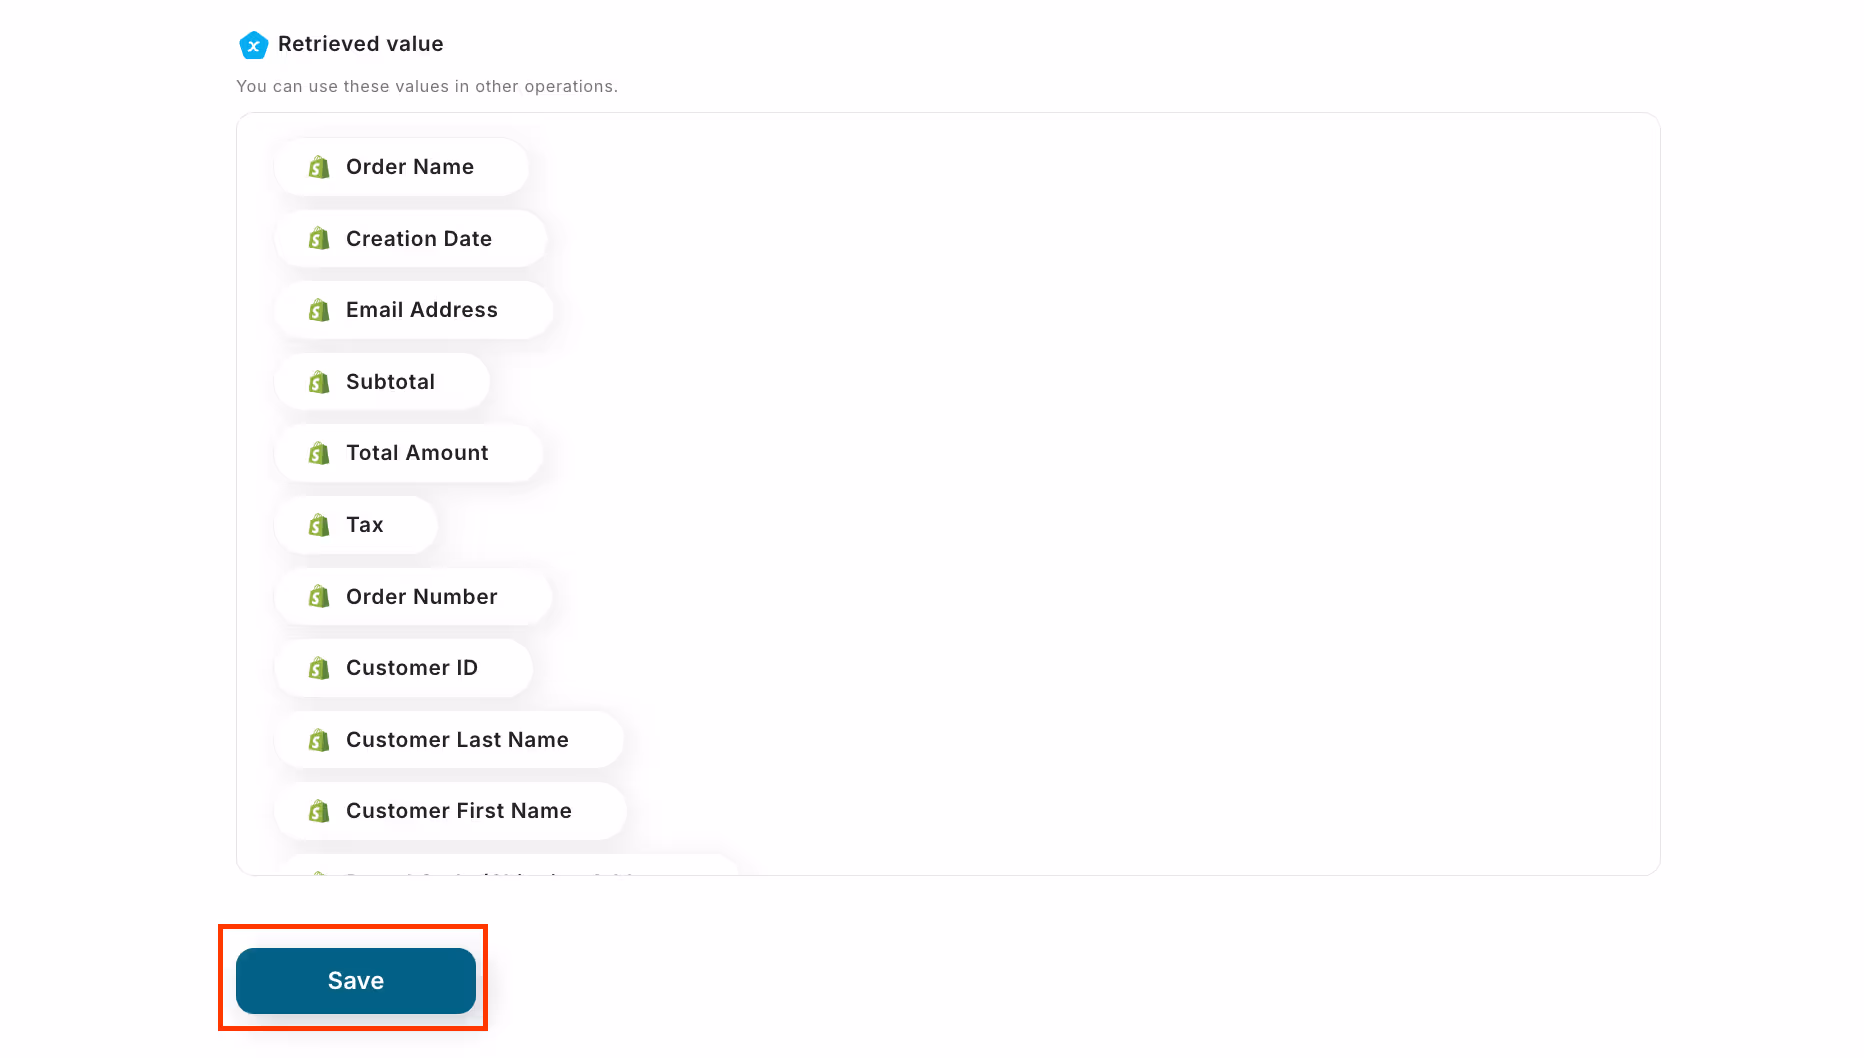
The Shopify order information you just created will be displayed in the output, so confirm it is correctly reflected and click "Save".
Step 3: Create a Contact in HubSpot
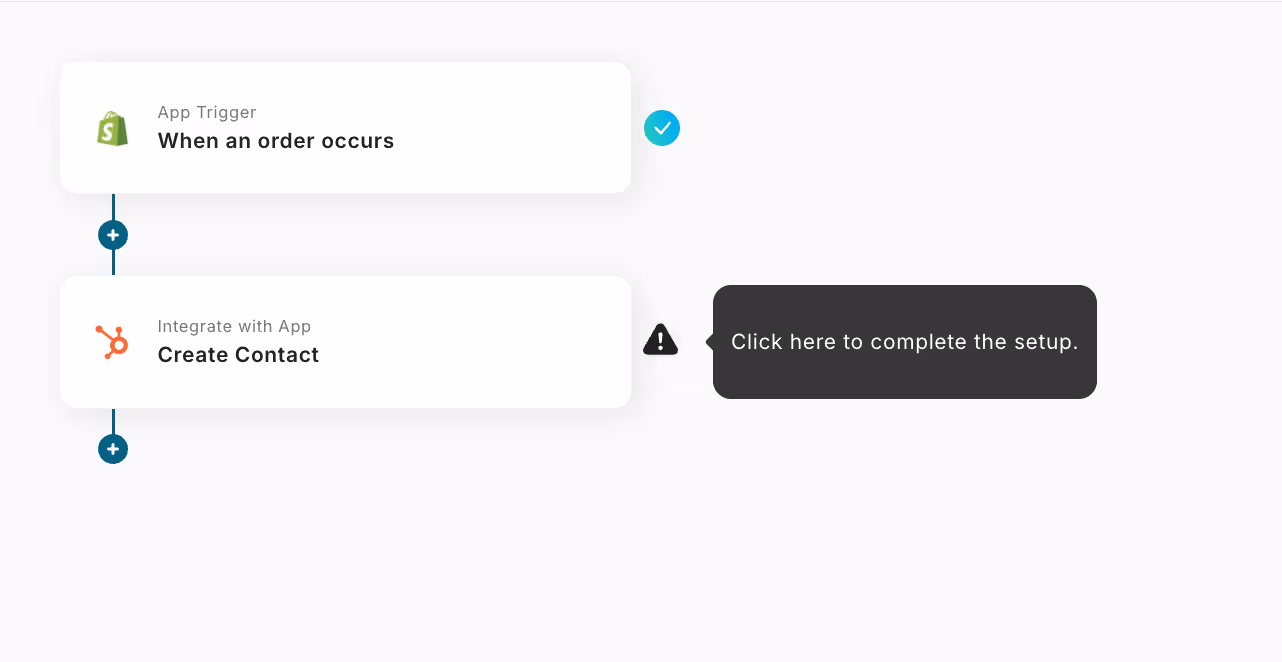
Next, we will set up "Create Contact".

This page is already set up.
Be sure to select "Create Contact" as the action.
After confirming there are no errors in the settings, click "Next".
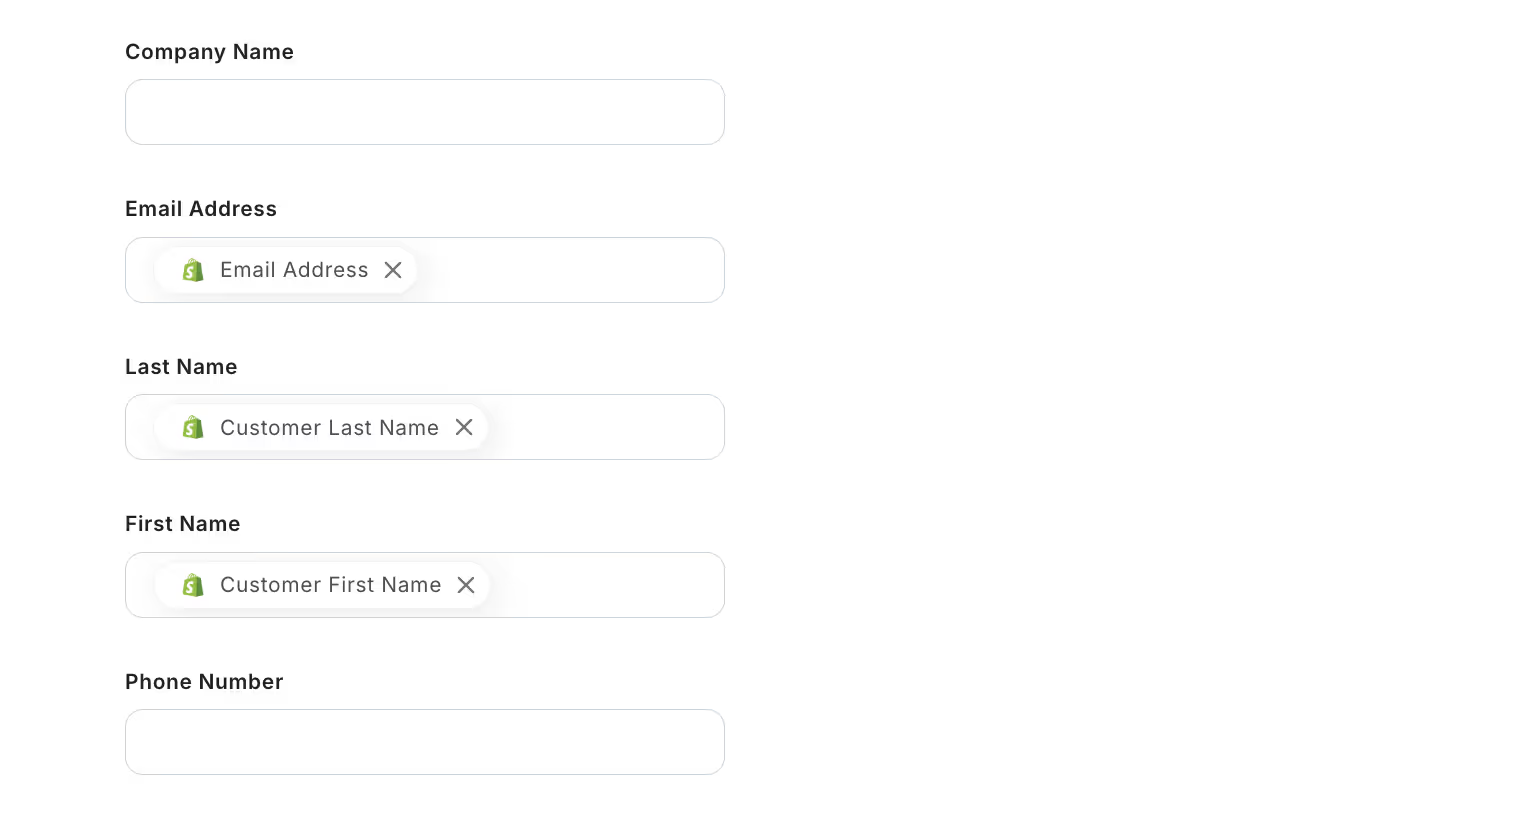
On this page, set up the items you want to automatically register in HubSpot.
In this case, it is already set up as shown in the image above.
Explanation: By setting it up this way, when an order is placed on Shopify, you can automatically obtain the purchaser's "Email Address", "Last Name", and "First Name" and add them to HubSpot's contacts.
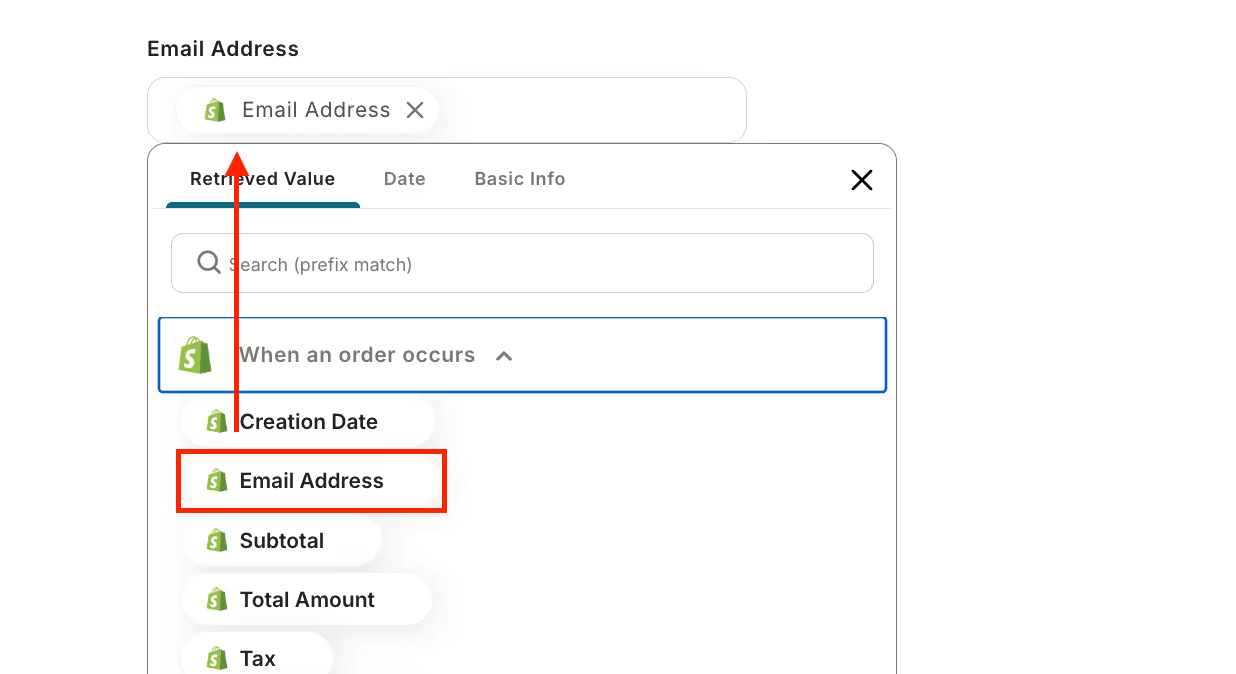
How to set: Click inside the box → Click "When an order is placed" → Click "Email Address"
You can freely set any other information you want to automatically obtain from Shopify.

Click Test, and if you can confirm that the contact has been registered in HubSpot without any issues, click "Save" to complete the setup.
Step 4: Turn ON the Trigger

Once all settings are complete, turn the trigger "ON".
This completes the flow of "Adding the purchaser to HubSpot's contacts when an order is placed on Shopify".


.avif)

.avif)
.avif)


