[No-Code Solution] How to Automatically Integrate Stripe Data with HubSpot
How to Integrate Applications
・
2025-05-20
[No-Code Solution] How to Automatically Integrate Stripe Data with HubSpot
m.wadazumi
Are you manually transferring Stripe payment information and subscription status to HubSpot? If so, you may encounter issues such as missing information, entry errors, and lack of internal sharing.
However, integrating Stripe with HubSpot seems to require programming knowledge, and many might feel, "This seems difficult for me."
In this article, we will introduce various ways to integrate Stripe and HubSpot using the no-code tool Yoom. <span class="mark-yellow">We offer numerous automated flows, from creating contacts upon payment completion to managing subscriptions and notifying payment failures.</span>
If you want to reduce the workload and enhance the speed and accuracy of customer service, be sure to check it out until the end.
For those who want to try it quickly
By using Yoom, you can easily integrate Stripe and HubSpot without any coding. Yoom provides templates for integrating Stripe and HubSpot, so you can achieve integration immediately just by registering, even without API knowledge.
What You Can Do by Integrating Stripe and HubSpot
By integrating the APIs of Stripe and HubSpot, you can automatically transfer Stripe data to HubSpot! For example, you can automatically perform data transfers like the ones below without any manual intervention.
Simply click "Try it out" on the automation example you're interested in and register an account to immediately experience the integration of Stripe and HubSpot. Registration takes just 30 seconds, so feel free to give it a try!
Create a HubSpot Contact When a Payment is Completed in Stripe
This flow involves obtaining customer information when a payment is completed in Stripe and creating a contact in HubSpot. <span class="mark-yellow">This flow is recommended for those who want to share contact information with marketing or sales teams.</span>
Create a Deal in HubSpot When a Stripe Subscription Ends
By creating a deal in HubSpot when a Stripe subscription ends, you can ensure a smooth transaction creation process. This flow is recommended for those who do not want to miss the opportunity to engage with customers who have canceled their subscriptions.
Create a Task in HubSpot When a Payment Fails in Stripe
You can add failed payments in Stripe as tasks in HubSpot, eliminating the need for manual entry. This flow is recommended for those who want to address payment issues quickly.
Let's Create a Flow to Integrate Stripe and HubSpot
Now, let's create a flow that integrates Stripe and HubSpot! We will use Yoom to proceed with the integration of Stripe and HubSpot without any coding, so if you don't have a Yoom account yet, please create one from this registration form.
[What is Yoom]
<span class="mark-yellow">This time, we will create a flow bot that creates a contact in HubSpot when a payment is completed in Stripe!</span> The creation process is broadly divided into the following steps.
Register Stripe and HubSpot as My Apps
Copy the template
Set up the Stripe trigger that initiates the flow and the subsequent HubSpot action settings
Turn on the trigger button to activate the flow bot
Step 1: Register My Apps with Stripe and HubSpot
First, register your apps to connect Stripe and HubSpot with Yoom. Completing the app registration in advance will make it easier to proceed with automation settings.
Let's proceed with the setup! Click on "My Apps" → "+ Add" on the left side of the Yoom screen.
How to Integrate Stripe
A list of apps will be displayed, so find Stripe from there or use the search function.
When the following screen appears, make the settings within the red frame. For detailed setup instructions, check here.
How to Integrate HubSpot
Similarly, find it from the list or use the search function. When the following screen appears, log in to HubSpot.
If Stripe and HubSpot are displayed in your My Apps section, the registration is complete.
Step 2: Copy the Template
Now, let's proceed with the automation settings! Log in to Yoom and click "Try it" on the banner below.
The template will be automatically copied, and the following screen will be displayed. The template will be automatically stored in a project called "My Project," so please check there if you want to confirm.
Read the following screen display and click "OK."
When the following screen is displayed, please check the "Title." You can also change the title to make it easier to use. First, to set up the flowbot to activate once payment is completed on Stripe, click "When payment is successfully completed."
Step 3: Set the Stripe trigger that initiates the flow
The following screen will be displayed, so please check the settings. If there are no issues, click "Next."
※Stripe is an app for those using the Team Plan or Success Plan. Please note that using it with the Free Plan or Mini Plan will cause errors in flowbot operations and data connections. There is a two-week free trial for paid plans (Team Plan, Success Plan). During the trial period, you can try Stripe without any restrictions.
<span class="mark-yellow">Move to the Stripe screen and complete a mock payment for testing.</span> Return to the Yoom screen and click "Test." When "Test Successful" is displayed, click "Next."
When the following screen is displayed, click "Test."
"Test Successful" will be displayed, and "Output" will be shown below it. Although not shown below, values will be displayed next to the item names.
Output will be used in the subsequent settings, so please check for any mistakes. Once confirmed, click "Save."
Step 4: Set to retrieve customer information from Stripe
Next, to set up retrieving customer information from Stripe, click "Retrieve Customer Information."
The following screen will be displayed, so please check the settings. If there are no issues, click "Next."
When the following screen is displayed, set the "Customer ID."
Select "Customer ID" from the output of "When payment is successfully completed." Once the setup is complete, click "Test."
Once the test is successful, the customer information from Stripe will be displayed, so click "Save."
Step 5: Set to create a contact in HubSpot
Next, to set up creating a contact in HubSpot, click "Create Contact."
The following screen will be displayed, so please check the settings. If there are no issues, click "Next."
Please check the following precautions.
When the following screen is displayed, set the contact information from the output of "Retrieve Customer Information."
HubSpot requires contacts to be registered separately as "Last Name" and "First Name," but since Stripe sets it as a full name, "Customer Name" is set as "Last Name."
Once the setup is complete, click "Test." "Test Successful" will be displayed, so click "Save."
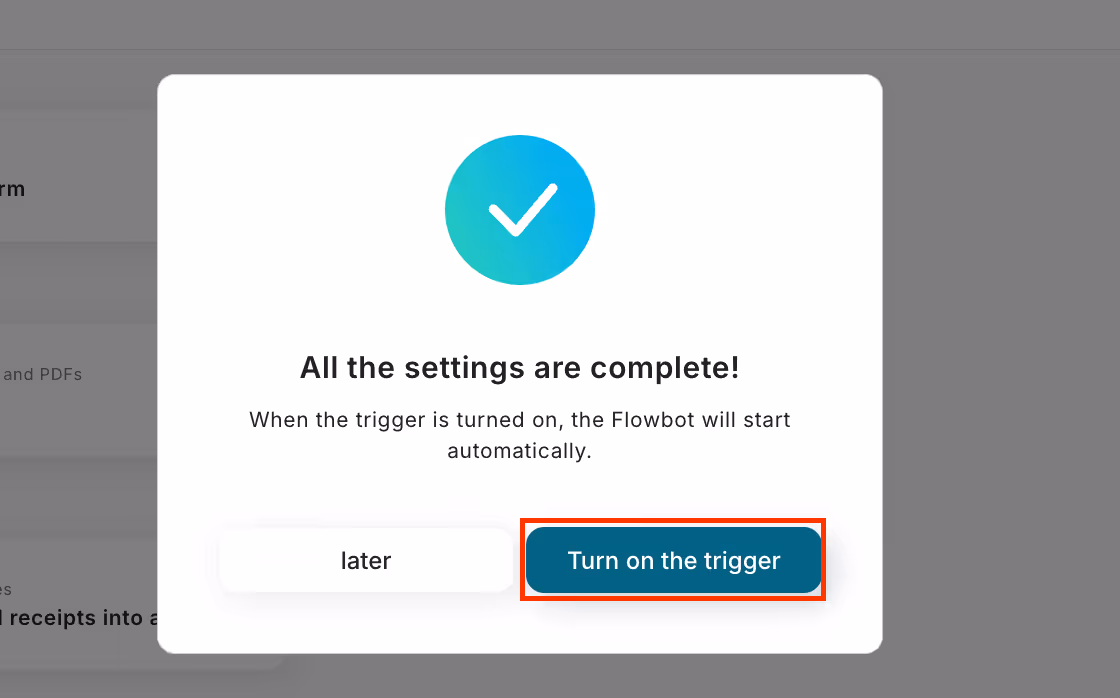
Step 6: Turn on the trigger button and activate the flowbot
All the settings for each item are now complete! The following screen will be displayed, and once you click "Turn on the trigger," the automation setup will be complete. Check to see if the flowbot you set up is working correctly!
This was the flow to create a contact in HubSpot when payment is completed on Stripe.
If you want to link HubSpot data to Stripe
Earlier, we introduced how to link data from Stripe to HubSpot, but if you want to link data from HubSpot to Stripe, please use the template below.
Register a customer in Stripe when a contact is added in HubSpot
You can register HubSpot contact information as a customer in Stripe, saving you the trouble of transcription. This flow is recommended for those who want to centrally manage customer information and improve business efficiency.
Send a Payment Link via Stripe When a Deal is Closed in HubSpot
When the status in HubSpot is updated to closed, you can send a payment link via Stripe, ensuring a smoother payment process. This flow is recommended for those who want to automate the sending of payment links.
Other Automation Examples Using Stripe and HubSpot APIs
In addition to integration with Stripe, leveraging HubSpot's API can make daily operations more efficiently automated. If you want to enhance the quality of your marketing and sales activities, please try the following flows!
Convenient Automation Examples Using Stripe
Triggered by the completion of a payment on Stripe, you can automatically send thank-you emails via Gmail or Outlook, send notifications to Slack, and record information in Google Sheets. Additionally, you can register new customer information in Salesforce, which helps improve information management efficiency and team collaboration.
Convenient Automation Examples Using HubSpot
With HubSpot, you can automate tasks such as notifications, email sending, and schedule creation in conjunction with form submissions and contact additions. The major advantage is reducing the hassle of manual handling and preventing information omissions and sharing errors.
Conclusion
The integration of Stripe and HubSpot has often been considered difficult without specialized knowledge. However, with Yoom, you can easily start the integration without any programming knowledge.
By utilizing the flow introduced in this article, you can significantly reduce the hassle of registering payment information and managing customers! Templates are also available, so even beginners can feel at ease.
Register for free now and experience the automatic integration of Stripe and HubSpot with Yoom!
The person who wrote this article
m.wadazumi
Having transitioned from a career in child welfare to working as a writer, I am currently blogging for Yoom. I am continually amazed by the efficiency improvements Yoom enables and am eager to share this excitement with others to contribute to society. I will be sharing insights on app integrations and automation that even someone like me, with zero programming knowledge, can accomplish.
Conventional RPA can only automate simple repetitive tasks, and the setup process was very complicated. With “hyperautomation,” which combines various technologies such as AI, API, RPA, and OCR, it is possible to automate many tasks that could not be realized until now more easily than before.
Most tools simply connect one app to another, leaving the complex tasks to you. Yoom goes much further: From document creation and browser automation to OCR and generative AI, Yoom handles it all seamlessly in one platform.
Why settle for basic integrations? Streamline your entire workflow with Yoom’s powerful hyperautomation.


.avif)


.avif)


.avif)


