How to integrate Backlog with Outlook to automatically send issues added in Backlog to Outlook
How to Integrate Applications
・
2025/01/24
How to integrate Backlog with Outlook to automatically send issues added in Backlog to Outlook
y.matsumoto
Missing newly registered issues or tasks can lead to project delays or a decline in quality. Especially in projects involving remote work or activities across different teams, quick information sharing is essential. The system that allows automatic notifications to be sent to Outlook when issues are added to Backlog is very effective for those aiming to improve work efficiency. This blog explains in detail the specific flow and benefits of automating issue notifications by linking Backlog and Outlook without code. It is recommended for those aiming to streamline task management and facilitate smooth information sharing. Please read to the end.
Recommended for
Those who are already using Backlog as a project management tool
Those who are already using Outlook as a communication tool within the team
Those who want to quickly check new issues and prevent missing important ones
Those who want to facilitate information sharing and reduce communication errors or omissions
Those who want to automate task notifications and information sharing to improve efficiency
Benefits and Examples of Linking Backlog and Outlook
Benefit 1: Prevent missing important issues and enable quick response
By linking Backlog and Outlook, you can build a system that automatically sends notifications to Outlook when issues are added to Backlog, reducing the risk of missing important tasks or problems. Especially for teams managing multiple projects simultaneously, there are many tasks to manage, making it easy to overlook important issues. By introducing this automation, you can quickly share information such as the content of new issues and the person in charge through Outlook email notifications, allowing the person in charge to respond promptly. This can lead to early response and improved client satisfaction.
Benefit 2: Share project information without omissions
By automatically sending Backlog issue information to Outlook through app integration, information sharing among project members becomes smooth. Normally, to check issues in Backlog, you need to log in to Backlog and check the details, but by utilizing this automation, all team members can receive the same information without omissions through Outlook's automatic notifications. This can reduce communication errors and omissions, making task progress smoother and potentially improving the overall quality of the project.
Benefit 3: Reduce manual notification tasks and improve productivity
Traditionally, to check issues in Backlog, you needed to manually check tasks or set notifications individually, which was time-consuming. By linking Backlog and Outlook, you can automate Outlook notifications, reducing manual input tasks and allowing the person in charge to focus on their original work. For example, if you were responsible for checking Backlog and sharing tasks with other members, you can reduce that burden. This can streamline the workflow, leading to improved productivity.
From here, we will explain how to use the no-code tool Yoom to "send to Outlook when an issue is added to Backlog."
[What is Yoom]
How to Automatically Send Issues Added to Backlog to Outlook
You can achieve this by receiving notifications of issues added or updated in Backlog using Backlog's API and sending them to Outlook using Outlook's API. Generally, programming knowledge is required to achieve this, but with the no-code tool Yoom, you can easily achieve it without programming knowledge.
The integration flow is broadly divided into the following processes.
Link Backlog and Outlook My Apps
Copy the template
Set triggers in Backlog and actions in Outlook
Turn on the trigger
You can create a Yoom account from here. If you already have an account, please log in!
Step 1: My Apps Integration with Backlog and Outlook
1. How to Register Backlog
Click "My Apps" and search for Backlog from "New Connection".
When the above screen appears, set the "Domain" and click "Add".
2. How to Register Outlook Next, select Outlook from "New Connection". * Microsoft365 (formerly Office365) has a personal plan and a general business plan (Microsoft365 Business), and if you are not subscribed to the general business plan, authentication may fail.
Select the account to sign in with on the above screen.
Enter your password and click "Sign In".
This completes the My Apps integration with Backlog and Outlook.
Next, click "Try it" on the template below.
From the next step, we will actually start creating the flow.
Step 2: Set up a trigger to activate when an issue is added or updated in Backlog
First, let's set up the app trigger. Click on "When an issue is added or updated".
This page is already set up. The title can be edited as desired. Without changing the trigger action, click "Next".
The trigger activation interval can be set as desired. Note: The shortest activation interval varies depending on the plan, so please be careful.
Set the domain and project ID with reference to the annotations.
Click "Test" and if successful, save the settings.
Step 3: Send to Outlook
Next, let's set up the action. Click on "Send to Outlook".
The title can be changed according to the purpose. Without changing the action, proceed to the next page.
The recipient can be set as desired.
The body can be set freely. As an example, I have set it as shown in the image above. By setting it this way, when an issue is added in Backlog, you can automatically retrieve the "Subject", "Issue Details", and "Assignee" and quote them in an Outlook email. Set the information you want to automatically retrieve from Backlog as shown on the screen above.
Once the settings are complete, press "Next".
When the next page is displayed, press the test button. A sample email will be sent to Outlook, so once you have confirmed it, click "Save".
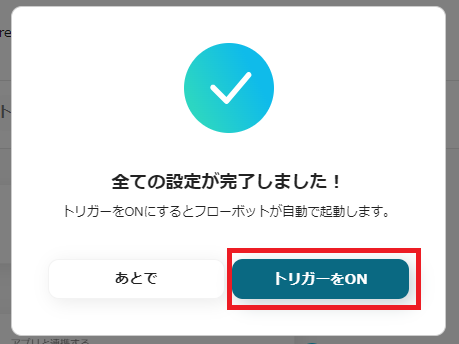
Step 4: Turn on the Trigger
Finally, click "Turn on Trigger" to complete the automation setup. Check to see if the flow bot is activated correctly.
Introduction to Other Automation Examples Using Backlog and Outlook
There are many other examples of automation using Backlog and Outlook, so here are a few introductions.
1. This flow automatically extracts information using AI when a new email arrives in Outlook and adds it as a task in Backlog. By utilizing this flow, you can automate registration in Backlog, reducing the effort of manual input and improving work efficiency. Additionally, it can help reduce human errors such as registration mistakes and omissions.
2. This is a flow where when an item is added to a Notion database, a task is automatically created in Backlog and an email is sent to Outlook. By utilizing this flow, you can save the effort of repeatedly entering data, allowing your work to proceed smoothly. Additionally, since tasks are automatically added to Backlog and emails are sent to Outlook, it helps prevent any omissions in information management.
3. This is a flow that automatically registers the due dates of tasks registered in Backlog to Google Calendar. By utilizing this flow, you can automatically register events in Google Calendar, preventing any forgetfulness in registration. Additionally, since the manual task of registering to Google Calendar is streamlined, information sharing can be facilitated smoothly.
Summary
In this blog, we introduced a method to integrate Backlog with Outlook so that when a task is added in Backlog, it is automatically sent to Outlook. With Outlook's email notifications, you can quickly share information such as the details of new tasks registered in Backlog and the assignees, which can streamline operations and prevent overlooking important tasks. This can lead to smoother task progress, potentially improving the overall quality of the project. By using Yoom, anyone can easily integrate applications without specialized knowledge. Let's integrate Backlog and Outlook to enhance team productivity.
The person who wrote this article
y.matsumoto
Until now, I have experienced sales and sales office work in the human resources industry.
Based on my experience in my previous job, I feel that the problems faced by various companies can be reduced by “automating operations.”
Through Yoom, we will continue to send out information on a daily basis so that we can solve your problems even a little bit!
Conventional RPA can only automate simple repetitive tasks, and the setup process was very complicated. With “hyperautomation,” which combines various technologies such as AI, API, RPA, and OCR, it is possible to automate many tasks that could not be realized until now more easily than before.
Most tools simply connect one app to another, leaving the complex tasks to you. Yoom goes much further: From document creation and browser automation to OCR and generative AI, Yoom handles it all seamlessly in one platform.
Why settle for basic integrations? Streamline your entire workflow with Yoom’s powerful hyperautomation.


.avif)


.avif)
.avif)
.avif)
.avif)


