How to integrate Notion with SendGrid to add leads to the SendGrid contact list when a lead is created in the Notion database
How to Integrate Applications
・
2025-04-16
How to integrate Notion with SendGrid to add leads to the SendGrid contact list when a lead is created in the Notion database
-
If you manually manage lead information with Notion and SendGrid, transcription work becomes a challenge. Not only does it take time, but it also leads to input omissions and duplicate registrations, causing a time lag in data reflection. These issues can be resolved by integrating Notion and SendGrid to automate the transcription process. This will improve the accuracy of lead information, enhance team collaboration, and increase the efficiency of the person in charge. This article introduces a method to integrate Notion and SendGrid without coding. No specialized knowledge is required, and the setup is simple, so please refer to this when introducing automation.
Recommended for:
- Those using Notion and SendGrid
- Those using Notion and SendGrid and finding the transcription of lead information cumbersome
- Those who want to smoothly share lead information between teams by integrating Notion and SendGrid
- Those who want to reduce errors when transcribing from Notion to SendGrid
Now, let's introduce how to use the no-code tool Yoom to "add a lead to the SendGrid contact list when it is created in the Notion database."
[What is Yoom]
How to add a lead to the SendGrid contact list when it is created in the Notion database:
This method is achievable by receiving the creation of a lead in the Notion database using the API provided by Notion and adding it to the contact list using the API provided by SendGrid. Generally, programming knowledge is required to achieve this, but it can be easily accomplished without programming knowledge by using the no-code tool Yoom.
This time, we will create it through the following major processes:
- Register Notion and SendGrid as my apps
- Copy the template
- Set up Notion as the starting point of the flow, followed by the SendGrid setup
- Turn on the trigger button and verify the integration operation of Notion and SendGrid
If you are not using Yoom, please register for free from here. If you are already using Yoom, please log in.
Step 1: Connect Notion and SendGrid to My Apps
First, register Notion and SendGrid with My Apps to connect them to Yoom.
1. Select "My Apps" on the left side of the Yoom management screen and click "+ New Connection".
2. In the following screen, search and select Notion and SendGrid, then proceed to the next screen.
<For Notion>
・Click "Select Page". On the following screen, check the box and click "Allow Access" to complete the registration with My Apps.
<For SendGrid>
・Enter the account name and access token, then click "Add" to complete the registration with My Apps.
Step 2: Copy the Template
Next, copy the template for connecting Notion and SendGrid.
1. Open the link below.
2. Click "Try this template" to complete the copy.
Step 3: Setting the Trigger in Notion
Set up the trigger action that will start the flow. In this flow, the trigger will activate when a page in a specific Notion database is created or updated.
1. Select "My Projects" in the Yoom management screen and click "Add to SendGrid contact list when a lead is created in Notion database (Copy)". * You can change the template title on the next screen.
2. Click "App Trigger: When a page in a specific database is created or updated".
3. Confirm the account linked with Notion and click "Next". * Other items are set by default.
4. Set the trigger activation interval and database ID, then perform a test. * Trigger activation intervals of 5, 10, 15, 30, and 60 minutes are available, and the selectable times vary depending on the plan. Once per selected interval, check the trigger action in the app, and when the action is executed, the flow bot will start. If you want to quickly reflect information in SendGrid, a shorter interval setting is recommended.
5. Save if the test is successful.
6. Click "Operate Database: Retrieve Record (ID Search)".
7. Confirm the account linked with Notion, set the database ID, and click "Next". * Other items are set by default. * The database ID can be set from the "Candidates" displayed when you click the frame.
8. Set the conditions for the record you want to retrieve and perform a test. * In the right frame, set the "Object ID" from "When a page in a specific database is created or updated" in the output displayed when you click the frame. (Values are displayed in double brackets)
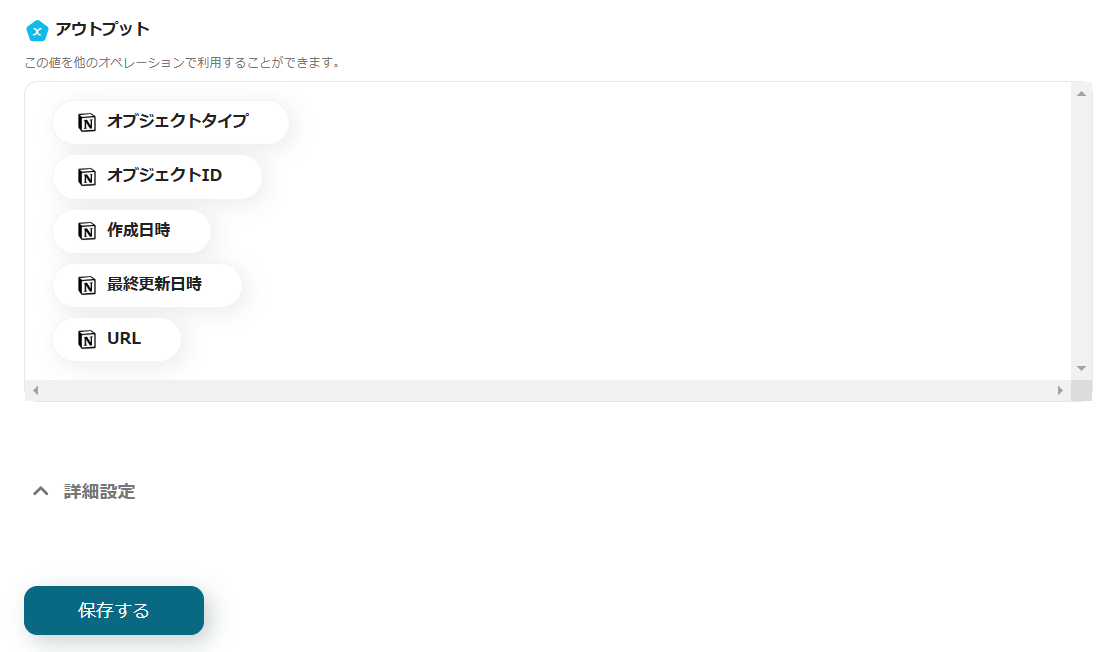
9. If the test is successful, the information retrieved from Notion will be displayed in the output. Save if there are no issues.
Step 4: Setting SendGrid
Finally, set up the registration of lead information in SendGrid.
1. Click "Integrate with App: Add New Contact to Contact List".
2. Confirm the account linked with SendGrid and click "Next". * Other items are set by default.
3. Set the items to register lead information and perform a test. * To reflect Notion information, set from "Retrieve Record (ID Search)" in the output displayed when you click the frame. (Values are displayed in double brackets) * The list ID can be set from the "Candidates" displayed when you click the frame.
4. If the test is successful, the lead will be registered in SendGrid. Save if there are no issues.
5. When the trigger is turned ON, every time a lead is created in the Notion database, it will be automatically added to the SendGrid contact list.
If you have any questions about the flow introduced, please check the help page here.
Other Automation Examples Using Notion
There are many other examples of automation using Notion on Yoom, so here are a few introductions.
1. Notify Slack When a Page is Created or Updated in Notion
This is a template for automatically notifying Slack when a page is created or updated in Notion. By using this integration, you can reduce manual notification tasks and enable smooth information sharing.
2. Add a task to a Microsoft Excel sheet when it is registered in Notion
This is a template that automatically adds tasks to Microsoft Excel when they are registered in Notion. With this integration, the task transcription process is automated, which is expected to reduce the workload of the person in charge.
3. Create a folder in Google Drive when a client is registered in Notion
This is a template for automatically creating a folder in Google Drive when a client is registered in Notion. With this integration, folders are automatically created, allowing related members to store documents smoothly.
Benefits and Examples of Integrating Notion with SendGrid
Benefit 1: Improved Accuracy by Preventing Data Entry Errors
When manually transferring lead information from Notion to SendGrid, there is a risk of missing or duplicating information. If there are errors in the transferred data, it can lead to proceeding with tasks based on incorrect information, resulting in time loss. By integrating Notion with SendGrid, you can prevent human errors during data transfer, thereby improving the accuracy of managed data. For example, when a campaign generates a large number of leads, the person in charge may be overwhelmed with registration tasks, increasing the likelihood of errors. By using this integration, you can focus on registering in Notion, reducing human errors and enabling accurate data registration.
Benefit 2: Smooth Information Sharing Among Teams
Manually transferring information from Notion to SendGrid carries the risk of time lags. If there is a delay in reflecting the information, it can hinder the operations of related departments. By automating the transfer through the integration of Notion and SendGrid, data can be smoothly reflected, leading to enhanced team collaboration. For example, if the sales team registers data in Notion and SendGrid, and the marketing team uses the data registered in SendGrid, preventing time lags is crucial. By using this integration, data can be smoothly reflected, allowing the marketing team to proceed with their tasks seamlessly.
Benefit 3: Increased Efficiency by Reducing Manual Data Entry
The task of transferring data from Notion to SendGrid tends to become routine, and doing it manually can be time-consuming and challenging to streamline. By integrating Notion with SendGrid, the data transfer task can be automated, improving the efficiency of the person in charge. For example, in a small, elite team, the person in charge may have many tasks besides registering lead information, and spending time on data transfer might be undesirable. By reducing the data transfer task through the integration of Notion and SendGrid, you can handle other tasks with the freed-up time, thereby increasing efficiency.
Conclusion
Manually transferring lead information from Notion to SendGrid carries risks of human error and time lags. Additionally, the time-consuming nature of the task makes it challenging to improve efficiency. These challenges can be addressed by integrating Notion with SendGrid and automating the data transfer task. This can lead to improved data accuracy, enhanced team collaboration, and increased efficiency. The integration of Notion and SendGrid can be implemented without code by using Yoom. The setup is simple and can be used immediately, so take this opportunity to try automation with Yoom.
The person who wrote this article
-
I've been running a personal blog for over 5 years.
When writing, it is important to explain the information readers want to know in an easy-to-understand manner.
Based on the writing experience I learned in managing a blog, I will introduce how to use and appeal of Yoom, which can automate complex tasks without code, in an easy-to-understand manner.
Conventional RPA can only automate simple repetitive tasks, and the setup process was very complicated. With “hyperautomation,” which combines various technologies such as AI, API, RPA, and OCR, it is possible to automate many tasks that could not be realized until now more easily than before.
Most tools simply connect one app to another, leaving the complex tasks to you. Yoom goes much further: From document creation and browser automation to OCR and generative AI, Yoom handles it all seamlessly in one platform.
Why settle for basic integrations? Streamline your entire workflow with Yoom’s powerful hyperautomation.


.avif)

.avif)


