When Outlook receives a receipt, use AI OCR to read it, check the registration status of the business in the Qualified Invoice Issuer Public System, and notify via Google Chat.
How to Integrate Applications
・
2025/01/24
When Outlook receives a receipt, use AI OCR to read it, check the registration status of the business in the Qualified Invoice Issuer Public System, and notify via Google Chat.
r.suzuki
Are you overwhelmed with processing receipts and verifying registration numbers in your accounting tasks? Manual verification is time-consuming and can lead to errors. This time, we will introduce a method to automatically read receipts received in Outlook using AI OCR, verify the registration status of businesses in the Qualified Invoice Issuer Public System, and notify the results in Google Chat. This not only automates the reading of receipts but also automates the verification of registration status and notification of results, greatly improving efficiency. Additionally, you can expect improved accuracy through automation. This blog also explains how to set up the integration without coding, so please use it as a reference.
Recommended for
Those who are concerned about complying with the Qualified Invoice System
Those considering implementing automation tools using Google Chat to improve work efficiency
Those who need accurate data management to prevent registration number verification errors or issues
Accounting personnel who frequently use Outlook and receive many receipts
Benefits and Examples of Integrating Outlook and Google Chat
Benefit 1: Improved Work Efficiency and Productivity
This integration automates the receipt verification process, significantly reducing the time accounting personnel spend on manual processing. This allows personnel to allocate more time to more important tasks, improving overall productivity. For example, during periods like the end of the month or fiscal year when receipts accumulate, automation can reduce the time spent on verification from several hours to a short period. This kind of system can also reduce stress during busy periods and improve the quality of work.
Benefit 2: Quick Response
With a system that automatically notifies Google Chat of the receipt registration number verification results, quick sharing of results among stakeholders is expected. By utilizing this system, you can quickly grasp the registration status, improving subsequent work speed. For example, if a business whose registration cannot be confirmed is identified, information is quickly shared with all stakeholders, reducing the time needed for confirmation with the business partner and necessary actions. Additionally, quick information sharing prevents oversight and communication errors, improving work efficiency and reliability.
Benefit 3: Early Error Detection and Trouble Prevention
Automation can help detect errors and registration number input mistakes that are often overlooked in manual work. This is expected to prevent issues due to unverified or incomplete registrations in transactions requiring qualified invoices. For example, even if a receipt with an incorrect registration number is received, errors are automatically detected and notified to stakeholders, allowing for a quick response. Early response can prevent the escalation of issues and ensure smooth business operations. Moreover, improved accuracy through automation enhances the reliability of verification tasks, improving relationships with business partners and the overall quality of work.
From here, we will set up using Yoom's template 【Read registration numbers from receipts received in Outlook, verify the registration status of businesses in the Qualified Invoice Issuer Public System, and notify Google Chat】 as the integration flow.
[What is Yoom]
How to Use AI OCR to Read Receipts Received by Outlook, Verify Registration with the Qualified Invoice Issuer Publication System, and Notify Google Chat
When Outlook receives a receipt, you can use AI OCR to read the content, verify the registration status with the Qualified Invoice Issuer Publication System, and notify Google Chat. With Yoom, you can automate this process without any programming knowledge.
The steps for this integration flow are broadly as follows:
Integrate Outlook, Google Chat, and the Qualified Invoice Issuer Publication System with My Apps
Copy the template
Set up triggers and actions
Finally, verify if the trigger is activated
Preparation
1) First, access the official Yoom website and create an account. Yoom Account Creation Page If you already have an account, please log in.
Step 1: Integrate Outlook, Google Chat, and the Qualified Invoice Issuer Publication System with My Apps
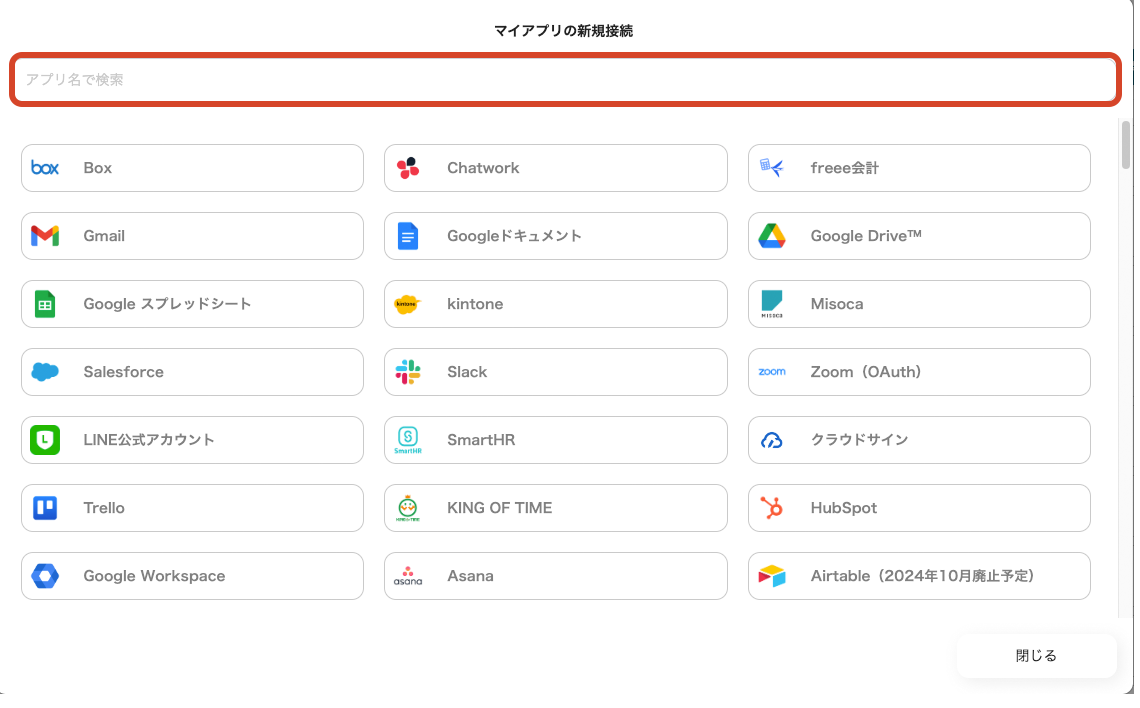
1) Once logged into your Yoom account, register the apps you will use next. Click "My Apps" and select "New Connection".
2) A list of apps that can be connected with Yoom will be displayed, and you can search for each app one by one using the search box.
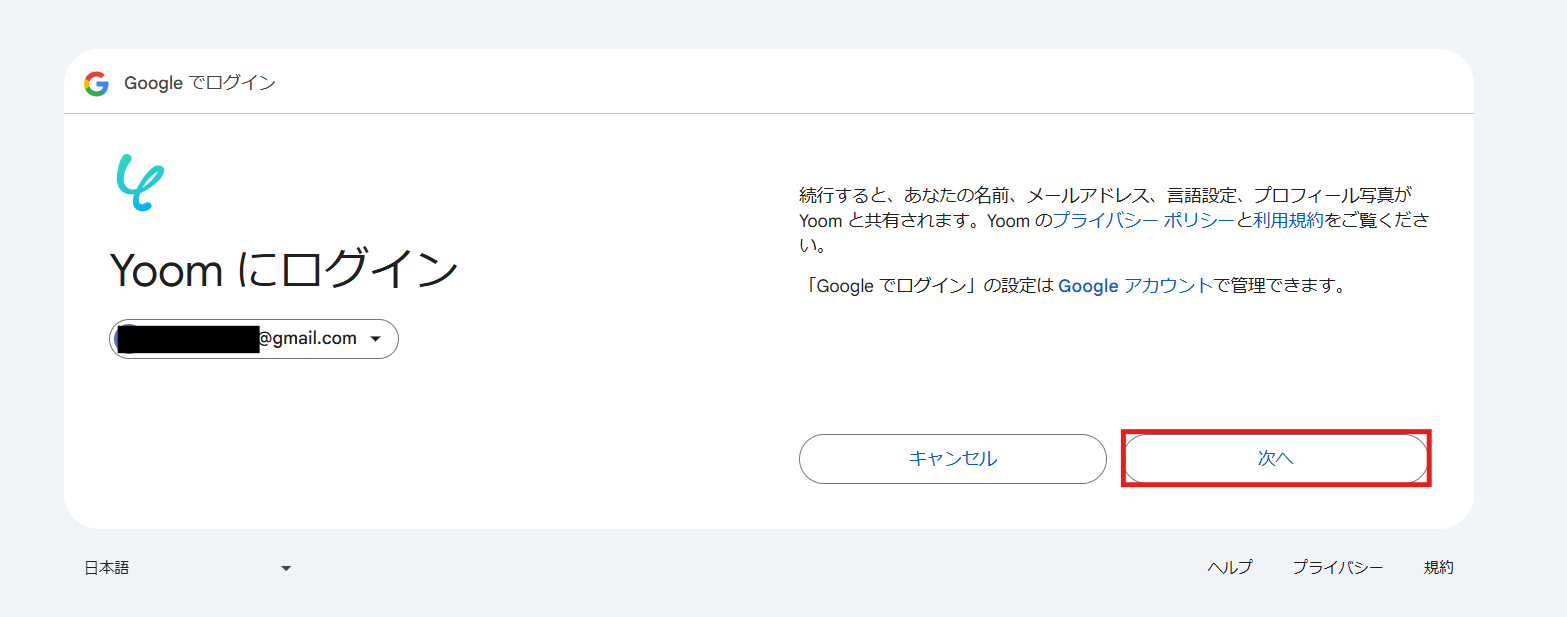
Once you can select Outlook, log in with the account you will use.
Similarly, once you can select the Qualified Invoice Issuer Publication System, enter any name for management purposes in the account name, "yoom" in the access token, and click "Add".
Similarly, once you select Google Chat, log in with your Google account.
3) Once registration is complete, an icon will be displayed in My Apps. Check if the icon of the registered app is displayed correctly.
Step 2: Copy the Template
Click on this banner.
1) First, click on the "Try this template" icon.
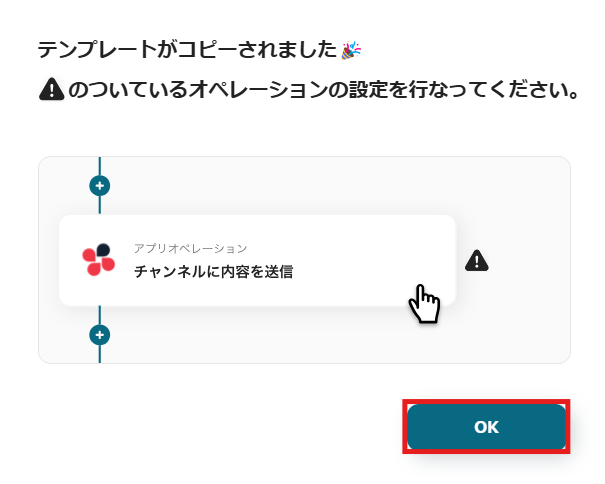
2) The following confirmation screen will appear, so click "OK".
When this screen appears, the copy has been completed successfully.
After that, you can click on the title or details to edit them. A "!" icon will appear on the right side, click them in order to set the operations. The template will be saved in "My Projects".
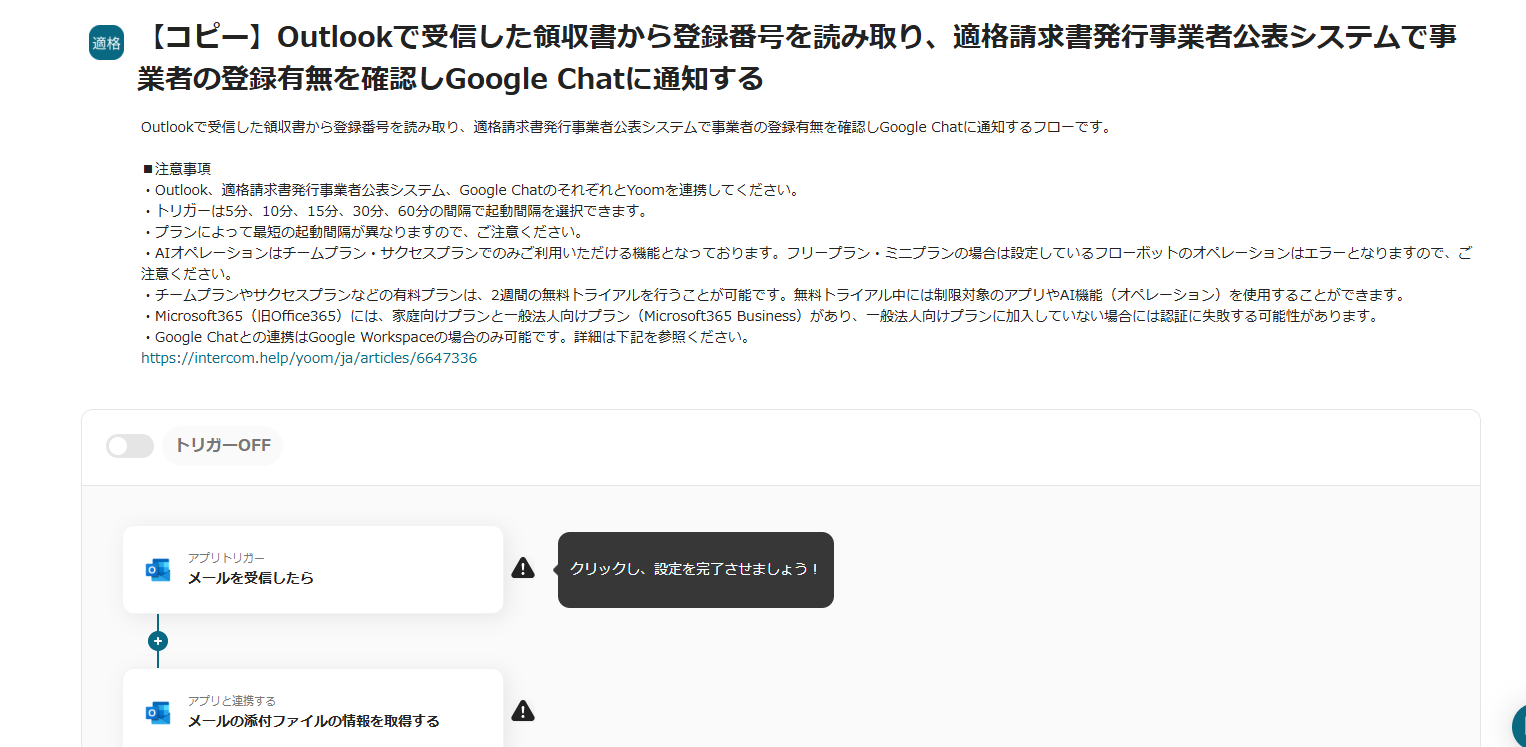
Step 3: Set the Trigger
Click on "App Trigger - When an email is received".
Step 4: Set Outlook Action 1
1) Select the action "When an email is received" and click "Next".
1) Return to the flow and click on the icon "Integrate with app - Get email attachment information".
2) Select the action "Get email attachment information" and click "Next".
3) Enter the required information.
You can use the output information obtained in Outlook in Step 4 to enter. Select from the options as needed, and click "Save" once the input is complete.
Step 6: Set Outlook Action 3
1) Return to the flow and click on the icon "Integrate with app - Download email attachments".
2) Select the action "Download email attachments" and click "Next".
3) Enter the required information.
You can use the output information obtained in Outlook in Step 5 to enter. Select from the options as needed, and click "Save" once the input is complete.
Step 7: Set AI Operation
1) Return to the flow and click on the icon "Integrate with app - Read text from image/PDF". *AI operations are only available in the Team Plan and Success Plan. Please note that if you are on the Free Plan or Mini Plan, the operations set in the flowbot will result in an error. *Paid plans such as the Team Plan and Success Plan offer a 2-week free trial. During the free trial, you can use restricted apps and AI features (operations).
2) Select the action "Read text from image/PDF" and click "Next".
3) Enter the details. Select "Upload file" for the file attachment method, and specify "Registration Number" for any additional items you want to extract. Once completed, click "Test", and after a successful test, click "Save".
Step 8: Set the Action for the Qualified Invoice Issuer Public System
1) Return to the flow and click on the icon "Integrate with app - Get public information from registration number".
2) Select the action "Get public information from registration number" and click "Next".
2) Enter the required information. You can use the output information obtained from the AI operation to enter. Select from the options, and click "Save" once the input is complete.
Step 9: Set the Branch
1) Return to the flow and click on the icon "Branch - Command Operation".
2) Confirm that the operation for the branch target output is "Get public information from registration number" and the output is "Registration Number", and that the branch condition is "Registration Number output is not empty", then click "Save". *Branching is a feature (operation) available in plans above the Mini Plan. Please note that if you are on the Free Plan, the operations set in the flowbot will result in an error. *Paid plans such as the Mini Plan offer a 2-week free trial. During the free trial, you can use restricted apps and features (operations).
Step 10: Set Google Chat
1) Return to the flow and click on the icon "Integrate with app - Send message".
2) Select the action "Send message" and click "Next".
3) Enter the required information.
You can use the output information to enter. Select from the options, and click "Save" once the input is complete.
This completes the flow of 【Reading the registration number from a receipt received in Outlook, checking the registration status of the business in the Qualified Invoice Issuer Public System, and notifying Google Chat】.
Step 11: Test and Verify
Once the setup is complete, the following display will appear, click "Turn on Trigger". Start the flowbot and verify that it works correctly.
Here is the template used this time
Other Automation Examples Using the Qualified Invoice Issuer Publication System
There are many other examples of automation using the Qualified Invoice Issuer Publication System in Yoom, so here are a few introductions.
1. Read the registration number from receipts received in Gmail, check the registration status of the business in the Qualified Invoice Issuer Publication System, and notify Google Chat This template reads the registration number from receipts received in Gmail using AI OCR, checks the registration status in the Qualified Invoice Issuer Publication System, and notifies the "Accounting Department" Google Chat with the results. This streamlines the verification process, helps prevent errors, and is expected to save time.
2. Automatically Check the Registration of Qualified Invoice Issuers When a Client is Registered in Notion This template automatically checks the registration status in the Qualified Invoice Issuer Publication System when a new client is registered in Notion, and notifies the "General Affairs Department" in Microsoft Teams. This reduces manual work and is expected to improve operational efficiency by preventing registration omissions and confirmation errors.
3. Automatically verify the registration of qualified invoice issuing businesses when the status is updated in kintone This template automatically checks the registration status in the Qualified Invoice Issuer Publication System when the status of a client is updated in kintone, and notifies the "Accounting Department" Slack channel of the results. By reducing the effort of verification work and improving accuracy, it is expected to enhance operational efficiency and prevent errors.
Summary
This time, we introduced a method to receive receipts in Outlook, read them with AI OCR, check the registration status of the business in the Qualified Invoice Issuer Publication System, and notify via Google Chat. By implementing an automation process, you can expect improved efficiency and accuracy in accounting tasks. By integrating Outlook, AI OCR, the Qualified Invoice Issuer Publication System, and Google Chat, you can automate tedious tasks and ensure quick information sharing. Additionally, by utilizing Yoom, even beginners can easily set up the integration. Why not take this opportunity to incorporate it into your company's workflow?
The person who wrote this article
r.suzuki
I came across Yoom when I was searching for ways to improve work efficiency on a daily basis at a small and medium-sized enterprise in a region where human resources are limited.
I was casually thinking that it would be nice if this were the case, and by introducing Yoom, we can make it so much more efficient! I'm moved.
Even though I have no knowledge or experience with systems or programming, my work has changed drastically, so I'm writing that I hope I can share it with many people who feel the same way.
Conventional RPA can only automate simple repetitive tasks, and the setup process was very complicated. With “hyperautomation,” which combines various technologies such as AI, API, RPA, and OCR, it is possible to automate many tasks that could not be realized until now more easily than before.
Most tools simply connect one app to another, leaving the complex tasks to you. Yoom goes much further: From document creation and browser automation to OCR and generative AI, Yoom handles it all seamlessly in one platform.
Why settle for basic integrations? Streamline your entire workflow with Yoom’s powerful hyperautomation.


.avif)
.avif)
.avif)
.avif)


