・
Google スプレッドシートで行が更新されたら、Harvestのクライアント情報を更新する方法

取引先のデータは慎重に扱う必要がありますよね。
場合によっては金銭に相違が出たり、クライアントに迷惑をかけてしまう可能性も否めません。
とは言え、全てのクライアントデータを毎回慎重にチェックするのは少々手間に感じませんか?
そこで今回は、Harvestのクライアント情報を自動で更新できるアプリ連携をご紹介します。
Google スプレッドシートで詳細管理しているクライアント情報をHarvestに反映させることで、データ管理の手間を削減できます。
業務効率の向上を図りたい方におすすめです!とにかく早く試したい方へ
本記事ではノーコードツール「Yoom」を使用した連携方法をご紹介します。
難しい設定や操作は必要なく、非エンジニアの方でも簡単に実現できます。
下記のテンプレートから今すぐに始めることもできるので、ぜひお試しください!
■概要
クライアント情報をGoogle スプレッドシートで管理し、その情報をHarvestにも手動で転記・更新する作業は、手間がかかる上に更新漏れのリスクも伴います。
特に、情報の変更が頻繁に発生する場合、その管理は煩雑になりがちです。
このワークフローを活用すれば、Google スプレッドシートの行情報が更新されると、Harvestのクライアント情報が自動で更新されるため、こうした二重入力の手間やヒューマンエラーを解消できます。
■このテンプレートをおすすめする方- Google スプレッドシートとHarvestで顧客情報を二重管理している方
- 手作業による情報更新に時間がかかり、非効率だと感じているプロジェクトマネージャーの方
- クライアント情報の更新漏れや入力ミスをなくし、正確なデータ管理を目指したい方
■このテンプレートを使うメリット- Google スプレッドシートの情報が更新されるとHarvestのクライアント情報が自動で同期され、これまで手作業に費やしていた時間を短縮できます。
- 手作業でのデータ転記が不要になることで、入力間違いや更新漏れといったヒューマンエラーのリスク軽減に繋がります。
■フローボットの流れ- はじめに、Google スプレッドシートとHarvestをYoomと連携します。
- 次に、トリガーでGoogle スプレッドシートを選択し、「行が更新されたら」というアクションを設定します。
- 最後に、オペレーションでHarvestの「Update Client」アクションを設定し、Google スプレッドシートで更新された行の情報を紐付けます。
※「トリガー」:フロー起動のきっかけとなるアクション、「オペレーション」:トリガー起動後、フロー内で処理を行うアクション
■このワークフローのカスタムポイント- Google スプレッドシートのトリガー設定では、監視対象としたいスプレッドシートIDやシートIDを任意で設定してください。
- Harvestでクライアント情報を更新するアクションでは、前段のトリガーで取得した値を引用し、どの項目を更新するかを自由に設定可能です。
■注意事項- Google スプレッドシート、HarvestのそれぞれとYoomを連携してください。
- トリガーは5分、10分、15分、30分、60分の間隔で起動間隔を選択できます。
- プランによって最短の起動間隔が異なりますので、ご注意ください。
- Google スプレッドシートをアプリトリガーとして使用する際の注意事項は「【アプリトリガー】Google スプレッドシートのトリガーにおける注意事項」を参照してください。
クライアント情報をGoogle スプレッドシートで管理し、その情報をHarvestにも手動で転記・更新する作業は、手間がかかる上に更新漏れのリスクも伴います。
特に、情報の変更が頻繁に発生する場合、その管理は煩雑になりがちです。
このワークフローを活用すれば、Google スプレッドシートの行情報が更新されると、Harvestのクライアント情報が自動で更新されるため、こうした二重入力の手間やヒューマンエラーを解消できます。
■このテンプレートをおすすめする方
- Google スプレッドシートとHarvestで顧客情報を二重管理している方
- 手作業による情報更新に時間がかかり、非効率だと感じているプロジェクトマネージャーの方
- クライアント情報の更新漏れや入力ミスをなくし、正確なデータ管理を目指したい方
- Google スプレッドシートの情報が更新されるとHarvestのクライアント情報が自動で同期され、これまで手作業に費やしていた時間を短縮できます。
- 手作業でのデータ転記が不要になることで、入力間違いや更新漏れといったヒューマンエラーのリスク軽減に繋がります。
■フローボットの流れ
- はじめに、Google スプレッドシートとHarvestをYoomと連携します。
- 次に、トリガーでGoogle スプレッドシートを選択し、「行が更新されたら」というアクションを設定します。
- 最後に、オペレーションでHarvestの「Update Client」アクションを設定し、Google スプレッドシートで更新された行の情報を紐付けます。
■このワークフローのカスタムポイント
- Google スプレッドシートのトリガー設定では、監視対象としたいスプレッドシートIDやシートIDを任意で設定してください。
- Harvestでクライアント情報を更新するアクションでは、前段のトリガーで取得した値を引用し、どの項目を更新するかを自由に設定可能です。
■注意事項
- Google スプレッドシート、HarvestのそれぞれとYoomを連携してください。
- トリガーは5分、10分、15分、30分、60分の間隔で起動間隔を選択できます。
- プランによって最短の起動間隔が異なりますので、ご注意ください。
- Google スプレッドシートをアプリトリガーとして使用する際の注意事項は「【アプリトリガー】Google スプレッドシートのトリガーにおける注意事項」を参照してください。
こんな方におすすめ
- Google スプレッドシートでクライアント情報の詳細な管理をしている方
- Google スプレッドシートのクライアント情報をHarvestに手動転記している方
- Harvestのクライアントデータの更新作業を簡易化したい方
- Harvestのクライアントデータの更新漏れを回避したい方
Google スプレッドシートとHarvestの連携メリットと具体例
メリット1: いつでも最新データを確認できる
今回のアプリ連携を行うと、Google スプレッドシートのクライアント情報を更新したら、Harvestのクライアント情報も自動で更新されるようになります。
そのため、Google スプレッドシートとHarvestの両データは常に最新の状態を保てるはずです。
例えば、Google スプレッドシートとHarvestのデータに相違があり、どちらが最新のデータなのかわからなくなってしまった経験はありませんか?
これは片方のみ更新し、もう片方のツールを更新しなかった場合に起こり得るシチュエーションです。
今回のアプリ連携を行うことで、このような事態に陥る可能性は減少することが見込めます。メリット2: 繰り返し作業を削減する
繰り返しの作業を削減するためにも、Google スプレッドシートとHarvestのアプリ連携はおすすめです。
例えば、両ツールのクライアントデータを更新する際、片方のツールを更新した後にもう片方のツールも更新するという流れになるはずです。
ごく普通の作業ではありますが、少々手間に感じてしまうこともあるのではないでしょうか?
そこでアプリ連携を行い自動化を導入すれば、Google スプレッドシートだけ変更を行うことでHarvestも自動更新されるため、繰り返しの作業を削減できます。メリット3: 正しい情報を共有可能になる
Google スプレッドシートさえ更新を行えばHarvestも自動で更新されるため、クライアントデータは常に正しい情報を共有できます。
例えば、これまでGoogle スプレッドシートのデータをHarvestに手動で反映させていた場合、タイピングミスなどにより間違ったデータを転記してしまう可能性がありました。
しかし自動化を導入すると、Google スプレッドシートのデータがそのまま反映されるため、転記時のミスによるデータの相違は起こりにくくなります。
これにより他メンバーと正しいクライアント情報を共有できるでしょう。Google スプレッドシートとHarvestを連携してできること
Google スプレッドシートで更新が行われたデータをGoogle スプレッドシートのAPIを利用して取得します。
そして、HarvestのAPIを用いて更新データを受け取り、クライアント情報を書き換えることが可能です。
このような連携の実現には、一般的にはプログラミングの知識が必要ですが、ノーコードツールのYoomを用いることでプログラミング知識がなくても簡単に実現できます。
気になる自動化例の「試してみる」をクリックして、Yoomのアカウントを作成するだけで、すぐにGoogle スプレッドシートとHarvestの連携を実際に体験できます。
アカウント作成はたったの30秒で完了するので、ぜひ気軽にお試しください!Google スプレッドシートで行が更新されたら、Harvestのクライアント情報を更新する
Google スプレッドシートの行が更新されたことをトリガーに、Harvestでクラインアント情報を自動更新する連携です。
これにより、手動でHarvestの情報を更新する手間を省けるため、時間短縮やヒューマンエラーの防止が期待できるでしょう。
■概要
Google スプレッドシートで請求情報を管理し、それをもとにHarvestで請求書を作成する作業は、単純ですが手間がかかるのではないでしょうか。
特に、手作業によるデータ転記は入力ミスや対応漏れの原因にもなりかねません。
このワークフローを活用すれば、Google スプレッドシートの行が更新されるだけでHarvestの請求書作成が自動で完了するため、こうした定型業務の負担を軽減し、より正確な請求処理を実現できます。
■このテンプレートをおすすめする方- Google スプレッドシートとHarvestで請求書発行業務を行っている経理担当者の方
- 手作業による請求書作成を自動化し、ヒューマンエラーを防止したいと考えている方
- 複数のツール間のデータ転記作業をなくし、業務効率を改善したいと考えている方
■このテンプレートを使うメリット- Google スプレッドシートの行更新をトリガーにHarvestの請求書が自動作成されるため、これまで手作業に費やしていた時間を短縮することができます。
- システムが自動で処理を行うため、手作業による金額や宛先の転記ミスなどを防ぎ、請求業務の正確性を高めることに繋がります。
■フローボットの流れ- はじめに、Google スプレッドシートとHarvestをYoomと連携します。
- 次に、トリガーでGoogle スプレッドシートを選択し、「行が更新されたら」というアクションを設定します。
- 最後に、オペレーションでHarvestを選択し、「Create Invoice」アクションを設定し、トリガーで取得した情報を引用して請求書の内容を紐付けます。
※「トリガー」:フロー起動のきっかけとなるアクション、「オペレーション」:トリガー起動後、フロー内で処理を行うアクション
■このワークフローのカスタムポイント- Google スプレッドシートのトリガー設定では、監視対象としたいスプレッドシートIDやシートIDを任意で設定してください。
- Harvestのオペレーション設定では、Google スプレッドシートから取得した顧客名や金額、請求日などの値を引用し、請求書の各項目に自由にマッピングすることが可能です。
■注意事項- Google スプレッドシート、HarvestのそれぞれとYoomを連携してください。
- トリガーは5分、10分、15分、30分、60分の間隔で起動間隔を選択できます。
- プランによって最短の起動間隔が異なりますので、ご注意ください。
- Google スプレッドシートをアプリトリガーとして使用する際の注意事項は「【アプリトリガー】Google スプレッドシートのトリガーにおける注意事項」を参照してください。
Google スプレッドシートで請求情報を管理し、それをもとにHarvestで請求書を作成する作業は、単純ですが手間がかかるのではないでしょうか。
特に、手作業によるデータ転記は入力ミスや対応漏れの原因にもなりかねません。
このワークフローを活用すれば、Google スプレッドシートの行が更新されるだけでHarvestの請求書作成が自動で完了するため、こうした定型業務の負担を軽減し、より正確な請求処理を実現できます。
■このテンプレートをおすすめする方
- Google スプレッドシートとHarvestで請求書発行業務を行っている経理担当者の方
- 手作業による請求書作成を自動化し、ヒューマンエラーを防止したいと考えている方
- 複数のツール間のデータ転記作業をなくし、業務効率を改善したいと考えている方
- Google スプレッドシートの行更新をトリガーにHarvestの請求書が自動作成されるため、これまで手作業に費やしていた時間を短縮することができます。
- システムが自動で処理を行うため、手作業による金額や宛先の転記ミスなどを防ぎ、請求業務の正確性を高めることに繋がります。
■フローボットの流れ
- はじめに、Google スプレッドシートとHarvestをYoomと連携します。
- 次に、トリガーでGoogle スプレッドシートを選択し、「行が更新されたら」というアクションを設定します。
- 最後に、オペレーションでHarvestを選択し、「Create Invoice」アクションを設定し、トリガーで取得した情報を引用して請求書の内容を紐付けます。
■このワークフローのカスタムポイント
- Google スプレッドシートのトリガー設定では、監視対象としたいスプレッドシートIDやシートIDを任意で設定してください。
- Harvestのオペレーション設定では、Google スプレッドシートから取得した顧客名や金額、請求日などの値を引用し、請求書の各項目に自由にマッピングすることが可能です。
■注意事項
- Google スプレッドシート、HarvestのそれぞれとYoomを連携してください。
- トリガーは5分、10分、15分、30分、60分の間隔で起動間隔を選択できます。
- プランによって最短の起動間隔が異なりますので、ご注意ください。
- Google スプレッドシートをアプリトリガーとして使用する際の注意事項は「【アプリトリガー】Google スプレッドシートのトリガーにおける注意事項」を参照してください。
Google スプレッドシートで行が追加されたら、Harvestにタスクを作成する
Google スプレッドシートに新しい行が追加されたことをトリガーにして、Harvestに自動でタスクを作成することができます。
この連携により、スプレッドシートでタスクリストを管理している場合、Harvestへの登録作業を完全に自動化し、手入力の手間や入力ミスを減らすことができます。
■概要Google スプレッドシートで管理しているタスクリストを、工数管理ツールのHarvestへ手作業で転記することに手間を感じていませんか?
手入力による作業は、入力漏れや遅延の原因となり、正確なプロジェクト管理を妨げることもあります。
このワークフローを活用すれば、Google スプレッドシートに行が追加されるだけでHarvestへのタスク作成が自動化されるため、こうした課題をスムーズに解消し、タスク管理を効率化できます。
■このテンプレートをおすすめする方- Google スプレッドシートとHarvestを併用してタスク管理を行っている方
- 手作業によるタスク登録の手間を削減し、工数管理の精度を高めたいプロジェクトマネージャーの方
- ツール間のデータ転記作業をなくし、よりコアな業務に集中したいと考えているチームメンバーの方
■このテンプレートを使うメリット- Google スプレッドシートへの情報追加をトリガーに、Harvestへのタスク作成が自動化され、これまで手作業で行っていた転記時間を短縮できます。
- 手作業によるデータ転記が不要になるため、タスクの登録漏れや入力ミスといったヒューマンエラーの防止に繋がります。
■フローボットの流れ- はじめに、Google スプレッドシートとHarvestをYoomと連携します。
- 次に、トリガーでGoogle スプレッドシートを選択し、「行が追加されたら」というアクションを設定します。
- 続いて、オペレーションでHarvestの「タスクを作成する」アクションを設定し、スプレッドシートから取得した情報をマッピングします。
- 最後に、オペレーションでGoogle スプレッドシートの「レコードを更新する」アクションを設定し、Harvestへの登録が完了したことをスプレッドシートに記録します。
※「トリガー」:フロー起動のきっかけとなるアクション、「オペレーション」:トリガー起動後、フロー内で処理を行うアクション
■このワークフローのカスタムポイント- Google スプレッドシートのトリガー設定では、対象としたい任意のスプレッドシートIDやシートIDを設定してください。
- Harvestでタスクを作成するアクションでは、Google スプレッドシートから取得した値を引用し、タスク名や担当者などの各項目を自由に設定できます。
■注意事項- Google スプレッドシート、HarvestのそれぞれとYoomを連携してください。
- トリガーは5分、10分、15分、30分、60分の間隔で起動間隔を選択できます。
- プランによって最短の起動間隔が異なりますので、ご注意ください。
- Google スプレッドシートをアプリトリガーとして使用する際の注意事項は「【アプリトリガー】Google スプレッドシートのトリガーにおける注意事項」を参照してください。
手入力による作業は、入力漏れや遅延の原因となり、正確なプロジェクト管理を妨げることもあります。
このワークフローを活用すれば、Google スプレッドシートに行が追加されるだけでHarvestへのタスク作成が自動化されるため、こうした課題をスムーズに解消し、タスク管理を効率化できます。
■このテンプレートをおすすめする方
- Google スプレッドシートとHarvestを併用してタスク管理を行っている方
- 手作業によるタスク登録の手間を削減し、工数管理の精度を高めたいプロジェクトマネージャーの方
- ツール間のデータ転記作業をなくし、よりコアな業務に集中したいと考えているチームメンバーの方
■このテンプレートを使うメリット
- Google スプレッドシートへの情報追加をトリガーに、Harvestへのタスク作成が自動化され、これまで手作業で行っていた転記時間を短縮できます。
- 手作業によるデータ転記が不要になるため、タスクの登録漏れや入力ミスといったヒューマンエラーの防止に繋がります。
■フローボットの流れ
- はじめに、Google スプレッドシートとHarvestをYoomと連携します。
- 次に、トリガーでGoogle スプレッドシートを選択し、「行が追加されたら」というアクションを設定します。
- 続いて、オペレーションでHarvestの「タスクを作成する」アクションを設定し、スプレッドシートから取得した情報をマッピングします。
- 最後に、オペレーションでGoogle スプレッドシートの「レコードを更新する」アクションを設定し、Harvestへの登録が完了したことをスプレッドシートに記録します。
■このワークフローのカスタムポイント
- Google スプレッドシートのトリガー設定では、対象としたい任意のスプレッドシートIDやシートIDを設定してください。
- Harvestでタスクを作成するアクションでは、Google スプレッドシートから取得した値を引用し、タスク名や担当者などの各項目を自由に設定できます。
■注意事項
- Google スプレッドシート、HarvestのそれぞれとYoomを連携してください。
- トリガーは5分、10分、15分、30分、60分の間隔で起動間隔を選択できます。
- プランによって最短の起動間隔が異なりますので、ご注意ください。
- Google スプレッドシートをアプリトリガーとして使用する際の注意事項は「【アプリトリガー】Google スプレッドシートのトリガーにおける注意事項」を参照してください。
Google スプレッドシートとHarvestの連携フローを作ってみよう
それでは、さっそく実際にGoogle スプレッドシートとHarvestを連携したフローを作成してみましょう!
今回はYoomを使用して、ノーコードでGoogle スプレッドシートとHarvestの連携を進めていきますので、もしまだYoomのアカウントをお持ちでない場合は、こちらの登録フォームからアカウントを発行しておきましょう。
※今回連携するアプリの公式サイト:Google スプレッドシート/Harvest
[Yoomとは]フローの作成方法
今回は「Google スプレッドシートで行が更新されたら、Harvestのクライアント情報を更新する」フローを作成していきます!
作成の流れは大きく分けて以下です。
- Google スプレッドシートとHarvestをマイアプリ連携
- テンプレートをコピー
- Google スプレッドシートのトリガー設定およびHarvestのアクション設定
- トリガーをONにし、フローが起動するかを確認
■概要
クライアント情報をGoogle スプレッドシートで管理し、その情報をHarvestにも手動で転記・更新する作業は、手間がかかる上に更新漏れのリスクも伴います。
特に、情報の変更が頻繁に発生する場合、その管理は煩雑になりがちです。
このワークフローを活用すれば、Google スプレッドシートの行情報が更新されると、Harvestのクライアント情報が自動で更新されるため、こうした二重入力の手間やヒューマンエラーを解消できます。
■このテンプレートをおすすめする方- Google スプレッドシートとHarvestで顧客情報を二重管理している方
- 手作業による情報更新に時間がかかり、非効率だと感じているプロジェクトマネージャーの方
- クライアント情報の更新漏れや入力ミスをなくし、正確なデータ管理を目指したい方
■このテンプレートを使うメリット- Google スプレッドシートの情報が更新されるとHarvestのクライアント情報が自動で同期され、これまで手作業に費やしていた時間を短縮できます。
- 手作業でのデータ転記が不要になることで、入力間違いや更新漏れといったヒューマンエラーのリスク軽減に繋がります。
■フローボットの流れ- はじめに、Google スプレッドシートとHarvestをYoomと連携します。
- 次に、トリガーでGoogle スプレッドシートを選択し、「行が更新されたら」というアクションを設定します。
- 最後に、オペレーションでHarvestの「Update Client」アクションを設定し、Google スプレッドシートで更新された行の情報を紐付けます。
※「トリガー」:フロー起動のきっかけとなるアクション、「オペレーション」:トリガー起動後、フロー内で処理を行うアクション
■このワークフローのカスタムポイント- Google スプレッドシートのトリガー設定では、監視対象としたいスプレッドシートIDやシートIDを任意で設定してください。
- Harvestでクライアント情報を更新するアクションでは、前段のトリガーで取得した値を引用し、どの項目を更新するかを自由に設定可能です。
■注意事項- Google スプレッドシート、HarvestのそれぞれとYoomを連携してください。
- トリガーは5分、10分、15分、30分、60分の間隔で起動間隔を選択できます。
- プランによって最短の起動間隔が異なりますので、ご注意ください。
- Google スプレッドシートをアプリトリガーとして使用する際の注意事項は「【アプリトリガー】Google スプレッドシートのトリガーにおける注意事項」を参照してください。
クライアント情報をGoogle スプレッドシートで管理し、その情報をHarvestにも手動で転記・更新する作業は、手間がかかる上に更新漏れのリスクも伴います。
特に、情報の変更が頻繁に発生する場合、その管理は煩雑になりがちです。
このワークフローを活用すれば、Google スプレッドシートの行情報が更新されると、Harvestのクライアント情報が自動で更新されるため、こうした二重入力の手間やヒューマンエラーを解消できます。
■このテンプレートをおすすめする方
- Google スプレッドシートとHarvestで顧客情報を二重管理している方
- 手作業による情報更新に時間がかかり、非効率だと感じているプロジェクトマネージャーの方
- クライアント情報の更新漏れや入力ミスをなくし、正確なデータ管理を目指したい方
- Google スプレッドシートの情報が更新されるとHarvestのクライアント情報が自動で同期され、これまで手作業に費やしていた時間を短縮できます。
- 手作業でのデータ転記が不要になることで、入力間違いや更新漏れといったヒューマンエラーのリスク軽減に繋がります。
■フローボットの流れ
- はじめに、Google スプレッドシートとHarvestをYoomと連携します。
- 次に、トリガーでGoogle スプレッドシートを選択し、「行が更新されたら」というアクションを設定します。
- 最後に、オペレーションでHarvestの「Update Client」アクションを設定し、Google スプレッドシートで更新された行の情報を紐付けます。
■このワークフローのカスタムポイント
- Google スプレッドシートのトリガー設定では、監視対象としたいスプレッドシートIDやシートIDを任意で設定してください。
- Harvestでクライアント情報を更新するアクションでは、前段のトリガーで取得した値を引用し、どの項目を更新するかを自由に設定可能です。
■注意事項
- Google スプレッドシート、HarvestのそれぞれとYoomを連携してください。
- トリガーは5分、10分、15分、30分、60分の間隔で起動間隔を選択できます。
- プランによって最短の起動間隔が異なりますので、ご注意ください。
- Google スプレッドシートをアプリトリガーとして使用する際の注意事項は「【アプリトリガー】Google スプレッドシートのトリガーにおける注意事項」を参照してください。
ステップ1:Google スプレッドシートとHarvestをマイアプリ連携
ここでは、Yoomとそれぞれのアプリを連携して、操作が行えるようにしていきます。
まずは基本的な設定方法を解説しているナビをご覧ください!
この中でGoogle スプレッドシートのマイアプリ登録手順を解説していますので、ナビを参考に進めましょう!
次にHarvestをYoomと連携していきましょう!
1.検索する
Harvestのアイコンをクリックします。
2.サインインする
Harvestにサインインします。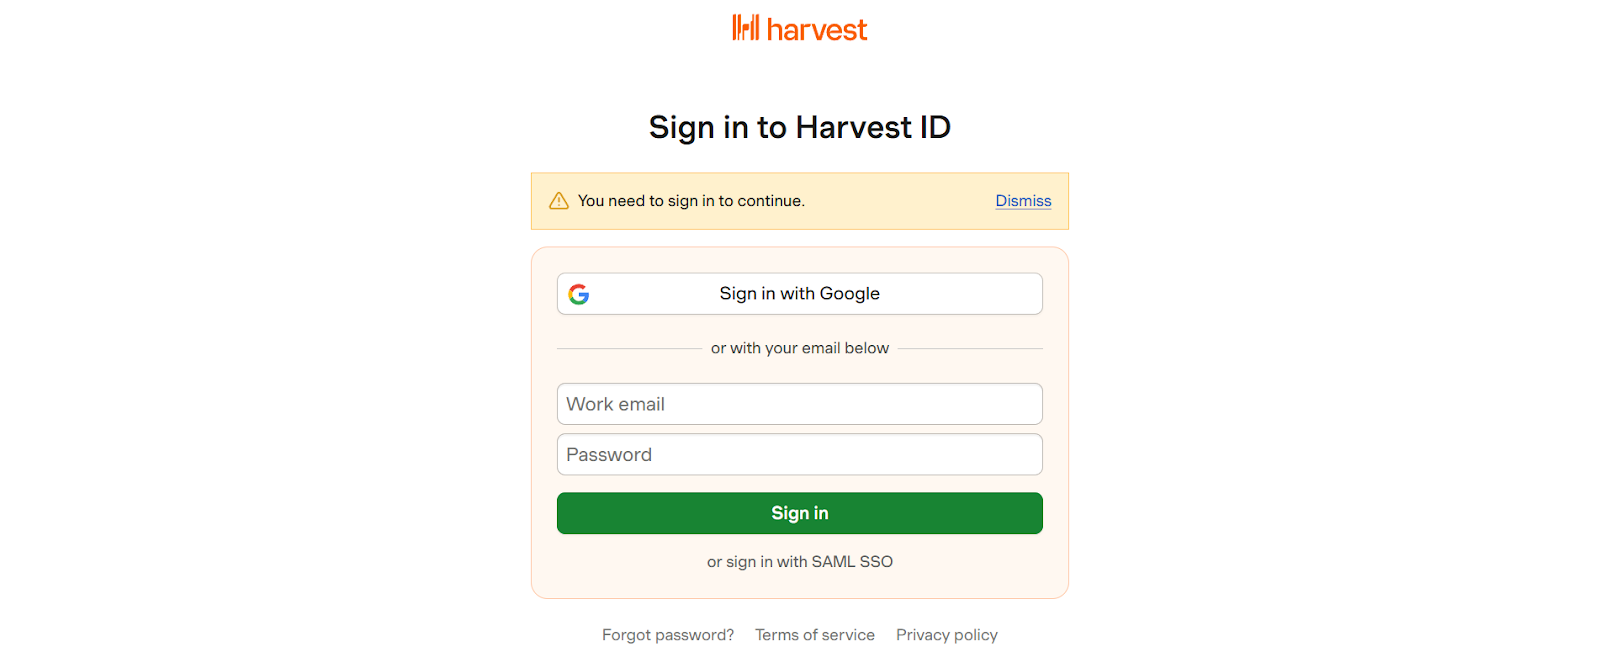
Yoomとの連携許可画面に移行します。
内容確認後、承認できたら緑色のボタンをクリックしてください。
3.連携完了
画面が切り替わり、下記の表示がされれば連携完了です。
ステップ2:テンプレートのコピー
次に、今回使用するテンプレートをコピーしましょう。
下のバナーの「試してみる」をクリックしてください。
■概要
クライアント情報をGoogle スプレッドシートで管理し、その情報をHarvestにも手動で転記・更新する作業は、手間がかかる上に更新漏れのリスクも伴います。
特に、情報の変更が頻繁に発生する場合、その管理は煩雑になりがちです。
このワークフローを活用すれば、Google スプレッドシートの行情報が更新されると、Harvestのクライアント情報が自動で更新されるため、こうした二重入力の手間やヒューマンエラーを解消できます。
■このテンプレートをおすすめする方- Google スプレッドシートとHarvestで顧客情報を二重管理している方
- 手作業による情報更新に時間がかかり、非効率だと感じているプロジェクトマネージャーの方
- クライアント情報の更新漏れや入力ミスをなくし、正確なデータ管理を目指したい方
■このテンプレートを使うメリット- Google スプレッドシートの情報が更新されるとHarvestのクライアント情報が自動で同期され、これまで手作業に費やしていた時間を短縮できます。
- 手作業でのデータ転記が不要になることで、入力間違いや更新漏れといったヒューマンエラーのリスク軽減に繋がります。
■フローボットの流れ- はじめに、Google スプレッドシートとHarvestをYoomと連携します。
- 次に、トリガーでGoogle スプレッドシートを選択し、「行が更新されたら」というアクションを設定します。
- 最後に、オペレーションでHarvestの「Update Client」アクションを設定し、Google スプレッドシートで更新された行の情報を紐付けます。
※「トリガー」:フロー起動のきっかけとなるアクション、「オペレーション」:トリガー起動後、フロー内で処理を行うアクション
■このワークフローのカスタムポイント- Google スプレッドシートのトリガー設定では、監視対象としたいスプレッドシートIDやシートIDを任意で設定してください。
- Harvestでクライアント情報を更新するアクションでは、前段のトリガーで取得した値を引用し、どの項目を更新するかを自由に設定可能です。
■注意事項- Google スプレッドシート、HarvestのそれぞれとYoomを連携してください。
- トリガーは5分、10分、15分、30分、60分の間隔で起動間隔を選択できます。
- プランによって最短の起動間隔が異なりますので、ご注意ください。
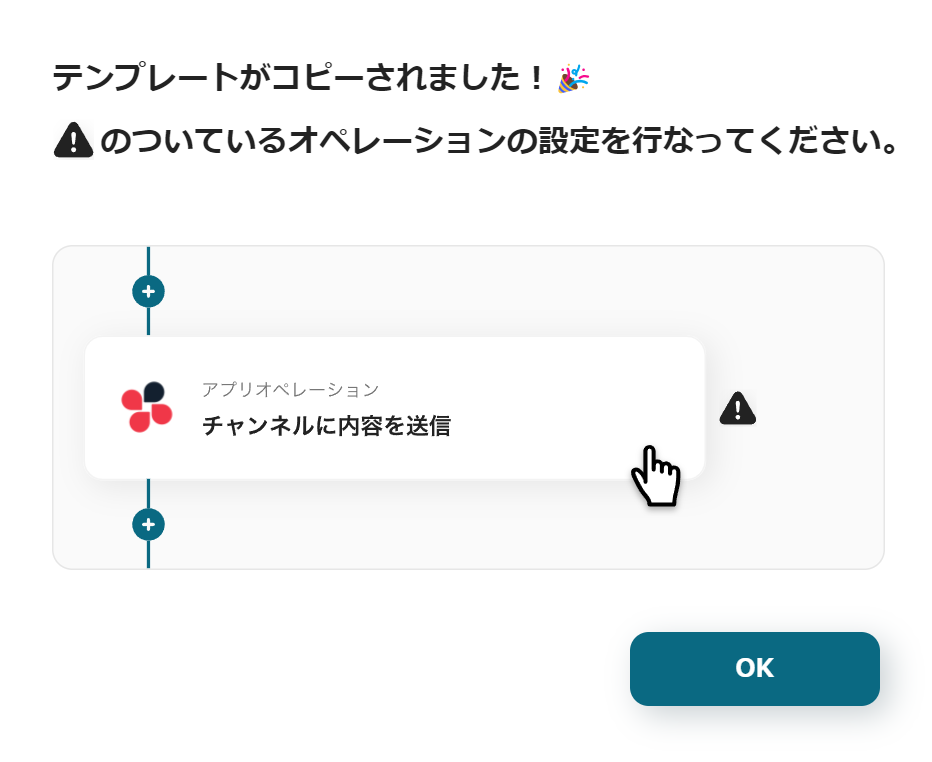
- Google スプレッドシートをアプリトリガーとして使用する際の注意事項は「【アプリトリガー】Google スプレッドシートのトリガーにおける注意事項」を参照してください。
「OK」をクリックします。クライアント情報をGoogle スプレッドシートで管理し、その情報をHarvestにも手動で転記・更新する作業は、手間がかかる上に更新漏れのリスクも伴います。
特に、情報の変更が頻繁に発生する場合、その管理は煩雑になりがちです。
このワークフローを活用すれば、Google スプレッドシートの行情報が更新されると、Harvestのクライアント情報が自動で更新されるため、こうした二重入力の手間やヒューマンエラーを解消できます。
■このテンプレートをおすすめする方
- Google スプレッドシートとHarvestで顧客情報を二重管理している方
- 手作業による情報更新に時間がかかり、非効率だと感じているプロジェクトマネージャーの方
- クライアント情報の更新漏れや入力ミスをなくし、正確なデータ管理を目指したい方
- Google スプレッドシートの情報が更新されるとHarvestのクライアント情報が自動で同期され、これまで手作業に費やしていた時間を短縮できます。
- 手作業でのデータ転記が不要になることで、入力間違いや更新漏れといったヒューマンエラーのリスク軽減に繋がります。
■フローボットの流れ
- はじめに、Google スプレッドシートとHarvestをYoomと連携します。
- 次に、トリガーでGoogle スプレッドシートを選択し、「行が更新されたら」というアクションを設定します。
- 最後に、オペレーションでHarvestの「Update Client」アクションを設定し、Google スプレッドシートで更新された行の情報を紐付けます。
■このワークフローのカスタムポイント
- Google スプレッドシートのトリガー設定では、監視対象としたいスプレッドシートIDやシートIDを任意で設定してください。
- Harvestでクライアント情報を更新するアクションでは、前段のトリガーで取得した値を引用し、どの項目を更新するかを自由に設定可能です。
■注意事項
- Google スプレッドシート、HarvestのそれぞれとYoomを連携してください。
- トリガーは5分、10分、15分、30分、60分の間隔で起動間隔を選択できます。
- プランによって最短の起動間隔が異なりますので、ご注意ください。
- Google スプレッドシートをアプリトリガーとして使用する際の注意事項は「【アプリトリガー】Google スプレッドシートのトリガーにおける注意事項」を参照してください。
コピーができたら、フローボットのテンプレートが「マイプロジェクト」に保存されます。
これでテンプレートのコピーができました。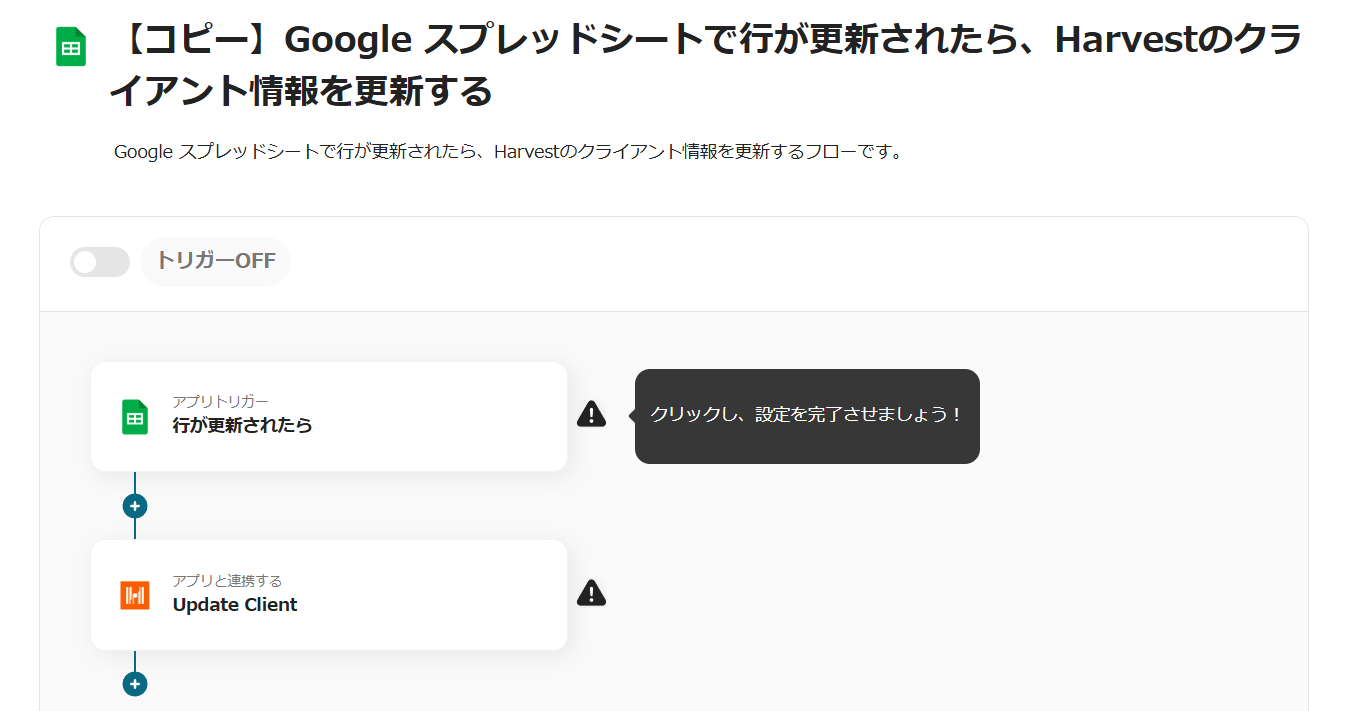
ステップ3:Google スプレッドシートの起動設定
1.Google スプレッドシートの用意
Harvestと連携させるGoogle スプレッドシートを用意しましょう。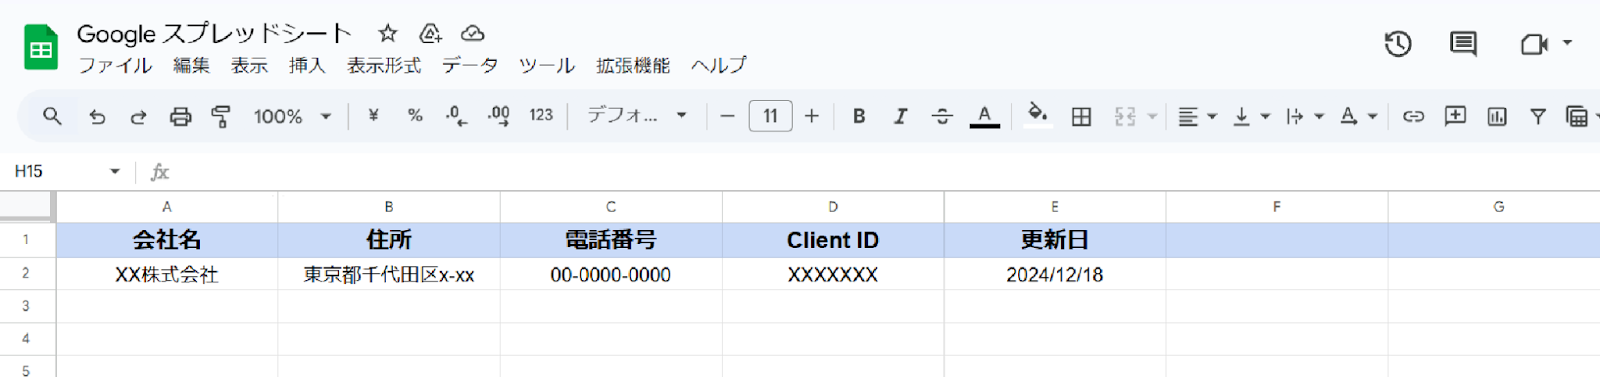
この際に、必ず「Client ID」「更新日」の項目を作成しておきましょう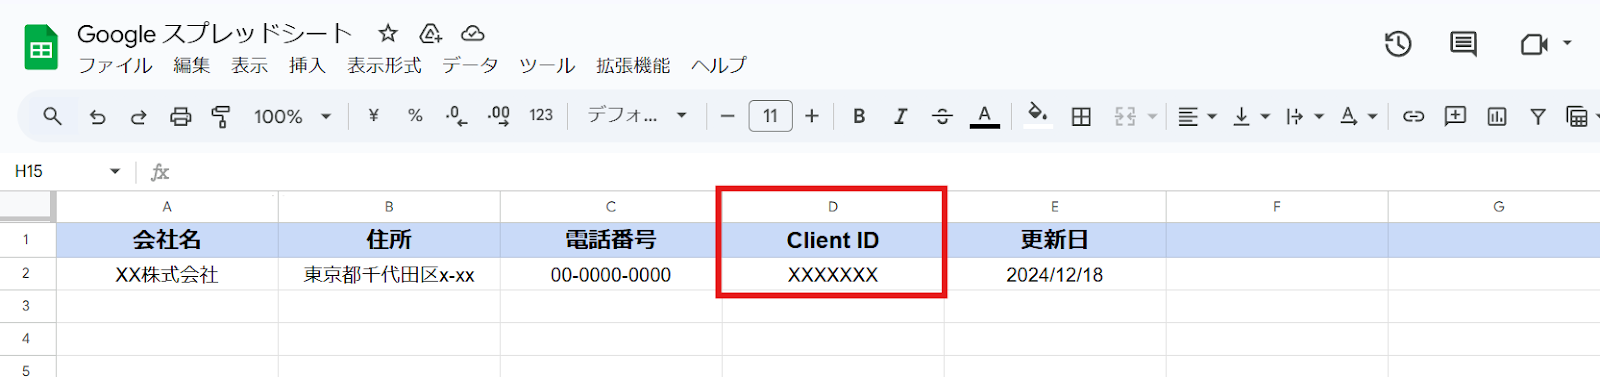
Client IDはHarvestのクライアント詳細画面から確認できます。
URL内の画像赤枠部分の数字の羅列が該当します。この数字をGoogle スプレッドシートに入力しましょう。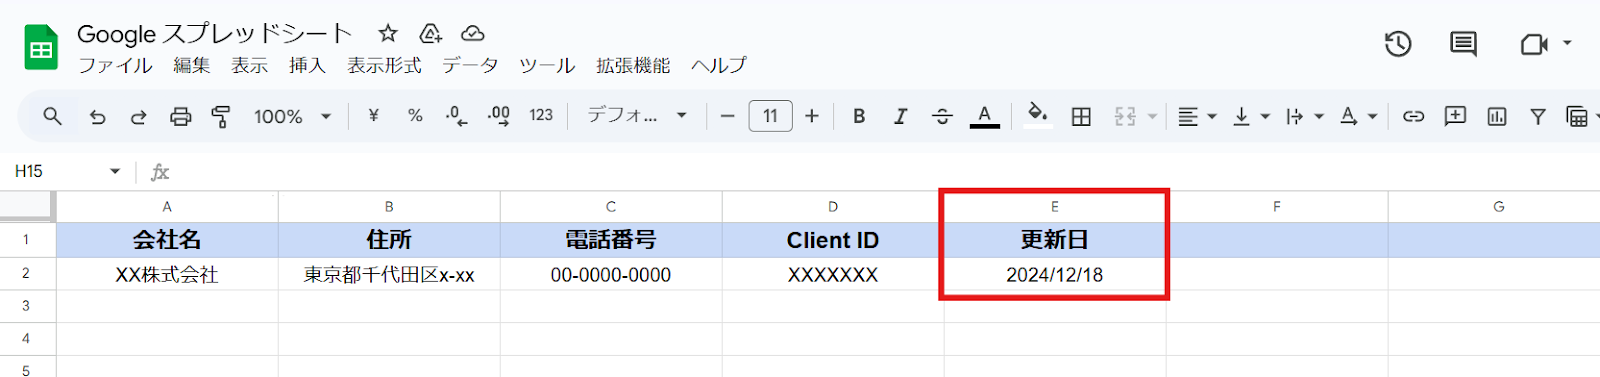
更新日は画像のように設定しました。
尚、その他の項目に関しては画像の通りである必要はありません。普段使用しているGoogle スプレッドシートに「Client ID」「更新日」を付け加える形でも連携可能です。
2.マイプロジェクトを開く
画面左側のメニューから「マイプロジェクト」を開きましょう。
3.コピーしたテンプレートを開く
「【コピー】Google スプレッドシートで行が更新されたら、Harvestのクライアント情報を更新する」をクリックします。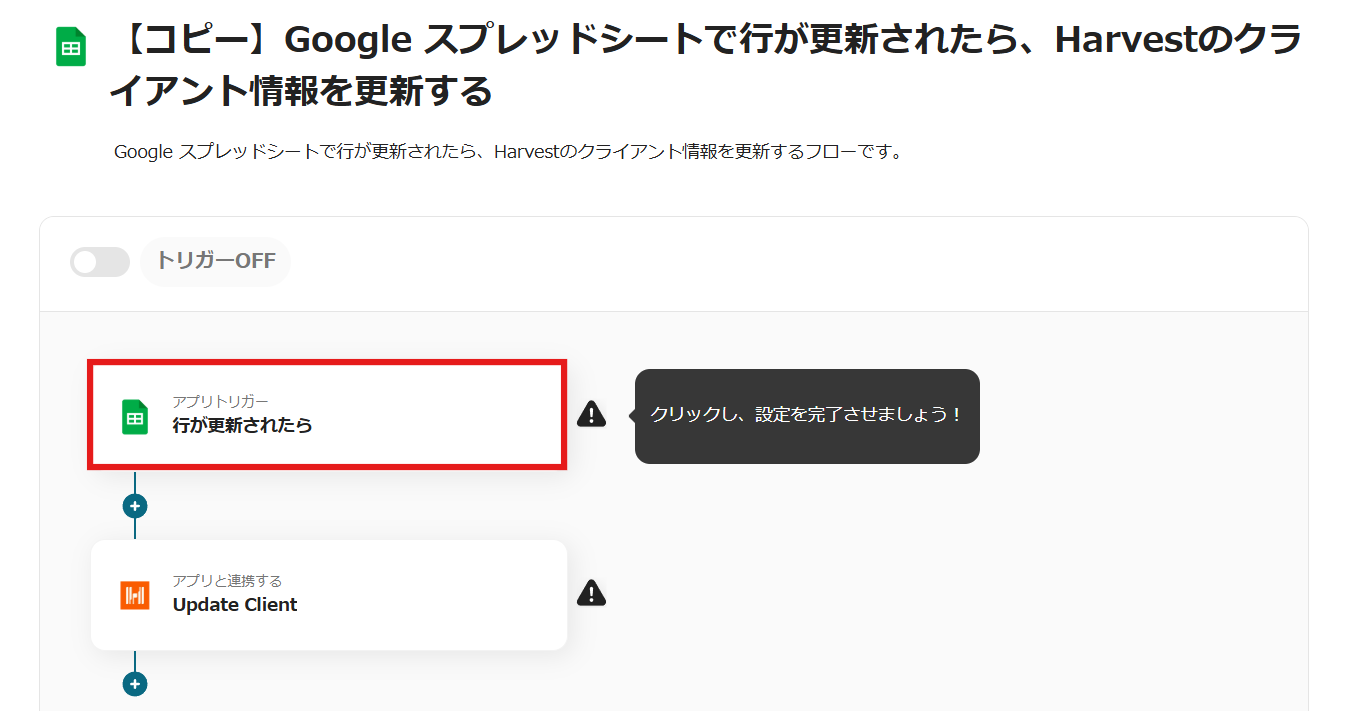
4.アプリトリガーを選択
Google スプレッドシートのアイコンの「行が更新されたら」をクリックします。
タイトルなどの設定は完了しているため、次へを押しましょう。
5.トリガーの起動間隔の設定
起動間隔を設定しましょう。
トリガーは5分、10分、15分、30分、60分の間隔で起動間隔を選択できます。
プランによって最短の起動間隔が異なりますので、ご注意ください。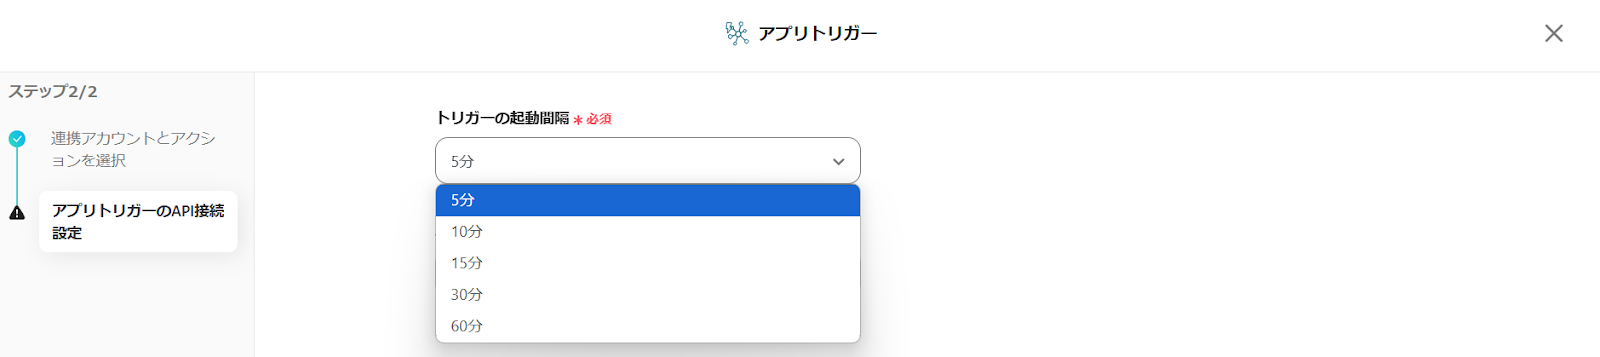
6.IDの入力
ボックス下部の補足に従い、候補から設定しましょう。ボックスをクリックします。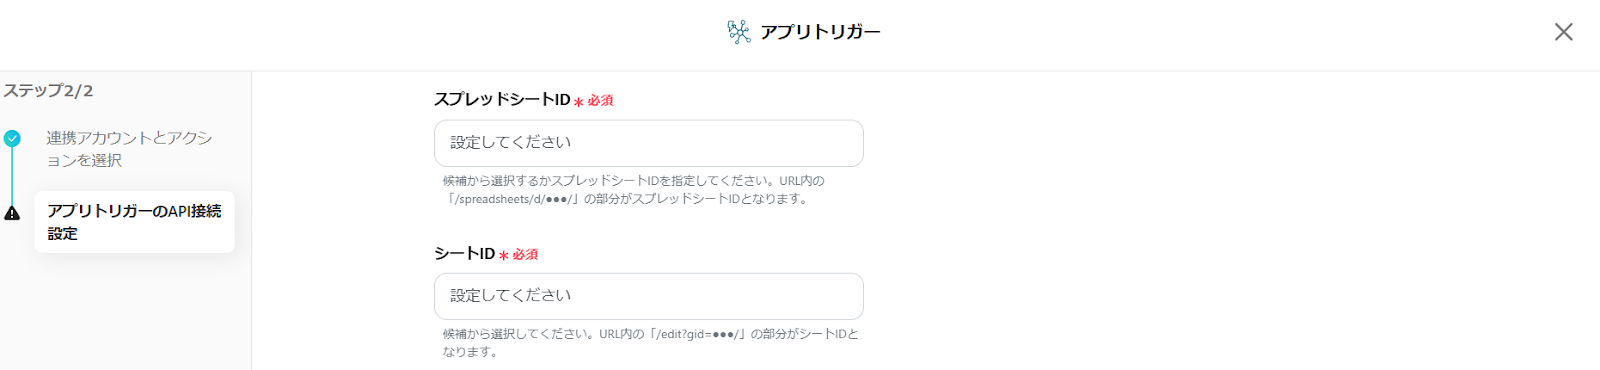
Google スプレッドシートのデータが一覧表示されるため、Harvestと連携したいものをクリックして挿入してください。
シートIDも同様に設定しましょう。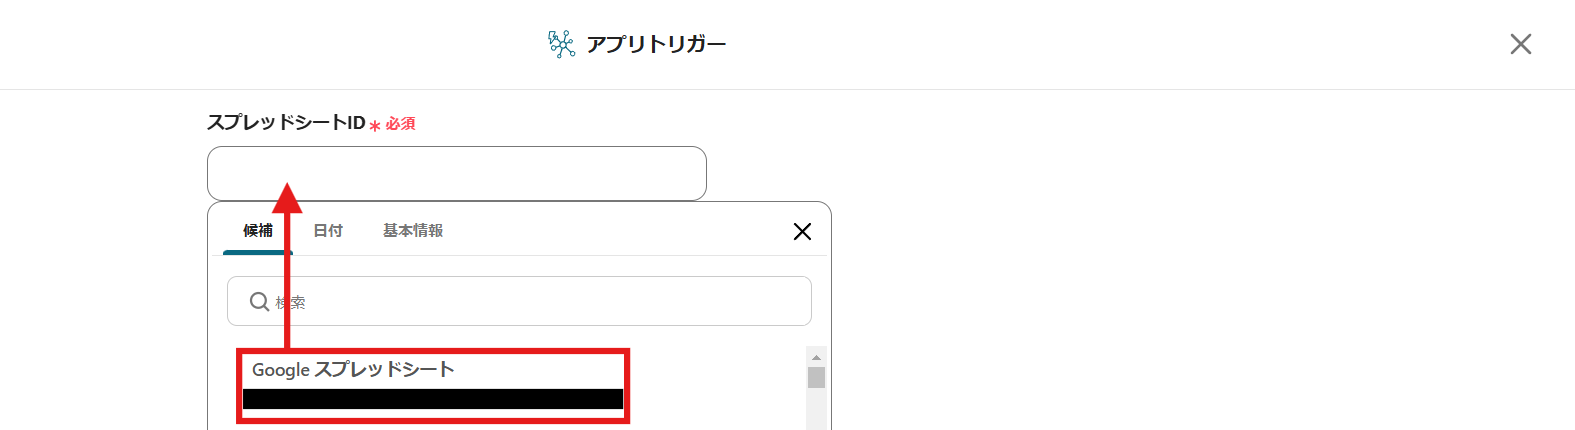
7.テーブル範囲などの入力
テーブル範囲などを指定します。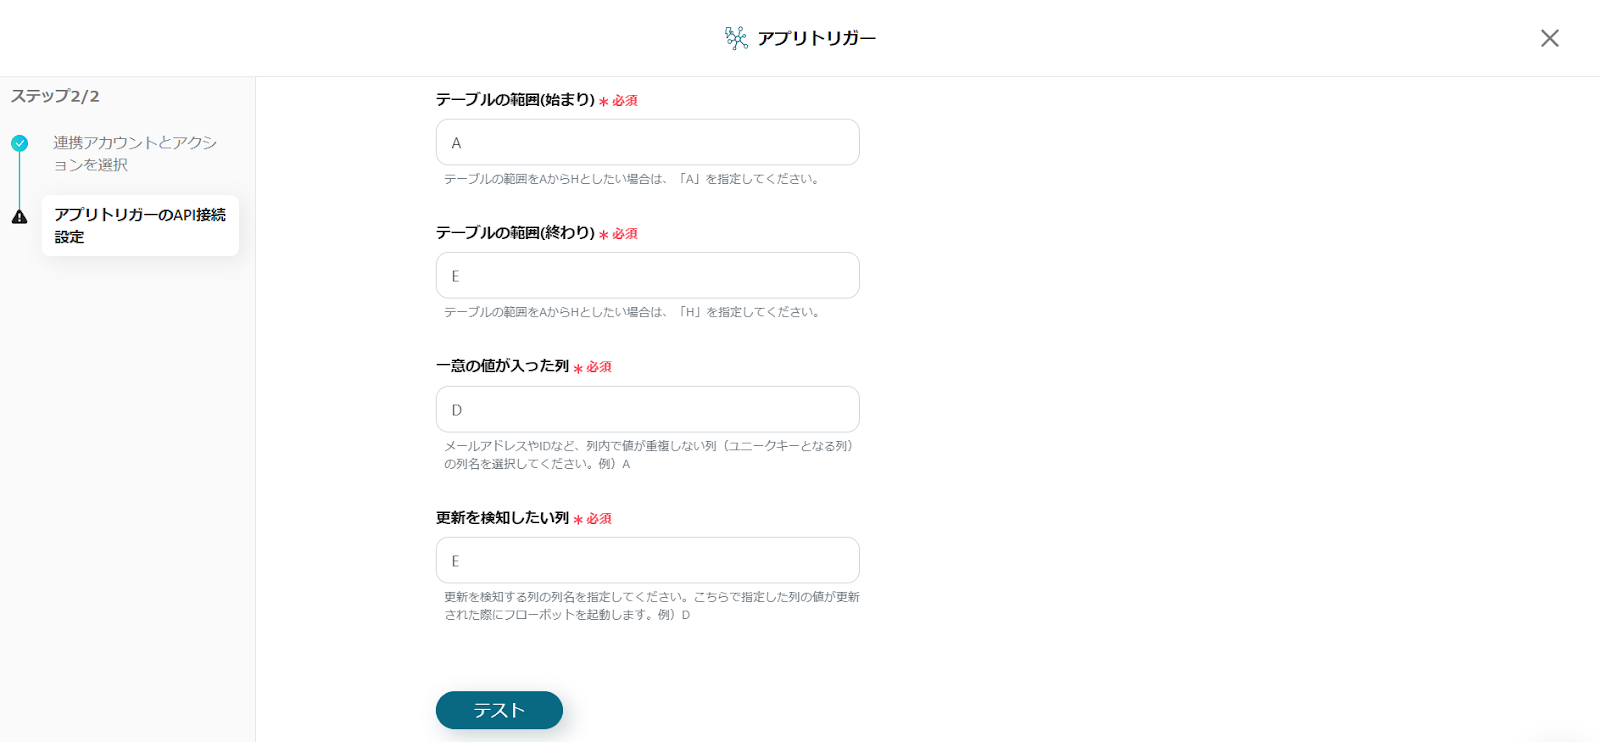
今回は用意したGoogle スプレッドシートのテーブル範囲は、A~Eとなります。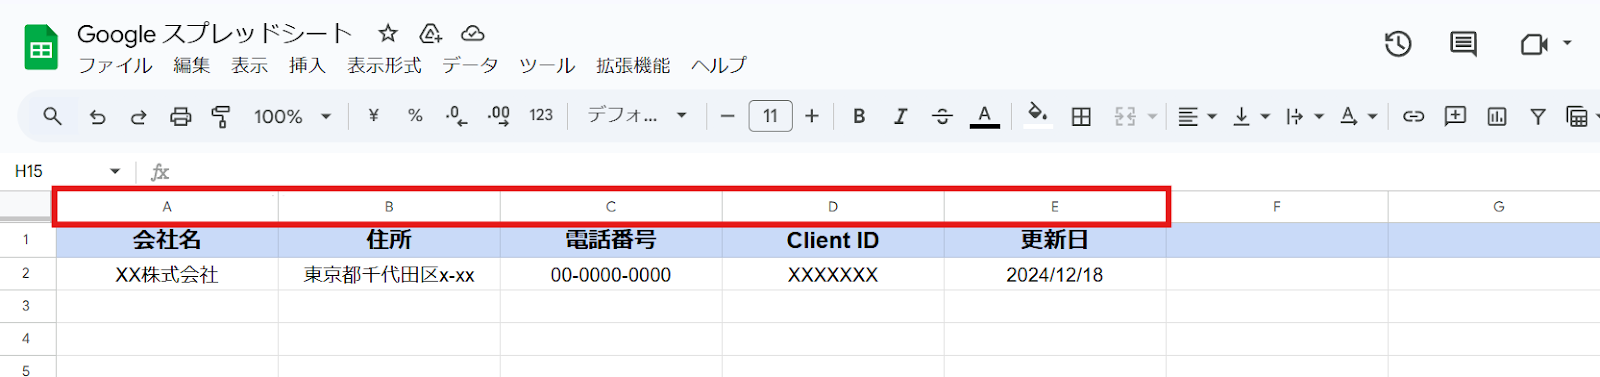
他と重複しない列はFのClient IDとしました。
更新を検知したい列はEの更新日です。
この項目を設定した列を編集した後、最後に「更新日」を編集することで、Harvestのクライアント情報も更新されるようになります。
そのため、設定は画像のようになります。
8.テストの実行
設定が完了したらテストボタンを押してください。
テスト成功と表示が出たら完了です。保存をクリックします。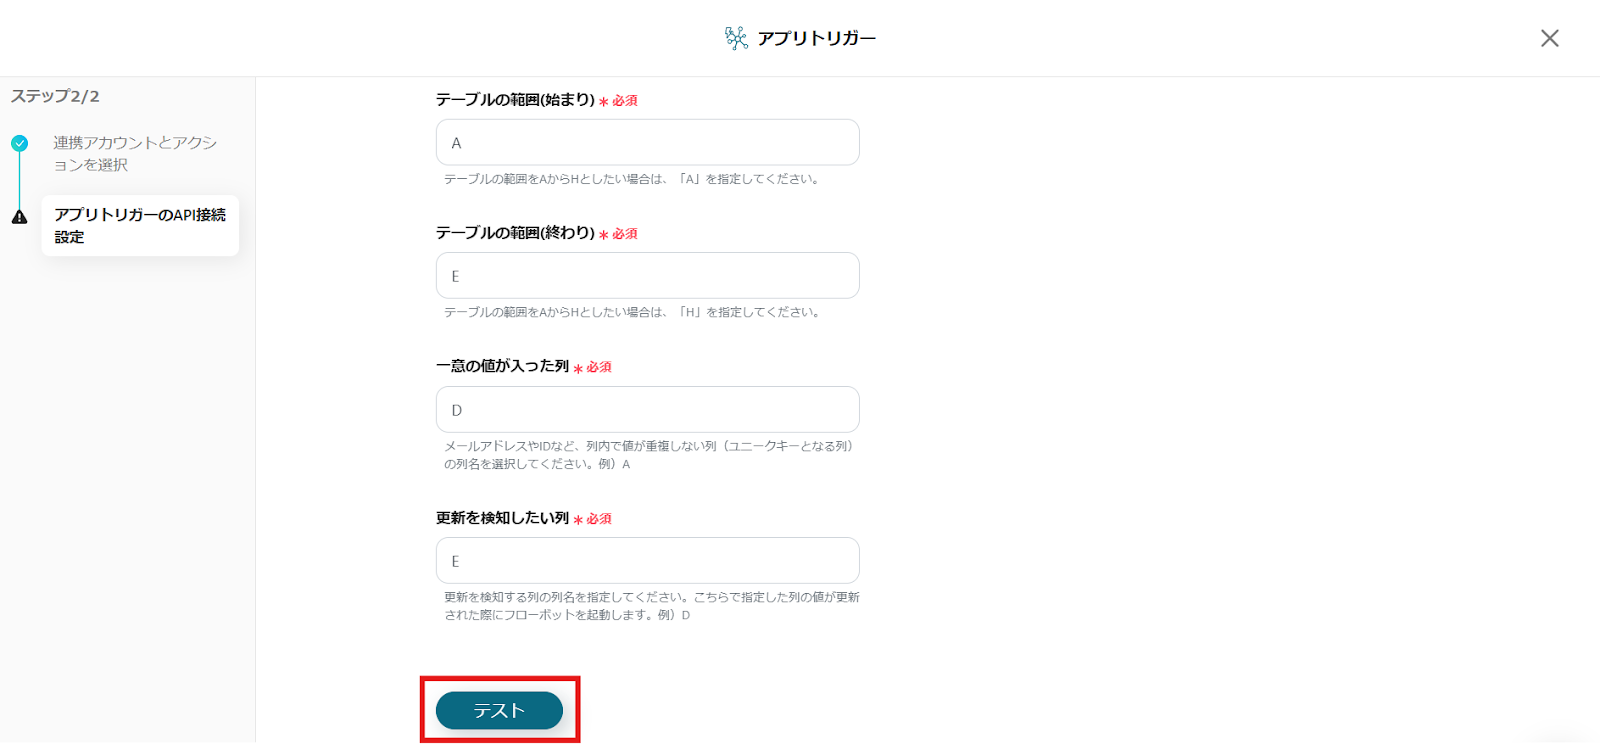
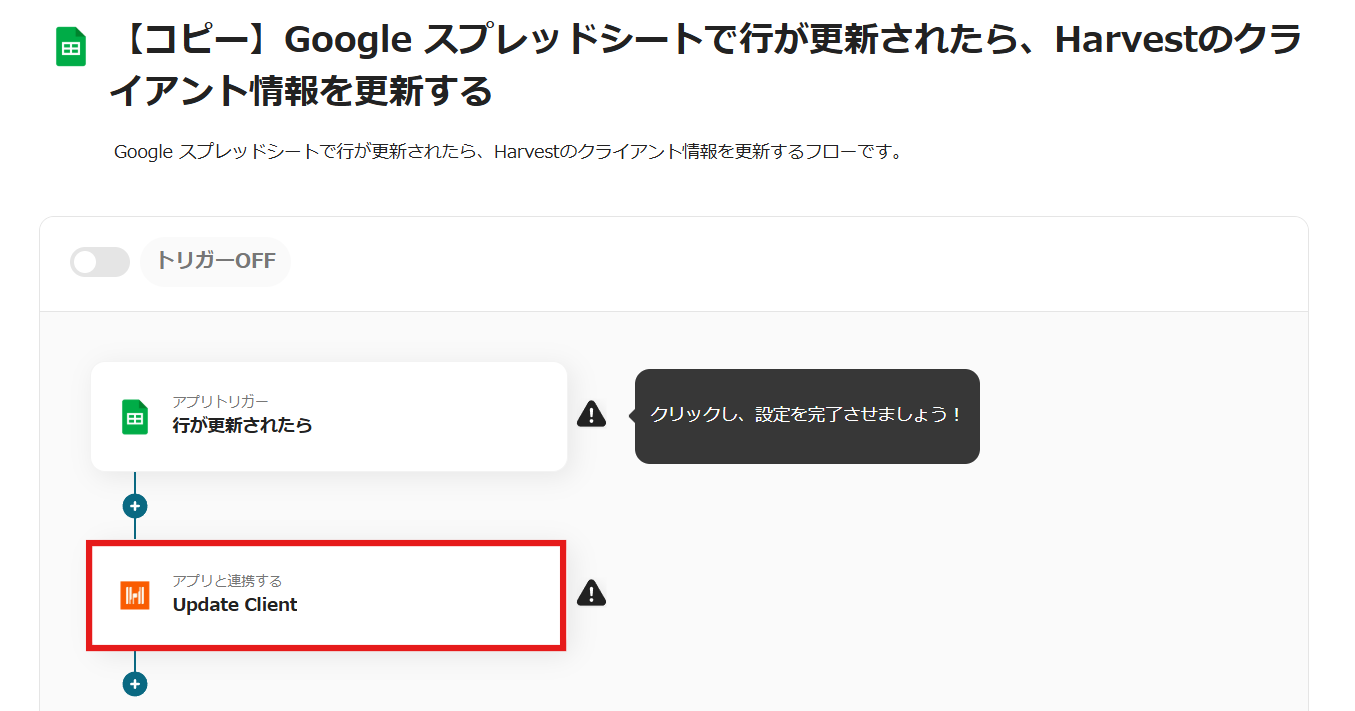
ステップ4: Harvestのクライアントデータを更新する設定
1.アプリと連携する
Harvestのアイコンの「Update Client」をクリックします。
タイトルなどの設定は完了しているため、次へを押しましょう。
2.必須項目の設定
必須項目の設定を行います。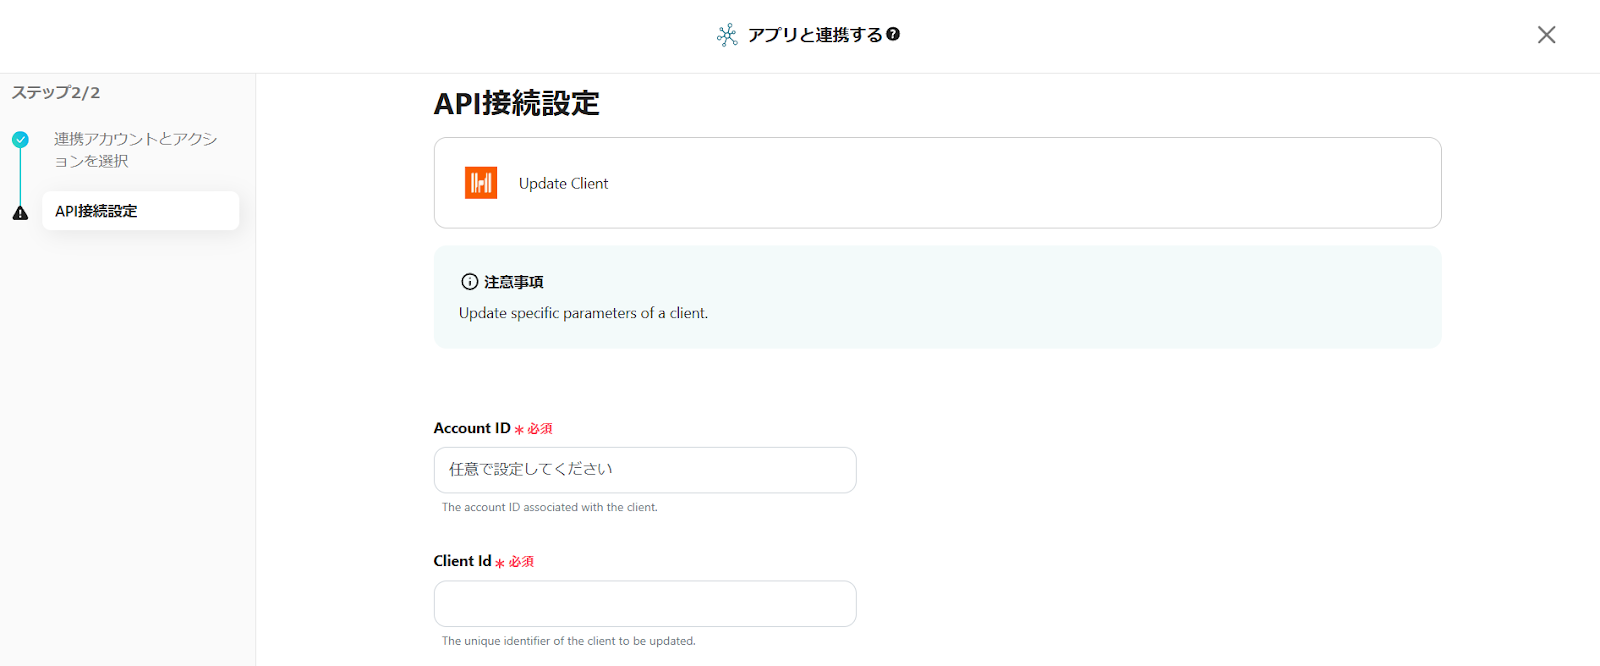
Account IDのボックス内をクリックしてください。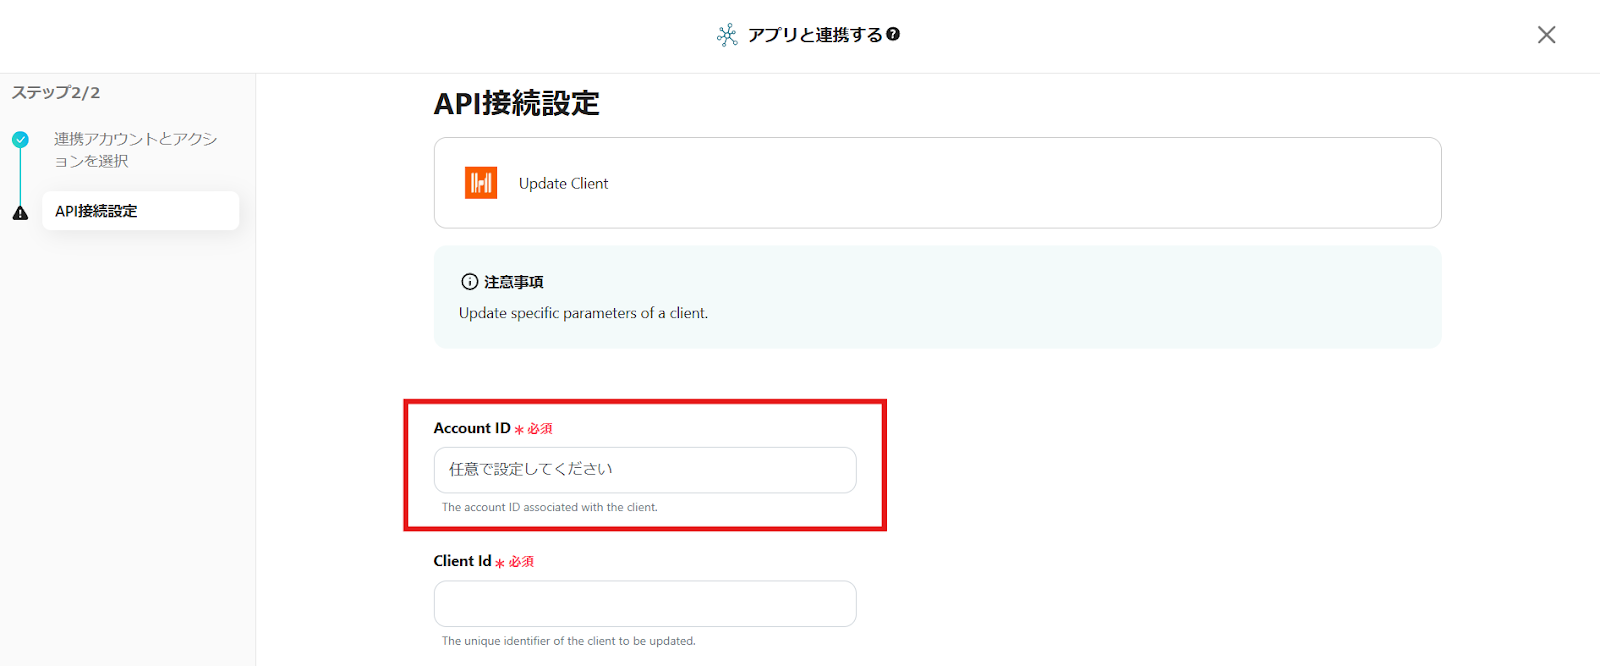
Account IDが一覧表示されるため、クライアント情報を自動更新したいアカウントを選択して挿入してください。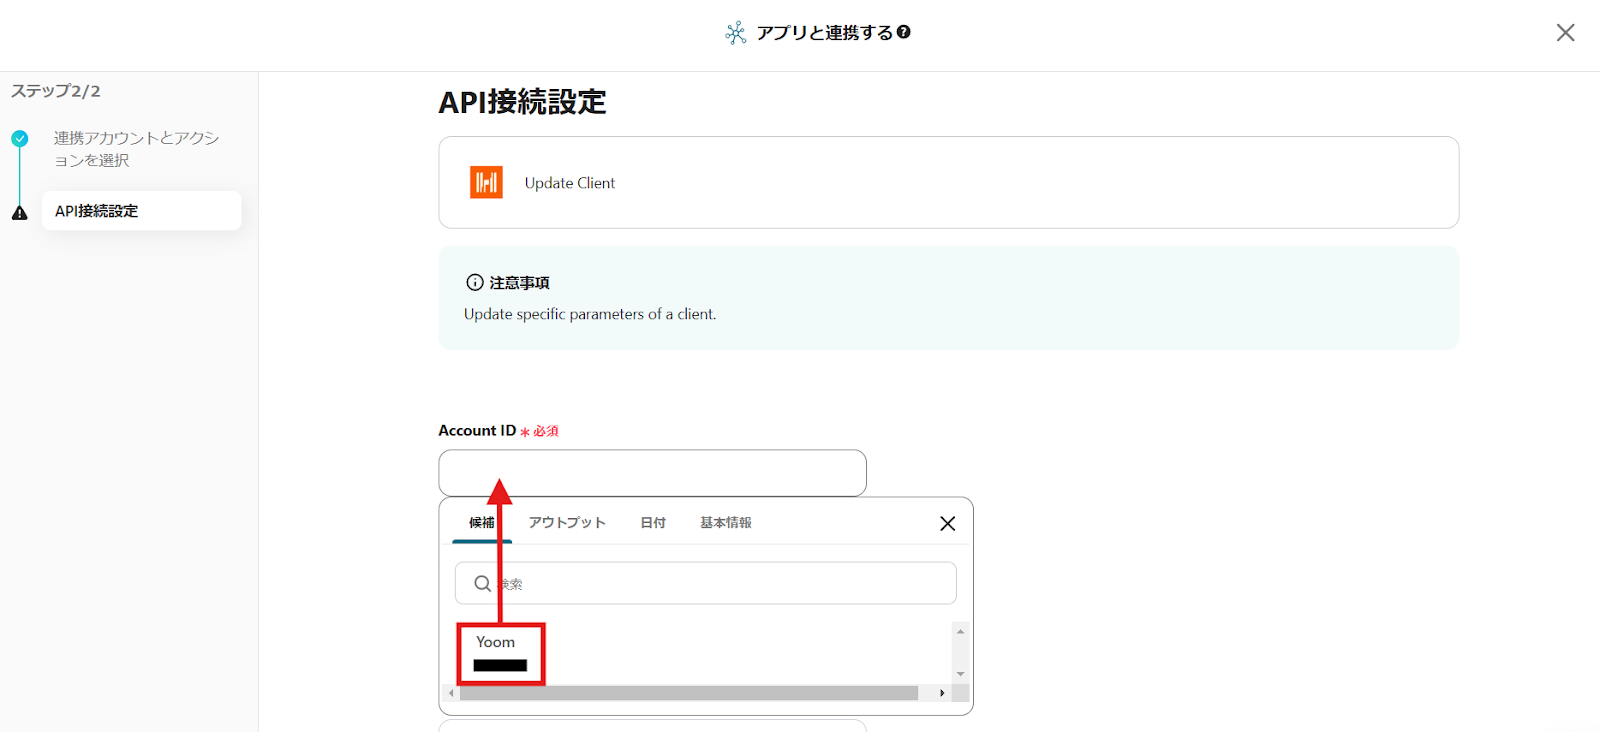
次はClient IDの設定です。ボックスをクリックしてください。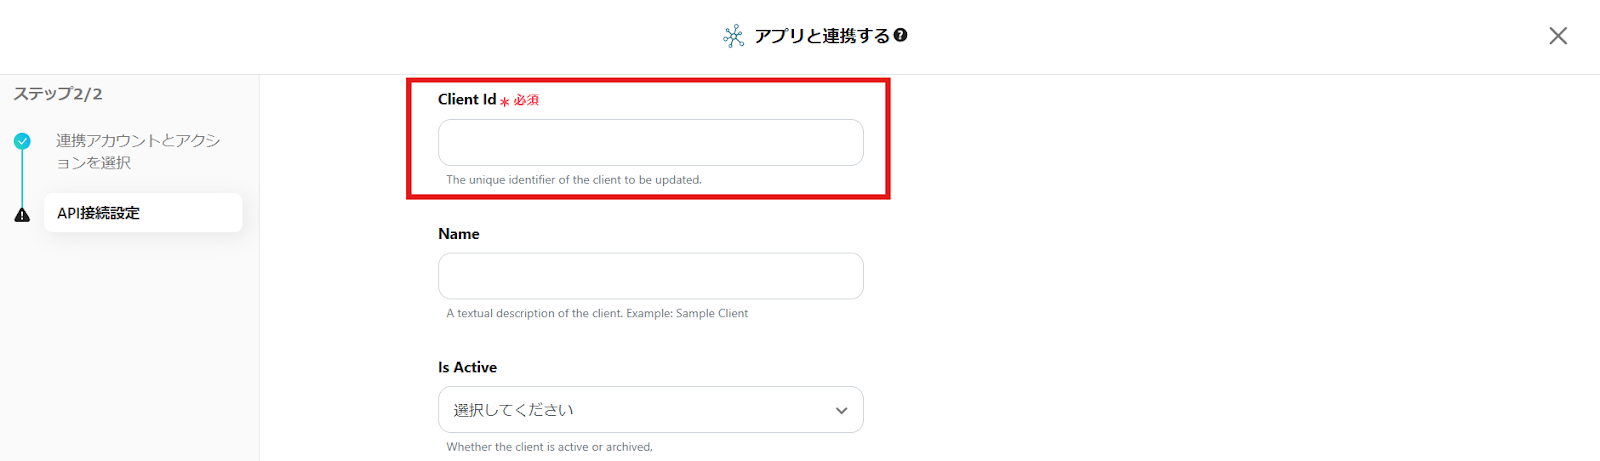
Google スプレッドシートのアイコンをクリックしてください。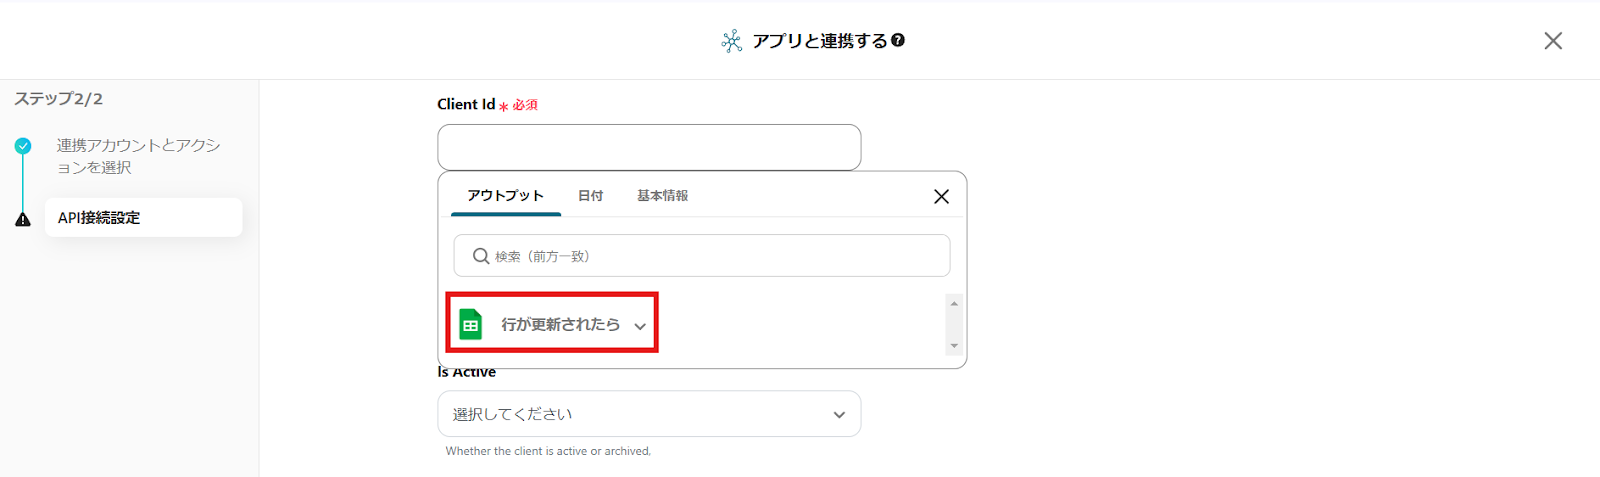
連携したGoogle スプレッドシートに登録済みのデータが一覧表示されます。
その中からClient IDに等しいデータをクリックして挿入してください。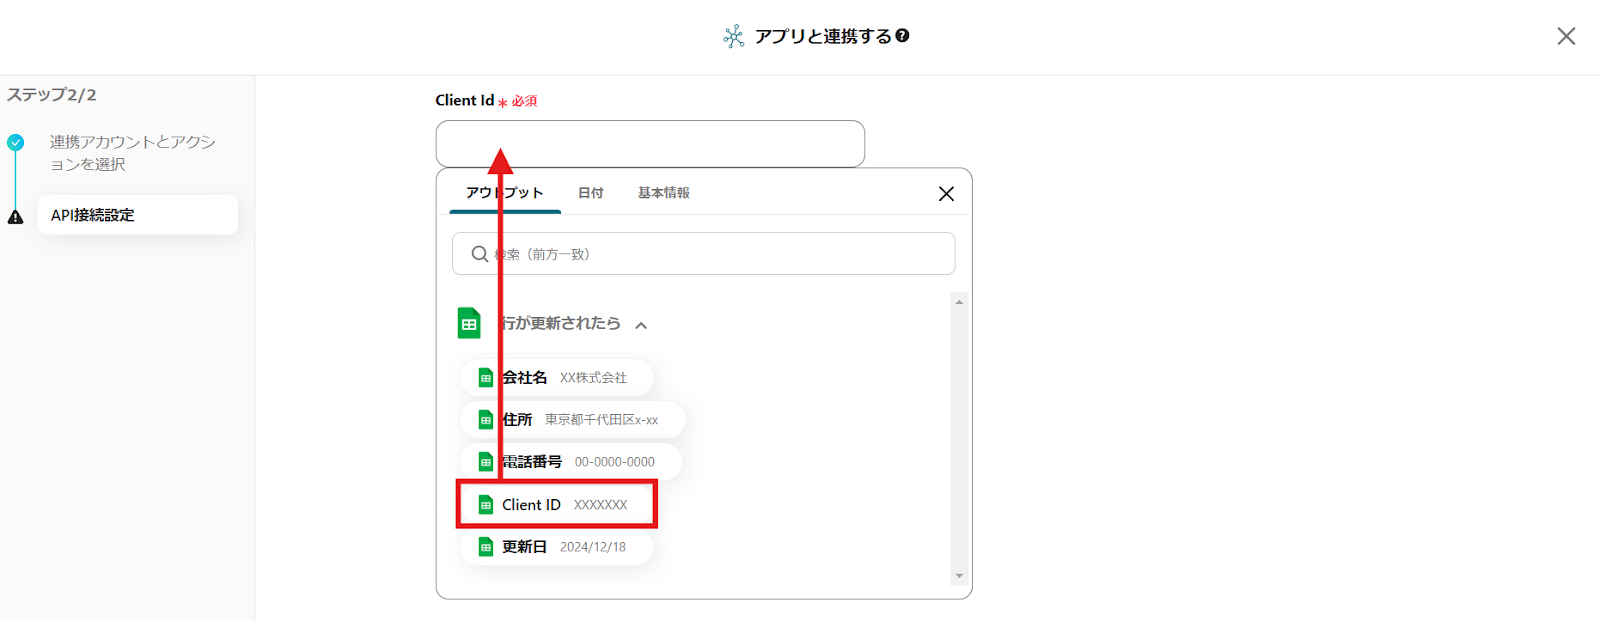
挿入できると画像のようになります。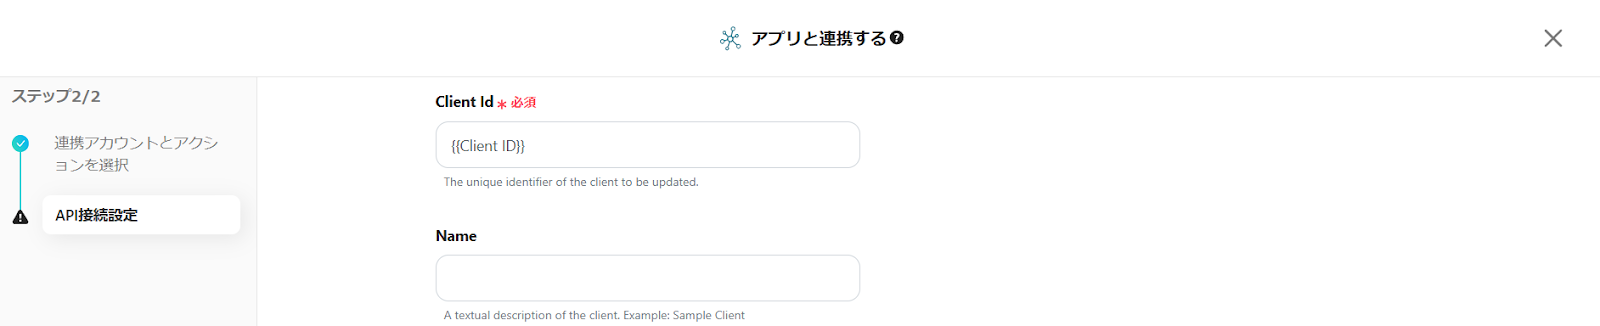
その他にも登録したいデータがある場合は同じように挿入しましょう。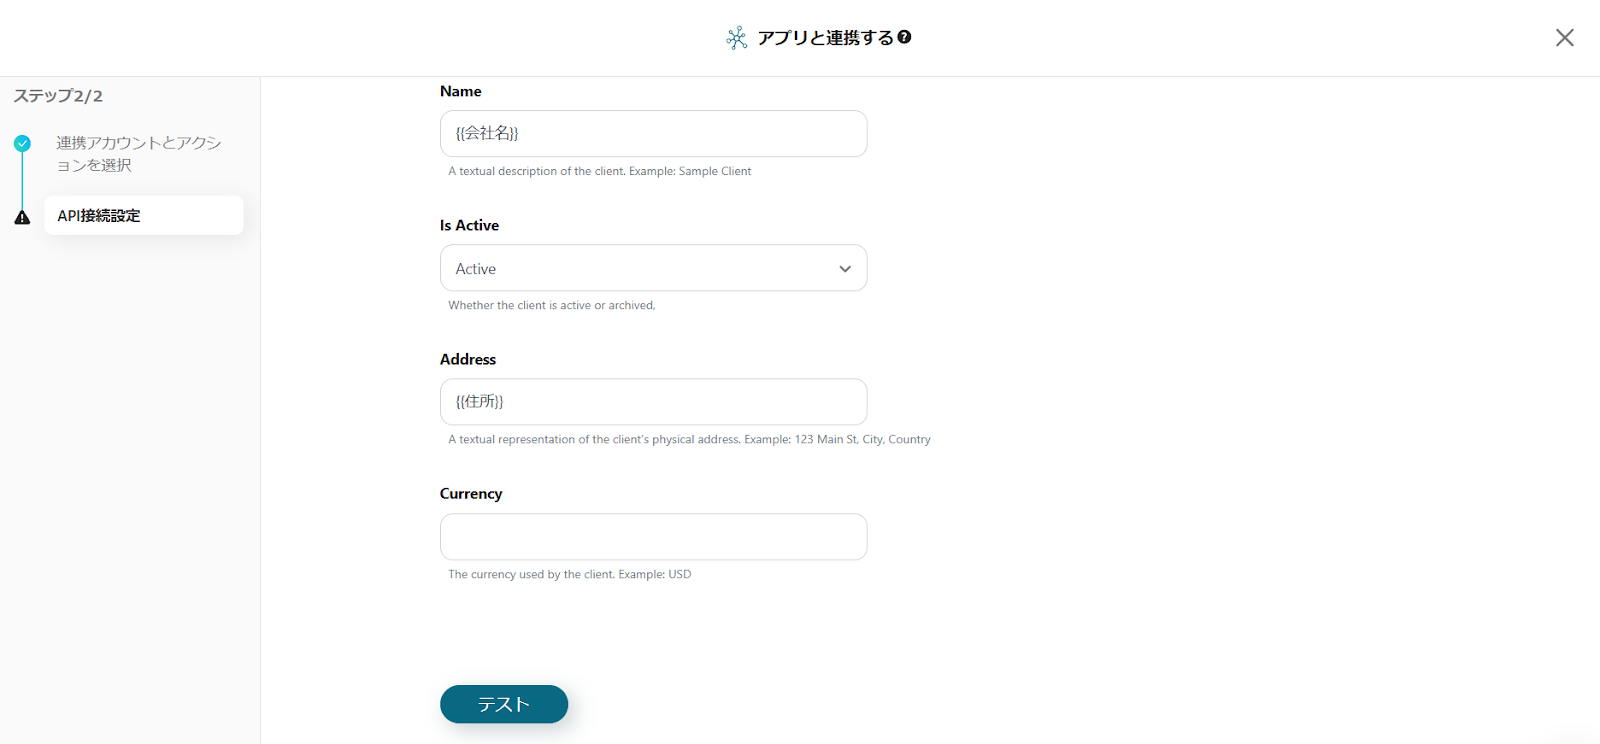
3.テストの実行
設定が完了したらテストボタンを押してください。
テスト成功と表示が出たら完了です。保存をクリックします。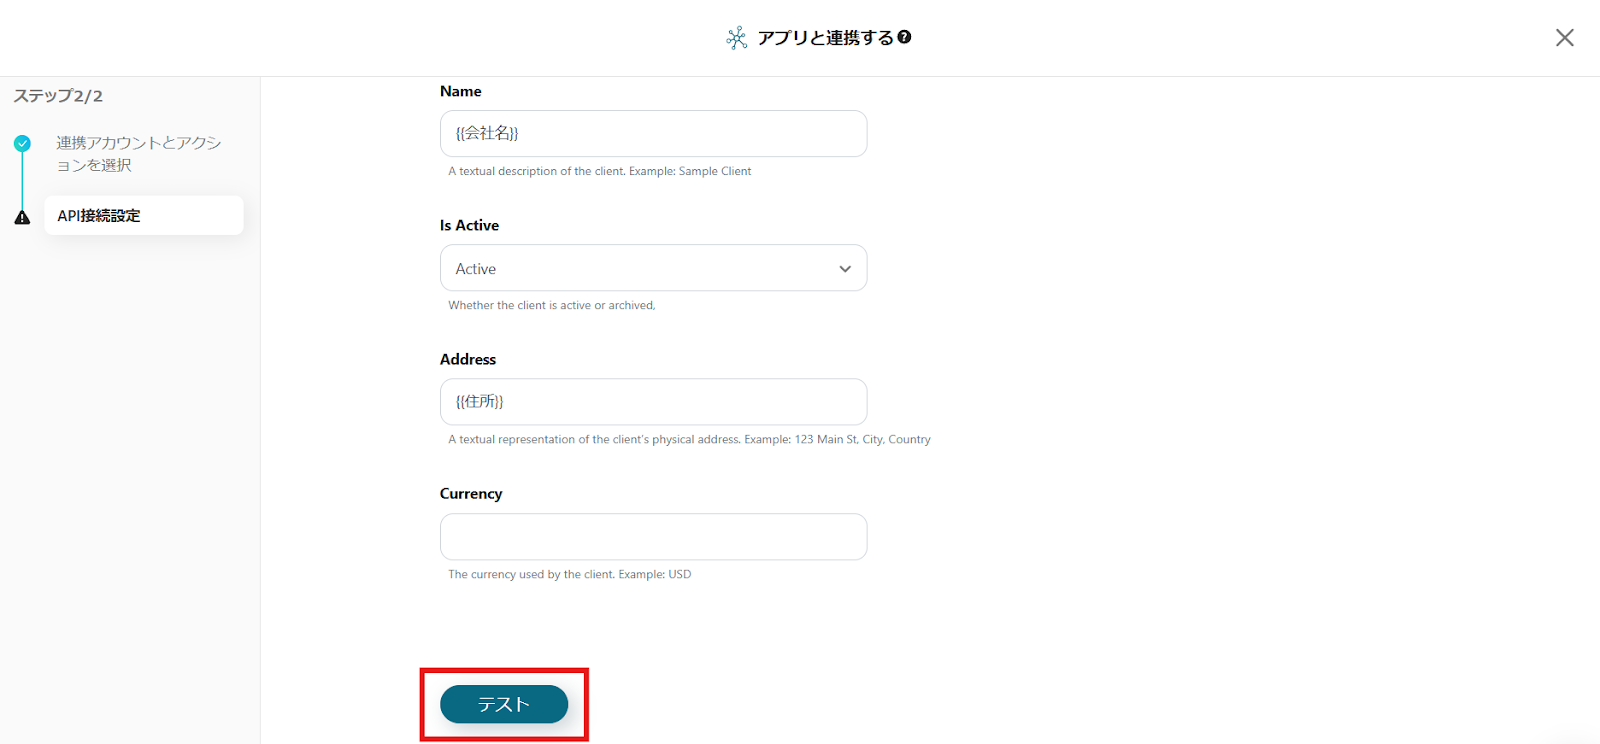
4.トリガーをONにする
フローボットの作成が完了すると、上記のような表示がされます。トリガーは初期設定ではOFFの状態なので、ONにしましょう。
以上でアプリ連携が完了です。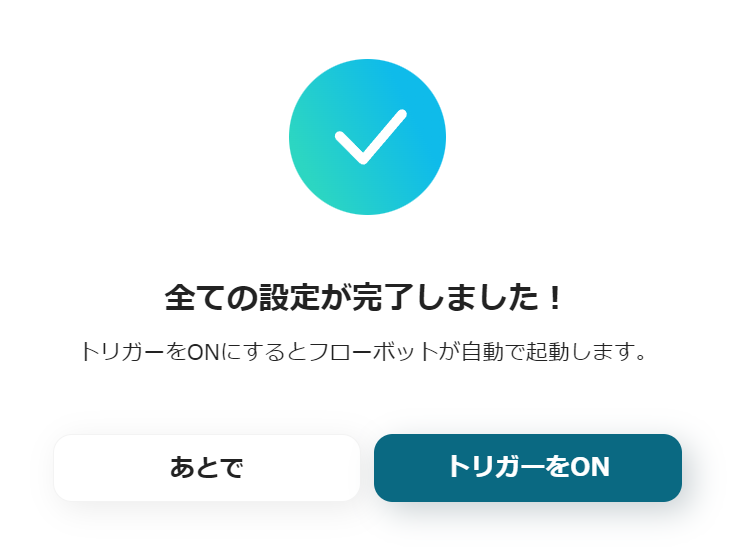
HarvestのデータをGoogle スプレッドシートに連携したい場合
今回はGoogle スプレッドシートからHarvestへデータを連携する方法をご紹介しましたが、逆にHarvestからGoogle スプレッドシートへのデータ連携を実施したい場合は、下記のテンプレートも併せてご利用ください。Harvestで追加されたクライアント情報をGoogle スプレッドシートに追加する
Harvestに新しいクライアントが追加された際に、その情報を自動でGoogle スプレッドシートの指定した行に追記する連携です。
この自動化により、Harvestで管理しているクライアント情報を手動で転記することなく、顧客リストとしてGoogle スプレッドシートに一元管理できるようになり、データの整合性を保ちながら管理業務を効率化します。
■概要
Harvestで新規クライアントを追加した際、管理のためにGoogle スプレッドシートへ情報を手入力していませんか?作業自体は単純ですが、件数が増えると入力ミスや転記漏れの原因にもなりかねません。このワークフローを活用すれば、Harvestへのクライアント追加をきっかけにGoogle スプレッドシートへ自動で情報を書き込めるため、こうした課題をスムーズに解消することができます。
■このテンプレートをおすすめする方
- HarvestとGoogle スプレッドシートを用いてクライアント情報を管理している方
- 手作業による情報転記の手間を省き、入力ミスを防止したいと考えている方
- クライアント情報の管理を効率化し、コア業務に集中したいと考えている方
■このテンプレートを使うメリット
- Harvestにクライアントが追加されると自動でGoogle スプレッドシートへ転記されるため、これまで手作業に費やしていた時間を短縮できます。
- 手作業でのデータ転記が不要になることで、入力間違いや情報の転記漏れといったヒューマンエラーの防止に繋がります。
■フローボットの流れ
- はじめに、HarvestとGoogle スプレッドシートをYoomと連携します。
- 次に、トリガーでHarvestを選択し、「New Client(新しいクライアントが追加されたら)」というアクションを設定します。
- 最後に、オペレーションでGoogle スプレッドシートの「レコードを追加する」アクションを設定し、Harvestから取得したクライアント情報を指定のシートに行として追加します。
※「トリガー」:フロー起動のきっかけとなるアクション、「オペレーション」:トリガー起動後、フロー内で処理を行うアクション
■このワークフローのカスタムポイント
- Google スプレッドシートのオペレーションでは、レコードを追加する対象のスプレッドシート及びシートを任意で設定できます。
- シートの各列にどの情報を追加するかは、トリガーで取得したHarvestのクライアント名やIDといった情報を変数として自由に設定することが可能です。
■注意事項
- Google スプレッドシート、HarvestのそれぞれとYoomを連携してください。
- トリガーは5分、10分、15分、30分、60分の間隔で起動間隔を選択できます。
- プランによって最短の起動間隔が異なりますので、ご注意ください。
HarvestでProjectsが追加されたらGoogle スプレッドシートに追加する
Harvestで新しいプロジェクトが作成されたことをトリガーにして、プロジェクト名やクライアント情報などを自動でGoogle スプレッドシートに追加する連携です。
プロジェクト管理用のシートを手動で更新する必要がなくなり、常に最新のプロジェクト一覧をタイムリーに把握できるため、レポート作成や進捗管理が格段にスムーズになります。
■概要
Harvestで新しいプロジェクトが追加されるたびに、その情報を手作業でGoogle スプレッドシートに転記するのは手間がかかり、入力ミスも発生しがちではないでしょうか。
このワークフローは、HarvestとGoogle スプレッドシートを連携させることで、そうした定型業務の自動化を実現します。Harvestに新しいプロジェクトが登録されると、その情報が自動でGoogle スプレッドシートの指定した行に追加されるため、手作業の手間を省き、正確な情報共有を円滑にします。
■このテンプレートをおすすめする方
- Harvestで管理しているプロジェクト情報を、手作業でGoogle スプレッドシートに転記している方
- HarvestとGoogle スプレッドシートを連携させ、プロジェクト管理の効率化を目指している方
- プロジェクト追加時の転記漏れや入力ミスを防ぎ、正確な情報管理を徹底したいチームリーダーの方
■このテンプレートを使うメリット
- Harvestにプロジェクトが追加されると自動でGoogle スプレッドシートに記録されるため、これまで手作業に費やしていた時間を短縮することができます。
- システムが自動で処理を行うので、手作業による情報の入力漏れや転記ミスといったヒューマンエラーを防ぎ、データの一貫性と正確性を保ちます。
■フローボットの流れ
- はじめに、HarvestとGoogle スプレッドシートをYoomと連携します。
- 次に、トリガーでHarvestを選択し、「新しいプロジェクトが追加されたら」というアクションを設定します。
- 最後に、オペレーションでGoogle スプレッドシートの「レコードに追加する」アクションを設定し、Harvestから取得したプロジェクト情報を指定のシートに書き込みます。
■このワークフローのカスタムポイント
- Google スプレッドシートの「レコードに追加する」アクションでは、どのスプレッドシートの、どのシートに情報を追加するかを任意で設定してください。
- シートに追加する各項目は、固定のテキストを入力するだけでなく、トリガーとなるHarvestから取得したプロジェクト名やクライアント名といった情報を変数として埋め込むなど、柔軟な設定が可能です。
※「トリガー」:フロー起動のきっかけとなるアクション、「オペレーション」:トリガー起動後、フロー内で処理を行うアクション
■注意事項
- Google スプレッドシート、HarvestのそれぞれとYoomを連携してください。
- トリガーは5分、10分、15分、30分、60分の間隔で起動間隔を選択できます。
- プランによって最短の起動間隔が異なりますので、ご注意ください。
Google スプレッドシートとHarvestを使った自動化例
Google スプレッドシートの自動化例
行が追加された際には、CRMツールや情報管理ツール、別のデータベースに自動でレコードを追加するといった一連の作業を自動化できます。
また、毎日定時に広告レポートを取得したり、チャットツールの投稿内容をトリガーに行を削除することが可能です。
これにより、データの自動収集から複数ツールへの共有まで、データ管理の効率が向上するでしょう。
■概要Google スプレッドシートで管理しているリストを、一件ずつSalesforceに手作業で入力する業務に手間を感じていないでしょうか。こうした手作業でのデータ移行は時間がかかるだけでなく、入力ミスや連携漏れといったヒューマンエラーを招く原因にもなります。このワークフローを活用すれば、Google スプレッドシートに行が追加されると自動でSalesforceにレコードが作成されるため、データ連携に関わる業務を効率化できます。■このテンプレートをおすすめする方- Google スプレッドシートで管理している情報をSalesforceへ手動で入力している方
- Salesforceへのデータ入力ミスや連携漏れを防ぎたいと考えている営業やマーケティング担当者の方
- SaaS間のデータ連携を自動化し、手作業による定型業務の工数を削減したい方
■このテンプレートを使うメリット- Google スプレッドシートへの行追加をきっかけに、Salesforceへ自動でレコードが作成されるため、データ入力にかかっていた時間を削減できます
- 手作業による転記が減ることで、入力ミスや対応漏れといったヒューマンエラーを防ぎ、データ精度の向上に繋がります
■フローボットの流れ- はじめに、Google スプレッドシートとSalesforceをYoomと連携します
- 次に、トリガーでGoogle スプレッドシートを選択し、「行が追加されたら」というアクションを設定し、対象のシートを指定します
- 続いて、オペレーションでSalesforceを選択し、「リードオブジェクトのレコードを作成」アクションを設定し、スプレッドシートから取得した情報を紐付けます
- 最後に、オペレーションでGoogle スプレッドシートの「レコードを更新する」アクションを設定し、Salesforceへの連携が完了したことを示すステータスなどを書き込みます
※「トリガー」:フロー起動のきっかけとなるアクション、「オペレーション」:トリガー起動後、フロー内で処理を行うアクション
■このワークフローのカスタムポイント- Google スプレッドシートのトリガー設定では、起動のきっかけとしたいスプレッドシートおよびシートを任意で設定してください
- Salesforceへのレコード作成オペレーションでは、Google スプレッドシートのどの列の情報をSalesforceのどの項目に連携するかを任意で設定できます
■注意事項- Google スプレッドシート、SalesforceのそれぞれとYoomを連携してください。
- トリガーは5分、10分、15分、30分、60分の間隔で起動間隔を選択できます。
- プランによって最短の起動間隔が異なりますので、ご注意ください。
- Googleスプレッドシートをアプリトリガーとして使用する際の注意事項は「【アプリトリガー】Googleスプレッドシートのトリガーにおける注意事項」を参照してください。
- Salesforceはチームプラン・サクセスプランでのみご利用いただけるアプリとなっております。フリープラン・ミニプランの場合は設定しているフローボットのオペレーションやデータコネクトはエラーとなりますので、ご注意ください。
- チームプランやサクセスプランなどの有料プランは、2週間の無料トライアルを行うことが可能です。無料トライアル中には制限対象のアプリを使用することができます
■概要Google スプレッドシートとSPIRALを併用し、それぞれに手作業で情報を入力・転記する作業に手間を感じていないでしょうか。こうした二重入力は時間がかかるだけでなく、入力ミスや更新漏れの原因にもなり得ます。 このワークフローを活用すれば、Google スプレッドシートに新しい行が追加されるだけでSPIRALにレコードを自動で追加できるため、手作業による手間を減らし、スムーズなデータ連携を実現します。■このテンプレートをおすすめする方- Google スプレッドシートとSPIRALの両方で顧客情報などを管理している方
- 手作業によるデータ転記に課題を感じており、業務を効率化したいと考えている方
- データの二重入力を減らし、ヒューマンエラーの発生を防ぎたいチームリーダーの方
■このテンプレートを使うメリット- Google スプレッドシートへの情報追加をトリガーに、SPIRALへ自動でレコードが登録されるため、これまで手作業で行っていた転記作業の時間を短縮します
- 手作業でのデータ転記が削減されることで、入力ミスや更新漏れといったヒューマンエラーの発生を防ぎ、データの正確性を保つことに繋がります
■フローボットの流れ- はじめに、Google スプレッドシートとSPIRALをYoomと連携します
- 次に、トリガーでGoogle スプレッドシートを選択し、「行が追加されたら」というアクションを設定します
- その後、オペレーションでSPIRALの「レコードを登録」アクションを設定し、スプレッドシートから取得した情報を紐付けます
- 最後に、オペレーションでGoogle スプレッドシートの「レコードを更新する」アクションを設定し、SPIRALへの登録が完了したことを示すステータスなどを更新します
※「トリガー」:フロー起動のきっかけとなるアクション、「オペレーション」:トリガー起動後、フロー内で処理を行うアクション
■このワークフローのカスタムポイント- SPIRALでレコードを追加する際に、対象のデータベースや、Google スプレッドシートのどの列の情報を反映させるかなどを任意で設定してください
- Google スプレッドシートでレコードを更新する際に、対象のスプレッドシートや更新する内容(例:ステータス列に「連携済み」と入力する等)を任意で設定してください
■注意事項- Google スプレッドシート、SPIRALのそれぞれとYoomを連携してください。
- トリガーは5分、10分、15分、30分、60分の間隔で起動間隔を選択できます。
- プランによって最短の起動間隔が異なりますので、ご注意ください。
- Googleスプレッドシートをアプリトリガーとして使用する際の注意事項は「【アプリトリガー】Googleスプレッドシートのトリガーにおける注意事項」を参照してください。
■概要
Google スプレッドシートに顧客データを入力した後、Microsoft Excelにも同じ情報を手作業で転記するのは手間がかかり、入力ミスも心配ではありませんか?このワークフローを活用すれば、Google スプレッドシートへのデータ追加をトリガーに、Microsoft Excelへ自動で情報が追加され、こうしたデータ管理の課題をスムーズに解消できます。
■このテンプレートをおすすめする方
- Google スプレッドシートとMicrosoft Excel間でデータの手動コピー&ペーストをしている方
- 顧客リストなど、両方のSaaSで同じ情報を二重管理しているチームの方
- 日々のデータ入力作業の効率化やミスの削減を目指している担当者の方
■このテンプレートを使うメリット
- Google スプレッドシートへの情報追加と同時に、Microsoft Excelへも自動でデータが反映されるため、転記作業にかかっていた時間を削減できます。
- 手作業によるデータの入力間違いや転記漏れといったヒューマンエラーを防ぎ、データの正確性を保つことに繋がります。
■フローボットの流れ
- はじめに、Google スプレッドシートとMicrosoft ExcelをYoomと連携します。
- 次に、トリガーでGoogle スプレッドシートを選択し、「行が追加されたら」というアクションを設定します。この際、対象のスプレッドシートとシートを指定します。
- 最後に、オペレーションでMicrosoft Excelを選択し、「レコードを追加する」アクションを設定します。ここで、対象のファイルとシート、そしてGoogle スプレッドシートから取得したどの情報をExcelのどの列に追加するかを紐付けます。
※「トリガー」:フロー起動のきっかけとなるアクション、「オペレーション」:トリガー起動後、フロー内で処理を行うアクション
■このワークフローのカスタムポイント
- Google スプレッドシートのトリガー設定では、自動化の起点としたい任意のスプレッドシート名およびシート名を指定してください。
- Microsoft Excelのオペレーション設定では、データの追加先となる任意のファイル名およびシート名を指定できます。また、各項目に対して、前段階のGoogle スプレッドシートから取得したどの情報を割り当てるか、または固定値を設定するかなど、柔軟にカスタムすることが可能です。
■注意事項
- Google スプレッドシート、Microsoft ExcelのそれぞれとYoomを連携してください。
- トリガーは5分、10分、15分、30分、60分の間隔で起動間隔を選択できます。
- プランによって最短の起動間隔が異なりますので、ご注意ください。
- Microsoft365(旧Office365)には、家庭向けプランと一般法人向けプラン(Microsoft365 Business)があり、一般法人向けプランに加入していない場合には認証に失敗する可能性があります。
■概要毎日のGoogle Adsのレポート確認、手動でのダウンロードやGoogle スプレッドシートへの転記に時間を取られていませんか。日々の繰り返し作業でありながら、重要なデータのためミスが許されず、負担に感じている方もいるかもしれません。このワークフローを活用すれば、指定した時間に前日のGoogle Adsレポートを自動で取得し、Google スプレッドシートへ記載する一連の流れを自動化できます。定型的なレポート作成業務から解放され、より戦略的な分析業務に集中することが可能になります。■このテンプレートをおすすめする方- 毎日Google Adsの管理画面からレポートを手動で作成している広告運用担当者の方
- 広告レポートをGoogle スプレッドシートで管理しており、転記作業を効率化したい方
- 日々のレポート作成業務を自動化し、チームの生産性を高めたいマーケティング責任者の方
■このテンプレートを使うメリット- 毎日のレポート取得とGoogle スプレッドシートへの転記作業が自動化されるため、これまで手作業に費やしていた時間を短縮できます。
- 手作業でのデータ転記がなくなることで、コピー&ペーストによるミスや入力漏れといったヒューマンエラーの発生を防ぎます。
■フローボットの流れ- はじめに、Google AdsとGoogle スプレッドシートをYoomと連携します。
- 次に、トリガーでスケジュールトリガーを選択し、毎日フローボットを起動したい任意の時間を設定します。
- 次に、オペレーションでGoogle Adsの「アカウントレポートの取得」アクションを設定し、前日のレポートを取得するように設定します。
- 次に、取得したレポートの値を加工するため、オペレーションで計算(四則演算)機能を設定します。
- 最後に、オペレーションでGoogle スプレッドシートの「レコードを追加する」アクションを設定し、加工したデータを指定のシートに行として追加します。
※「トリガー」:フロー起動のきっかけとなるアクション、「オペレーション」:トリガー起動後、フロー内で処理を行うアクション
■このワークフローのカスタムポイント- スケジュールトリガーでは、レポートを取得したい時間を任意で設定してください。例えば、毎朝9時に設定することが可能です。
- Google Adsでレポートを取得する際、対象となる広告アカウントIDやレポートの集計期間を任意で設定してください。
- レポートの数値を元にクリック率(CTR)などを算出したい場合、計算機能で任意の計算式を設定できます。
- Google スプレッドシートにデータを記載する際、出力先となるスプレッドシートIDやタブ名を任意で設定してください。
■注意事項- Google Ads、Google スプレッドシートのそれぞれとYoomを連携してください。
■概要
アンケートを実施した後、Gmailで回答を受け取り、その結果を手作業でGoogle スプレッドシートに転記・集計する作業は、時間もかかり、入力ミスも発生しやすいのではないでしょうか。 特に回答数が多い場合、その負担は無視できません。 このワークフローを活用すれば、Gmailで特定のラベルが付いたアンケート結果メールを受信するだけで、AI機能が内容を解析し、Google スプレッドシートの集計用シートに必要な情報を自動で追加するため、こうした課題をスムーズに解消できます。
■このテンプレートをおすすめする方
- Gmailで受信したアンケート回答を、手作業でGoogle スプレッドシートへ転記しているご担当者の方
- アンケート結果の集計業務における入力ミスや作業漏れを減らしたいと考えているチームリーダーの方
- 定型的なデータ入力作業を自動化し、より重要な業務に時間を割きたいと考えているすべての方
■このテンプレートを使うメリット
- Gmailでアンケート結果メールを受信する度に、自動で内容を抽出しGoogle スプレッドシートへ追加するため、これまで手作業に費やしていた時間を短縮できます。
- 手作業によるデータ転記が不要になるため、入力間違いや漏れといったヒューマンエラーのリスク軽減に繋がります。
■フローボットの流れ
- はじめに、GmailとGoogle スプレッドシートをYoomと連携します。
- 次に、トリガーでGmailを選択し、「特定のラベルのメールを受信したら」というアクションを設定し、アンケート結果メールに付与されるラベルを指定します。
- 次に、オペレーションでAI機能を選択し、「テキストからデータを抽出する」アクションを設定し、メール本文からアンケートの回答項目を抽出するように指定します。
- 最後に、オペレーションでGoogle スプレッドシートの「レコードを追加する」アクションを設定し、抽出したデータを指定のシートに追加します。
※「トリガー」:フロー起動のきっかけとなるアクション、「オペレーション」:トリガー起動後、フロー内で処理を行うアクション
■このワークフローのカスタムポイント
- Gmailのトリガー設定では、アンケート結果メールを識別するための受信対象とするメールのラベルを任意で指定してください。
- AI機能のオペレーションでは、Gmailで受信したメール本文の中から、具体的にどの情報を抽出するかを任意で設定することが可能です。例えば、氏名、メールアドレス、各アンケート設問への回答などを指定できます。
- Google スプレッドシートのオペレーションでは、書き込み対象となる任意のスプレッドシートとシートを指定でき、さらにシート内の各項目(列)に対して、前段階のAI機能で抽出したどの情報を割り当てるか、または固定値を設定するかなど、柔軟にカスタムすることが可能です。
■注意事項
- Gmail、Google スプレッドシートのそれぞれとYoomを連携してください。
- トリガーは5分、10分、15分、30分、60分の間隔で起動間隔を選択できます。
- プランによって最短の起動間隔が異なりますので、ご注意ください。
- Google スプレッドシートで管理している情報をSalesforceへ手動で入力している方
- Salesforceへのデータ入力ミスや連携漏れを防ぎたいと考えている営業やマーケティング担当者の方
- SaaS間のデータ連携を自動化し、手作業による定型業務の工数を削減したい方
- Google スプレッドシートへの行追加をきっかけに、Salesforceへ自動でレコードが作成されるため、データ入力にかかっていた時間を削減できます
- 手作業による転記が減ることで、入力ミスや対応漏れといったヒューマンエラーを防ぎ、データ精度の向上に繋がります
- はじめに、Google スプレッドシートとSalesforceをYoomと連携します
- 次に、トリガーでGoogle スプレッドシートを選択し、「行が追加されたら」というアクションを設定し、対象のシートを指定します
- 続いて、オペレーションでSalesforceを選択し、「リードオブジェクトのレコードを作成」アクションを設定し、スプレッドシートから取得した情報を紐付けます
- 最後に、オペレーションでGoogle スプレッドシートの「レコードを更新する」アクションを設定し、Salesforceへの連携が完了したことを示すステータスなどを書き込みます
■このワークフローのカスタムポイント
- Google スプレッドシートのトリガー設定では、起動のきっかけとしたいスプレッドシートおよびシートを任意で設定してください
- Salesforceへのレコード作成オペレーションでは、Google スプレッドシートのどの列の情報をSalesforceのどの項目に連携するかを任意で設定できます
- Google スプレッドシート、SalesforceのそれぞれとYoomを連携してください。
- トリガーは5分、10分、15分、30分、60分の間隔で起動間隔を選択できます。
- プランによって最短の起動間隔が異なりますので、ご注意ください。
- Googleスプレッドシートをアプリトリガーとして使用する際の注意事項は「【アプリトリガー】Googleスプレッドシートのトリガーにおける注意事項」を参照してください。
- Salesforceはチームプラン・サクセスプランでのみご利用いただけるアプリとなっております。フリープラン・ミニプランの場合は設定しているフローボットのオペレーションやデータコネクトはエラーとなりますので、ご注意ください。
- チームプランやサクセスプランなどの有料プランは、2週間の無料トライアルを行うことが可能です。無料トライアル中には制限対象のアプリを使用することができます
- Google スプレッドシートとSPIRALの両方で顧客情報などを管理している方
- 手作業によるデータ転記に課題を感じており、業務を効率化したいと考えている方
- データの二重入力を減らし、ヒューマンエラーの発生を防ぎたいチームリーダーの方
- Google スプレッドシートへの情報追加をトリガーに、SPIRALへ自動でレコードが登録されるため、これまで手作業で行っていた転記作業の時間を短縮します
- 手作業でのデータ転記が削減されることで、入力ミスや更新漏れといったヒューマンエラーの発生を防ぎ、データの正確性を保つことに繋がります
- はじめに、Google スプレッドシートとSPIRALをYoomと連携します
- 次に、トリガーでGoogle スプレッドシートを選択し、「行が追加されたら」というアクションを設定します
- その後、オペレーションでSPIRALの「レコードを登録」アクションを設定し、スプレッドシートから取得した情報を紐付けます
- 最後に、オペレーションでGoogle スプレッドシートの「レコードを更新する」アクションを設定し、SPIRALへの登録が完了したことを示すステータスなどを更新します
■このワークフローのカスタムポイント
- SPIRALでレコードを追加する際に、対象のデータベースや、Google スプレッドシートのどの列の情報を反映させるかなどを任意で設定してください
- Google スプレッドシートでレコードを更新する際に、対象のスプレッドシートや更新する内容(例:ステータス列に「連携済み」と入力する等)を任意で設定してください
- Google スプレッドシート、SPIRALのそれぞれとYoomを連携してください。
- トリガーは5分、10分、15分、30分、60分の間隔で起動間隔を選択できます。
- プランによって最短の起動間隔が異なりますので、ご注意ください。
- Googleスプレッドシートをアプリトリガーとして使用する際の注意事項は「【アプリトリガー】Googleスプレッドシートのトリガーにおける注意事項」を参照してください。
■概要
Google スプレッドシートに顧客データを入力した後、Microsoft Excelにも同じ情報を手作業で転記するのは手間がかかり、入力ミスも心配ではありませんか?このワークフローを活用すれば、Google スプレッドシートへのデータ追加をトリガーに、Microsoft Excelへ自動で情報が追加され、こうしたデータ管理の課題をスムーズに解消できます。
■このテンプレートをおすすめする方
- Google スプレッドシートとMicrosoft Excel間でデータの手動コピー&ペーストをしている方
- 顧客リストなど、両方のSaaSで同じ情報を二重管理しているチームの方
- 日々のデータ入力作業の効率化やミスの削減を目指している担当者の方
■このテンプレートを使うメリット
- Google スプレッドシートへの情報追加と同時に、Microsoft Excelへも自動でデータが反映されるため、転記作業にかかっていた時間を削減できます。
- 手作業によるデータの入力間違いや転記漏れといったヒューマンエラーを防ぎ、データの正確性を保つことに繋がります。
■フローボットの流れ
- はじめに、Google スプレッドシートとMicrosoft ExcelをYoomと連携します。
- 次に、トリガーでGoogle スプレッドシートを選択し、「行が追加されたら」というアクションを設定します。この際、対象のスプレッドシートとシートを指定します。
- 最後に、オペレーションでMicrosoft Excelを選択し、「レコードを追加する」アクションを設定します。ここで、対象のファイルとシート、そしてGoogle スプレッドシートから取得したどの情報をExcelのどの列に追加するかを紐付けます。
※「トリガー」:フロー起動のきっかけとなるアクション、「オペレーション」:トリガー起動後、フロー内で処理を行うアクション
■このワークフローのカスタムポイント
- Google スプレッドシートのトリガー設定では、自動化の起点としたい任意のスプレッドシート名およびシート名を指定してください。
- Microsoft Excelのオペレーション設定では、データの追加先となる任意のファイル名およびシート名を指定できます。また、各項目に対して、前段階のGoogle スプレッドシートから取得したどの情報を割り当てるか、または固定値を設定するかなど、柔軟にカスタムすることが可能です。
■注意事項
- Google スプレッドシート、Microsoft ExcelのそれぞれとYoomを連携してください。
- トリガーは5分、10分、15分、30分、60分の間隔で起動間隔を選択できます。
- プランによって最短の起動間隔が異なりますので、ご注意ください。
- Microsoft365(旧Office365)には、家庭向けプランと一般法人向けプラン(Microsoft365 Business)があり、一般法人向けプランに加入していない場合には認証に失敗する可能性があります。
- 毎日Google Adsの管理画面からレポートを手動で作成している広告運用担当者の方
- 広告レポートをGoogle スプレッドシートで管理しており、転記作業を効率化したい方
- 日々のレポート作成業務を自動化し、チームの生産性を高めたいマーケティング責任者の方
- 毎日のレポート取得とGoogle スプレッドシートへの転記作業が自動化されるため、これまで手作業に費やしていた時間を短縮できます。
- 手作業でのデータ転記がなくなることで、コピー&ペーストによるミスや入力漏れといったヒューマンエラーの発生を防ぎます。
- はじめに、Google AdsとGoogle スプレッドシートをYoomと連携します。
- 次に、トリガーでスケジュールトリガーを選択し、毎日フローボットを起動したい任意の時間を設定します。
- 次に、オペレーションでGoogle Adsの「アカウントレポートの取得」アクションを設定し、前日のレポートを取得するように設定します。
- 次に、取得したレポートの値を加工するため、オペレーションで計算(四則演算)機能を設定します。
- 最後に、オペレーションでGoogle スプレッドシートの「レコードを追加する」アクションを設定し、加工したデータを指定のシートに行として追加します。
■このワークフローのカスタムポイント
- スケジュールトリガーでは、レポートを取得したい時間を任意で設定してください。例えば、毎朝9時に設定することが可能です。
- Google Adsでレポートを取得する際、対象となる広告アカウントIDやレポートの集計期間を任意で設定してください。
- レポートの数値を元にクリック率(CTR)などを算出したい場合、計算機能で任意の計算式を設定できます。
- Google スプレッドシートにデータを記載する際、出力先となるスプレッドシートIDやタブ名を任意で設定してください。
- Google Ads、Google スプレッドシートのそれぞれとYoomを連携してください。
■概要
アンケートを実施した後、Gmailで回答を受け取り、その結果を手作業でGoogle スプレッドシートに転記・集計する作業は、時間もかかり、入力ミスも発生しやすいのではないでしょうか。 特に回答数が多い場合、その負担は無視できません。 このワークフローを活用すれば、Gmailで特定のラベルが付いたアンケート結果メールを受信するだけで、AI機能が内容を解析し、Google スプレッドシートの集計用シートに必要な情報を自動で追加するため、こうした課題をスムーズに解消できます。
■このテンプレートをおすすめする方
- Gmailで受信したアンケート回答を、手作業でGoogle スプレッドシートへ転記しているご担当者の方
- アンケート結果の集計業務における入力ミスや作業漏れを減らしたいと考えているチームリーダーの方
- 定型的なデータ入力作業を自動化し、より重要な業務に時間を割きたいと考えているすべての方
■このテンプレートを使うメリット
- Gmailでアンケート結果メールを受信する度に、自動で内容を抽出しGoogle スプレッドシートへ追加するため、これまで手作業に費やしていた時間を短縮できます。
- 手作業によるデータ転記が不要になるため、入力間違いや漏れといったヒューマンエラーのリスク軽減に繋がります。
■フローボットの流れ
- はじめに、GmailとGoogle スプレッドシートをYoomと連携します。
- 次に、トリガーでGmailを選択し、「特定のラベルのメールを受信したら」というアクションを設定し、アンケート結果メールに付与されるラベルを指定します。
- 次に、オペレーションでAI機能を選択し、「テキストからデータを抽出する」アクションを設定し、メール本文からアンケートの回答項目を抽出するように指定します。
- 最後に、オペレーションでGoogle スプレッドシートの「レコードを追加する」アクションを設定し、抽出したデータを指定のシートに追加します。
※「トリガー」:フロー起動のきっかけとなるアクション、「オペレーション」:トリガー起動後、フロー内で処理を行うアクション
■このワークフローのカスタムポイント
- Gmailのトリガー設定では、アンケート結果メールを識別するための受信対象とするメールのラベルを任意で指定してください。
- AI機能のオペレーションでは、Gmailで受信したメール本文の中から、具体的にどの情報を抽出するかを任意で設定することが可能です。例えば、氏名、メールアドレス、各アンケート設問への回答などを指定できます。
- Google スプレッドシートのオペレーションでは、書き込み対象となる任意のスプレッドシートとシートを指定でき、さらにシート内の各項目(列)に対して、前段階のAI機能で抽出したどの情報を割り当てるか、または固定値を設定するかなど、柔軟にカスタムすることが可能です。
■注意事項
- Gmail、Google スプレッドシートのそれぞれとYoomを連携してください。
- トリガーは5分、10分、15分、30分、60分の間隔で起動間隔を選択できます。
- プランによって最短の起動間隔が異なりますので、ご注意ください。
Harvestを使った自動化例
ユーザーやタスクが追加されたら、チャットツールに通知したり、他のツールにカードを作成することが可能です。
また、新規Contactが作成されたら、会計ソフトにも自動でContactを作成できます。
手動での情報転記の手間を削減し、チームの情報共有をスムーズにして、タスク管理を効率化しましょう!
■概要
Harvestに新しいユーザーが追加されるたびに、手作業で関係者に連絡していませんか。手作業で実施することで、情報共有の遅延や連絡漏れの原因になることがあります。このワークフローを活用すれば、Harvestにユーザーが追加されたタイミングで、指定したMicrosoft Teamsのチャンネルへ自動で通知できます。これにより、チームへの情報共有を迅速かつ正確に行い、手作業による手間をなくすことができます。
■このテンプレートをおすすめする方
- Harvestでプロジェクトメンバーを管理しており、追加時の情報共有を効率化したい方
- 新メンバーの参加をMicrosoft Teamsで迅速にチーム全体へ周知したいと考えている方
- アプリケーション間の情報伝達を手作業で行っており、手間や連絡漏れに課題を感じている方
■このテンプレートを使うメリット
- Harvestにユーザーが追加されると自動で通知が飛ぶため、これまで手作業で行っていた連絡業務の時間を短縮できます。
- 手作業による通知の漏れや遅延を防ぎ、新しいメンバーの情報を関係者へ迅速かつ確実に共有することが可能になります。
■フローボットの流れ
- はじめに、HarvestとMicrosoft TeamsをYoomと連携します。
- 次に、トリガーでHarvestを選択し、「ユーザーが新規追加されたら」というアクションを設定します。
- 最後に、オペレーションでMicrosoft Teamsを選択し、「チャネルにメッセージを送る」アクションを設定して、通知内容を記述します。
※「トリガー」:フロー起動のきっかけとなるアクション、「オペレーション」:トリガー起動後、フロー内で処理を行うアクション
■このワークフローのカスタムポイント
- Microsoft Teamsの通知先は、任意のチャンネルやプライベートチャンネルに設定することが可能です。
- 通知するメッセージの本文は自由に編集できます。Harvestのトリガーから取得した新しいユーザーの名前やメールアドレスなどの情報を文章に含めることで、より具体的な通知を作成できます。
■注意事項
- Microsoft Teams、HarvestのそれぞれとYoomを連携してください。
- トリガーは5分、10分、15分、30分、60分の間隔で起動間隔を選択できます。
- プランによって最短の起動間隔が異なりますので、ご注意ください。
- Microsoft365(旧Office365)には、家庭向けプランと一般法人向けプラン(Microsoft365 Business)があり、一般法人向けプランに加入していない場合には認証に失敗する可能性があります。
■概要
Harvestへの情報登録後、会計ソフトのXeroにも同じ情報を手入力していませんか?このような二重入力は手間がかかるだけでなく、入力ミスなどのヒューマンエラーの原因にもなりがちです。このワークフローは、Harvestで新しいContactが作成された際に、その情報をXeroへ自動で作成するため、HarvestとXeroの連携により、こうした手作業をなくし、顧客情報管理を効率化します。
■このテンプレートをおすすめする方
- HarvestとXeroを併用しており、顧客データの二重入力に手間を感じている方
- 手作業によるデータ転記での入力ミスをなくし、業務の正確性を高めたい方
- HarvestとXeroの顧客情報を同期させ、管理業務を効率化したいと考えている方
■このテンプレートを使うメリット
- HarvestへのContact登録だけでXeroにも情報が自動作成されるため、手作業での転記に費やしていた時間を短縮できます。
- 複数のツールへの手入力が不要となり、xeroとharvest間での情報の入力間違いや更新漏れといったヒューマンエラーを防ぎます。
■フローボットの流れ
- はじめに、HarvestとXeroをYoomと連携します。
- 次に、トリガーでHarvestを選択し、「新しいContactが作成されたら」というアクションを設定します。
- 最後に、オペレーションでXeroを選択し、「Contactを作成または更新する」アクションを設定し、トリガーで取得した情報を各項目に設定します。
※「トリガー」:フロー起動のきっかけとなるアクション、「オペレーション」:トリガー起動後、フロー内で処理を行うアクション
■このワークフローのカスタムポイント
- Harvestのトリガー設定では、特定のAccount IDを指定することで、そのアカウントに紐づくContactが作成された時のみフローボットを起動させることが可能です。
- Xeroへのデータ登録の際には、Harvestから取得した顧客名やメールアドレスといった情報を、XeroのContact情報における任意の項目に自由に設定できます。
■ 注意事項
- HarvestとXeroのそれぞれをYoomと連携してください。
- トリガーの起動間隔は5分、10分、15分、30分、60分の間隔で選択できます。
- プランによって最短の起動間隔が異なりますので、ご注意ください。
■概要
Harvestで新しいタスクを作成した際、都度Slackなどで関係者に共有するのは手間がかかる作業ではないでしょうか。このワークフローを活用すれば、Harvestでタスクが作成されたタイミングをトリガーに、指定したSlackチャンネルへ自動で通知できます。手動での情報共有が不要になるため、harvest apiを利用するような連携をノーコードで実現し、タスク共有の効率化と迅速化を支援します。
■このテンプレートをおすすめする方
- Harvestでのタスク管理と、Slackでのチームへの共有を効率化したい方
- 手作業によるタスクの通知漏れや、共有のタイムラグを解消したいプロジェクト管理者の方
- harvest apiの活用を含め、コーディング不要で業務の自動化を進めたいと考えている方
■このテンプレートを使うメリット
- Harvestでタスクが作成されると、自動でSlackへ通知が実行されるため、これまで手作業での共有に費やしていた時間を短縮できます。
- 手作業による通知漏れや、内容の転記ミスといったヒューマンエラーを防ぎ、チーム内での確実な情報共有を実現します。
■フローボットの流れ
- はじめに、HarvestとSlackをYoomと連携します。
- 次に、トリガーでHarvestを選択し、「新しいタスクが作成されたら」というアクションを設定します。
- 最後に、オペレーションでSlackの「チャンネルにメッセージを送る」アクションを設定し、任意のチャンネルにタスク情報を通知します。
※「トリガー」:フロー起動のきっかけとなるアクション、「オペレーション」:トリガー起動後、フロー内で処理を行うアクション
■このワークフローのカスタムポイント
- Harvestのトリガー設定では、連携の対象としたいアカウントのIDを任意で設定してください。
- Slackのオペレーション設定では、メッセージを通知したいチャンネルのIDを任意で設定してください。
■注意事項
- Harvest、SlackのそれぞれとYoomを連携してください。
- トリガーは5分、10分、15分、30分、60分の間隔で起動間隔を選択できます。
- プランによって最短の起動間隔が異なりますので、ご注意ください。
■概要
プロジェクトのタスク管理にHarvest、開発管理にGitHubを利用していると、双方の情報を手動で連携させる手間が発生しがちです。特に、Harvestで新しいタスクが追加されるたびにGitHubへIssueを手で作成するのは、抜け漏れのリスクも伴います。このワークフローは、HarvestとGitHubを連携させ、タスク追加からIssue作成までを自動化することで、こうした日々の面倒な作業を解消し、業務の正確性を高めます。
■このテンプレートをおすすめする方
- HarvestとGitHubを併用し、タスクと開発イシューを手作業で連携している方
- HarvestとGitHub間の情報同期を自動化し、工数を削減したいプロジェクト管理者の方
- タスクの作成漏れを防ぎ、開発プロセスの正確性を向上させたいチームリーダーの方
■このテンプレートを使うメリット
- Harvestにタスクが追加されると自動でGitHubにIssueが作成され、これまで手作業に費やしていた時間を短縮できます
- 手動での情報転記が不要になるため、Issueの作成漏れや内容の間違いといったヒューマンエラーを防ぐことに繋がります
■フローボットの流れ
- はじめに、HarvestとGitHubをYoomと連携します
- 次に、トリガーでHarvestを選択し、「新しいTaskが作成されたら」というアクションを設定します
- 最後に、オペレーションでGitHubの「Issueを作成する」アクションを設定し、Harvestから取得した情報を元にIssueが作成されるよう設定します
※「トリガー」:フロー起動のきっかけとなるアクション、「オペレーション」:トリガー起動後、フロー内で処理を行うアクション
■このワークフローのカスタムポイント
- GitHubでIssueを作成するアクションを設定する際に、Issueのタイトルや本文の内容を任意で設定してください。Harvestのタスク名や詳細を引用して、自動で内容が反映されるようにカスタマイズが可能です
■注意事項
- HarvestとGitHubのそれぞれとYoomを連携してください。
- トリガーは5分、10分、15分、30分、60分の間隔で起動間隔を選択できます。
- プランによって最短の起動間隔が異なりますので、ご注意ください。
■概要
Harvestでの時間追跡と、Trelloでのプロジェクト管理を併用する中で、2つのツール間の情報連携に手間を感じていませんか。
特定のタスクが発生するたびに手動でTrelloへカードを作成する作業は、時間がかかるだけでなく入力ミスや対応漏れの原因にもなります。
このワークフローは、HarvestとTrelloの連携を自動化するもので、Harvestで特定の条件に合致するタスクが追加された際に、Trelloへ自動でカードを作成し、こうした課題を円滑に解消します。
■このテンプレートをおすすめする方
- HarvestとTrelloを併用し、プロジェクトやタスクの進捗管理を行っている方
- HarvestからTrelloへの手作業での情報転記に手間や抜け漏れを感じている方
- Harvest Trello連携を自動化し、より効率的な業務フローを構築したいと考えている方
■このテンプレートを使うメリット
- Harvestでのタスク追加をトリガーにTrelloへ自動でカードが作成され、手作業での転記にかかっていた時間を短縮することができます。
- Harvest Trello間の手動連携によるカードの作成漏れや、内容の入力ミスといったヒューマンエラーを防ぎ、正確な情報共有を実現します。
■フローボットの流れ
- はじめに、HarvestとTrelloをYoomと連携します。
- 次に、トリガーでHarvestを選択し、「新しいタスクが作成されたら」というアクションを設定します。
- その後、オペレーションで分岐機能を設定し、特定の条件に合致するタスクの場合のみ、後続の処理に進むよう設定します。
- 最後に、オペレーションでTrelloの「新しいカードを作成する」アクションを設定し、指定のボード・リストにカードを作成します。
※「トリガー」:フロー起動のきっかけとなるアクション、「オペレーション」:トリガー起動後、フロー内で処理を行うアクション
■このワークフローのカスタムポイント
- 分岐機能では、特定のプロジェクト名やクライアント名を含むタスクのみを対象とするなど、Trelloにカードを作成する条件を任意で設定してください。
- Trelloでカードを作成するアクションでは、追加先のボードやリストのほか、カードのタイトルや説明文にHarvestのどの情報を反映させるかを自由に設定できます。
■注意事項
- HarvestとTrelloのそれぞれとYoomを連携してください。
- トリガーは5分、10分、15分、30分、60分の間隔で起動間隔を選択できます。
- プランによって最短の起動間隔が異なりますので、ご注意ください。
- 分岐はミニプラン以上のプランでご利用いただける機能(オペレーション)となっております。フリープランの場合は設定しているフローボットのオペレーションはエラーとなりますので、ご注意ください。
- ミニプランなどの有料プランは、2週間の無料トライアルを行うことが可能です。無料トライアル中には制限対象のアプリや機能(オペレーション)を使用することができます。
■概要
Harvestに新しいユーザーが追加されるたびに、手作業で関係者に連絡していませんか。手作業で実施することで、情報共有の遅延や連絡漏れの原因になることがあります。このワークフローを活用すれば、Harvestにユーザーが追加されたタイミングで、指定したMicrosoft Teamsのチャンネルへ自動で通知できます。これにより、チームへの情報共有を迅速かつ正確に行い、手作業による手間をなくすことができます。
■このテンプレートをおすすめする方
- Harvestでプロジェクトメンバーを管理しており、追加時の情報共有を効率化したい方
- 新メンバーの参加をMicrosoft Teamsで迅速にチーム全体へ周知したいと考えている方
- アプリケーション間の情報伝達を手作業で行っており、手間や連絡漏れに課題を感じている方
■このテンプレートを使うメリット
- Harvestにユーザーが追加されると自動で通知が飛ぶため、これまで手作業で行っていた連絡業務の時間を短縮できます。
- 手作業による通知の漏れや遅延を防ぎ、新しいメンバーの情報を関係者へ迅速かつ確実に共有することが可能になります。
■フローボットの流れ
- はじめに、HarvestとMicrosoft TeamsをYoomと連携します。
- 次に、トリガーでHarvestを選択し、「ユーザーが新規追加されたら」というアクションを設定します。
- 最後に、オペレーションでMicrosoft Teamsを選択し、「チャネルにメッセージを送る」アクションを設定して、通知内容を記述します。
※「トリガー」:フロー起動のきっかけとなるアクション、「オペレーション」:トリガー起動後、フロー内で処理を行うアクション
■このワークフローのカスタムポイント
- Microsoft Teamsの通知先は、任意のチャンネルやプライベートチャンネルに設定することが可能です。
- 通知するメッセージの本文は自由に編集できます。Harvestのトリガーから取得した新しいユーザーの名前やメールアドレスなどの情報を文章に含めることで、より具体的な通知を作成できます。
■注意事項
- Microsoft Teams、HarvestのそれぞれとYoomを連携してください。
- トリガーは5分、10分、15分、30分、60分の間隔で起動間隔を選択できます。
- プランによって最短の起動間隔が異なりますので、ご注意ください。
- Microsoft365(旧Office365)には、家庭向けプランと一般法人向けプラン(Microsoft365 Business)があり、一般法人向けプランに加入していない場合には認証に失敗する可能性があります。
■概要
Harvestへの情報登録後、会計ソフトのXeroにも同じ情報を手入力していませんか?このような二重入力は手間がかかるだけでなく、入力ミスなどのヒューマンエラーの原因にもなりがちです。このワークフローは、Harvestで新しいContactが作成された際に、その情報をXeroへ自動で作成するため、HarvestとXeroの連携により、こうした手作業をなくし、顧客情報管理を効率化します。
■このテンプレートをおすすめする方
- HarvestとXeroを併用しており、顧客データの二重入力に手間を感じている方
- 手作業によるデータ転記での入力ミスをなくし、業務の正確性を高めたい方
- HarvestとXeroの顧客情報を同期させ、管理業務を効率化したいと考えている方
■このテンプレートを使うメリット
- HarvestへのContact登録だけでXeroにも情報が自動作成されるため、手作業での転記に費やしていた時間を短縮できます。
- 複数のツールへの手入力が不要となり、xeroとharvest間での情報の入力間違いや更新漏れといったヒューマンエラーを防ぎます。
■フローボットの流れ
- はじめに、HarvestとXeroをYoomと連携します。
- 次に、トリガーでHarvestを選択し、「新しいContactが作成されたら」というアクションを設定します。
- 最後に、オペレーションでXeroを選択し、「Contactを作成または更新する」アクションを設定し、トリガーで取得した情報を各項目に設定します。
※「トリガー」:フロー起動のきっかけとなるアクション、「オペレーション」:トリガー起動後、フロー内で処理を行うアクション
■このワークフローのカスタムポイント
- Harvestのトリガー設定では、特定のAccount IDを指定することで、そのアカウントに紐づくContactが作成された時のみフローボットを起動させることが可能です。
- Xeroへのデータ登録の際には、Harvestから取得した顧客名やメールアドレスといった情報を、XeroのContact情報における任意の項目に自由に設定できます。
■ 注意事項
- HarvestとXeroのそれぞれをYoomと連携してください。
- トリガーの起動間隔は5分、10分、15分、30分、60分の間隔で選択できます。
- プランによって最短の起動間隔が異なりますので、ご注意ください。
■概要
Harvestで新しいタスクを作成した際、都度Slackなどで関係者に共有するのは手間がかかる作業ではないでしょうか。このワークフローを活用すれば、Harvestでタスクが作成されたタイミングをトリガーに、指定したSlackチャンネルへ自動で通知できます。手動での情報共有が不要になるため、harvest apiを利用するような連携をノーコードで実現し、タスク共有の効率化と迅速化を支援します。
■このテンプレートをおすすめする方
- Harvestでのタスク管理と、Slackでのチームへの共有を効率化したい方
- 手作業によるタスクの通知漏れや、共有のタイムラグを解消したいプロジェクト管理者の方
- harvest apiの活用を含め、コーディング不要で業務の自動化を進めたいと考えている方
■このテンプレートを使うメリット
- Harvestでタスクが作成されると、自動でSlackへ通知が実行されるため、これまで手作業での共有に費やしていた時間を短縮できます。
- 手作業による通知漏れや、内容の転記ミスといったヒューマンエラーを防ぎ、チーム内での確実な情報共有を実現します。
■フローボットの流れ
- はじめに、HarvestとSlackをYoomと連携します。
- 次に、トリガーでHarvestを選択し、「新しいタスクが作成されたら」というアクションを設定します。
- 最後に、オペレーションでSlackの「チャンネルにメッセージを送る」アクションを設定し、任意のチャンネルにタスク情報を通知します。
※「トリガー」:フロー起動のきっかけとなるアクション、「オペレーション」:トリガー起動後、フロー内で処理を行うアクション
■このワークフローのカスタムポイント
- Harvestのトリガー設定では、連携の対象としたいアカウントのIDを任意で設定してください。
- Slackのオペレーション設定では、メッセージを通知したいチャンネルのIDを任意で設定してください。
■注意事項
- Harvest、SlackのそれぞれとYoomを連携してください。
- トリガーは5分、10分、15分、30分、60分の間隔で起動間隔を選択できます。
- プランによって最短の起動間隔が異なりますので、ご注意ください。
■概要
プロジェクトのタスク管理にHarvest、開発管理にGitHubを利用していると、双方の情報を手動で連携させる手間が発生しがちです。特に、Harvestで新しいタスクが追加されるたびにGitHubへIssueを手で作成するのは、抜け漏れのリスクも伴います。このワークフローは、HarvestとGitHubを連携させ、タスク追加からIssue作成までを自動化することで、こうした日々の面倒な作業を解消し、業務の正確性を高めます。
■このテンプレートをおすすめする方
- HarvestとGitHubを併用し、タスクと開発イシューを手作業で連携している方
- HarvestとGitHub間の情報同期を自動化し、工数を削減したいプロジェクト管理者の方
- タスクの作成漏れを防ぎ、開発プロセスの正確性を向上させたいチームリーダーの方
■このテンプレートを使うメリット
- Harvestにタスクが追加されると自動でGitHubにIssueが作成され、これまで手作業に費やしていた時間を短縮できます
- 手動での情報転記が不要になるため、Issueの作成漏れや内容の間違いといったヒューマンエラーを防ぐことに繋がります
■フローボットの流れ
- はじめに、HarvestとGitHubをYoomと連携します
- 次に、トリガーでHarvestを選択し、「新しいTaskが作成されたら」というアクションを設定します
- 最後に、オペレーションでGitHubの「Issueを作成する」アクションを設定し、Harvestから取得した情報を元にIssueが作成されるよう設定します
※「トリガー」:フロー起動のきっかけとなるアクション、「オペレーション」:トリガー起動後、フロー内で処理を行うアクション
■このワークフローのカスタムポイント
- GitHubでIssueを作成するアクションを設定する際に、Issueのタイトルや本文の内容を任意で設定してください。Harvestのタスク名や詳細を引用して、自動で内容が反映されるようにカスタマイズが可能です
■注意事項
- HarvestとGitHubのそれぞれとYoomを連携してください。
- トリガーは5分、10分、15分、30分、60分の間隔で起動間隔を選択できます。
- プランによって最短の起動間隔が異なりますので、ご注意ください。
■概要
Harvestでの時間追跡と、Trelloでのプロジェクト管理を併用する中で、2つのツール間の情報連携に手間を感じていませんか。
特定のタスクが発生するたびに手動でTrelloへカードを作成する作業は、時間がかかるだけでなく入力ミスや対応漏れの原因にもなります。
このワークフローは、HarvestとTrelloの連携を自動化するもので、Harvestで特定の条件に合致するタスクが追加された際に、Trelloへ自動でカードを作成し、こうした課題を円滑に解消します。
■このテンプレートをおすすめする方
- HarvestとTrelloを併用し、プロジェクトやタスクの進捗管理を行っている方
- HarvestからTrelloへの手作業での情報転記に手間や抜け漏れを感じている方
- Harvest Trello連携を自動化し、より効率的な業務フローを構築したいと考えている方
■このテンプレートを使うメリット
- Harvestでのタスク追加をトリガーにTrelloへ自動でカードが作成され、手作業での転記にかかっていた時間を短縮することができます。
- Harvest Trello間の手動連携によるカードの作成漏れや、内容の入力ミスといったヒューマンエラーを防ぎ、正確な情報共有を実現します。
■フローボットの流れ
- はじめに、HarvestとTrelloをYoomと連携します。
- 次に、トリガーでHarvestを選択し、「新しいタスクが作成されたら」というアクションを設定します。
- その後、オペレーションで分岐機能を設定し、特定の条件に合致するタスクの場合のみ、後続の処理に進むよう設定します。
- 最後に、オペレーションでTrelloの「新しいカードを作成する」アクションを設定し、指定のボード・リストにカードを作成します。
※「トリガー」:フロー起動のきっかけとなるアクション、「オペレーション」:トリガー起動後、フロー内で処理を行うアクション
■このワークフローのカスタムポイント
- 分岐機能では、特定のプロジェクト名やクライアント名を含むタスクのみを対象とするなど、Trelloにカードを作成する条件を任意で設定してください。
- Trelloでカードを作成するアクションでは、追加先のボードやリストのほか、カードのタイトルや説明文にHarvestのどの情報を反映させるかを自由に設定できます。
■注意事項
- HarvestとTrelloのそれぞれとYoomを連携してください。
- トリガーは5分、10分、15分、30分、60分の間隔で起動間隔を選択できます。
- プランによって最短の起動間隔が異なりますので、ご注意ください。
- 分岐はミニプラン以上のプランでご利用いただける機能(オペレーション)となっております。フリープランの場合は設定しているフローボットのオペレーションはエラーとなりますので、ご注意ください。
- ミニプランなどの有料プランは、2週間の無料トライアルを行うことが可能です。無料トライアル中には制限対象のアプリや機能(オペレーション)を使用することができます。
まとめ
今回の連携を行うと、Google スプレッドシートを更新するだけでHarvestのクライアントデータも更新可能となります。
2つのツールに同一情報を入力する必要がなくなるため、二度手間が省け、入力作業を削減できます。
また、更新漏れ防止も期待できます。
今回ご紹介したような業務自動化を実現できるノーコードツール「Yoom」を使えば、プログラミングの知識がない方でも、直感的な操作で簡単に業務フローを構築できます。
もし自動化に少しでも興味を持っていただけたなら、ぜひこちらから無料登録して、Yoomによる業務効率化を体験してみてください!
よくあるご質問
Q:連携が失敗した場合、どうなりますか?
A:
フローボットでエラーが発生すると、Yoomに登録したメールアドレス宛に通知が届きます。
通知にはエラーが起きたオペレーションや詳細のリンクが記載されており、すぐに原因を確認できます。
まずは通知内容を確認し、設定の修正が必要な場合は修正してください。
それでも解決しない場合は、お問い合わせ窓口からサポートにご連絡ください。
Q:双方向のデータ同期は可能ですか?
A:
はい、双方向のデータ同期も可能です。
たとえば、Harvest側でタスクのステータスや内容が更新された場合、その情報をGoogleスプレッドシートの該当行に反映させる設定ができます。
こうした仕組みを作っておくことで、片方を手動で更新する手間を減らし、両方の情報が常に揃った状態を保てます。
プログラミング知識なしで手軽に構築できます。