・
How to Automatically Extract Text from JPG and PDF Files with AI OCR and Send the Results via Email
With the shift toward digitalized environments, more businesses are shifting towards storing documents as images or PDFs. Thanks to advancements in AI technology, even handwritten text and dynamic formats that were once difficult with OCR to process can now be recognized easily.
By integrating AI-OCR with Gmail using Yoom, you can automatically extract content from documents, getting rid of the need to switch between multiple tools. The extracted content can then be sent directly through Gmail, enabling more efficient management of your document data.
In this article, we’ll introduce the key benefits of automating document management with OCR technology and how you can set up this automation to improve your workflow.
Meet Yoom: No-Code Automation
Yoom is a next-generation no-code automation that lets you connect and automate tasks between your favorite apps. Connecting different apps can be challenging for non-engineers, but Yoom makes automation accessible to everyone.
- 🌐 Connect with apps like Gmail and more.
- 📖 Use automation templates - no technical setup required
- 📈 Boost productivity and reduce human errors
You don't need to go through a complex setup and IT jargon, you can build your automation workflows with just a few clicks :) It's designed for those who want to streamline their daily work and save hours of time and stress from repetitive work.
👉 Sign Up for Yoom Here – Quick and Easy in Just 30 Seconds!
In this guide, you'll learn the step-by-step process of how to use Yoom to automatically extract text from documents using AI-OCR and send the content through gmail.
✨ Recommended for
- Those looking to improve work efficiency by utilizing AI-OCR
- Anyone who wants to speed up data organization tasks by integrating AI-OCR with Gmail
- Teams that want to eliminate the manual tasks of data entry
✔️ For Those Who Want to Try It Now
Yoom offers ready-made templates for easy setup. Click the "Try it" button to get started now!
We'll also walk you through the step-by-step process of creating this automation flow in the following section of this article.
🚀 Let’s Create a Flow to Automate Image & PDF Extraction with AI-OCR and Gmail
Let's walk through how to set up a flow that automatically extracts text from images of PDF files using AI-OCR and sends the result via Gmail.
⏱️ Setup time: 10 minutes
🔧 What You’ll Need
- A free Yoom account
- Access to Gmail
If you don’t have a Yoom account yet, register now from this registration form!
⚠️ Note: OCR (reading text) used in this Flowbot is only available in Yoom's certain plans. If you're using the Free plan, the Flowbot may face errors due to limited access. But don't worry - all plans have a 2-week free trial! You can try all features without restrictions. For more details on Yoom and its plans, visit our Yoom Help Center.
Step 1: Add Gmail to Yoom
After logging into Yoom, go to "My Apps" from the left side menu and click "+ Add".
Search for "Gmail" from the app list and select it.

Click "Sign in with Google."
Select the Google account to link with Yoom.

Now your Gmail is connected :)
Step 2: Copy the Template
Click the "Try It" button to copy the pre-built template into your project.
Click "Try this template".
Click "OK" and assign a name to the Flowbot for recognition.
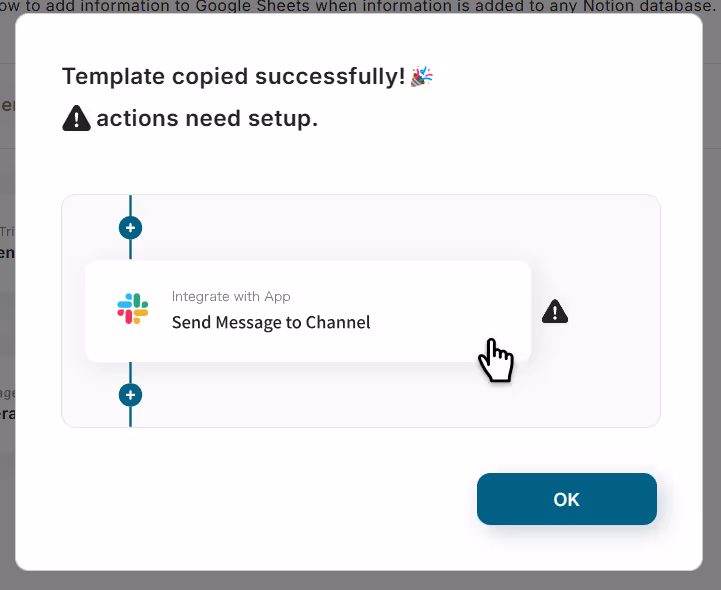
The template will be copied to your "My Project".
Step 3: Set Up Email Trigger Action
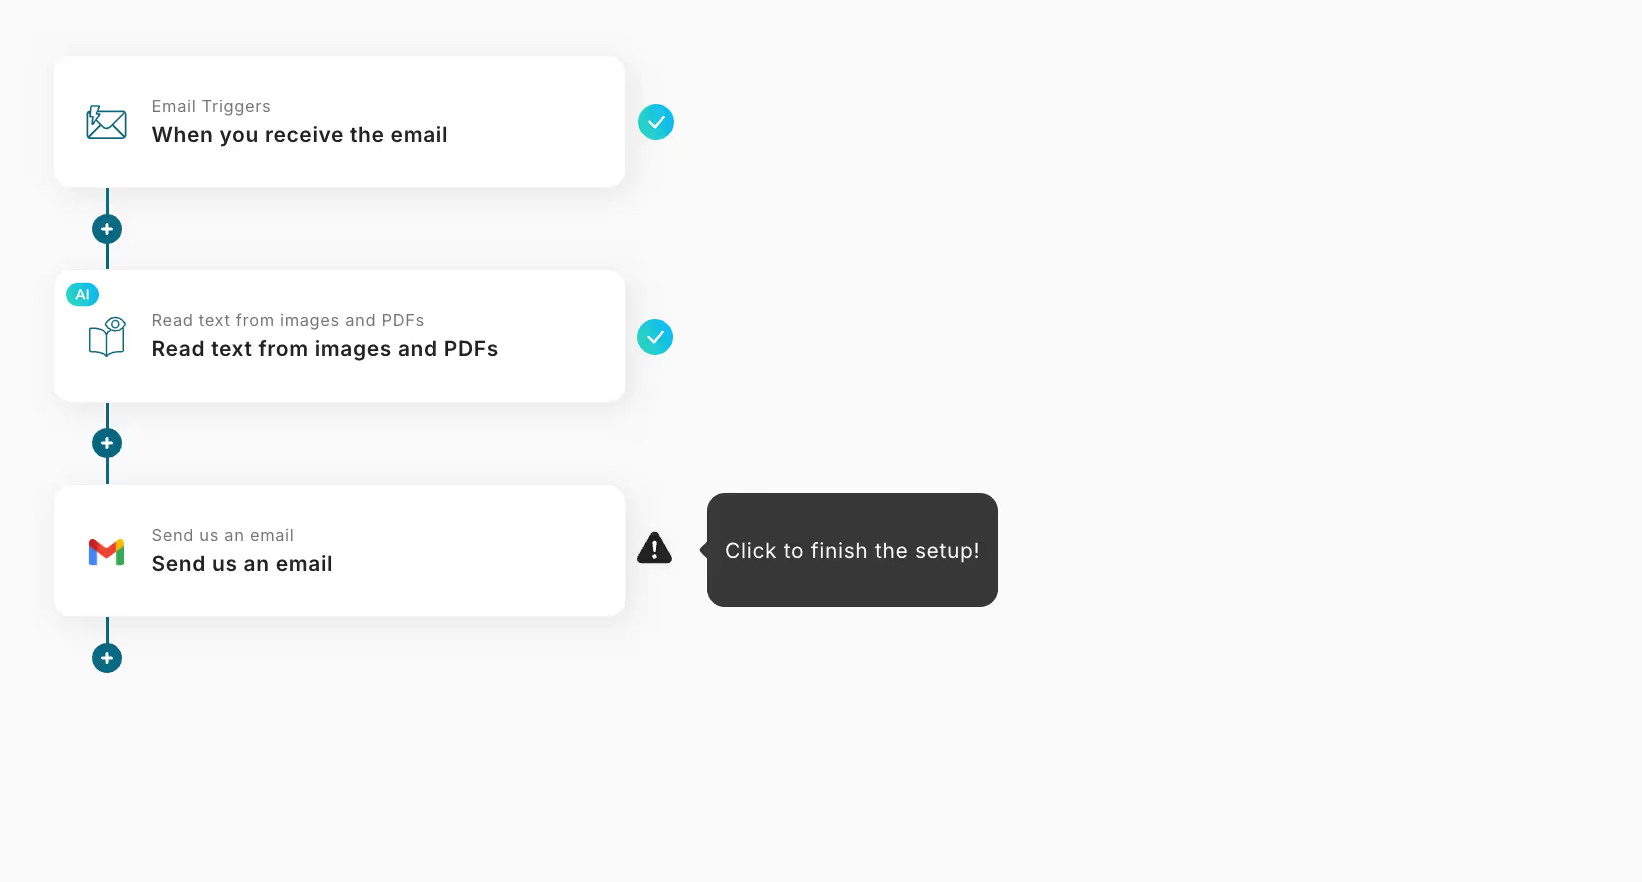
Click on the email trigger action.
Start by setting up a dedicated email address for Yoom to receive triggered emails. Choose an email address that is easy to remember and clearly indicates its purpose.
Once the email address is created, configure the necessary trigger conditions. For this example, in this case, we set up the condition that if the subject contains the word “photograph.”
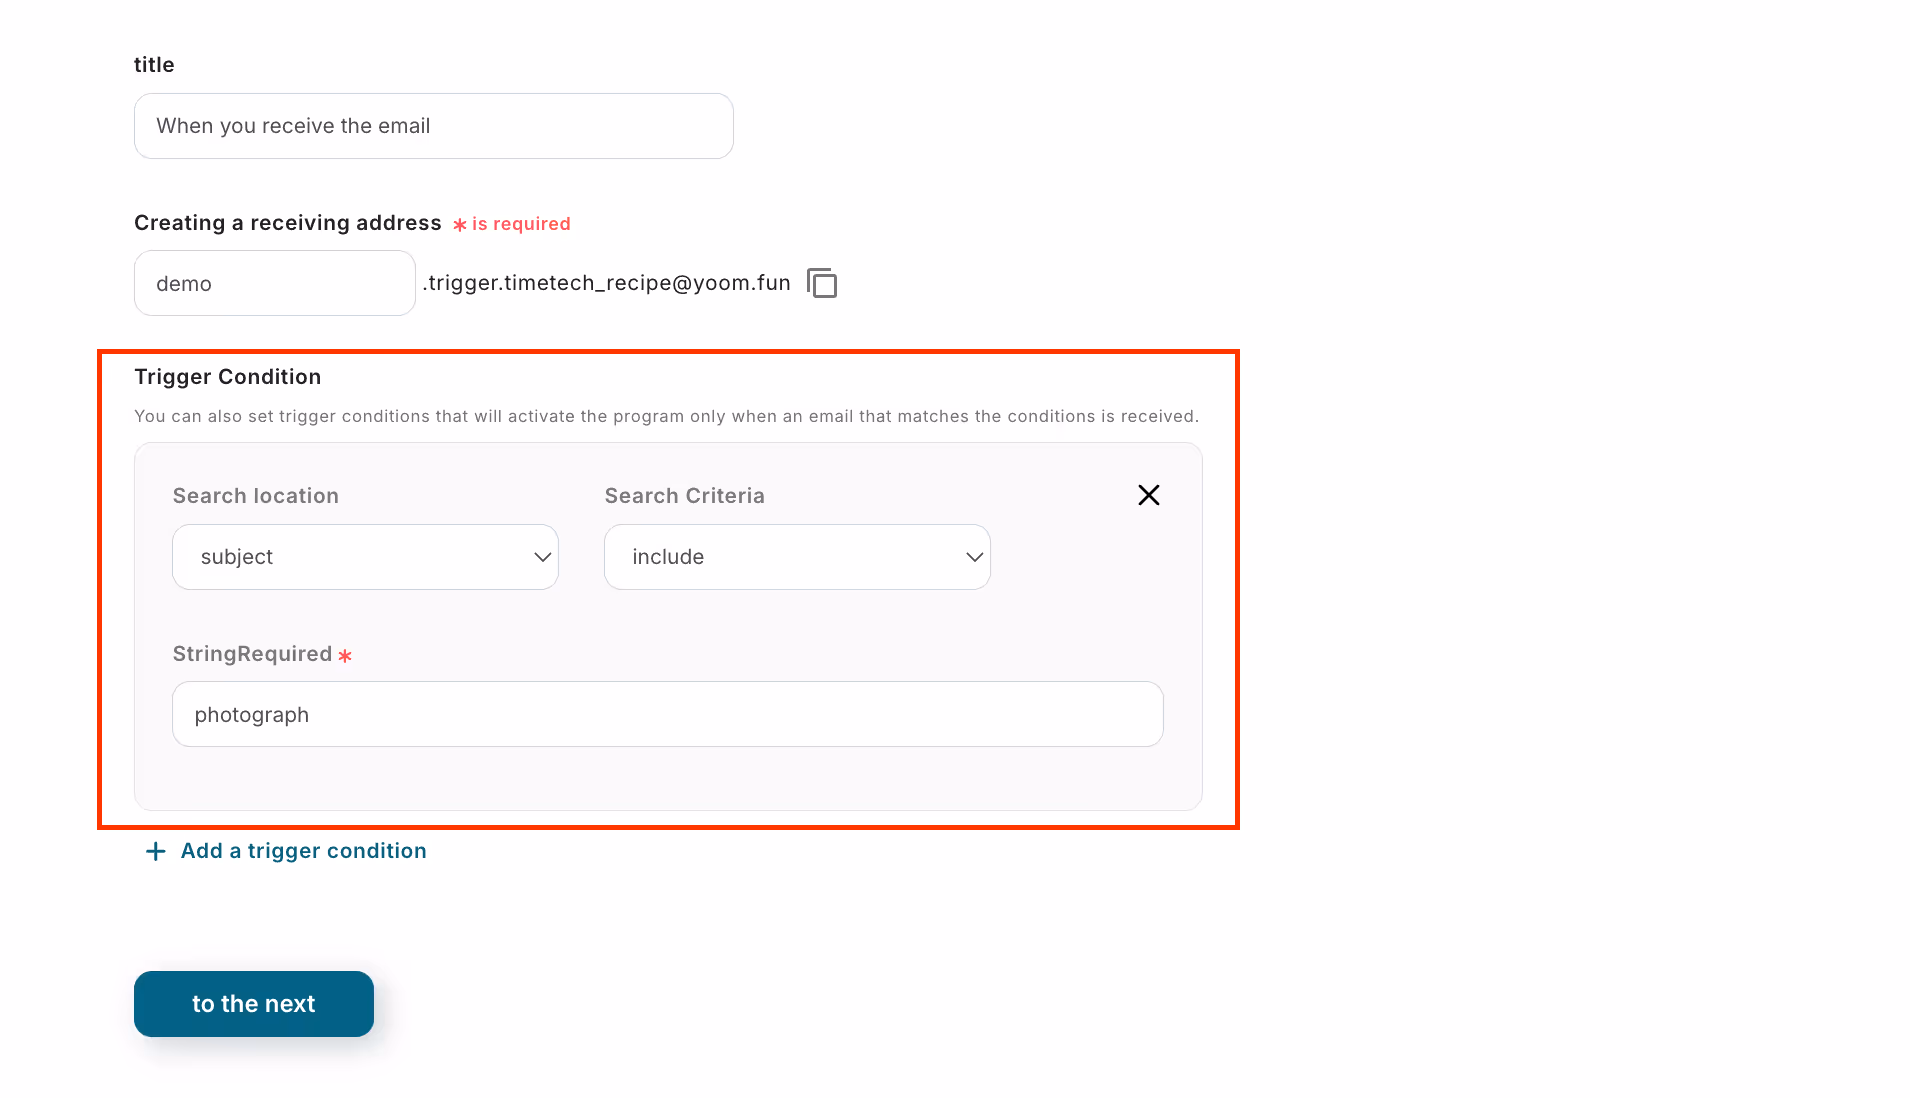
Once this is set, move on to the next step to continue setting up the flow.
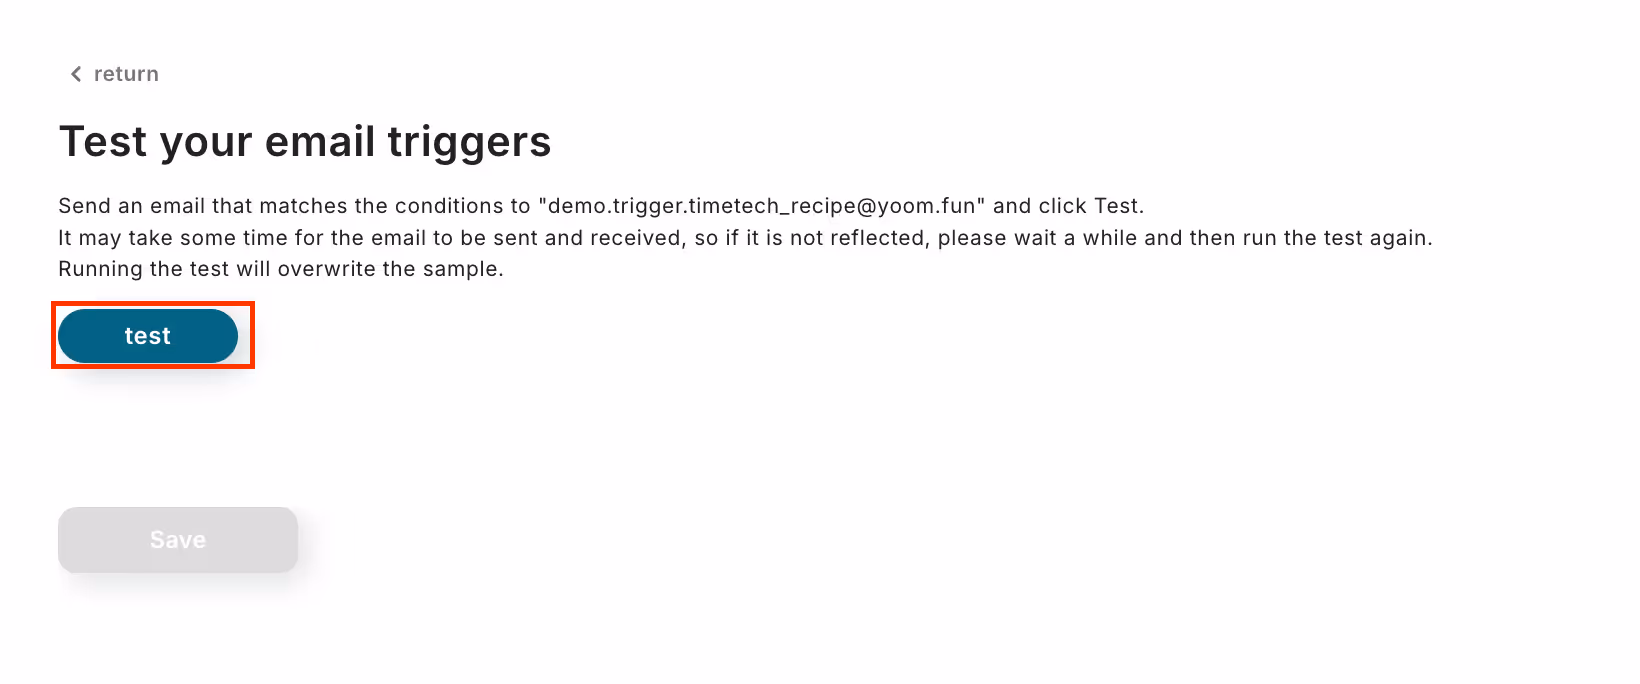
Send an email to the Yoom address you just configured. Make sure to attach the invoice and include the word "photograph" in the subject.
After sending the email, click the "Test" button. If you see "Test Successful", you're all set! Don't forget to click "Save" to complete the setup.
Step 4: Set Up OCR Action
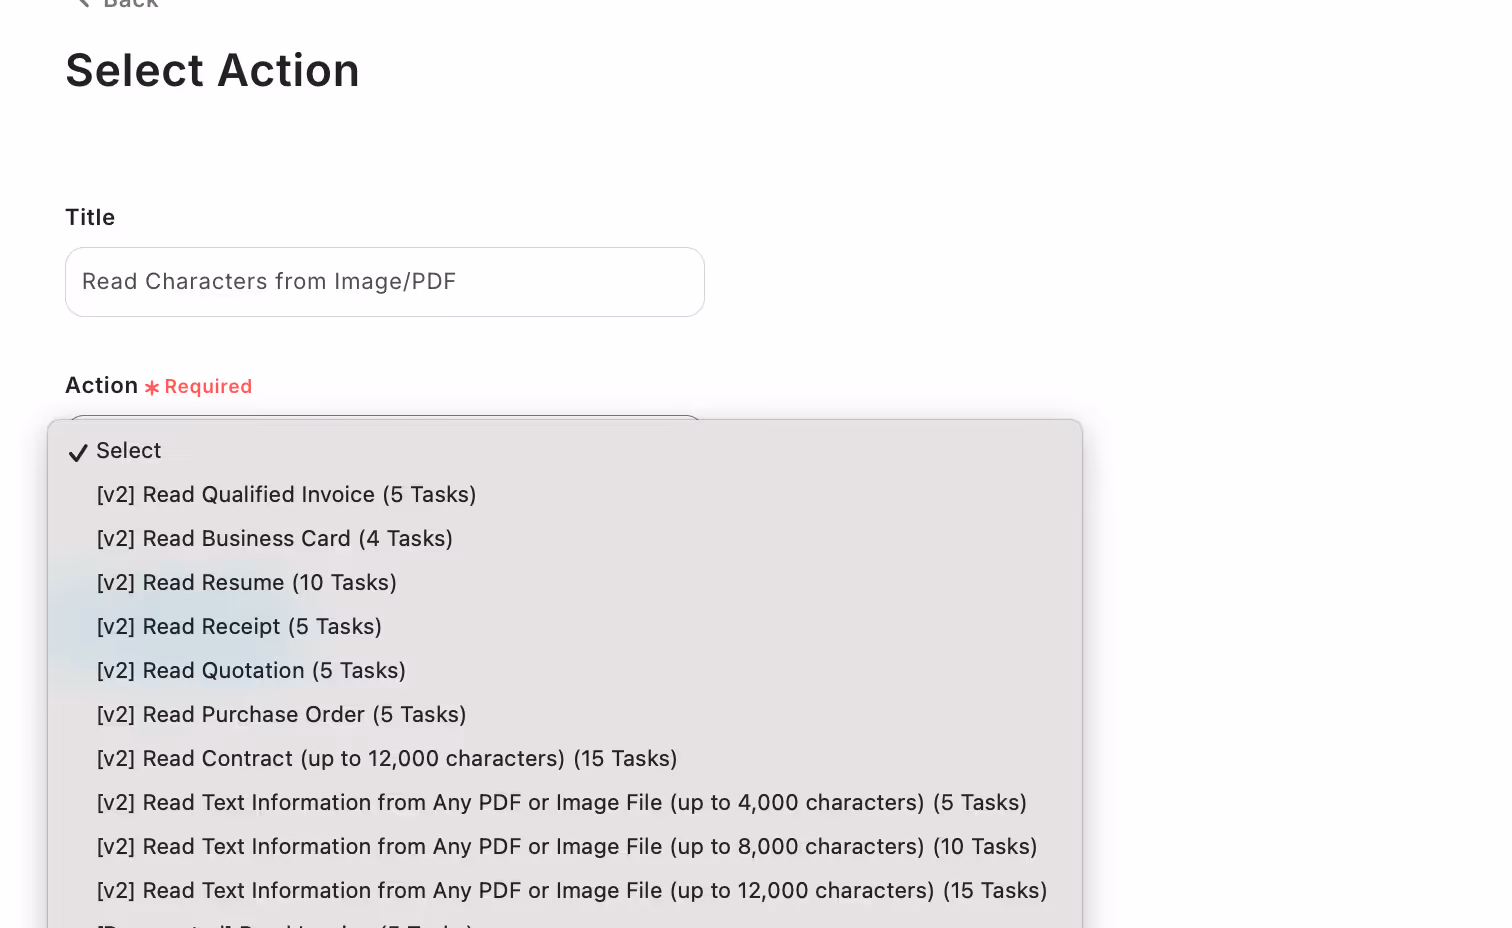
Next, we will set up to extract texts from images/PDFs. Click on the OCR action item.
Select the action based on the file type relevant to your need.
Select the file type for testing.
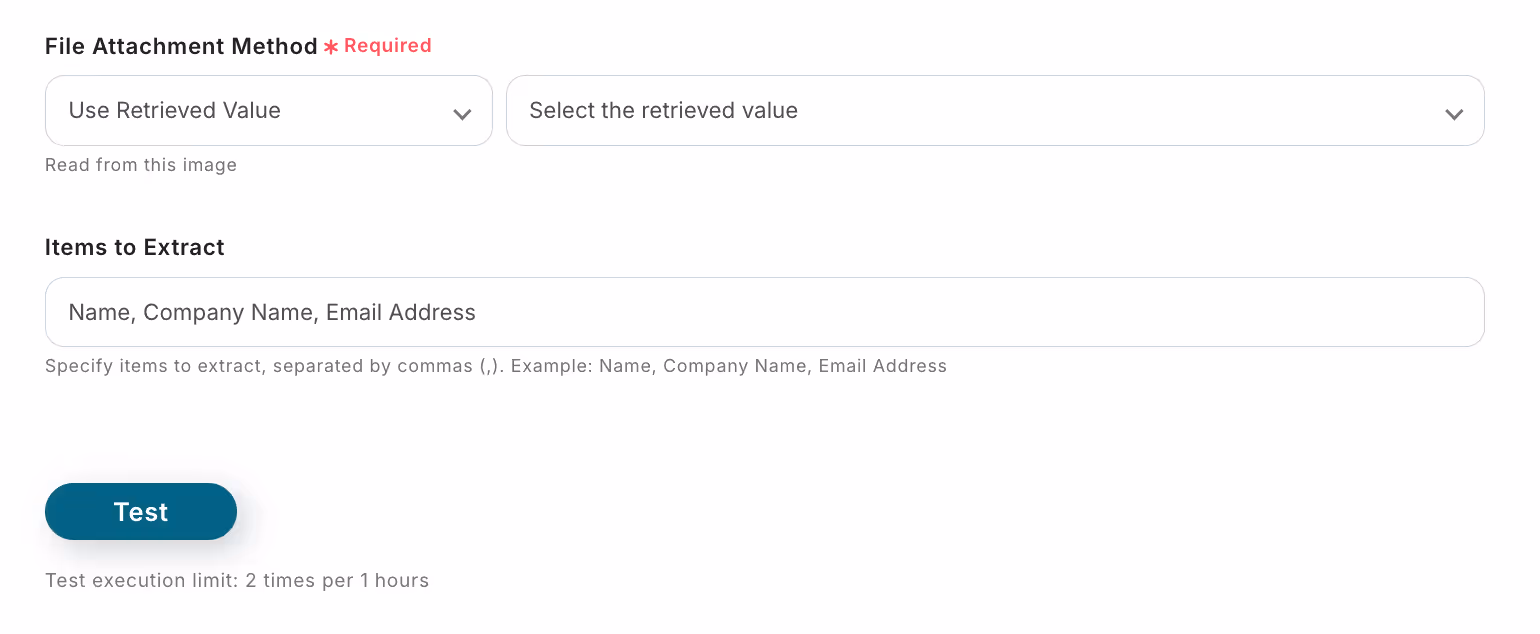
Choose between "Use Retrieved Values" or "Upload File."
Since we want to use the file retrieved from the email," we will choose the "Use Retrieved Values" option.
📚 Reference: For more details on retrieved values and how to set them up, see the guide here.
Next, specify which data you want to extract from the receipt file. You can add or remove items as needed.
Just like before, click the "Test" button, and if you see "Test Successful", everything is set up correctly!
Be sure to click "Save" to finalize the process.
Step 5: Send Gmail
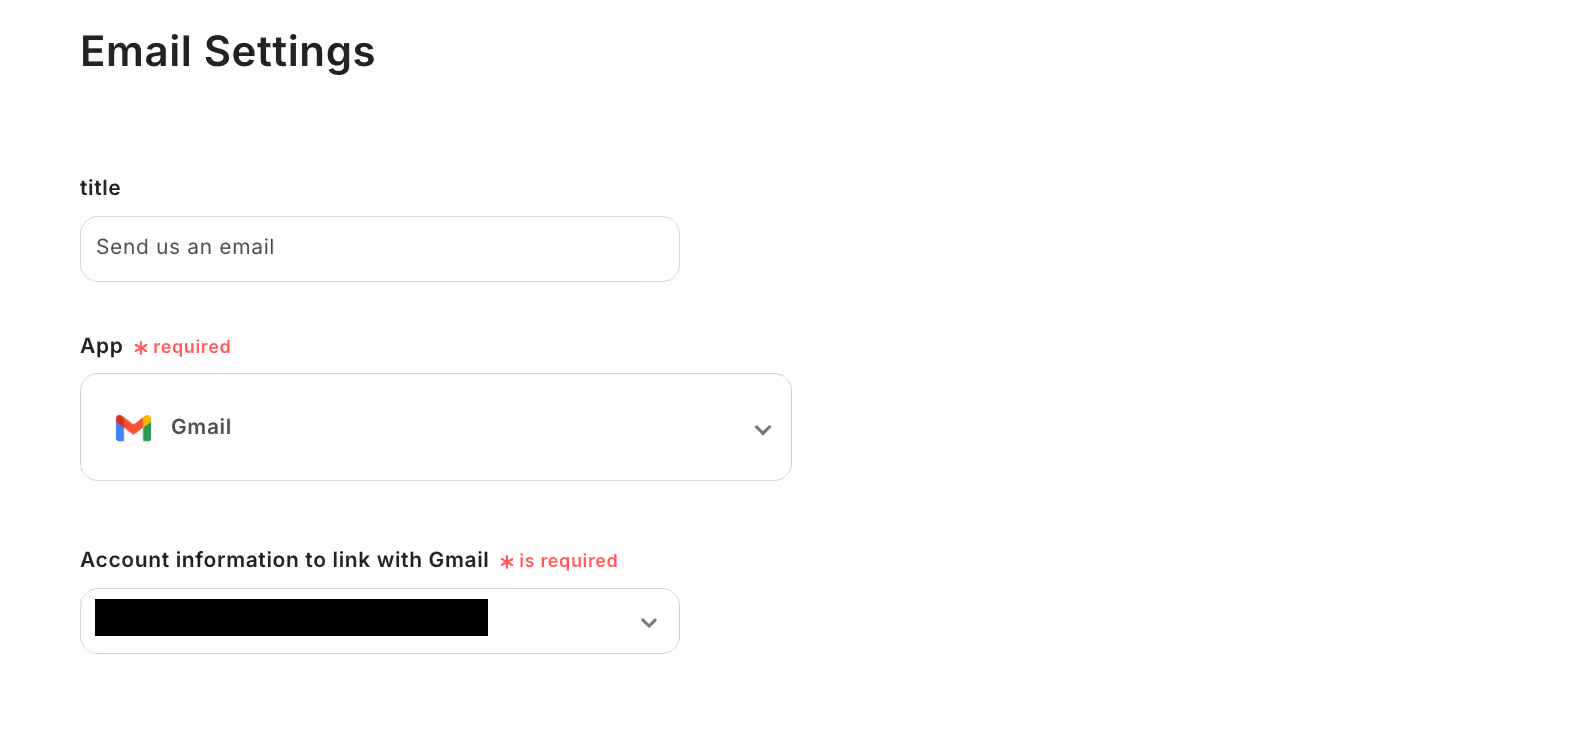
Click on the Gmail action item.
On the next screen, give an action a title (optional). Confirm the settings, and click “Next”.
Let’s set up the email content.
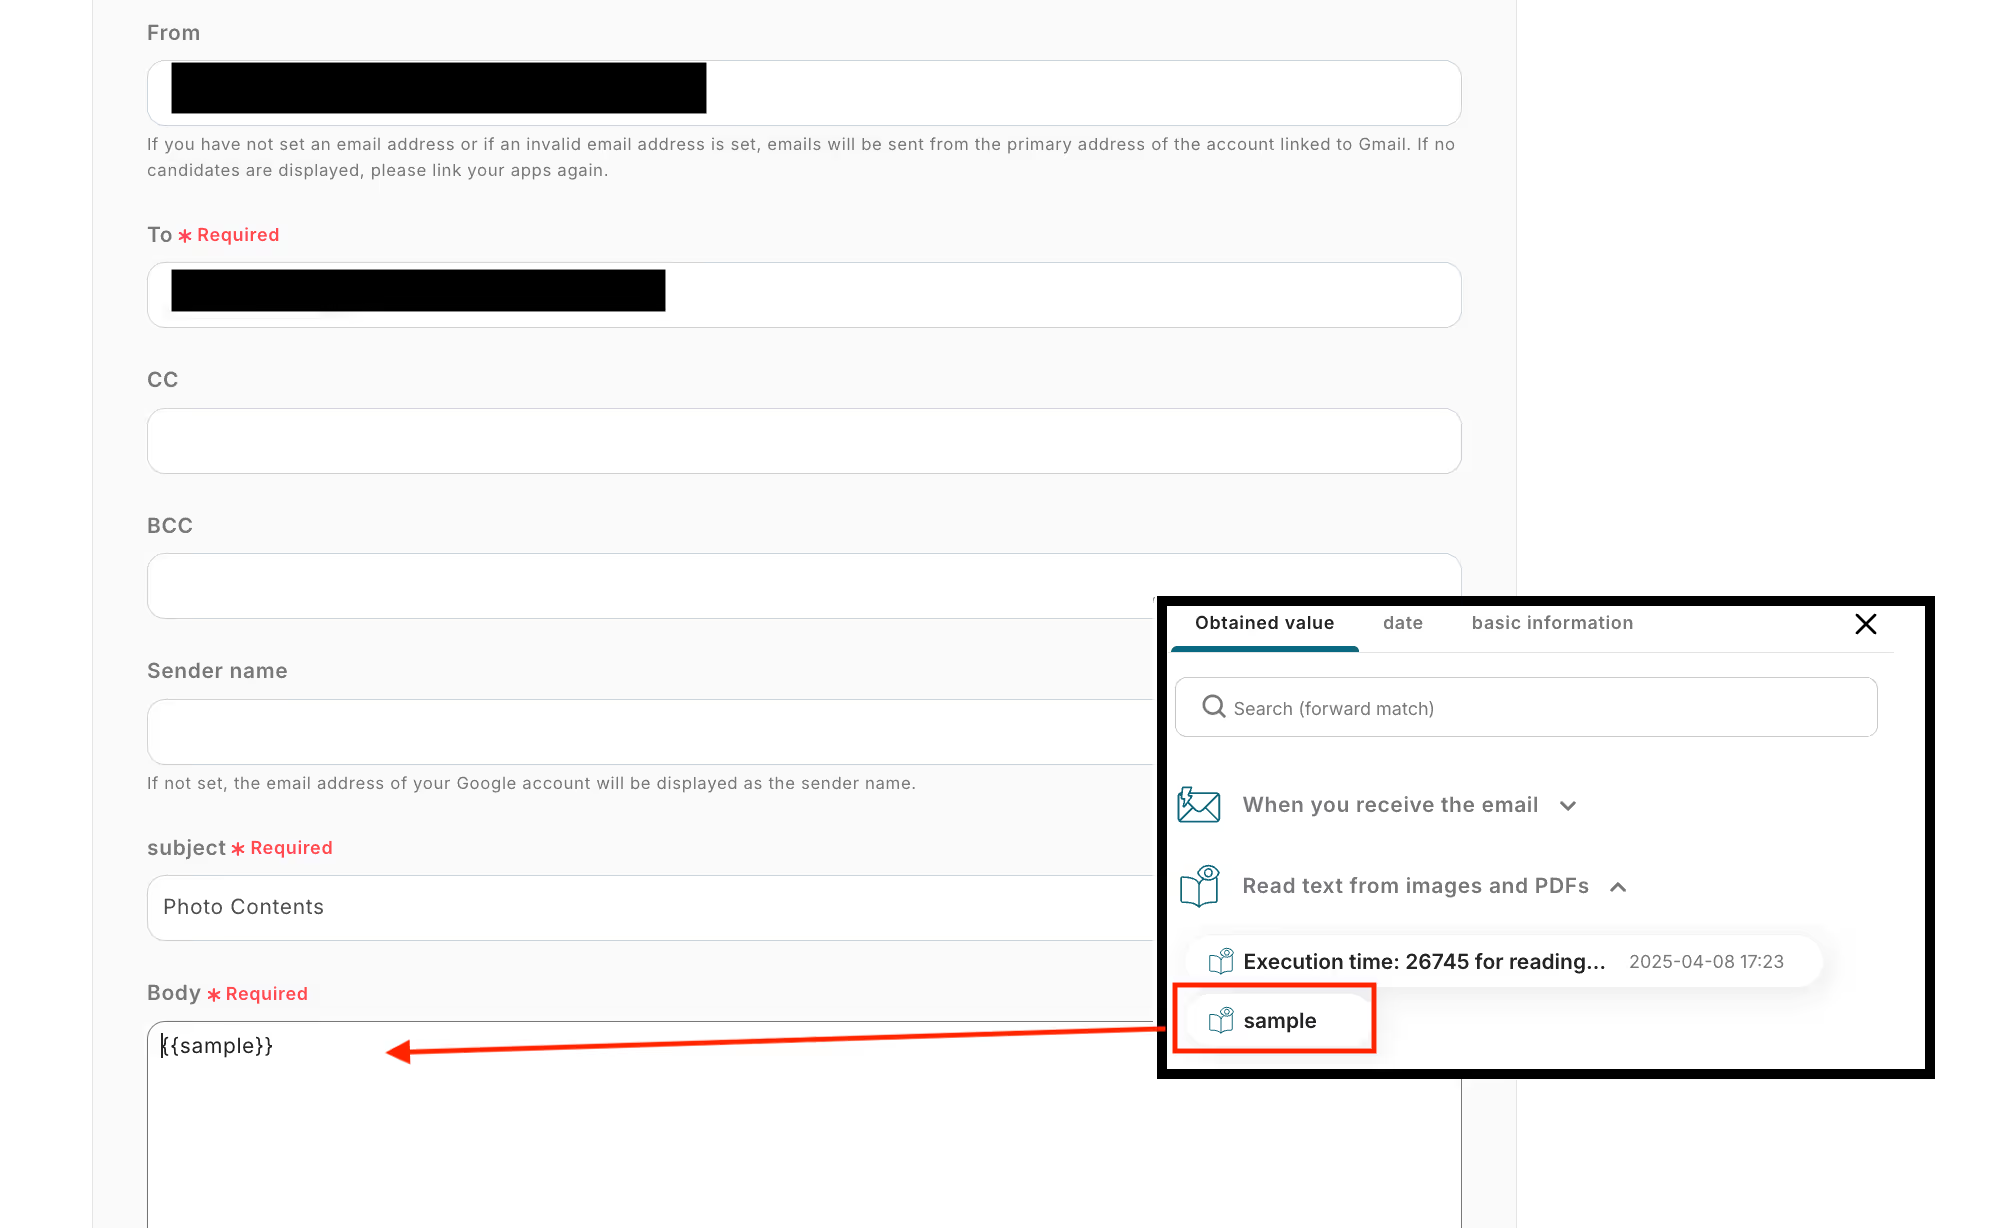
In the "To" field, enter the recipient's email address. You can also configure Cc and Bcc as needed.
Enter the subject of the email and set the body by using the retrieved value in step 4.
Once everything is filled in, click Next to proceed.
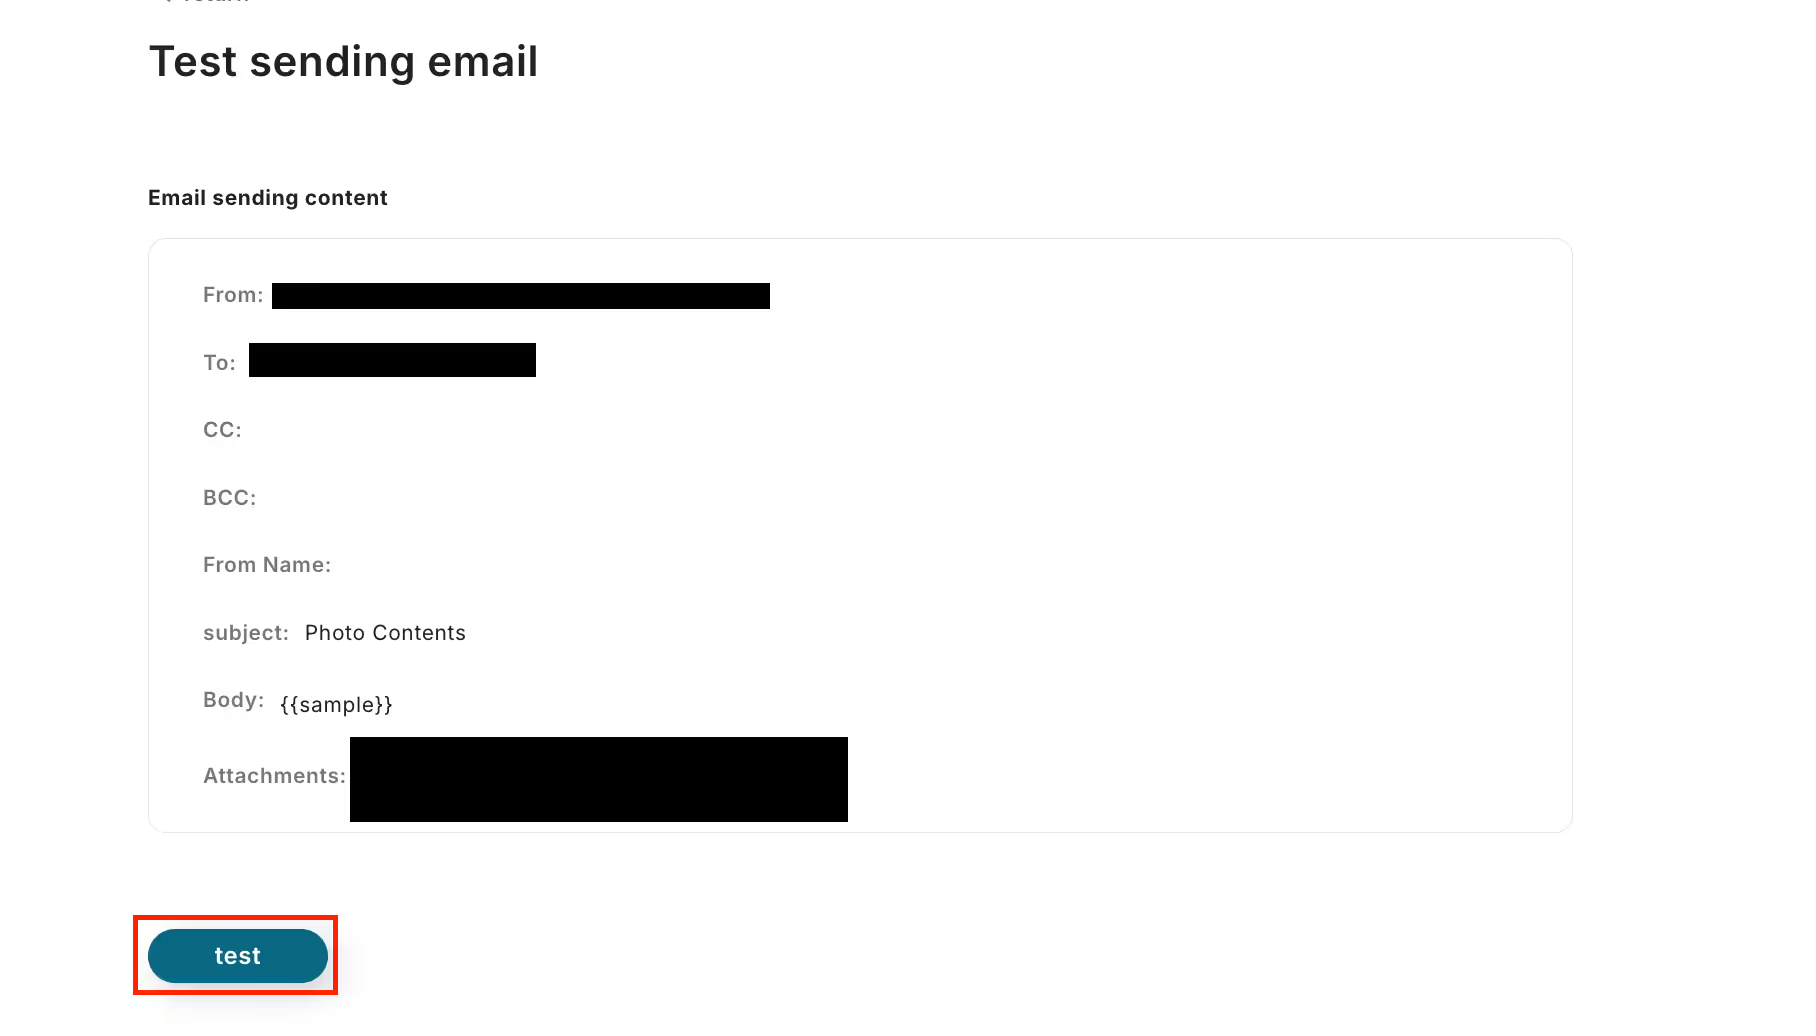
Click Test to check if the email is sent successfully. If the test is successful, click Save to finalize the settings.
Step 6: Activate the Flowbot
Toggle the "Trigger On" button to activate your flow!

That’s it! 🎉 The Flowbot is now complete!
💡 Other Automation Examples with AI-OCR and Gmail
By using Gmail and AI-OCR, you can unlock a wide range of automation possibilities that simplify your workflows. Here are some examples you can explore for your next automation!
Automate Document Management with OCR and Gmail
This Flowbot reads document data received via Gmail, updates the file name, and stores it in a cloud storage service. It reduces the time spent manually reviewing and organizing files.
■Overview
The workflow "Read Gmail attachments with OCR and add them to Microsoft Excel" helps reduce the burden of transcription work.
Automation reduces manual tasks, which will likely decrease human errors such as input mistakes.
■Recommended for
- Those who receive many attachments daily and find it cumbersome to manually check their contents
- Those who want to efficiently manage attachment information and reflect the data in Microsoft Excel as needed
- Companies looking to streamline data management
- Those who use Microsoft Excel regularly for data aggregation and analysis
- Those who spend a lot of time on manual data entry and want to achieve a more automated workflow
■Benefits of using this template
There are several benefits to the flow that reads Gmail attachments with OCR and automatically adds them to Microsoft Excel.
First, it eliminates the need for manual data entry, improving work efficiency.
As work time is reduced, the extra time can be allocated to other tasks.
Next, by utilizing OCR technology, handwritten and printed information can be accurately digitized, improving data accuracy.
Additionally, by using an automated flow, manual tasks are reduced, decreasing human errors and thus improving data quality.
■Overview
This is a flow that reads Gmail attachments using OCR and automatically saves them to Box.
With Yoom, you can easily achieve this flow without any programming, as it allows for seamless integration between apps.
■Recommended for
- Those who manage Gmail attachments by sorting them in Box
- Those who want to streamline the process of checking attachments and saving files to Box
- Those who want to prevent omissions in saving attachments to Box
■Benefits of using this template
If you manage Gmail attachments by organizing them into folders in Box, manual checking and sorting can be a hassle.
Additionally, you need to check each attachment individually, which can be time-consuming if you receive a lot of emails daily via Gmail.
With this flow, you can read Gmail attachments using OCR and save them to specified folders in Box based on the content of the files.
Since attachments received in Gmail can be automatically sorted and saved to Box, you can efficiently manage your files.
The Gmail settings allow you to specify emails containing certain keywords, enabling customization to meet your business needs.
■Overview
This is a flow that reads receipts received in Gmail using OCR and registers them in a Notion database.
With Yoom, you can easily achieve this flow without any programming, as it allows for seamless integration between apps.
■Recommended for
- Those who need to process a large number of expense reports each month and are spending too much time entering receipt data received in Gmail
- Those who have transactions with multiple projects or clients and need to categorize and manage expenses
- Those who are digitizing receipts but find it cumbersome to organize and search the data
- Teams or companies using Notion as an expense management tool
- Those aiming for centralized management of receipt information
■Benefits of using this template
With this flow, OCR reading of receipts received in Gmail and adding information to the Notion database are performed automatically.
This eliminates the need for manual verification and transcription of receipt data sent from multiple locations or numerous employees, reducing the workload of expense approvers and accounting personnel.
Additionally, it prevents human errors such as data entry omissions and allows for the swift sharing of expense information, thereby efficiently centralizing expense management in Notion.
■Overview
This is a flow that reads document data posted on Gmail using OCR, updates the file name, and stores it in Dropbox.
With Yoom, you can easily achieve this flow without the need for programming, as it allows for seamless integration between apps.
■Recommended for
1. Those who frequently exchange files via Gmail
・Those who check and rename received document data
■Benefits of using this template
If you find it cumbersome to check and rename stored files each time in Dropbox file management, this flow can help.
In this flow, document data attached to Gmail is read using OCR, and the file name is renamed based on the read content before being stored in Dropbox.
Since the file name can be renamed based on the content of the document data, manual checking and renaming of files is no longer necessary, allowing for more efficient file management.
■Notes
・Please integrate Gmail and Dropbox with Yoom.
・Please note that OCR data may not be readable if it exceeds 6,500 characters or if the text is too small.
・Branching is a feature available with the Mini Plan or higher. If you are on the Free Plan, the operation of the configured flow bot will result in an error.
・AI operations are available only with the Team Plan and Success Plan. If you are on the Free Plan or Mini Plan, the operation of the configured flow bot will result in an error, so please be aware.
・Paid plans such as the Mini Plan, Team Plan, and Success Plan offer a 2-week free trial. During the free trial, you can use restricted apps and AI features (operations).
■Overview
This is a flow that reads document data posted on Gmail using OCR, updates the file name, and stores it in OneDrive.
With Yoom, you can easily achieve this flow without any programming, as it allows integration between apps.
■Recommended for
1. Those who manage files on OneDrive
・Those who manually rename files attached to Gmail and store them in OneDrive
■Benefits of using this template
If you manage files manually, storing them in the wrong location can take time to find them.
This flow allows you to standardize file names and storage locations, preventing errors in renaming and storage locations, thereby enhancing the accuracy of management tasks.
■Notes
・Please integrate Gmail and OneDrive with Yoom.
・Please note that OCR data may not be readable if it exceeds 6,500 characters or if the text is small.
・Branching is a feature available with the Mini Plan or higher. If you are on the Free Plan, the operation of the flow bot you set will result in an error.
・AI operations are a feature available only with the Team Plan and Success Plan. If you are on the Free Plan or Mini Plan, the operation of the flow bot you set will result in an error, so please be careful.
・Paid plans such as the Mini Plan, Team Plan, and Success Plan offer a 2-week free trial. During the free trial, you can use restricted apps and AI features (operations).
・Microsoft365 (formerly Office365) has plans for home use and general business use (Microsoft365 Business). If you are not subscribed to the general business plan, authentication may fail.
■Overview
This is a flow that reads document data posted on Gmail using OCR, updates the file name, and stores it in Box.
With Yoom, you can easily achieve this flow without any programming, as it allows for seamless integration between apps.
■Recommended for
1. Those who frequently exchange files via Gmail
・Those who manage received files with Box
2. Those who use Box
・Those who find renaming files or moving files to be cumbersome
■Benefits of using this template
If you are manually moving and managing files sent via Gmail to Box, you might find the repetitive tasks cumbersome.
Additionally, if the file naming convention is not standardized, it may cause confusion when searching for files.
When an email with an attached file is received in Gmail, the flow is triggered, allowing for standardized file naming conventions and improving the efficiency of file search and management.
■Notes
・Please connect Gmail and Box with Yoom.
・Please note that OCR data may not be readable if it exceeds 6,500 characters or if the text is too small.
・Branching is a feature available with the Mini Plan or higher. Operations set in the flow bot will result in an error with the Free Plan.
・AI operations are only available with the Team Plan and Success Plan. Operations set in the flow bot will result in an error with the Free Plan and Mini Plan, so please be careful.
・Paid plans such as the Mini Plan, Team Plan, and Success Plan offer a 2-week free trial. During the free trial, you can use restricted apps and AI features (operations).
Business Card Data Entry Automation
This Flowbot reads business card images received in Gmail using OCR, extracts the contact information, and adds it to your information management tool. It then sends a thank-you email, speeding up your follow-up process.
■Overview
This flow involves reading business card images received in Gmail using OCR, adding the data to kintone, and sending a thank-you email via Outlook.
With Yoom, you can easily achieve this flow without any programming, as it allows for seamless integration between applications.
■Recommended for
- Sales managers and representatives who frequently exchange business cards and spend a lot of time managing customer data
- Those who often receive a large number of business cards at exhibitions or events and need to database this information
- Individuals who need to centrally manage business card information across multiple departments or branches
- Those who want to automate the registration of business card information into kintone and the sending of thank-you emails to reduce workload
- Those who want to prevent the personalization of business card management and smoothly share information with the entire team
■Benefits of using this template
By implementing this flow, you can automatically register business card information into kintone and send thank-you emails via Outlook based on business card images attached to received Gmail messages.
Business card information is digitized simply by taking or scanning images and sending emails, reducing the workload for the person in charge.
Smooth sharing of business card information enables faster lead approaches, marketing analysis, and customer follow-ups.
■Overview
This flow involves reading business card images received in Gmail using OCR, registering them as contacts in Salesforce, and sending a thank-you email via Outlook.
With Yoom, you can easily achieve this flow without any programming, as it allows for seamless integration between apps.
■Recommended for
1. Those who frequently exchange business cards
- Sales representatives who exchange many business cards daily and spend time manually entering information
- Those who want to smoothly approach contacts after exchanging business cards
2. Those who want to efficiently manage customer business card data
- Those who want to expedite follow-ups by utilizing business card information
- Those who want to achieve centralized management of customer information in Salesforce
- Those promoting efficiency improvements in customer management and digital transformation
■Benefits of using this template
By implementing this flow, the registration of contacts in Salesforce and the sending of thank-you emails via Outlook are automated based on business card images attached to received Gmail emails.
When registering data in Salesforce, the business card image is automatically uploaded, making it easy to verify against the data.
Business card information is digitized simply by taking or scanning an image and sending an email, reducing the workload on staff.
Sales and customer support representatives can smoothly proceed with approaches and follow-ups to customers.
■Overview
This is a flow where business card images received in Gmail are read by OCR, registered as contacts in Salesforce, and a thank-you email is sent via Gmail.
With Yoom, you can easily achieve this flow without any programming, as it allows for seamless integration between apps.
■Recommended for
1. Those who frequently exchange business cards
- Sales representatives who exchange many business cards daily and spend a lot of time manually entering information
- Those who want to smoothly proceed with follow-ups after exchanging business cards
2. Those who want to efficiently manage customer business card data
- Those who want to achieve quick follow-ups by utilizing business card information
- Those who want to seamlessly manage customer information in Salesforce
- Those promoting efficiency in customer management and digital transformation
■Benefits of using this template
By implementing this flow, the registration of contacts in Salesforce and the sending of thank-you emails in Gmail are automated based on business card images attached to received emails in Gmail.
When registering data in Salesforce, the business card image is automatically uploaded, making it easy to verify against the data.
Business card information is digitized simply by taking or scanning images and sending emails, reducing the workload on staff.
Sales and customer support representatives can smoothly proceed with approaches and follow-ups to customers.
Contract Processing with Gmail and OCR
Automatically read contracts received in Gmail using OCR, add the data to Kintone, and receive notifications via a chat tool. This ensures the receipt and registration of contracts are tracked efficiently.
■Overview
This is a flow that reads contracts received in Gmail using OCR, adds them to kintone, and notifies Google Chat.
By using Yoom, you can easily connect apps without the need for programming.
■Recommended for
1. Those who want to streamline contract management tasks
・Those who manually manage contracts received in Gmail but experience oversight or processing errors
2. Those who manage information using kintone
・Those who manage business data using kintone and want to centralize contract data management
3. Companies using Google Chat
・Those who use Google Chat to enhance communication within the team
■Benefits of using this template
There are several benefits to implementing an automated flow that reads contracts received in Gmail using OCR, adds them to kintone, and notifies Google Chat.
First, since the entire process from receiving to registering and notifying contracts is automated, you can reduce the time and effort of doing it manually.
Additionally, by reducing manual input, you can also lower the risk of human error and improve data accuracy.
■Notes
・Please integrate Gmail, kintone, and Google Chat with Yoom.
・Triggers can be set to activate at intervals of 5, 10, 15, 30, or 60 minutes.
・Please note that the shortest activation interval varies depending on the plan.
・OCR data may not be readable if it exceeds 6,500 characters or if the text is small, so please be aware.
・AI operations are only available with the Team Plan and Success Plan. In the case of the Free Plan or Mini Plan, the operation of the set flow bot will result in an error, so please be aware.
・Paid plans such as the Team Plan and Success Plan offer a 2-week free trial. During the free trial, you can use restricted apps and AI features (operations).
・Integration with Google Chat is only possible with Google Workspace. For details, please refer to here.
■Overview
This is a flow that reads contracts received in Gmail using OCR, adds them to kintone, and notifies Microsoft Teams.
By using Yoom, you can easily connect apps without the need for programming.
■Recommended for
1. Those who exchange contracts using Gmail
・Looking for a system to organize and manage contract contents
2. Companies that use kintone for data management
・Want to register and manage important contract information in kintone
3. Workplaces that utilize Microsoft Teams
・Want to provide information to team members quickly and improve work efficiency
■Benefits of using this template
By introducing a flow that reads contracts received in Gmail using OCR, adds them to kintone, and notifies Microsoft Teams, the efficiency of contract management is improved.
First, using OCR eliminates the need for manual input, reducing the workload.
Additionally, the accuracy of data entry is improved, preventing human errors.
■Notes
・Please connect Gmail, kintone, and Microsoft Teams with Yoom.
・Triggers can be set to activate at intervals of 5, 10, 15, 30, or 60 minutes.
・Please note that the shortest activation interval varies depending on the plan.
・OCR may not read data over 6,500 characters or small text, so please be aware.
・AI operations are only available with the Team Plan and Success Plan. For Free Plan and Mini Plan, operations of the set flow bot will result in an error, so please be careful.
・Paid plans such as Team Plan and Success Plan offer a 2-week free trial. During the free trial, you can use restricted apps and AI features (operations).
・Microsoft365 (formerly Office365) has both home and general business plans (Microsoft365 Business). If you are not subscribed to the general business plan, authentication may fail.
■Overview
This is a flow that reads contracts received in Gmail using OCR, adds them to kintone, and notifies Slack.
By using Yoom, you can easily connect apps without the need for programming.
■Recommended for
1. Those who use Gmail for work communication
・Those who want to efficiently manage contracts and important documents received in Gmail
2. Companies that use kintone for business management
・Those who manage contracts and documents in kintone but find manual data entry cumbersome
3. Companies that use Slack as a communication tool
・Those who share information within the company on a daily basis using Slack
■Benefits of using this template
By reading contracts received in Gmail using OCR, adding them to kintone, and notifying Slack, information management is centralized, enabling prompt responses.
This improves business efficiency. Since manual data entry is no longer necessary, input errors and oversights are reduced, improving data accuracy.
By utilizing the notification function, all relevant members can quickly grasp the information, leading to smoother communication.
■Notes
・Please connect Gmail, kintone, and Slack with Yoom.
・Triggers can be set to activate at intervals of 5, 10, 15, 30, or 60 minutes.
・Please note that the shortest activation interval varies depending on the plan.
・OCR data may not be readable if it exceeds 6,500 characters or if the text is small, so please be careful.
・AI operations are only available with the Team Plan and Success Plan. If you are on the Free Plan or Mini Plan, the operation of the flow bot you set will result in an error, so please be careful.
・Paid plans such as the Team Plan and Success Plan offer a two-week free trial. During the free trial, you can use restricted apps and AI features (operations).
Other automation examples using Gmail
Schedule-based Email Automation
Using Yoom’s schedule trigger, emails can be automatically sent at a set date and time, informing your team of goals and providing reminders without manual effort.
■Overview
This is a flow bot that automatically sends emails via Gmail at a specified time every day.
Please use it for automatic sending of reminders, etc.
■Notes
・Feel free to change the recipient and content of the emails as you like.
・You can set the activation timing freely.
■Overview
This is a flow that starts at the end of each month to send an email via Gmail.
It can be used for various purposes, such as aggregation processing in Microsoft Excel or monthly invoice issuance.
■Notes
・Please integrate Gmail with Yoom.
・The branching feature is available with the Mini Plan or higher plans.
・For the Free Plan, the operations of the flow bot you set will result in an error, so please be careful.
・Paid plans like the Mini Plan offer a 2-week free trial. During the free trial, you can use restricted apps and AI features (operations).
■Overview
This is a flow that starts the flow bot on a specified day of the week to send Gmail.
It is a flow that can be used for regular weekly communications or daily reminder tasks, and does not require complex settings.
By automating routine tasks that occur daily, you can prevent mistakes such as missed notifications.
■Notes
・Please integrate Gmail with Yoom.
Send Customer Information via Gmail on a Set Schedule
Automate the sending of standard messages via Gmail at specified times. This eliminates manual tasks, reducing the chance of emails being sent to the wrong address or missed altogether.
■Overview
This flow retrieves customer information from Google Sheets at a specified date and time and sends a template email via Gmail.
With Yoom, you can easily achieve this flow without any programming, as it allows for seamless integration between apps.
■Recommended for
- Sales or customer support personnel at companies managing customer information with Google Sheets
- Those who find regular follow-up emails to customers burdensome
- Corporate sales representatives or assistants who need to send reminder emails to customers based on contract renewal dates or deadlines
- Those who want to send information such as coupons to multiple customers according to a schedule
■Benefits of using this template
By implementing this flow, template emails in Gmail will be automatically sent based on customer information managed in Google Sheets according to a specified schedule.
It automates reminders based on contract renewal dates or deadlines, sending congratulatory messages or coupons to individual customers in their birth month, and campaign announcements based on purchased products or purchase frequency.
This eliminates the need for manual information retrieval and email creation/sending, preventing errors in recipients and forgotten sends.
Additionally, using templated emails ensures consistent quality in communication.
■Overview
This flow retrieves customer information from Notion at a specified date and time and sends a template email via Gmail.
With Yoom, you can easily achieve this flow without the need for programming, as it allows for seamless integration between apps.
■Recommended for
- Sales or customer support representatives at companies that manage customer information with Notion
- Those who find it burdensome to send regular follow-up emails to customers
- Corporate sales representatives or assistants who need to send reminder emails to customers based on contract renewal dates or deadlines
- Those who want to schedule and send announcements, such as coupons, to multiple customers who meet certain criteria
■Benefits of using this template
By implementing this flow, template emails in Gmail will be automatically sent based on customer information managed in Notion and according to the specified schedule.
Automations include sending reminders based on contract renewal dates or deadlines, sending birthday greetings or coupons to individual customers, and campaign announcements based on purchased products or purchase frequency.
Manual information retrieval and email creation/sending are no longer necessary, preventing errors in recipient addresses and missed sends.
Additionally, using templated emails allows for consistent quality communication.
■Overview
This flow retrieves customer information from kintone at a specified date and time and sends a template email via Gmail.
With Yoom, you can easily achieve this flow without any programming, as it allows for integration between apps.
■Recommended for
- Sales or customer support representatives at companies managing customer information with kintone
- Those who find it cumbersome to send regular follow-up emails to customers
- Corporate sales representatives or assistants who want to send reminder emails to customers in line with contract renewal periods or deadlines
- Those who wish to schedule and send coupons or campaign information to multiple customers who meet certain criteria
■Benefits of using this template
By implementing this flow, template emails in Gmail are automatically sent based on customer information managed in kintone, according to a specified schedule.
Reminders aligned with contract renewal periods or deadlines, birthday greetings or coupons for individual customers, and campaign information based on purchased products or purchase frequency are automated.
This eliminates the need for manual information retrieval and email creation/sending, preventing errors in recipient addresses and missed sends.
Additionally, using templated emails ensures consistent quality communication.
Automatic Upload of Gmail Attachments
Automatically upload email attachments received in Gmail to a designated folder. This feature is especially useful for sharing files quickly with your team.
■Overview
This is a flow to upload attachments received in Gmail to Google Drive.
With Yoom, you can easily achieve this flow without any programming, as it allows for seamless integration between apps.
■Recommended for
1. Those who use Gmail for business
・Those who frequently receive files via email from clients
・Those who want to prevent the risk of missing or losing email attachments
2. Those who use Google Drive for business
・Those who want to quickly save files to a shared drive for the entire team
・Those who manage multiple projects and want to organize deliverables in project-specific folders
・Those who want to organize and manage contracts and invoices sent by customers
■Benefits of using this template
With this flow, files attached to emails with specific labels received in Gmail are automatically uploaded to a designated folder in Google Drive.
It enables timely information sharing after receiving emails, reduces human errors such as missing or incorrect file storage, and prevents the risk of loss.
It is useful for sharing files received via email, such as invoices, project documents and deliverables, and various internal documents.
■Notes
・Please integrate Gmail and Google Drive with Yoom.
・You can select the trigger interval from 5 minutes, 10 minutes, 15 minutes, 30 minutes, or 60 minutes.
・Please note that the shortest trigger interval varies depending on the plan.
・If you are using email auto-sorting settings to determine the presence of attachments with specific labels, branching settings are not necessary.
■Overview
This is a flow to save files received in Gmail to OneDrive.
■Recommended for
1. Those who use Gmail and OneDrive for business
・Personnel who use Gmail for communication with clients
・Personnel who use OneDrive for file management
・Those considering efficiency improvements by integrating Gmail and OneDrive
2. Those who want to reduce manual file saving tasks and automate them
・Owners of small and medium-sized enterprises aiming for business automation
・Personnel in general affairs and administration with many manual tasks
■Benefits of using this template
・By automatically saving files received in Gmail to OneDrive, you can improve business efficiency.
・Automatically saving files to OneDrive helps prevent human errors.
・You no longer need to perform file saving tasks from Gmail, allowing you to allocate time to other important tasks.
・By customizing the flow bot, you can also send notifications to communication tools after saving files to OneDrive.
■Notes
・Please integrate both Gmail and OneDrive with Yoom.
・Microsoft365 (formerly Office365) has plans for home use and general corporate use (Microsoft365 Business). If you are not subscribed to the general corporate plan, authentication may fail.
・For forwarding processing when using Gmail as a trigger by integrating Gmail with Yoom, please refer to the following:
■Overview
This is a flow to upload attachments received in Gmail to Dropbox.
By using Yoom, you can easily connect apps without the need for programming.
■Recommended for
1. Those who manage business emails using Gmail
・Those who receive a large number of attachments via email for business purposes and find manual organization time-consuming
・Those who want to efficiently save and manage attachments in cloud storage
2. Those who use Dropbox for file sharing and management
・Those who want to save files collectively in Dropbox but find manual uploading cumbersome
・Those who want to automate file management by linking Gmail and Dropbox
■Benefits of using this template
By uploading attachments received in Gmail to Dropbox, you can enjoy the following benefits.
Firstly, the task of manually downloading and uploading files is eliminated.
This improves work efficiency and allows you to dedicate valuable time to other important tasks.
This is especially effective in tasks that frequently handle files.
Furthermore, automation reduces missed files and errors, achieving accurate data management.
This reduces future troubles and verification tasks, ensuring smooth business operations.
■Notes
・Please connect both Gmail and Dropbox with Yoom.
・You can select the trigger interval from 5 minutes, 10 minutes, 15 minutes, 30 minutes, and 60 minutes.
・Please note that the shortest trigger interval varies depending on the plan.
👏 Benefits and Examples of Integrating AI OCR with Gmail
Benefit 1. Digitization of Documents
By converting documents saved as images or PDFs into text using AI-OCR, you can easily digitize document data. This makes document management more efficient by getting rid of the need for manual data entry and reducing errors.
Benefit 2. Easy Information Retrieval
Once converted into text, the data is fully searchable. Using OCR technology enables fast and efficient keyword searches, allowing you to quickly locate the information you need without having to look through physical or image-based documents.
Benefit 3. Streamlining Data Entry
OCR eliminates the need for manual entry by automatically converting paper-based documents into digital data. This reduces the time and effort required for data input, freeing up resources for other tasks. OCR can handle large volumes of documents in no time, making data entry much faster and more efficient.
Benefit 4. Integration with Other Systems
By digitizing documents, you open the possibilities to workflow automation and system integration. Once documents are converted into a usable digital format, they can be seamlessly integrated with other systems, improving overall operational efficiency.
📖 Summary
Being able to digitize documents has become increasingly important in today’s business environment. Automating image data and PDF extraction with AI-OCR can greatly streamline your workflow, improve accuracy, and save valuable time.
Best of all, no technical expertise is needed, and anyone can easily set it up! Ready to simplify your workflows? Sign up for Yoom and try it today!